[Vue.js] 스팀잇(Steemit)기반 앱 만들기 #2 - 최근글 가져오기
이번 시간에는 스팀잇에 등록된 글을 가져와서 출력하는 화면을 구현하겠습니다.
저도 학습하면서 구현하는 중이기 때문에 설명이 부족할 수 있습니다.
양해부탁드립니다.
이전글
스팀잇 최신글을 가져와서 출력하는 화면 만들기
앱을 실행했을 때 처음에 보여질 메인화면를 생성하고 라우터(router)에 추가할 것입니다. 라우터에 대한 설명은 여기를 참고하세요.
App.vue 파일에서 <v-content> 부분을 아래와 같이 수정합니다.
...
<v-content>
  <keep-alive>
    <router-view></router-view>
  </keep-alive>
</v-content>
...
<router-view> 태그는 라우터에 의해 해당하는 컴포넌트를 렌더링하여 보여주는 영역입니다.
그리고 router/index.js 파일에서 routers 부분을 아래와 같이 수정합니다.
import Main from '@/components/Main' // Main 컴포넌트 임포트

export default new Router({
  routes: [
    {
      path: '/',
      name: 'Main',
      component: Main
    }
  ]
})
/경로로 접근하게 되었을때, <router-view> 영역에 Main 컴포넌트가 렌더링된 화면이 보여질 것입니다.
마지막으로 최근글을 가져와서 출력할 화면인 components/Main.vue 파일을 생성합니다.
<template>
  <v-container fill-height fluid grid-list-md>
    <v-layout>
      <v-flex xs12 md9 offset-md3>
        <v-layout row wrap>
          <v-flex xs12 md6 xl4 v-for="idx in 3" :key="idx">
            <v-card>
              <v-list>
                <v-list-tile>
                  <v-list-tile-avatar>
                  <img src="https://steemitimages.com/u/anpigon/avatar" alt="avatar">
                  </v-list-tile-avatar>
                  <v-list-tile-content>
                    <v-list-tile-title>anpigon (55)</v-list-tile-title>
                    <v-list-tile-sub-title>11시간 · KR</v-list-tile-sub-title>
                  </v-list-tile-content>
                </v-list-tile>
              </v-list>
              <v-card-media
                src="https://cdn.vuetifyjs.com/images/cards/desert.jpg"
                height="200px"></v-card-media>
              <v-card-title primary-title>
                <div>
                  <h3 class="headline mb-0">Kangaroo Valley Safari</h3>
                  <div>Located two hours south of Sydney in the Southern Highlands of New South Wales, ...</div>
                </div>
              </v-card-title>
              <v-card-title>
                좋아요 5명 · 댓글 5명
                <v-spacer></v-spacer>
                <strong>$774.32</strong>
              </v-card-title>
              <v-divider></v-divider>
              <v-card-actions>
                <v-btn flat><v-icon left dark>favorite_border</v-icon> 좋아요</v-btn>
                <v-spacer></v-spacer>
                <v-btn flat><v-icon left dark>comment</v-icon> 댓글달기</v-btn>
                <v-spacer></v-spacer>
                <v-btn flat><v-icon left dark>reply</v-icon> 공유하기</v-btn>
              </v-card-actions>
            </v-card>
          </v-flex>
        </v-layout>
      </v-flex>
    </v-layout>
  </v-container>
</template>
그럼 아래와 같은 화면이 보일 것입니다. 우리는 스팀잇의 최근글을 가져와서 카드형태의 목록으로 보여줄 것입니다.
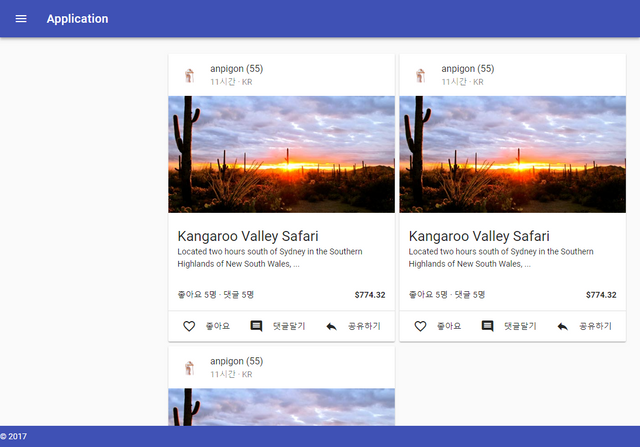
스팀잇에서 최신글 가져오기
이제 스팀잇 라이브러리(steem.js)를 사용해서 스팀잇에서 최근글을 가져오겠습니다.
steem.js에 대한 자세한 사용방법은 github에서 doc와 examples를 참고하세요.
아래와 같이 터미널을 열어 steem.js을 설치합니다.
$ npm install steem --save
설치하는데 시간이 좀 걸리네요. 설치가 완료될때 까지 기다립니다.
저의 경우에는 아래와 같은 오류가 발생하였는데, 다시 설치를 시도하니 설치가 잘 되었습니다. :-)
...
npm WARN gentlyRm not removing C:\workspace\steemit-app\node_modules\@babel\template\node_modules\.bin\babylon as it wasn't installed by C:\workspace\steemit-app\node_modules\@babel\template\node_modules\babylon
npm ERR! path C:\workspace\steemit-app\node_modules\glob-parent\package.json.1597626054
npm ERR! code EPERM
npm ERR! errno -4048
npm ERR! syscall rename
npm ERR! Error: EPERM: operation not permitted, rename 'C:\workspace\steemit-app\node_modules\glob-parent\package.json.1597626054' -> 'C:\workspace\steemit-app\node_modules\glob-parent\package.json'
...
Main.vue 파일을 열어서 아래와 같이 script 코드를 추가합니다.
<script>
import steem from 'steem' // 스팀잇 라이브러리 임포트

export default {
  data () {
    return {
      discussions: []
    }
  },
  methods: {
    getDiscussions () {
      let query = {
        tag: 'kr',
        limit: 10
      }
      // 스팀잇 최근글 가져오기
      steem.api.getDiscussionsByCreated(query, (err, result) => {
        console.log(err, result)
      })
    }
  },
  created () {
    this.getDiscussions()
  }
}
</script>
data에는 글을 가져와서 저장할 discussions 변수를 선언합니다.
methods에는 스팀잇에서 글을 가져오는 getDiscussions 함수를 구현합니다.
created 함수에는 컴포넌트가 생성되면, getDiscussions 함수를 호출하도록 하겠습니다.
콘솔창(Console)을 보면 아래와 같이 스팀잇에서 최근글을 가져와서 출력한 것을 볼 수 있습니다.
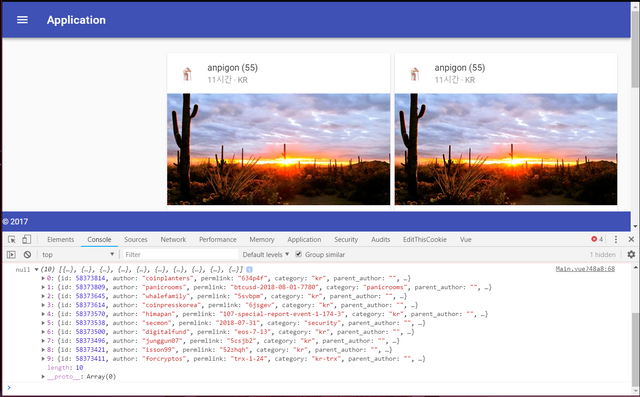
크롬 브라우저에서 콘솔창을 보려면 개발자 도구를 열어서(단축키: Ctrl + Shift + i), Console 탭을 선택하면 됩니다.
화면에 데이터 출력하기
이번 다음 단계에서는 가져온 데이터를 화면에 출력 해보겠습니다.
우리가 가져온 discussion데이터의 구조는 아래와 같습니다.
{
  "id": 58212397,
  "author": "anpigon",
  "permlink": "steemit-1-10f53977c621e",
  "category": "kr",
  "parent_author": "",
  "parent_permlink": "kr",
  "title": "스팀잇(Steemit)기반 앱 만들기 #1",
  "body": "스터디 목적으로 스팀잇 기반...",
  ...
}
root_,parent_와 같은 prefix가 있는 데이터가 여러군데 보입니다.
author,permlink와parent_author,parent_permlink,root_author,root_permlink,root_title의 차이점은 저도 잘모르겠습니다.ㅠㅠ
위의 데이터 구조에 맞추어 화면에 출력 할 수 있도록 Main.vue 파일을 수정합니다.
<v-flex xs12 md6 xl4 v-for="d in discussions" :key="d.id">
  <v-card>
    <v-list>
      <v-list-tile avatar>
        <v-list-tile-avatar>
          <img :src="'https://steemitimages.com/u/' + d.author + '/avatar'" alt="avatar">
        </v-list-tile-avatar>
        <v-list-tile-content>
          <v-list-tile-title>{{ d.author }} ({{ d.author_reputation }})</v-list-tile-title>
          <v-list-tile-sub-title>{{ d.created }} · {{ d.category }}</v-list-tile-sub-title>
        </v-list-tile-content>
      </v-list-tile>
    </v-list>
    <v-card-media src="https://cdn.vuetifyjs.com/images/cards/desert.jpg"
                  height="200px"></v-card-media>
    <v-card-title primary-title>
      <div>
        <h3 class="headline">{{ d.title }}</h3>
        {{ d.body.substr(0, 100) }}...
      </div>
    </v-card-title>
    <v-card-title>
      좋아요 {{ d.net_votes }}명 · 댓글 {{ d.children }}명
      <v-spacer></v-spacer>
      <strong>${{ d.payout_value }}</strong>
    </v-card-title>
    <v-divider></v-divider>
    <v-card-actions>
      <v-btn flat><v-icon left dark>favorite_border</v-icon> 좋아요</v-btn>
      <v-spacer></v-spacer>
      <v-btn flat><v-icon left dark>comment</v-icon> 댓글달기</v-btn>
      <v-spacer></v-spacer>
      <v-btn flat><v-icon left dark>reply</v-icon> 공유하기</v-btn>
    </v-card-actions>
  </v-card>
</v-flex>
그리고 getDiscussions 함수를 아래와 같이 수정합니다.
steem.api.getDiscussionsByCreated(query, (err, result) => {
  console.log(err, result)
  if (!err) this.discussions = result
})
steem.api.getDiscussionsByCreated 함수로 가져온 result 데이터를 this.discussions에 넣어주고 있습니다.
아래와 같이 출력됩니다. 하지만 못생기게 출력되었어요.ㅠㅠ
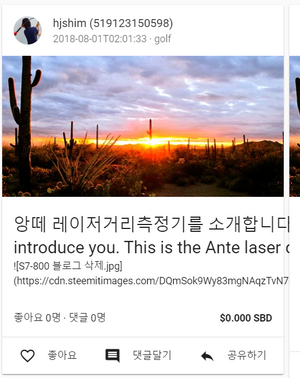
그래서 제목과 내용을 출력하는 부분에 style를 추가하고 아래와 같이 수정하였습니다.
<template>
  ...
    <v-list three-line>
    <v-list-tile>
      <v-list-tile-content>
        <v-list-tile-title>{{ d.title }}</v-list-tile-title>
        <v-list-tile-sub-title class='text-ellipsis'>{{ d.body }}</v-list-tile-sub-title>
      </v-list-tile-content>
    </v-list-tile>
  </v-list>
...
</template>

<style>
.text-ellipsis {
  overflow: hidden;
  text-overflow: ellipsis;
  -webkit-line-clamp: 3;
  display: -moz-box;
  display: -webkit-box;
  display: box;
  /*! autoprefixer: off */
  -moz-box-orient: vertical;
  -webkit-box-orient: vertical;
  /*! autoprefixer: on */
}
</style>
수정하고 나면 아래와 같이 나타납니다. 짠~
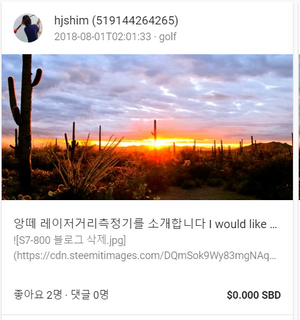
이미지 출력하기
이미지가 포함되어 있는 글인 경우에 이미지를 출력해보도록 하겠습니다.
getDiscussions 함수에서 result 데이터 가져오는 부분을 아래와 같이 수정합니다. 그리고 discussions변수에는 필요한 데이터만 가지고 있도록 정리하였습니다.
this.discussions = result.map((item) => {
  const metadata = JSON.parse(item.json_metadata) // 메타데이터 JSON 파싱
  const image = metadata.image ? metadata.image[0] : '' // 이미지 URL
  return {
    image: image,
    author: item.author,
    author_reputation: item.author_reputation,
    title: item.title,
    created: item.created,
    body: item.body.substr(0, 200),
    category: item.category,
    permlink: item.permlink,
    url: item.url,
    payout_value: item.payout_value,
    net_votes: item.net_votes,
    children: item.children
  }
})
이미지를 출력하는 <v-card-media> HMLT 태그를 아래와 같이 수정합니다.
 <v-card-media v-if="d.image"
               :src="d.image"
               height="200px"></v-card-media>
보상금액(payout) 계산하기
글에 보상된 페이금액은 아래와 같이 계산합니다.
const totalPayoutValue = parseFloat(item.total_payout_value.split(' ')[0])
const curatorPayoutValue = parseFloat(item.curator_payout_value.split(' ')[0])
const pendingPayoutCalue = parseFloat(item.pending_payout_value.split(' ')[0])
item.payout_value = (totalPayoutValue + curatorPayoutValue + pendingPayoutCalue).toFixed(2)
저자 명성(author reputation) 계산하기
저자 명성은 아래와 같이 계산합니다.
item.author_reputation = steem.formatter.reputation(item.author_reputation) // 저자 명성
글 등록시간을 경과 시간으로 보여주기
글 등록시간을 "2초 전", "5분 전", "1시간 전" 과 같은 형태로 보여줍니다.
const now = new Date()
const created = new Date(item.created + 'Z')
const elapsedSeconds = (now - created) / 1000 // 경과 시간(초)
if (elapsedSeconds < 60) {
  item.created = Math.round(elapsedSeconds) + '초 전'
} else if (elapsedSeconds < 360) {
  item.created = Math.round(elapsedSeconds / 60) + '분 전'
} else if (elapsedSeconds < 8640) {
  item.created = Math.round(elapsedSeconds / 60) + '시간 전'
} else if (elapsedSeconds < 207360) {
  item.created = '어제'
} else {
  item.created = (now.getFullYear() !== created.getFullYear() ? created.getFullYear() + '년 ' : '') +
    (created.getMonth() + 1) + '월 ' +
    created.getDate() + '일'
}
글 내용에서 HTML 제거하기
스팀잇 글 내용은 HTML과 마크다운을 혼용해서 사용하기 때문에, 마크다운을 HTML로 변환해줄 필요가 있습니다. 터미널에서 아래 명령어를 실행하여 remarkable 를 설치합니다.
$ npm install remarkable --save
사용방법은 아래와 같습니다.
import Remarkable from 'remarkable'

const md = new Remarkable({ html: true, linkify: true })
이제 글 내용에서 HTML 코드를 제거하겠습니다.
item.body = md.render(item.body).replace(/<\/?[^>]+(>|$)/g, '')
아래 화면은 지금까지 작업한 결과물입니다.
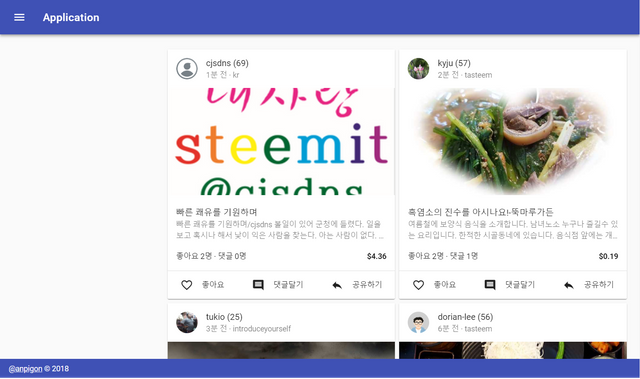
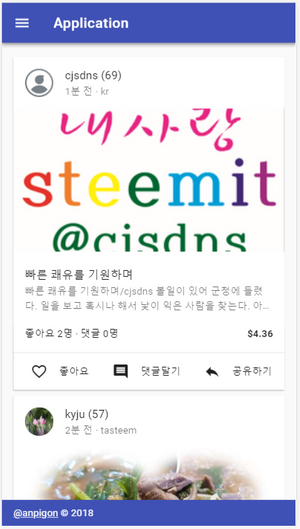
모바일에서는 아래와 같이 보입니다.
전체 소스 내용은 github에서 볼 수 있습니다.
여기까지 읽어주셔서 감사합니다.
(jjangjjangman 태그 사용시 댓글을 남깁니다.)
[제 0회 짱짱맨배 42일장]5주차 보상글추천, 1,2,3,4주차 보상지급을 발표합니다.(계속 리스팅 할 예정)
https://steemit.com/kr/@virus707/0-42-5-1-2-3-4
5주차에 도전하세요
그리고 즐거운 스티밋하세요!
댓글 감사합니다~^^
대박사건!!
이런 활용 정보는 처음 알게 되었습니다.
개발 공부에 응원 하겠습니다. ^&^
관심 가져주셔서 감사합니다.
Congratulations @anpigon! You have completed the following achievement on Steemit and have been rewarded with new badge(s) :
Click on the badge to view your Board of Honor.
If you no longer want to receive notifications, reply to this comment with the word
STOPreact보다 vue가 더 좋은거 같네요? 요즘 대세라구요?
vue가 대세라기 보다는 개인적인 제 의견입니다.
그냥 react보다 vue가 더 배우기가 쉬워서....
vue가 대세인 듯 사실인 양 글을 올려서 죄송합니다.ㅠㅠ
워후 좋습니다. ㅎㅎㅎ
감사합니다~^^
5년지나 지금에야 보고 있습니다
5년전에는 제가 이런걸 개발하고 있었군요. ㅎㅎ