FOODIE FRIDAY #2 - Pizza Knots
Hey Steemit Foodies!
I'm back from our family summer vacation, and ready to get back on track! I am so excited to start with one of these FOODIE FRIDAY posts. And, nothing seems more appropriate for a Friday evening post than these Pizza Knots! I mean, there is no way that we are the only family around that has pizza for dinner, practically ceremoniously, on Friday... Right?!
So, as stated in the first edition of FOODIE FRIDAY, hubby and I like to experiment with our cooking, and work on perfecting our recipes. That's where these bad boys come in. I was on a mission to make the "perfect pizza crust", making pizza at least once/week for a month or so, until we were satisfied that I'd gotten it. Not one to let myself get bored, I decided I needed to change it up a bit, and make something a little more interesting than the usual "pizza and breadsticks". Plus, this gave me another experiment to work on, with minimal extra work, and guaranteed tasty results... because, when you're simultaneously flexing your "foodie muscle", and responsible for feeding your family, you kinda want to ensure whatever you're working on will still be edible. ;) lol (How could you go wrong with pizza ingredients, no matter which way you put them together?!)
I also like to make non-traditional pizzas, and use pizza as a means of using up things that are in the fridge. Again, if it's on a pizza, it must be tasty. ;) This time we had some leftover meat and veggies from taco night earlier in the week. And so, we have Southwestern Pizza Knots!
When it comes to recipes, as with most things, it's best to start at the beginning. So first, we need to make the dough.
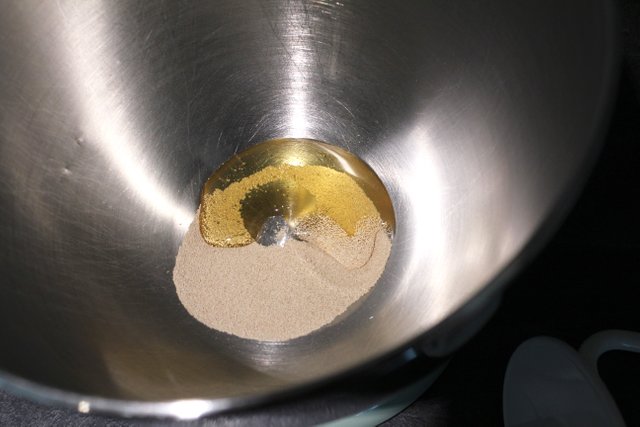
Start with yeast and honey in the bowl of a stand mixer:
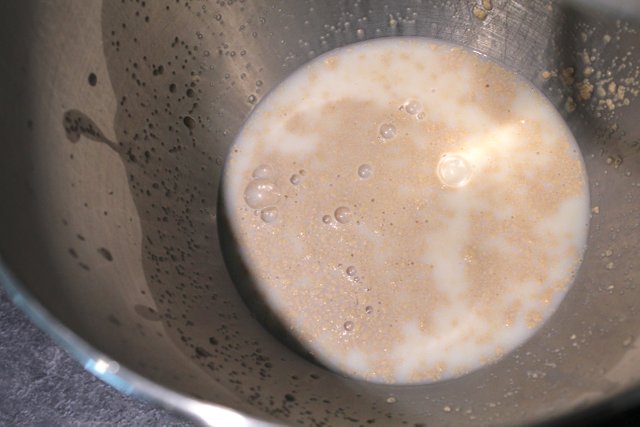
Then add the tepid (aka bath-water-warm, NOT hot) milk and water, stir it together to dissolve the yeast, and let it sit for about 5 minutes, until the yeast starts to foam:
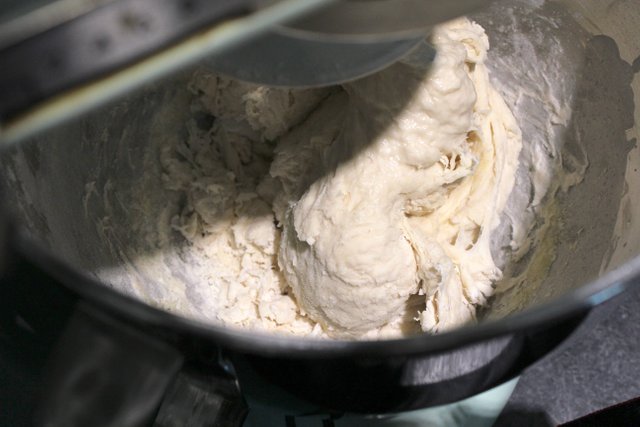
Once it's foamy, add in your oil, salt, and 2c of flour, and turn the mixer (with hook attachment) on low.
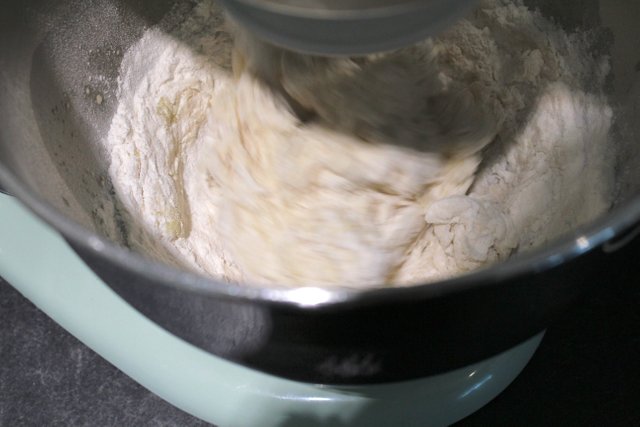
At this point it's still too sticky, so we're going to have to add more flour.
This is where experimenting and working on perfecting the recipe comes in... the actual amount of flour you'll need to get the right consistency varies day to day, because it's dependent on a bunch of factors, including the moisture in the air! So, working on the dough recipe, I developed more of a feel of when the dough has enough flour/has been kneaded enough.
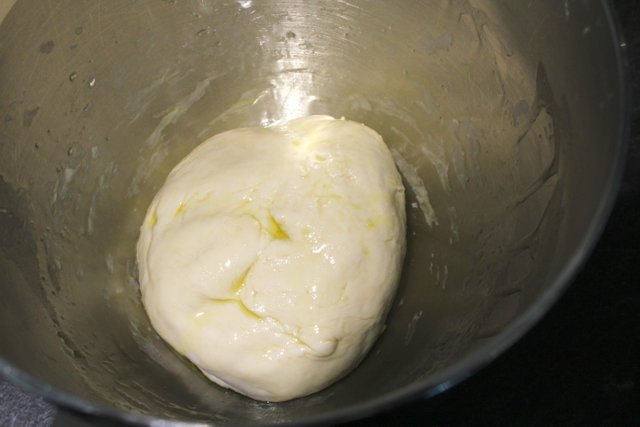
I added approximately 1/2-2/3c more flour, and continued mixing on speed 2 for a couple of minutes, until the dough pulled together into a ball, cleaned itself off the bowl, but wasn't wet or dry.
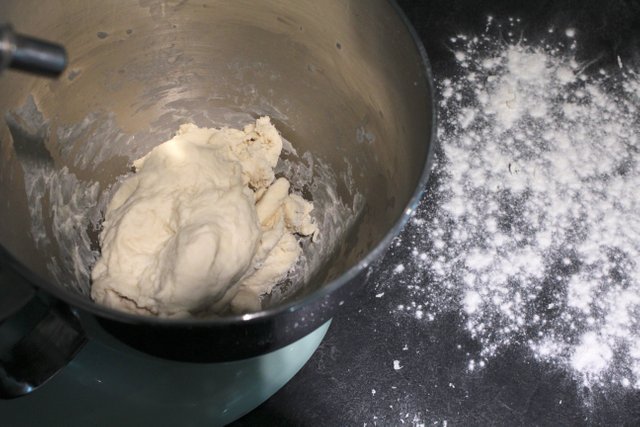
Then it's time to flour your board/counter, and continue to knead by hand, until the dough is "smooth and elastic".
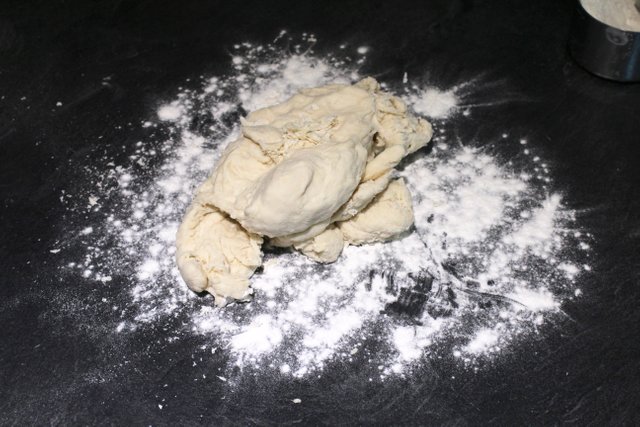
I know it's "smooth" enough when I run my hand around it and it feels satiny soft. Voilà!
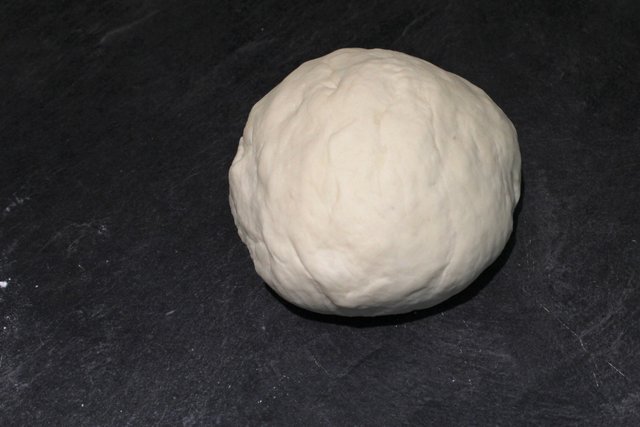
Then you need to oil the bowl, pouring a little olive oil around the sides, put the dough in the bottom, and turn it over to coat:
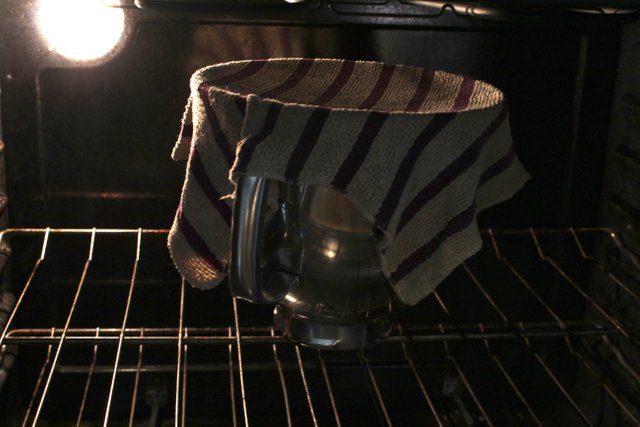
And now it's time to let it rise! I wet and wring out a cloth, place it over top of the bowl, and place into a slightly warmed oven. (Preheat for approx 30 seconds, then turn it off, and leave only the light on.) See you in a half hour!
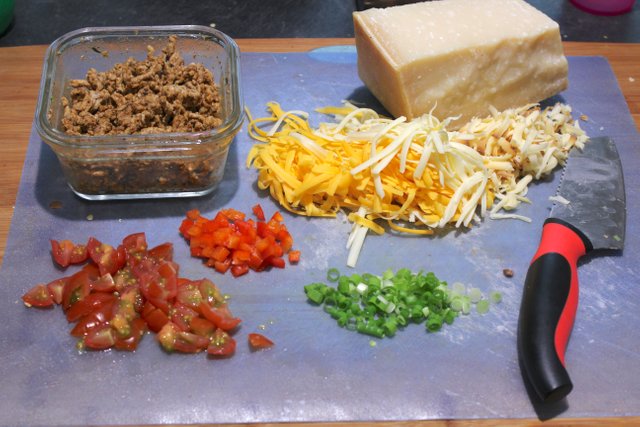
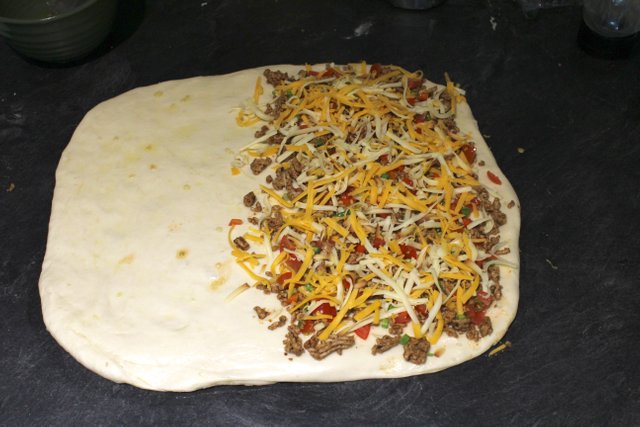
While the dough is rising, prep all your "filling" ingredients. I re-warmed the meat, grated some cheddar and mozza, and chopped the tomatoes, red pepper, and green onions.
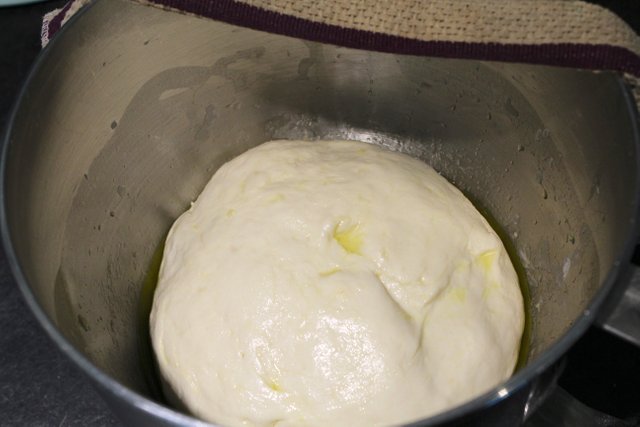
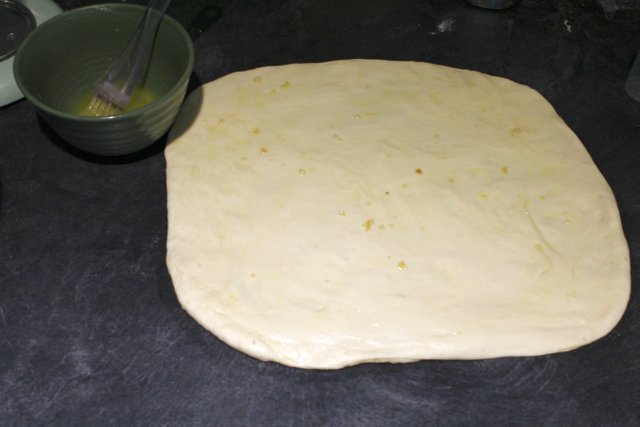
Here is the dough a half hour later, all fluffy puffy and ready to go!
Now we get to the assembly. Start by turning out the dough onto a clean counter, and press it out into a rectangle. Then brush the whole thing with some melted garlic butter.
Then you want to sprinkle your fillings onto one HALF of the dough, like so:
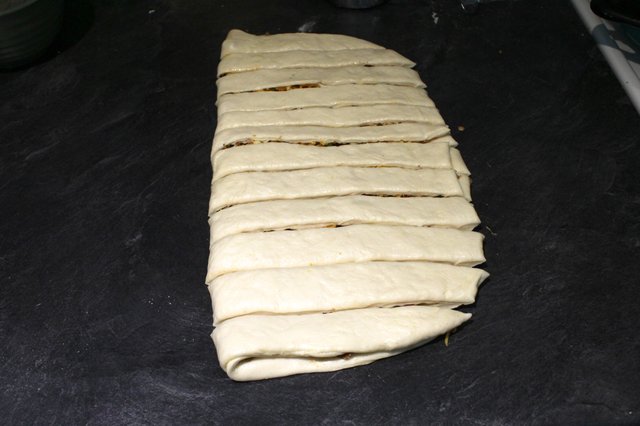
Once it's coated nicely, fold the dough over the fillings, and cut into 12 strips.
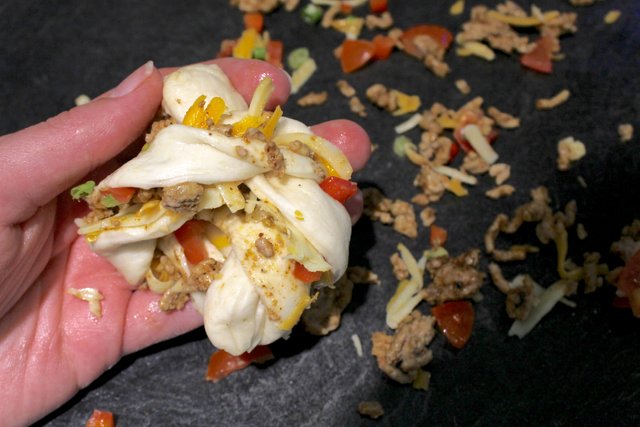
And now is when we make them into actual "knots". Pick up one of the strips, hold the ends in either hand, and loop one end through.
Place it into the prepared pan (cast iron skillet with a little splash of veg oil) and continue tying until the whole dozen are knotted and in the pan. (This process is messy but don't worry, we'll get back to that.) And then brush them with the remaining garlic butter.
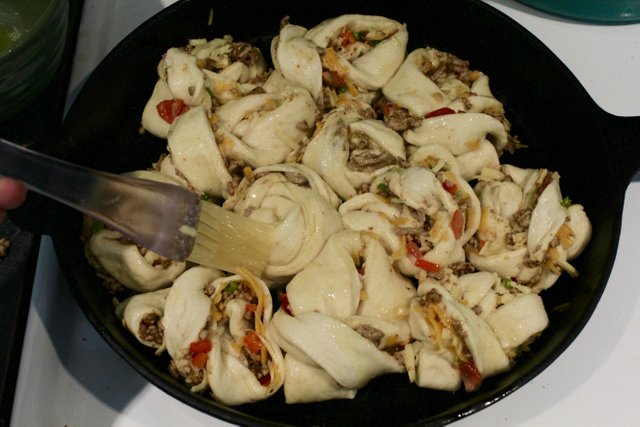
And then you want to go back and scoop up all the bits of filling that fell out, and sprinkle them on top of the knots.
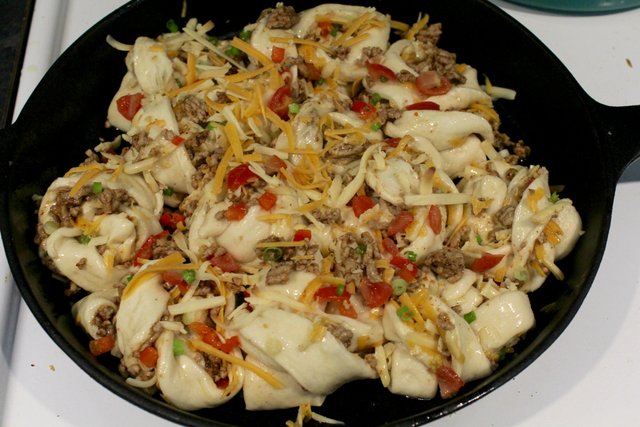
Plus another helping of cheese to coat it all thoroughly. Because yum.
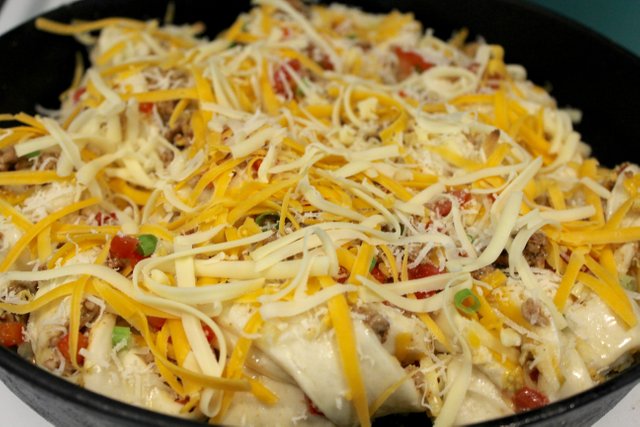
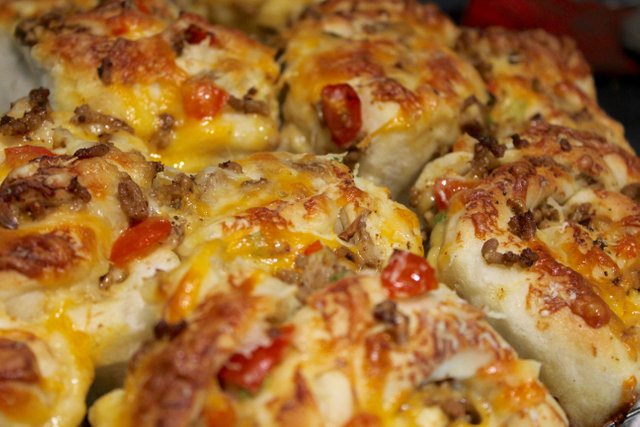
Then we pop that bad boy into a nice, hot 425F oven for about 20 minutes, and take it out when the cheese and bread are a nice golden brown. Use a spatula to lift them, and slide onto a cooling rack, to keep the bottom from getting soggy. We want that crisp crunch!
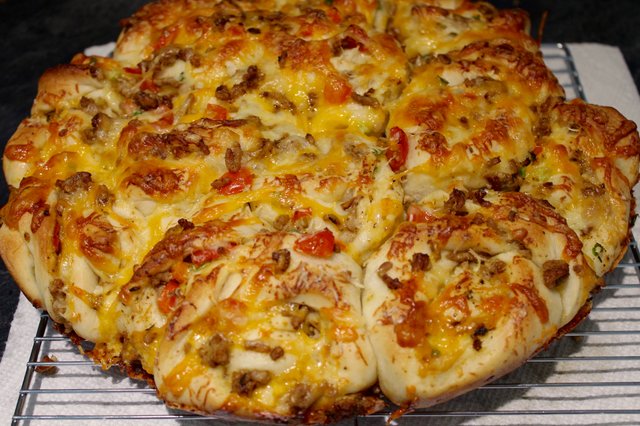
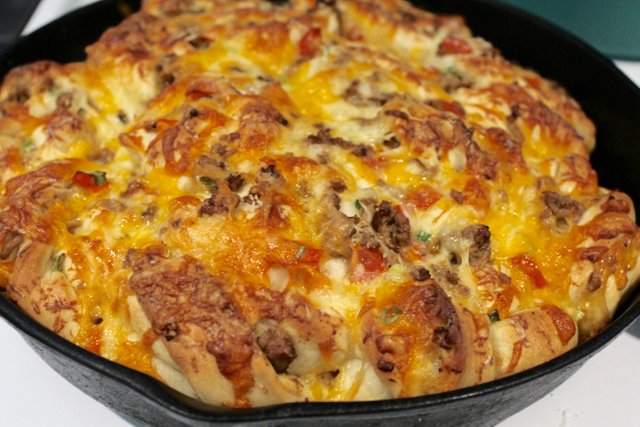
Don't they look yummy?!
Time to rip into one!
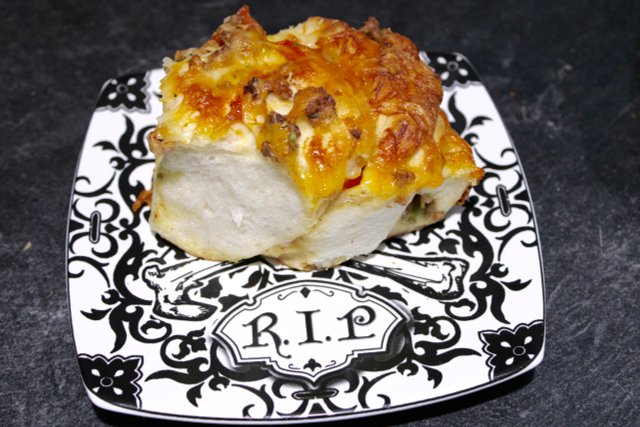
Fluffy bread with a crispy crust, covered in melty cheese, filled with deliciousness!
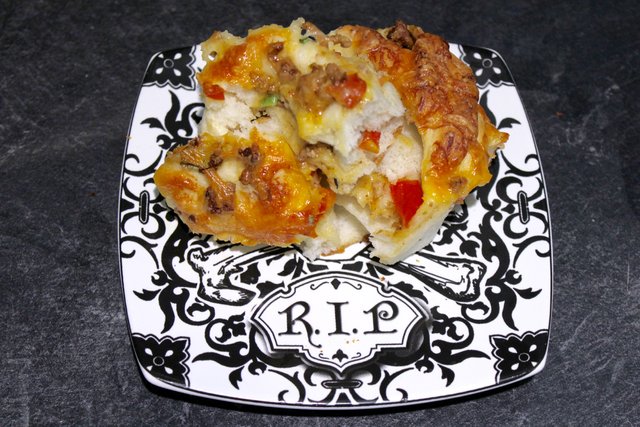
The only problem we've experienced with these, is that once you've started, it's hard to stop eating them! They've become a bit of a staple in our house.
The Recipe:
Dough
2 1/4 tsp (or 1 packet) instant dry yeast
2 tbsp honey
1/2 c warm water
1/2 c milk
2 1/2-3 c all purpose flour
2 tbsp extra virgin olive oil
1 1/2 tsp salt (I used some homemade smoked garlic salt)
Put yeast and honey in bowl of stand mixer. Put milk and water into microwave safe measuring cup, and warm approx 20 seconds, until liquid feels warm to the touch, but NOT hot. (Think bath, not hot tub!) Pour the liquid over the yeast and honey, stir it together, and allow the yeast to "bloom" for 5 minutes. Once there's some foam on top, add 2 c flour, oil, and salt, and using dough hook, turn mixer on to low. Add 1/2 c or more flour, to bring dough together, until it forms a ball and cleans the sides of the bowl. Continue kneading on speed 2 for 2 minutes longer.
Turn out the dough onto a floured surface, and continue to knead by hand, sprinkling on a little flour at a time, until the dough is no longer wet, and becomes smooth and elastic.
Drizzle a little more olive oil around the sides of the bowl, and place the dough inside, turning to coat.
Cover with a damp cloth, and allow to rise in a warm, draft-free place for 30 minutes, or until at least doubled in size. (Love the oven trick.)
Knots
1/4 c garlic butter, melted (homemade or store bought, whatever you like)
1 c taco meat (ours was ground pork, seasoned and cooked earlier in the week)
1/4 c diced red bell pepper
1/4 c finely sliced green onion
1/3 c diced grape tomatoes
1 c shredded cheddar
1 c shredded mozzarella
1/4 c grated parmigiano reggiano
Preheat oven to 425F. Pour 1 tbsp veg oil into cast iron skillet, and set aside. Turn out risen dough, and press out into large rectangle. Brush entire surface of dough with garlic butter. Sprinkle the meat, veggies, and half of the cheddar and mozza over half of the flattened dough. Pull the "empty" side of dough up over the side with the filling, folding it in half. Then cut that rectangle into 12 relatively equal strips. Pick up one strip at a time, holding either end, form a loop, and pull one end through, creating a knot. Place the knot into the skillet, and continue to make knots of the full dozen. Once they're all in the pan, brush them with the remaining garlic butter, sprinkle over all the bits of filling that fell out, and top with the rest of the cheese. Pop them into the oven for approx 20 minutes, or until they look golden brown and delicious. (Don't let the edges burn, but also don't take them out while still pale, or the middle will still be "doughy".) Lift them with a spatula, and slide out onto a cooling rack.
Allow them to rest for 5-10 minutes, to avoid risk of burning the bejeepers out of your fingers. Or just dig right in. Your call. Once you smell them, it's hard to resist trying "just one little piece." And, unless you have a stomach the size of a 2 year old's, it's going to be impossible to stop after one. Don't say I didn't warn you!
So, there you have it! Perhaps the next time you've got pizza on the brain, or you're looking to do something a little different with those leftovers, you can give these a whirl! And if you do, please be sure and let me know how it turns out!
It can not be tasteless.
Thank you for a good recipe.
That's for sure. haha Thanks for stopping by!
Congratulations @offbeatbroad! You have completed some achievement on Steemit and have been rewarded with new badge(s) :
Click on any badge to view your own Board of Honor on SteemitBoard.
For more information about SteemitBoard, click here
If you no longer want to receive notifications, reply to this comment with the word
STOPLooks so amazing and such a nice and detailed walkthrough Nice job!
Thanks! I definitely like to be thorough with my recipes. Glad it was appreciated! :)
meep
Delicious is a recipe that I will prepare
Awesome! Be sure to let me know how it turns out! :)
Yummmmy yummy @offbeatbroad, thank you for sharing your recipe with us. I like non-traditional way of making pizza. Bookmarking this to do to learn how to do this. Thanks for showing us all the pictures. That really helps. Upvoted and followed.
Thanks very much! I definitely have found that pictures tend to help when learning to do a different sort of recipe. Sometimes I wonder if I'm going a bit overboard, but I like to be thorough. :)
That crust looks amazing. Perfect for making knots like that, which might just be great at our next party at the house. Question: I like super thin cracker crust on my pizza. Have you ever given that a shot? I'm assuming that would mean no yeast and no proving but curious as to what you think.
I have made so many different sorts of pizza crust over the last 10 years, but the few times I've done a thin crust, my hubby turns his nose up... I enjoy a nice crisp crust sometimes too, but he basically wants a loaf of bread with toppings. LOL! You can use the same dough recipe, and stretch it thin, and put it on a hot pizza stone - that would give you a thin but chewy crust, still with the crunch on the bottom, but not a super thin cracker-like crust. Hope that helps!
Absolutely! Thanks for the reply. Next step: get a pizza stone.
Wow, looks really delicious. Thanks for sharing @offbeatbroad. 😊
Thank you!
Yummy! Thanks for sharing this recipe.
No problem! Thanks for stopping by!
that was art , thank for the post
Haha! Thanks! Glad it was enjoyed!
Hi i like your post upvoted your post hope you will like my posts and will upvote my posts as your true followe
Thank you! I will definitely go have a look! :)
Hi i like your post upvoted your post hope you will like my posts and will upvote my posts as your true followe