Tutorial - Alternative Guide to Portrait Painting from Life
We've all heard the cliche, the eyes are the windows to the soul. Though this is likely what makes painting portraits so enjoyable. Painting someone you know can be a challenge; we all have preconceptions regarding how a face should look, more so when that face is familiar to you.
This tutorial will give you an alternative method of structuring a portrait, whilst employing traditional techniques such as underpainting.
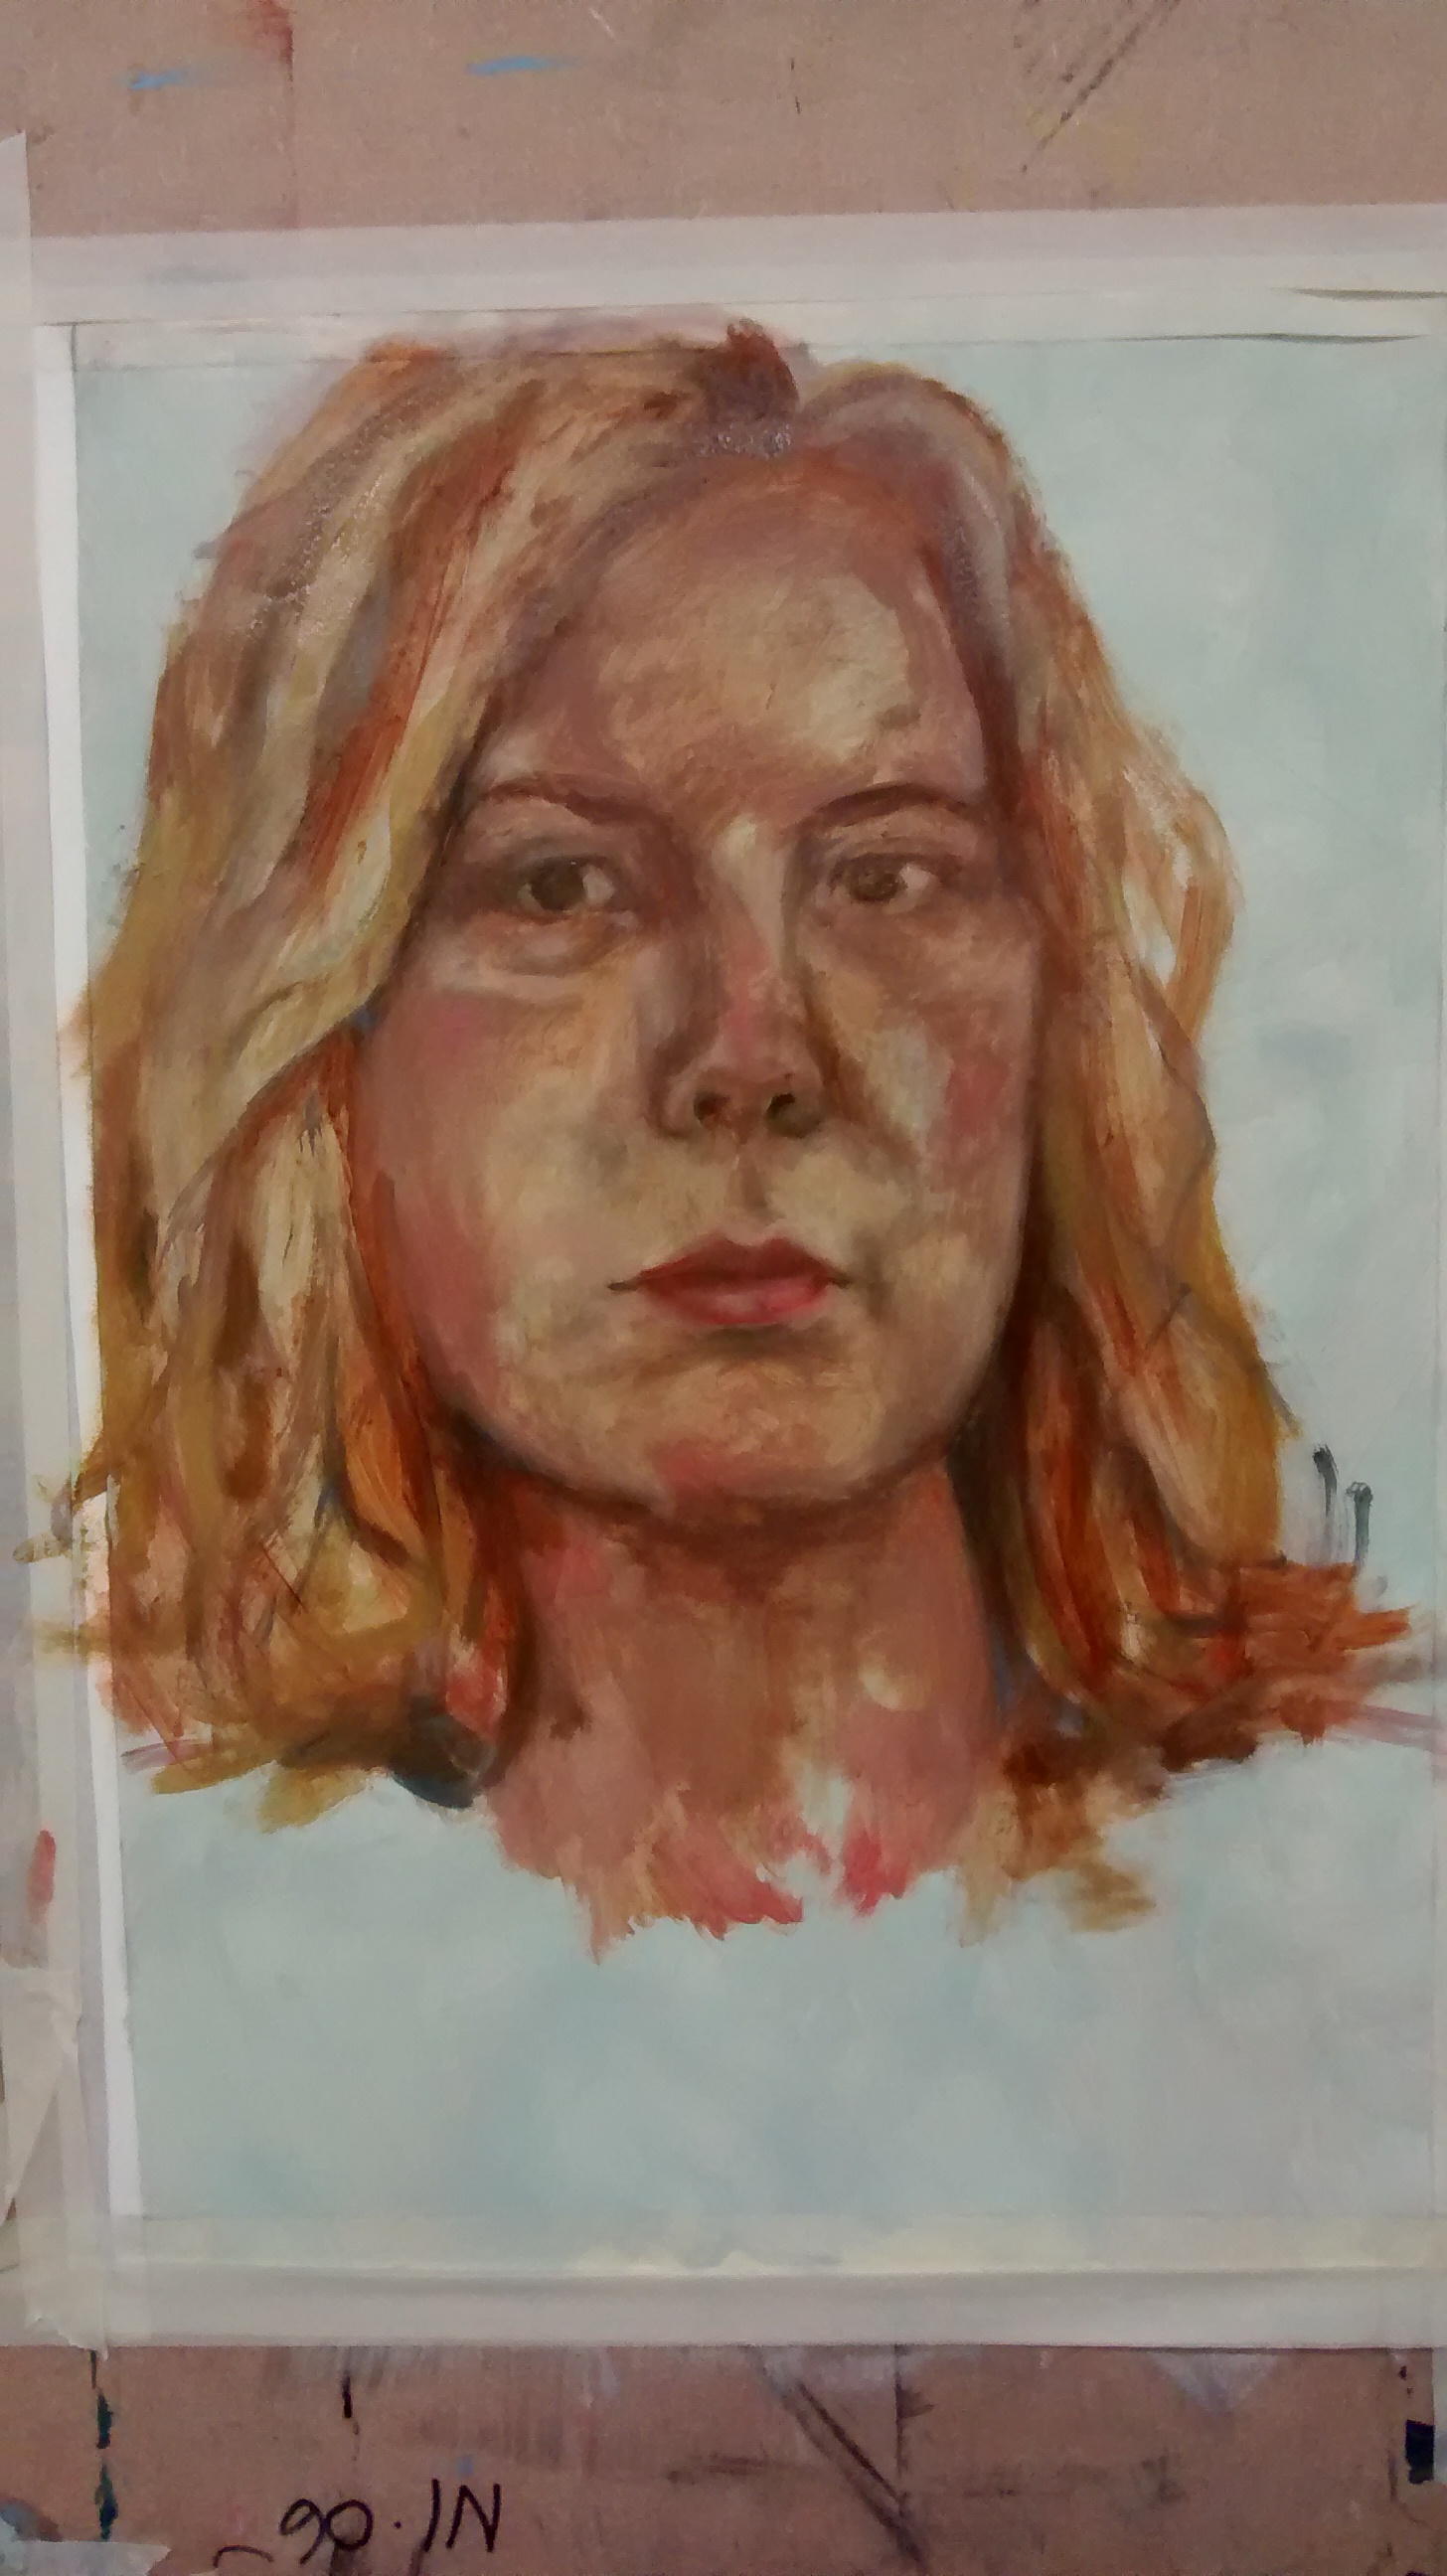
This is the final piece, before blending or adding small details. At this stage you have two choices, keep the portrait expressive, textured and 'paintily', or use two brushes, one for detail, one dry brush for blending.
Starting out
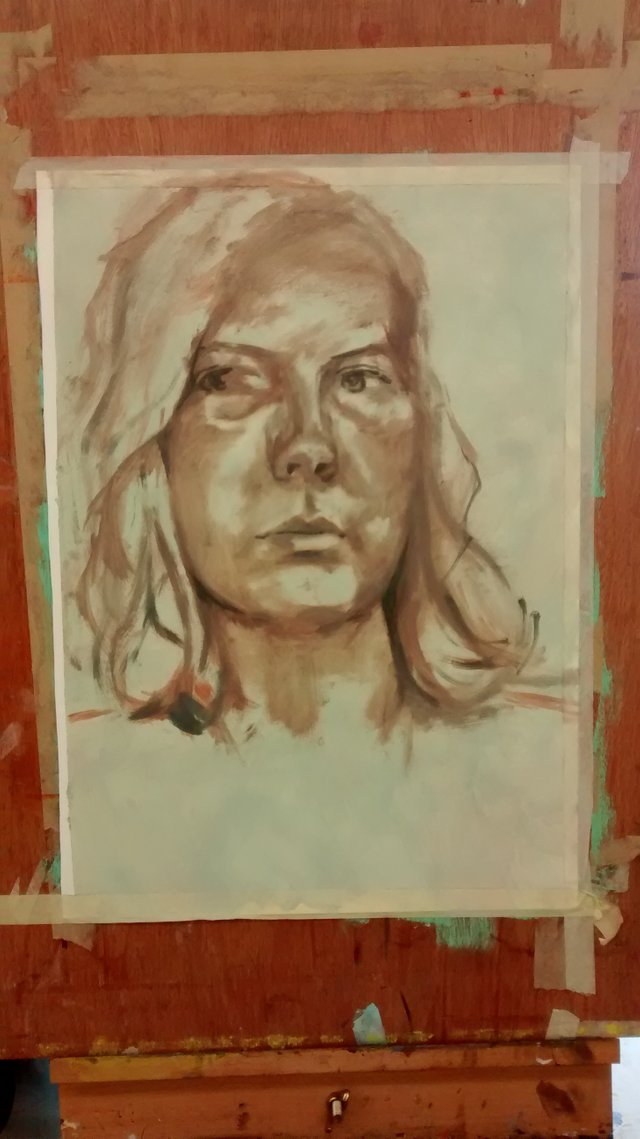
Begin by mixing a cool shade of brown. This would be a brown with more blue mixed in, or a tube colour such as 'raw sienna', 'raw umber'.
If using oil paints, keep your paint thin with a mixture of turps and linseed oil. If using a water based paint, use water to thin. Begin by sketching in the basic shape of your face. Working in thin paints allow changes to be made with ease, and building up layers will create depth.
Clean the excess from your brush and 'dry brush' the darkest parts of your portrait in. Here we begin to build tonal qualities so important to portraiture.
No need to panic your painting isn't looking like your subject at this stage! The fun in this method is creating layers and continuous 'fixing' to allow the work to evolve naturally (no drawing ovals and measuring distances for lines here!)
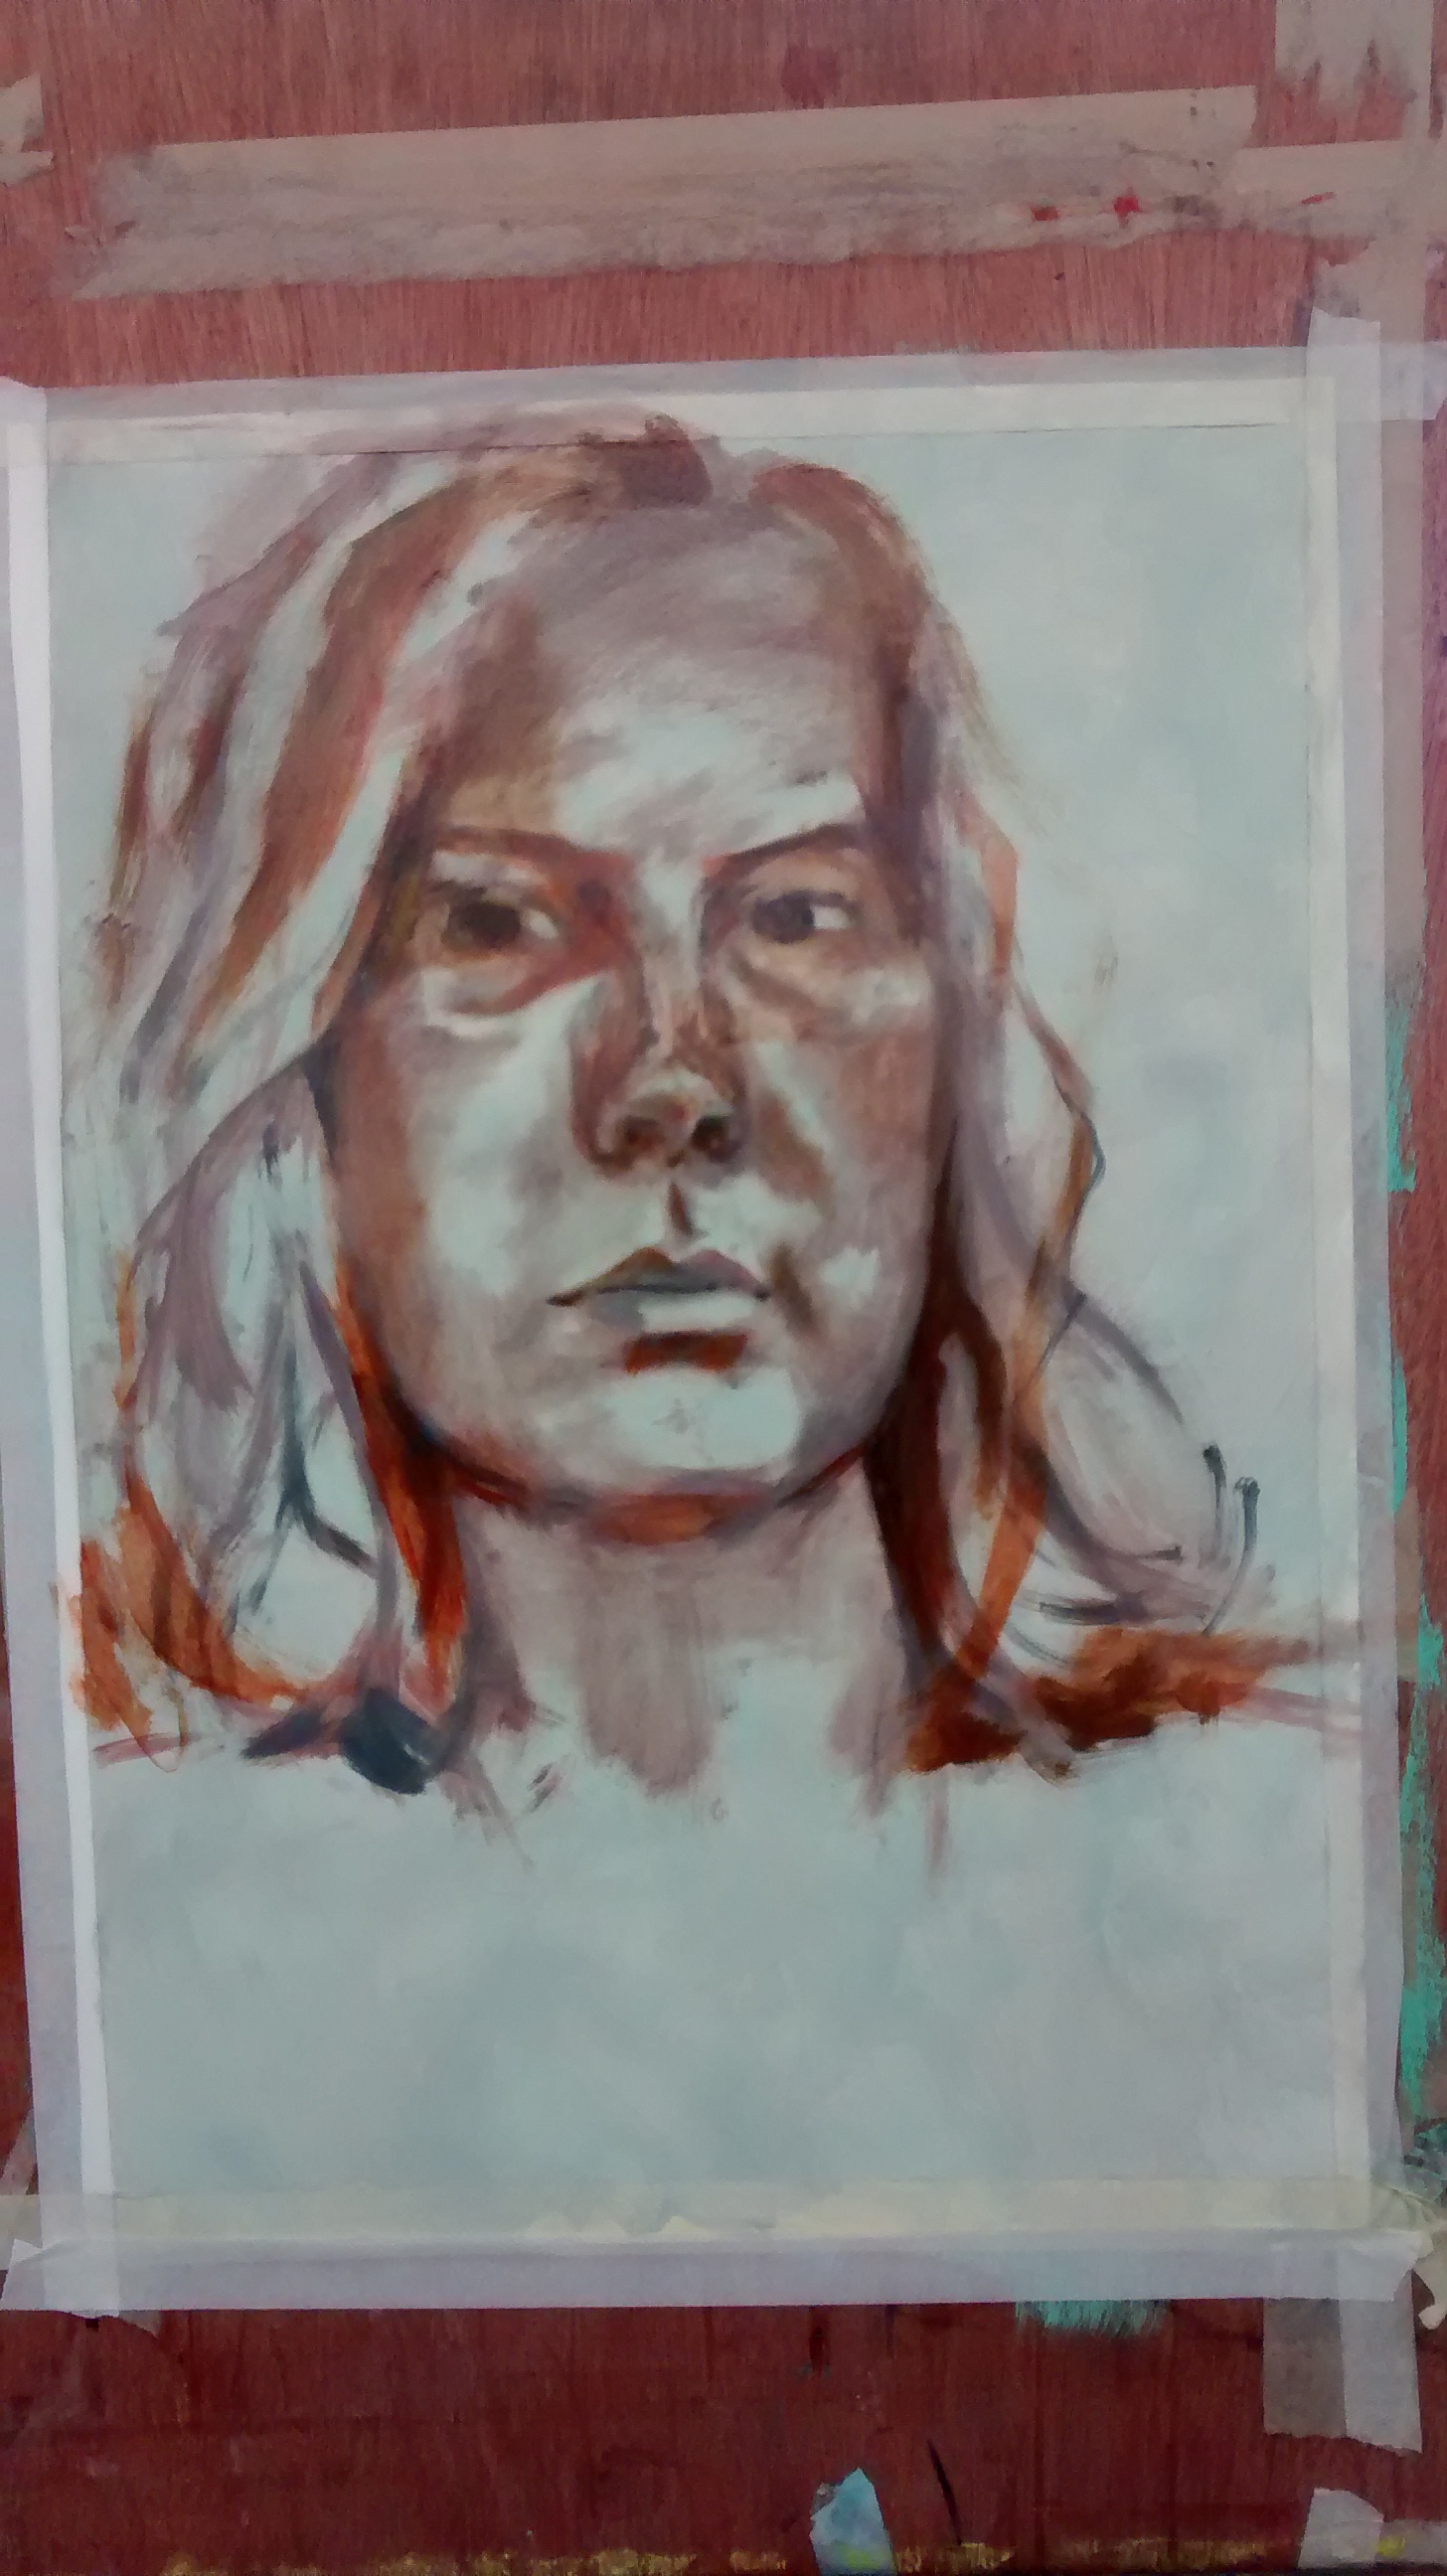
The next stage is to add a warm tone. The easiest way to mix this is to use red and yellow for orange, then use a very very small amount of blue for a warm brown. Alternatively use a tube color such as 'burnt sienna'. This will add vibrancy to your portrait and life to skin tones.
Continue working with dry brushing to build tone around the chin, cheeks, eyes and neck. Resist working on the features at this stage! All the tonal work done during the underpainting will guide the position and size of the eyes, nose and lips.
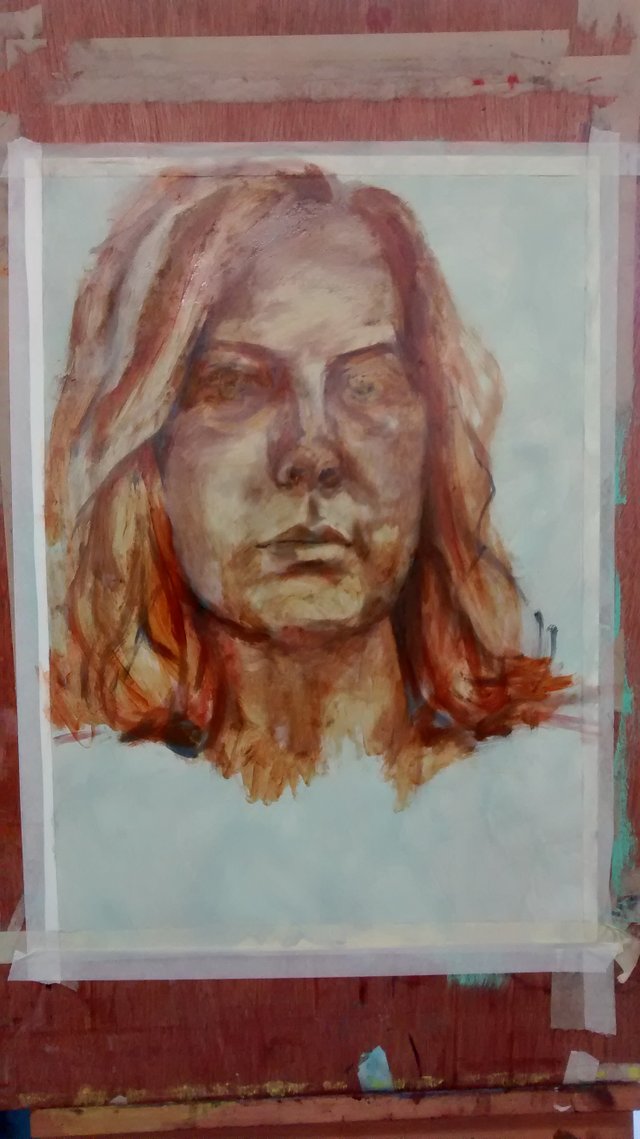
Once confident with the basic tones in your underpainting, begin to work around the features with slightly thicker paint. Moving onto this stage will require a few more colours. Try using your warm brown a little thicker. You can divide this into three, mixing a little blue with one for a darker tone and a touch of yellow and white to the other for a brighter, highlighting tone. The aim of this step is to have paint cover the entireity of the face, even if it is very thin in the lightest places.
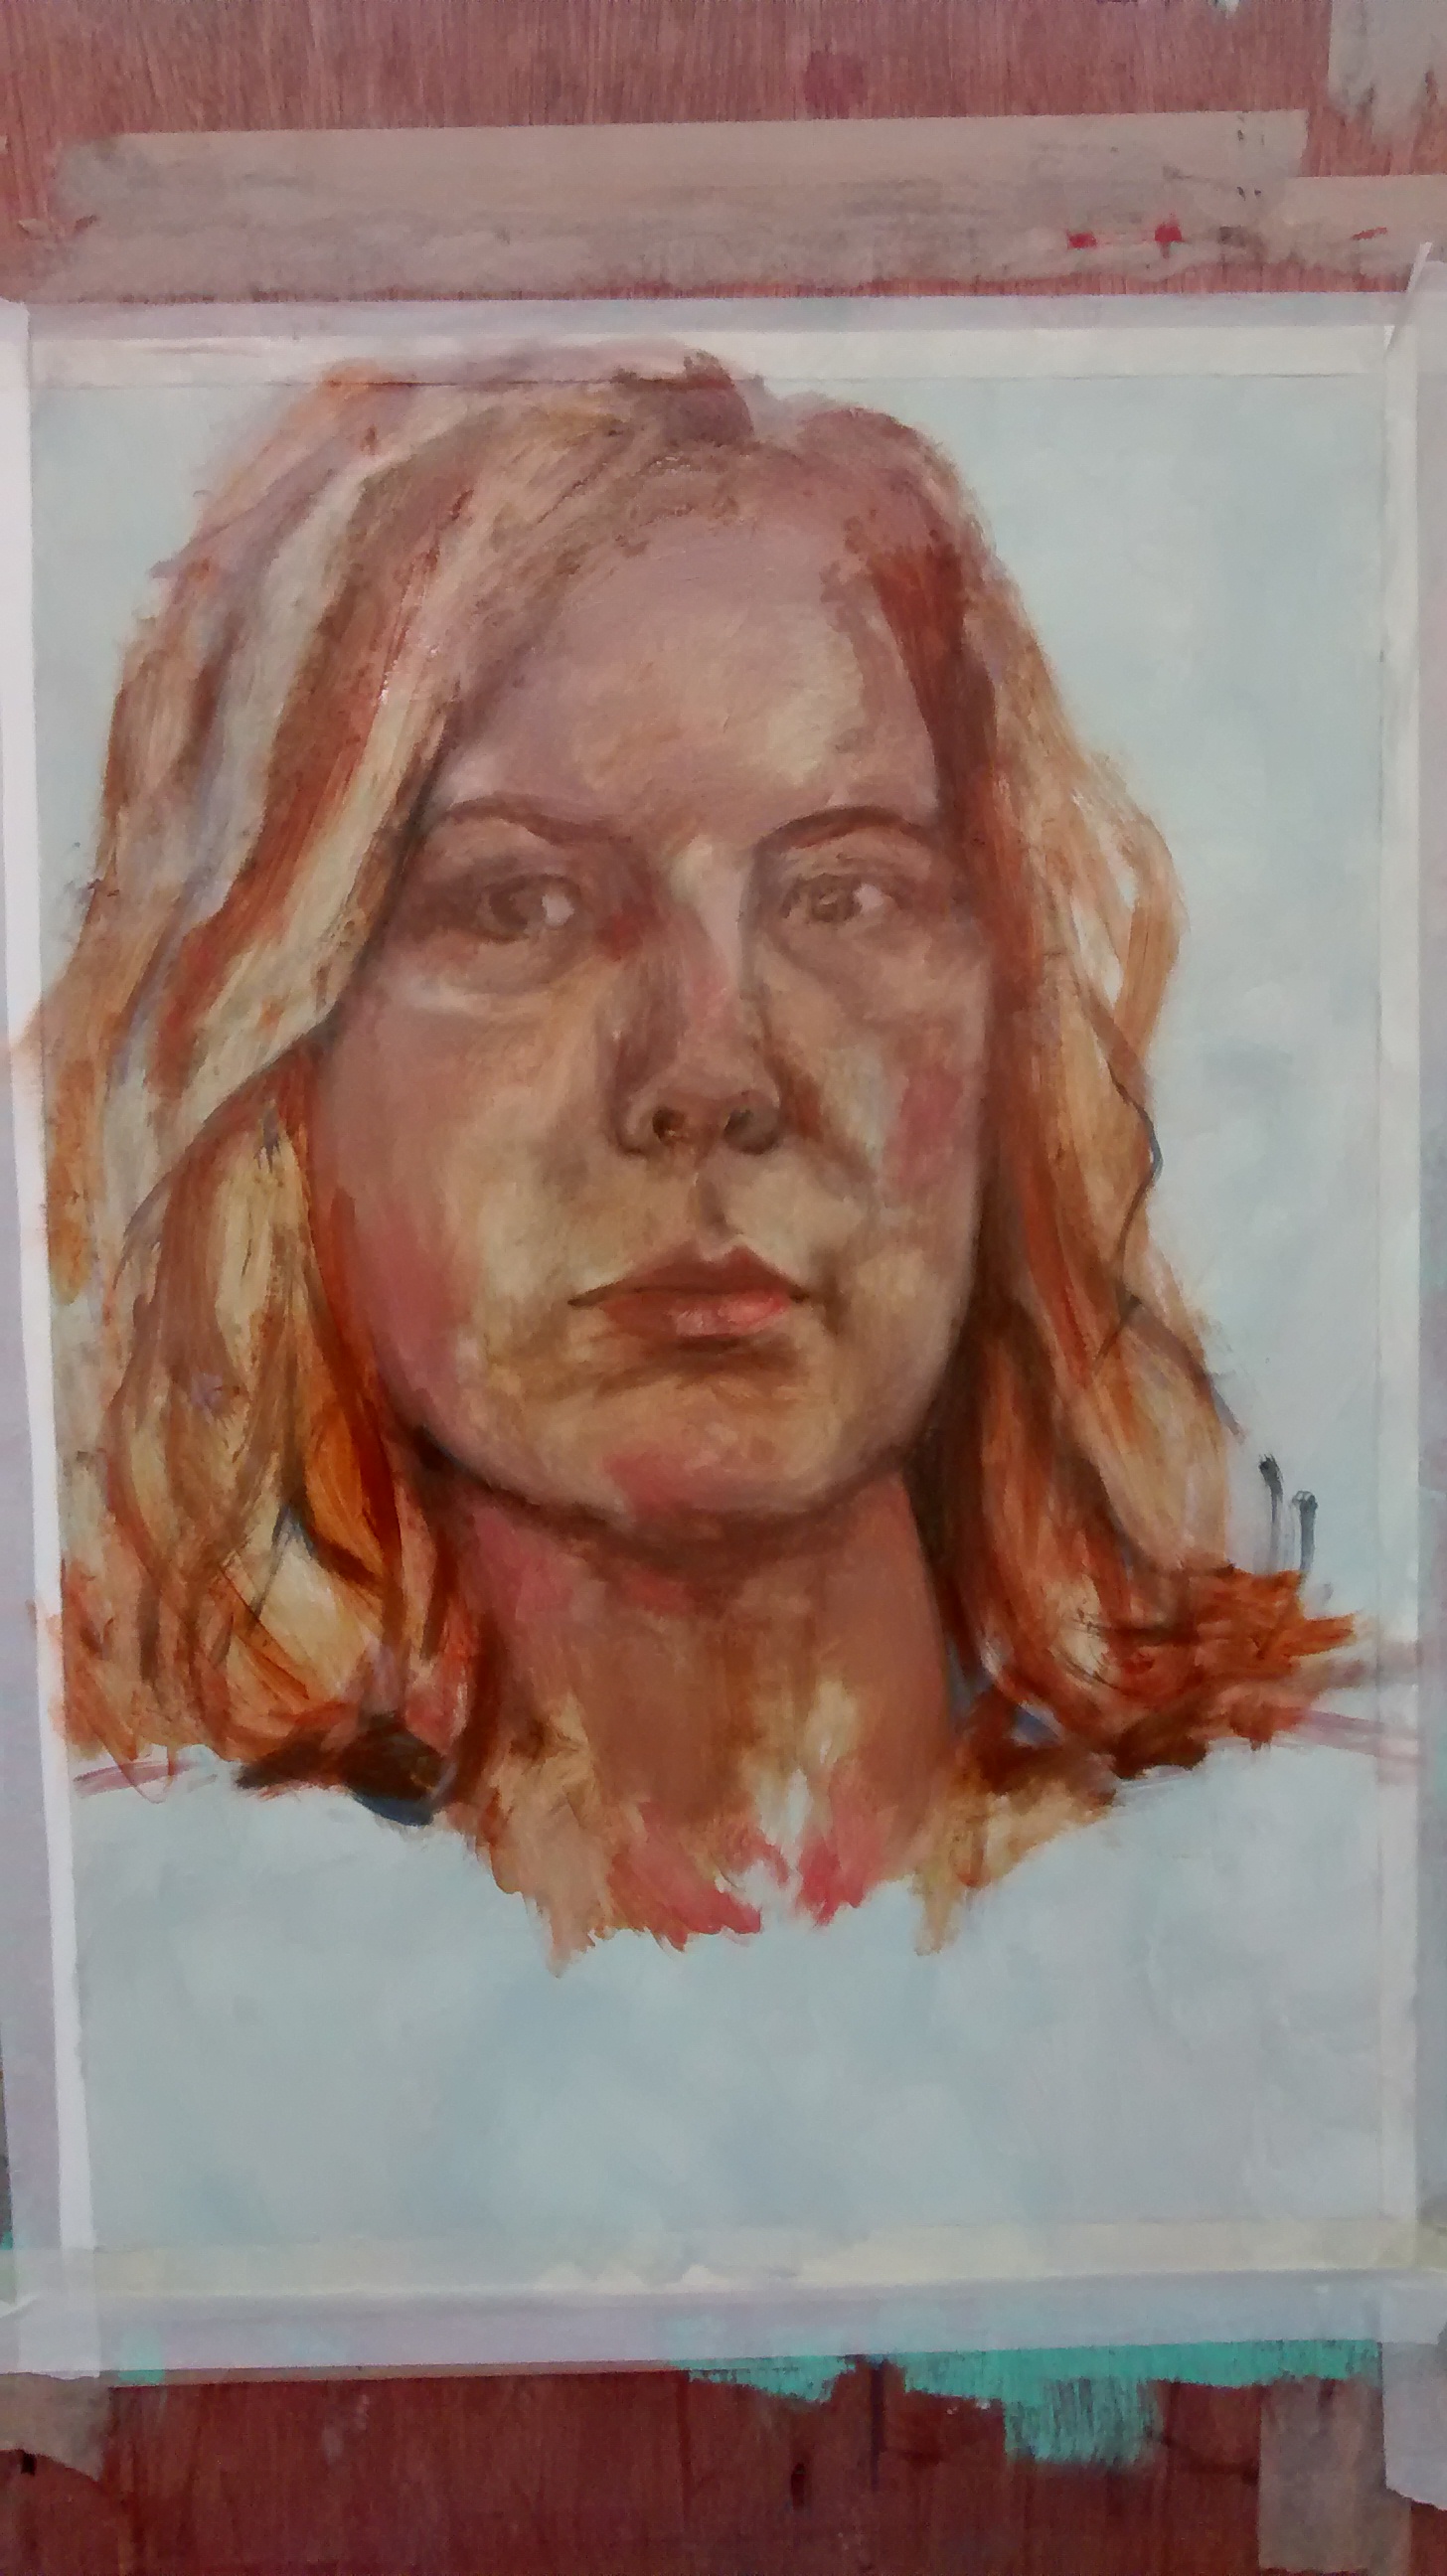
This stage is best done once the painting has dried a little. Begin mixing thicker, lighter colours to describe the highlights in the face. Mixing pink tones for flush will also unify the portrait and set parts of the face forward. At this stage you should be able to notice the depth of your painting developing due to all the work done on the underpainting.
To begin the features, I've chosen a slightly smaller brush to thinly block in the dark shapes around the eyes, nose and lips. It's really important at this stage to concentrate on your subject. Don't try to fix the painting without looking at your subject! A key skill in observational art is to look more at the object informing your art, than at the work itself. Eyes aren't ovals, pupils aren't perfectly round and nostrils aren't circles!
As painters we try to create an optical illusion, a trick you could try is to blur your eyes - this may help you to move away from your preconceived ideas of how something should look.
An example of how to create this illusion is whilst working around the eyes of your portrait. Most will each for the black/dark colours early on. Try layers of greys and blues, marking out the shape the eyelashes make as a collective, rather than each individual lash.

This self portrait is far from finished, but is an example of how portraiture can be quick, expressive and fun. I could now choose to build a thicker layer of paint whilst blending areas together for a smooth finish. I may decide to go expressive, Auerbach style and use palette knives, there are so many ways to finish a portrait!
I hope you enjoyed this post, please resteem if you believe others may find it useful!
I'll follow you because I love the story of Hacking. I'm passionate about that. Good job
Damn that's good. I've never had tuition in portrait painting or sought out a guide but I'm gonna have to try following this. A self portrait of course..
Thanks for sharing.
Thanks for your comment, it's a shame this post wasn't seen much but i think i must have posted at the wrong time of day! Please post pics if you have a go, would love to see you do a portrait.
I will, I've resteemed so it may reach another audience. I've no idea when a good time to post is -America is probably still asleep right now! One of my posts got $302 (and then proceeded to go down rapidly) whilst others may get a few cents. Not worked this site out yet.
I think the secret is to post things you find interesting and concentrate on that rather than chasing the money..
Agreed, I'm finding it useful to catalogue my work and force me to document my work, I'm unsure about the rewards yet! Thanks for resteeming.
You painting is really good however when talking about your art and tutorial you can let people fell more into it by telling them about the connection you Jane with your peice. Let them feel like they are doing the painting and not you. Let them use there senses more. Nothing is wrong with it because art in any way or form is a creation of expression.
Don't worry you are a great artist it just also might be the audience you delivering to.
Keep on steem on im gonna upvote you. And follow you.