Tip #5 Fingerzinken / Tip # 5 Finger tines
Was sind Fingerzinken ?
Hier wollen wir diese Frage beantworten.
Fingerzinken sind stabil, schön und sie sind leicht herzustellen.
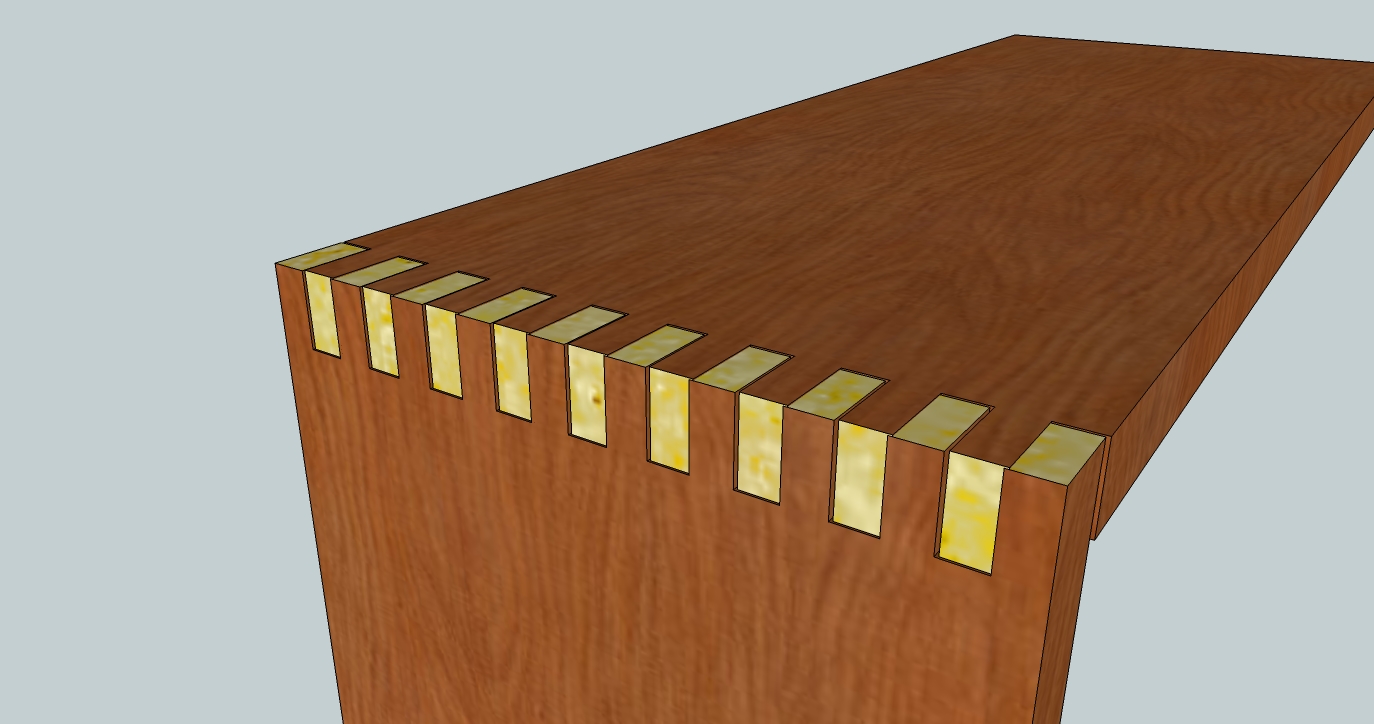
Fingerzinken
Die Fingerzinken sind eine mehrfache Verzahnung gerader Zapfen, die man Zinken nennt. Man wählt diese Verbindung zum Zusammenbau von Holzflächen, da die so verbundenen Teile ungehindert schwinden und quellen, sich aber nicht werfen können. Weil diese Verbindung gleichzeitig auch schmückend wirkt, muss man die Einteilung der Zinkung sorgfältig vornehmen.
Bei dieser Eckverbindung laufen alle Schnitte parallel zueinander; um das Öffnen zu verhindern, werden die Zinken miteinander verleimt; die Fingerzinkung sind aufgrund der leichten, maschinellen Herstellbarkeit auch für die Serienfertigung von Möbeln einsetzbar.
Nun folgen die einzelnen Schritte um diese Holzverbindung herzustellen.
Vorgehen
Hölzer Dimensionieren
Als erster Schritt musst du die Dimensionen der jeweiligen Hölzer festlegen und / oder vorbereiten. Wichtig ist hier das du exakt arbeitest und alle Bretter die gleiche Holzstärke haben.
In unserem Beispiel nutzen wir folgende Abmessungen:
20 cm x 20 cm x 2 cm
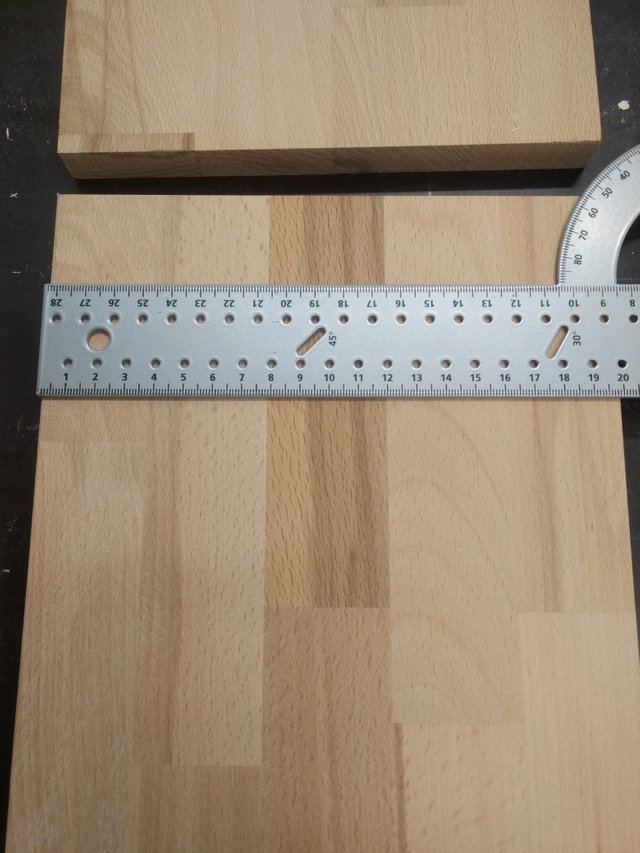
Zinkeneinteilung
Im nächste Schritt: müssen wir die Zinken und Zapfen rechnerisch bestimmen. Dafür gibt es Formeln.
Wir nutze folgende Formel:
Holzbreite / Holzstärke = Anzahl der Teile (Zinken)
Oder in Worten: Holzbreite durch Holzstärke ist gleich die Anzahl der Teile
In unserem Beispiel wären das folgende Maße:
200 mm / 20 mm = 10 Teile
Aufteilen und Anzeichnen
Als nächsten Schritt zeichnen wir die Teile (Zinken) auf das Brett.
Und wieder rechnen, um die Größe der Teile zu ermitteln.
200 mm / 10 Teile = 20 mm per Teil (Zinken)
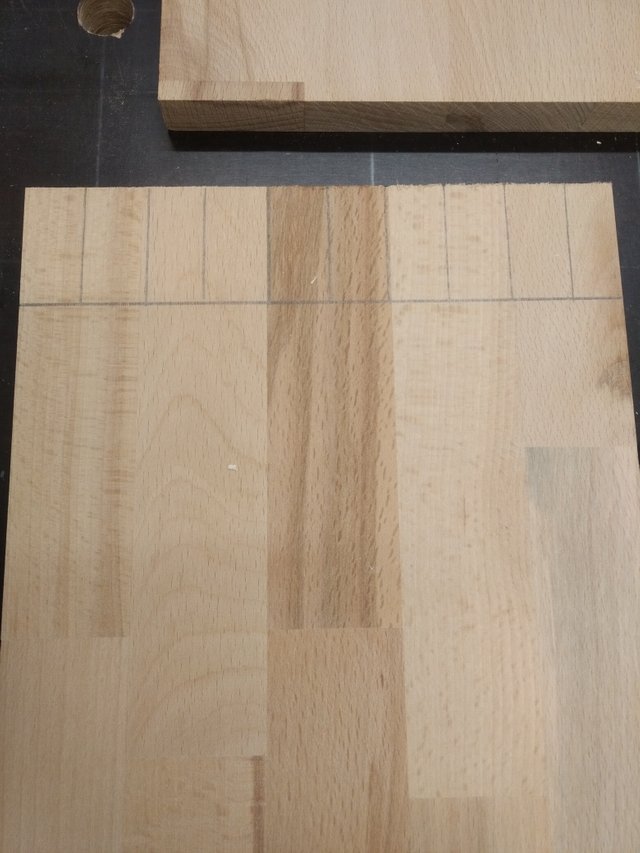
Brettstärke übertragen
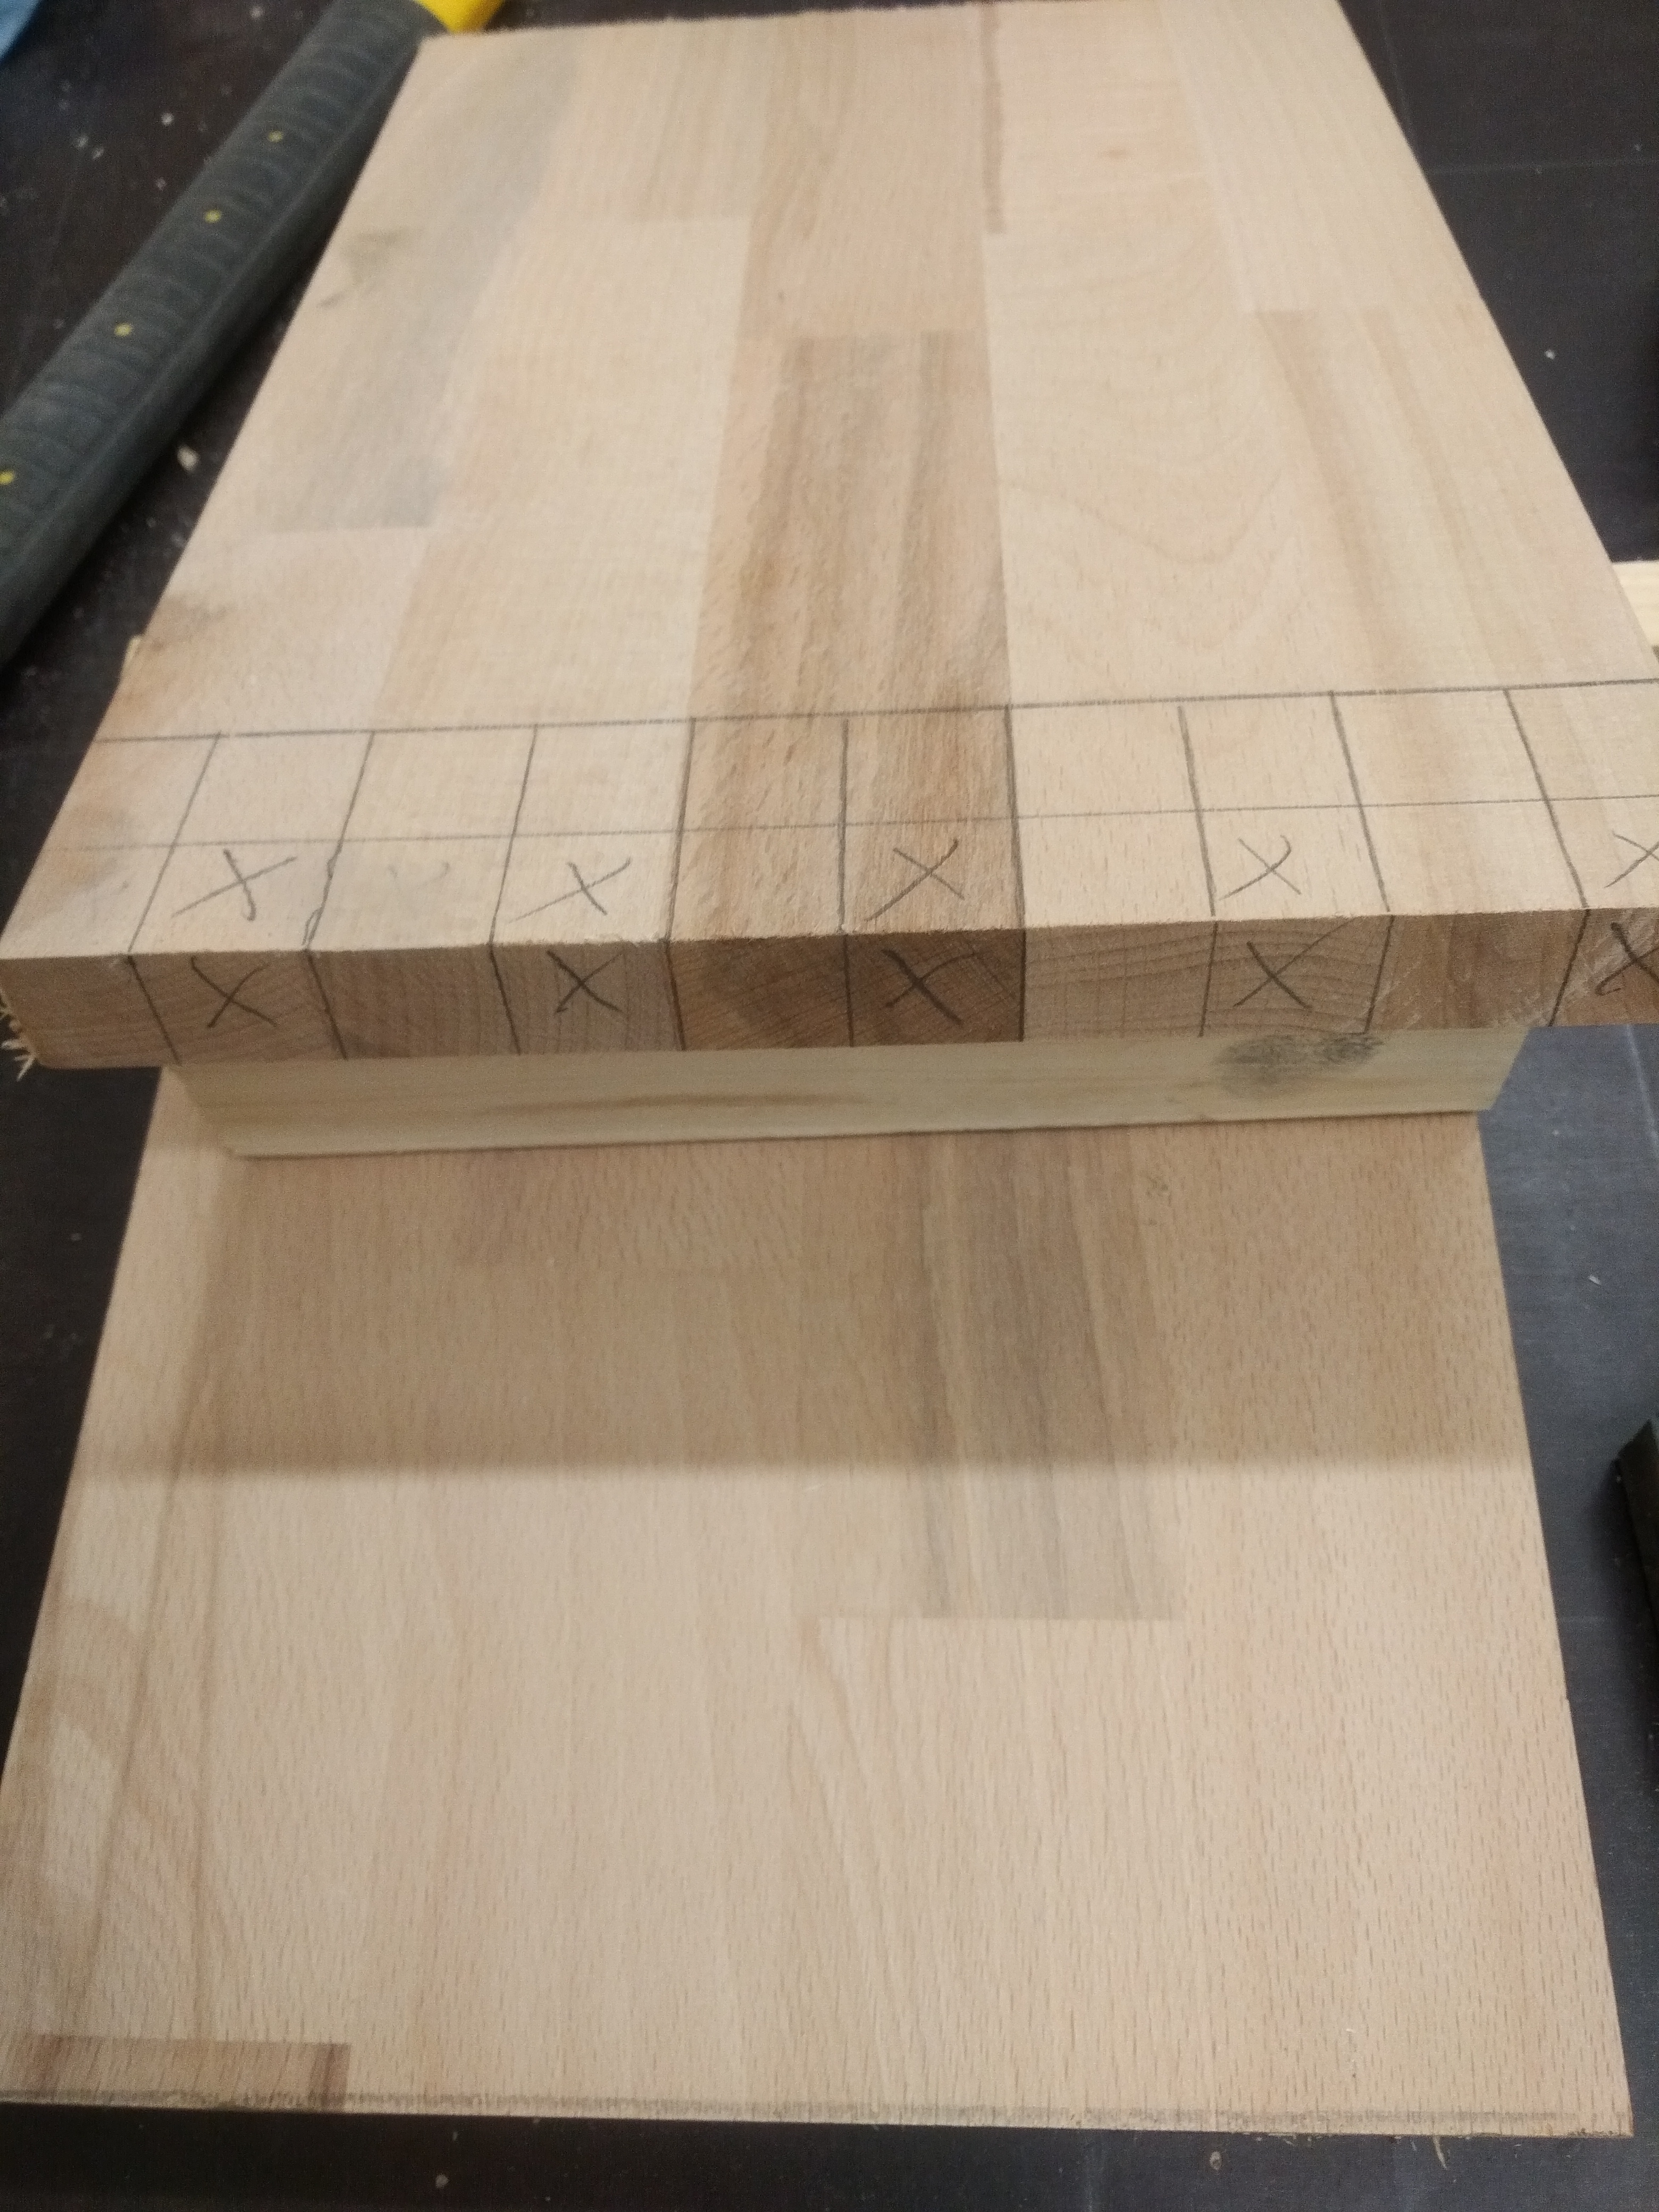
In unserem Beispiel ist unser Brett 2 cm stark; dieses übertragen wir nun auf das Brett; und Zeichnen auch undere Zinken an allen Seiten an.
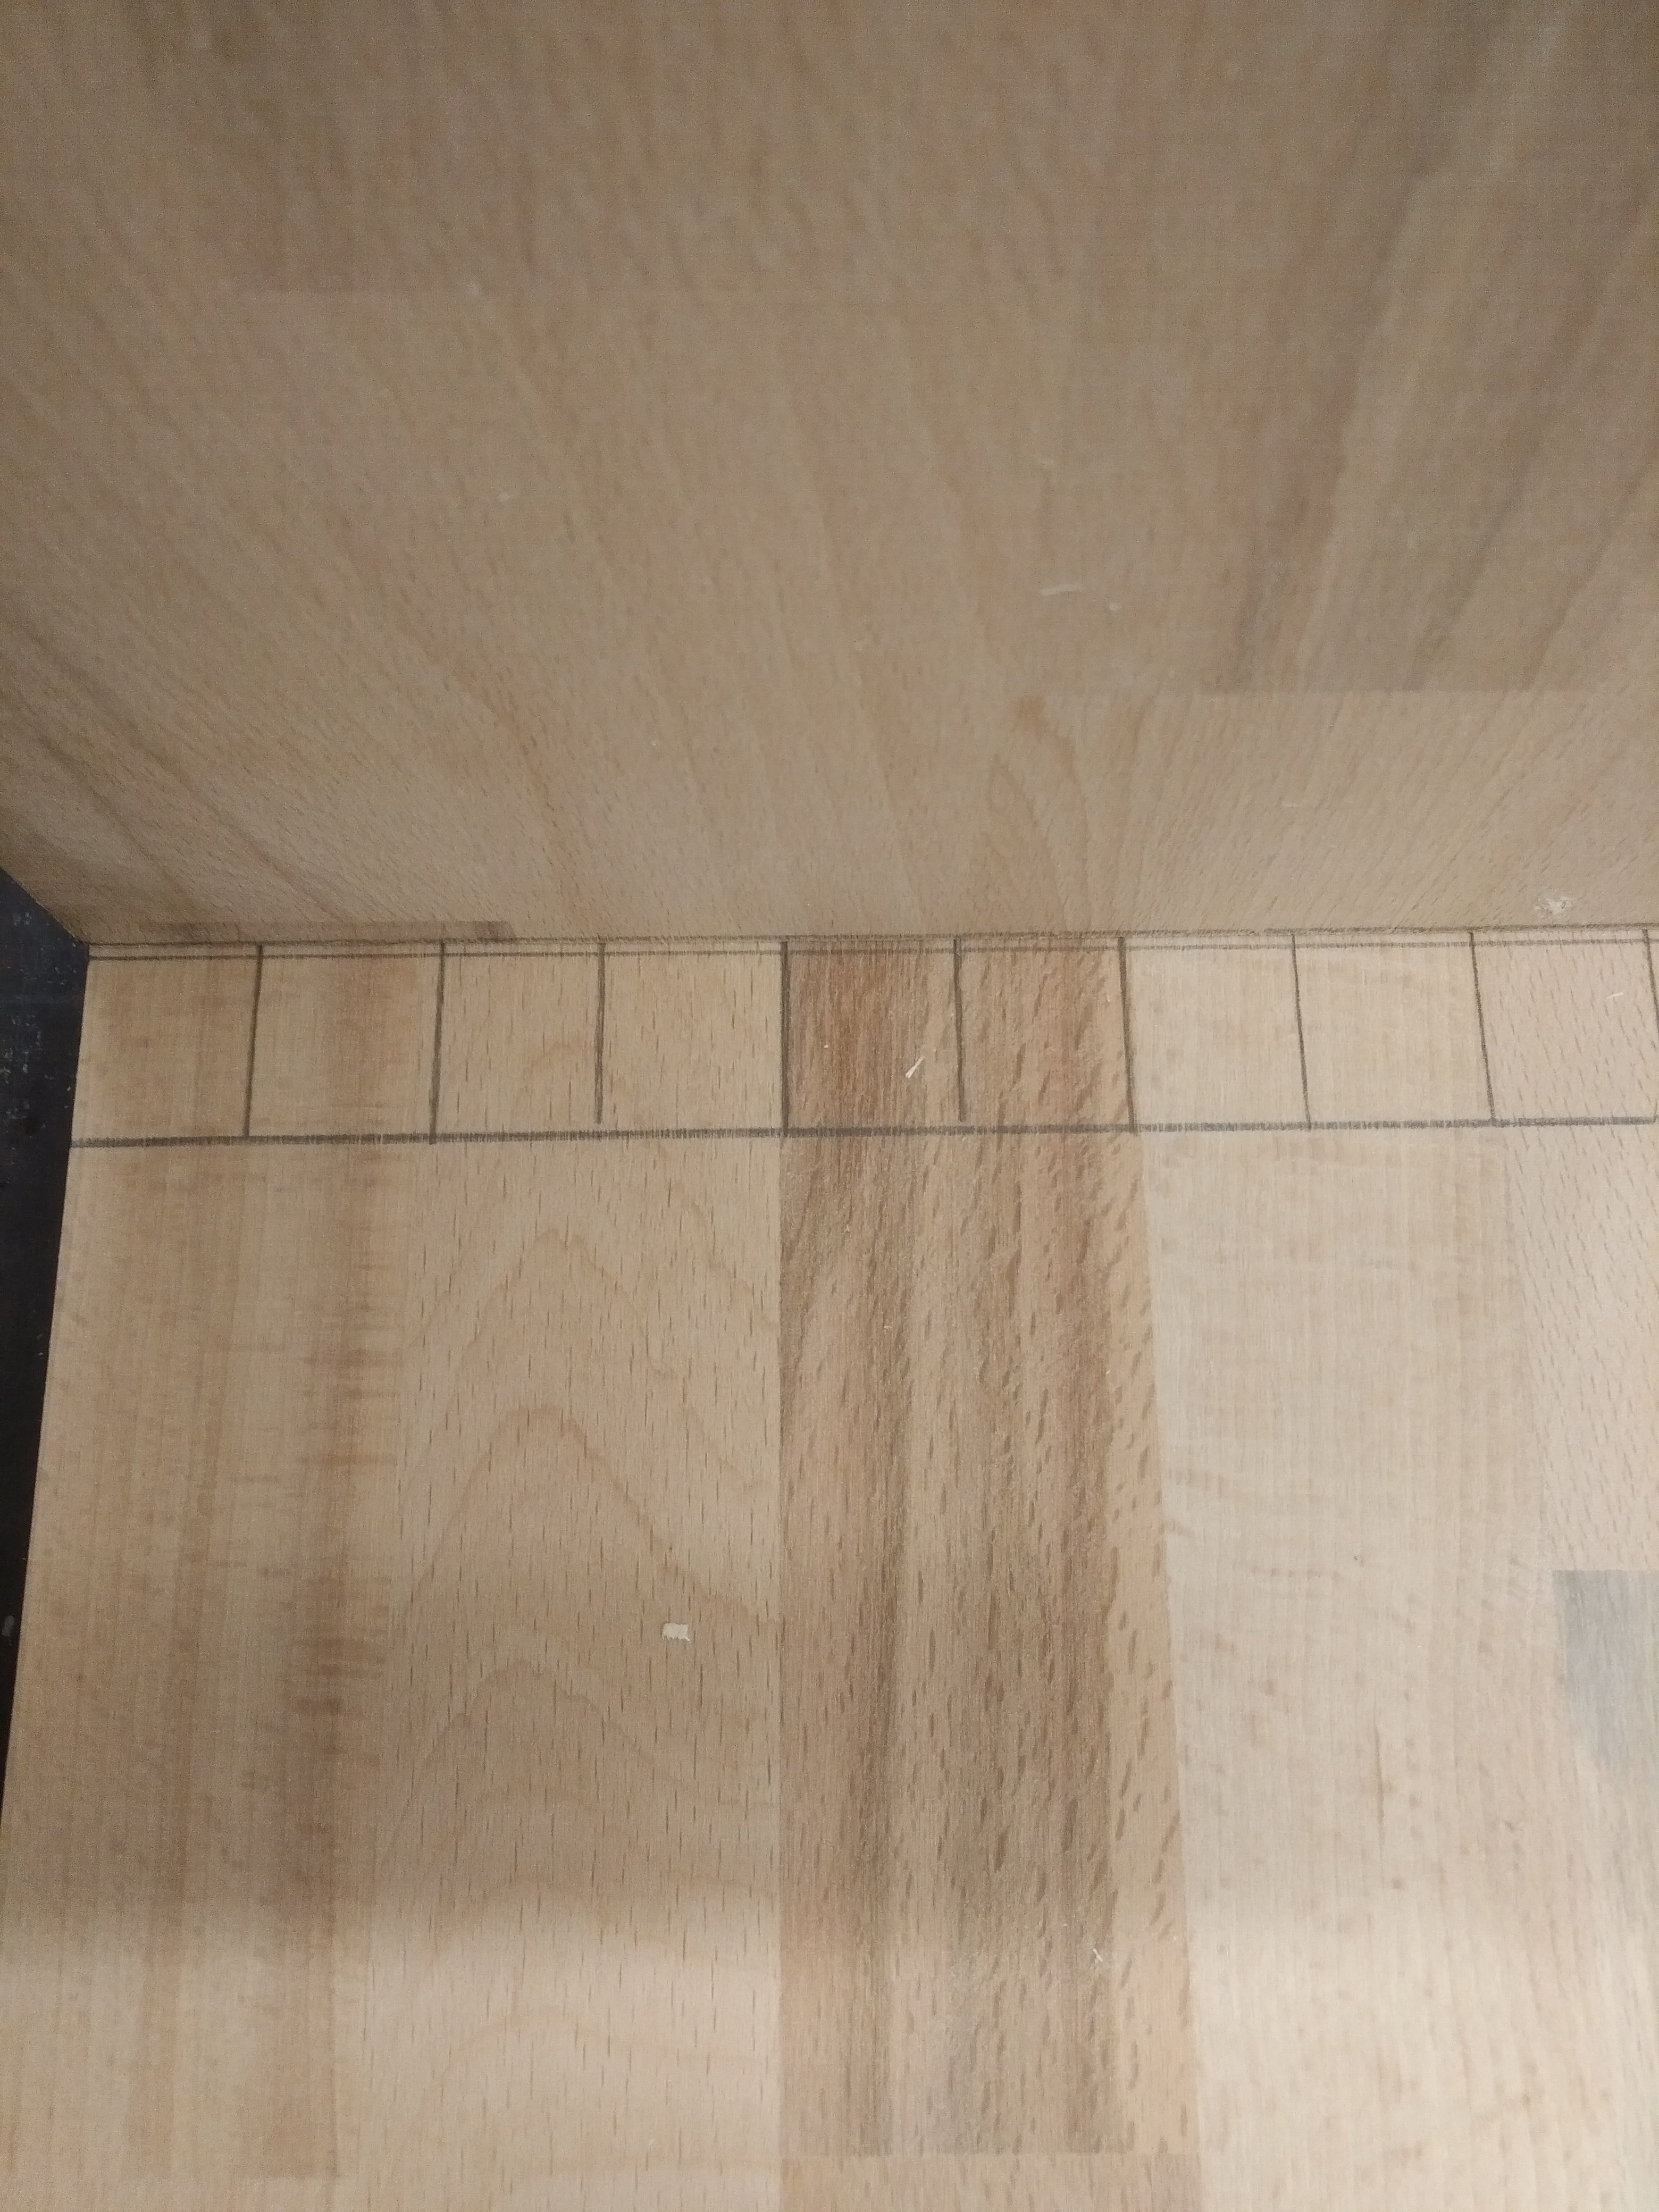
Bei den vielen Strichen kann man leicht durch einander geraten. Schraffiere am besten die Teile, welche ausgearbeitet werden müssen.

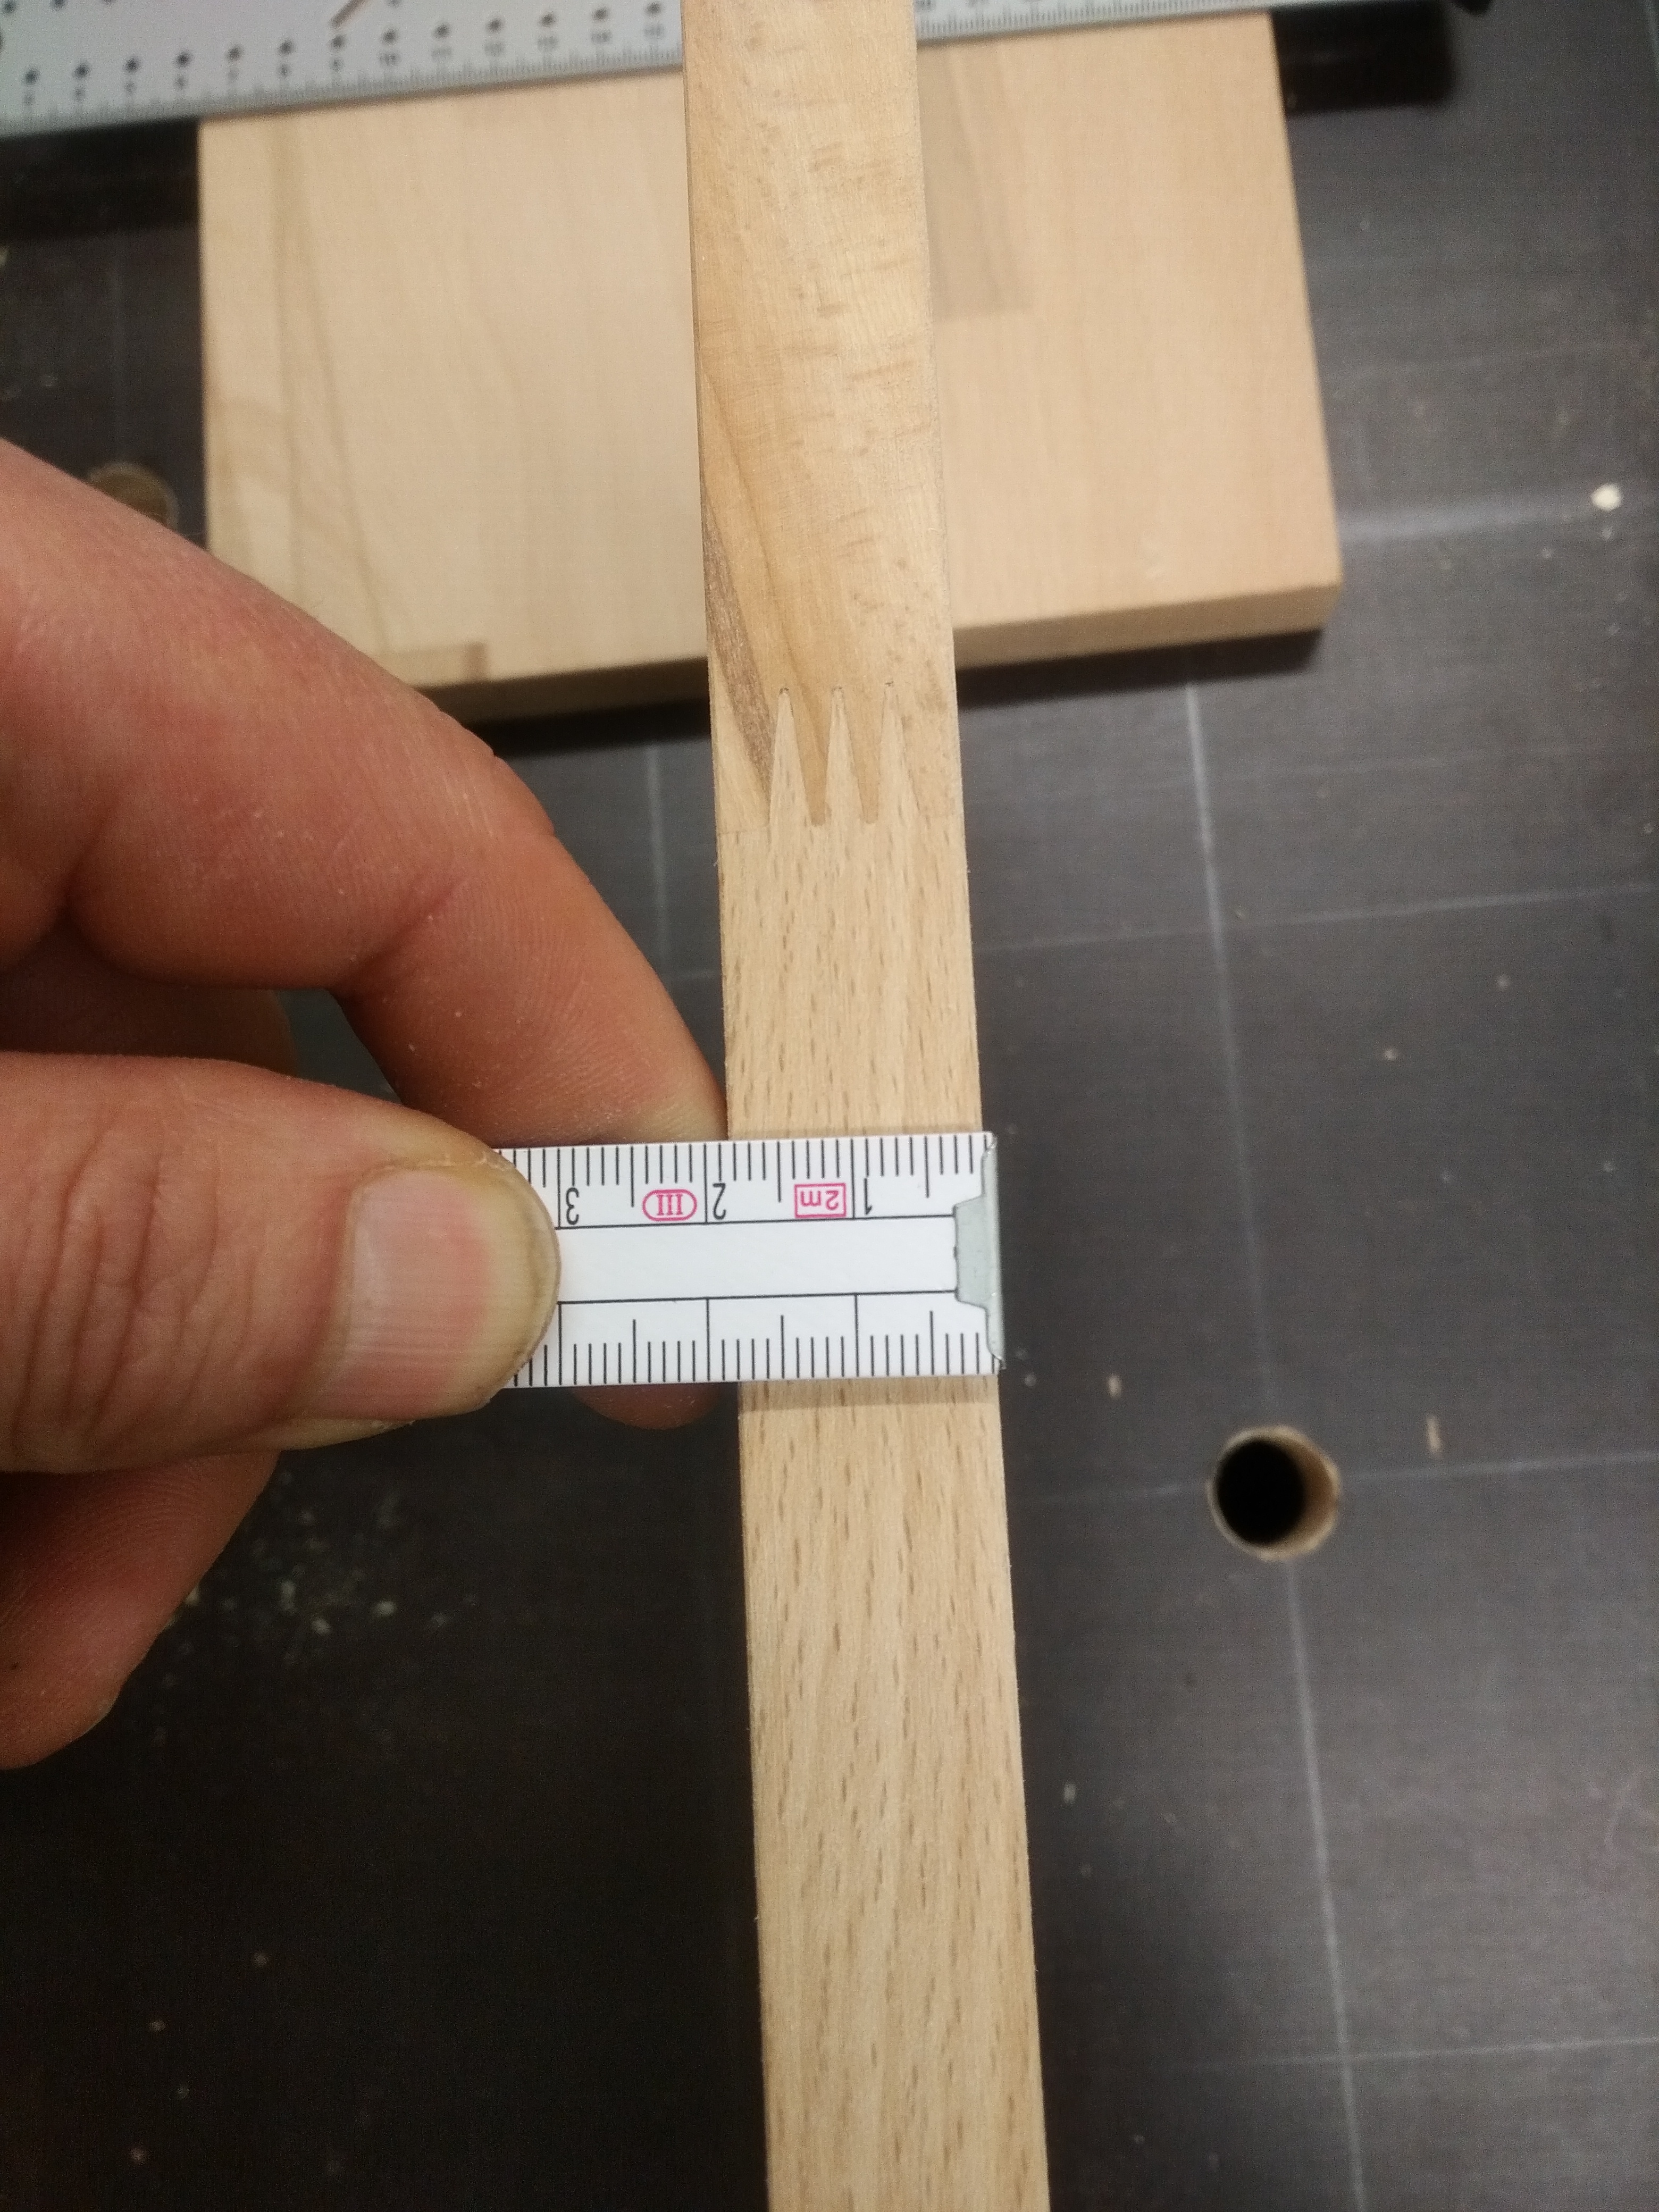
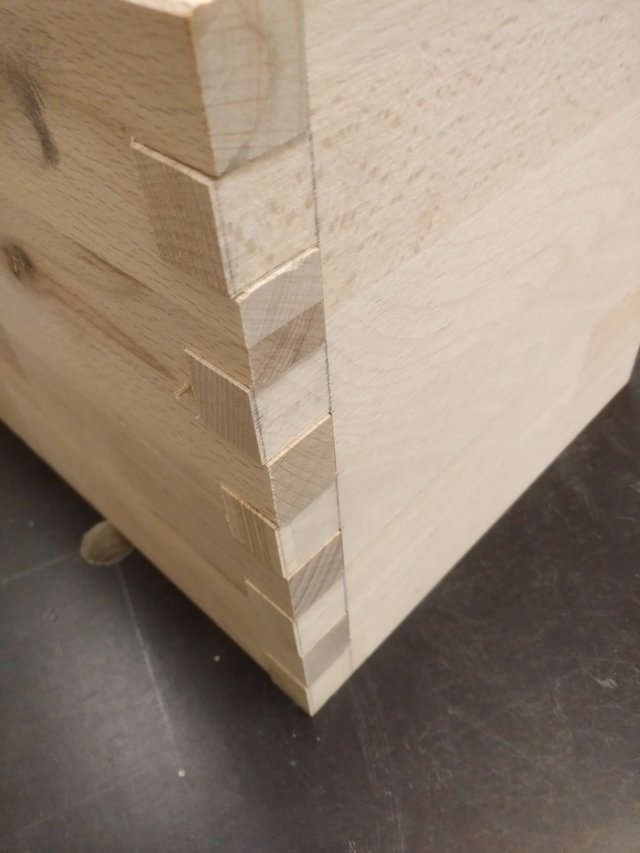
Ausarbeiten / Aussägen
nach dem Aussägen und ausstemmen sollte euer Ergebniss so aussehen:

Viel Spaß beim Werkeln
Euer Bastler und Co. Team
Dank für eure Unterstützung
Wunschliste für spätere Projekte
[Spenden für unser neue Kamera](https://paypal.me/linerus)What are finger tines?
Here we want to answer this question.
Finger prongs are stable, beautiful and they are easy to make.
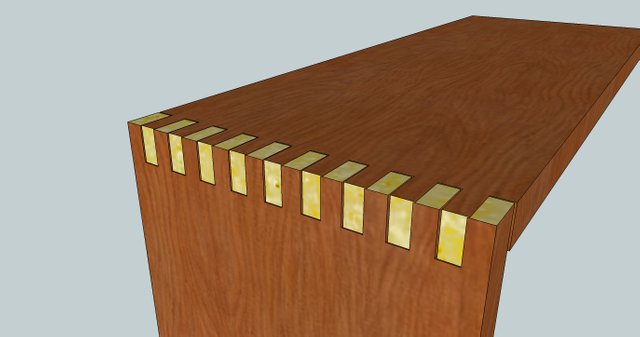
finger tines
The finger prongs are a multiple toothing of straight pins, which are called prongs. One selects this connection for the assembly of wood surfaces, since the so connected parts shrink and swell without hindrance, but can not throw themselves. Because this compound also has a decorative effect, it is necessary to carefully classify the zincation.
In this corner joint all cuts run parallel to each other; to prevent the opening, the tines are glued together; The Fingerzinkung are due to the ease of machinability also for the mass production of furniture used.
Now follow the steps to make this wooden connection.
Action
Timber Dimensioning
As a first step you have to define and / or prepare the dimensions of the respective woods. It is important that you work exactly and all boards have the same thickness.
In our example we use the following dimensions:
20cm x 20cm x 2cm


Zinc classification
In the next step: we have to determine the tines and cones by calculation. There are formulas for that.
We use the following formula:
wood width / wood thickness = number of parts (tines)
Or in words: Wood width by wood thickness is equal to the number of parts
In our example, the following dimensions would be:
** 200 mm / 20 mm = 10 parts **
splitting and marking
The next step is to draw the parts (tines) on the board.
And calculate again to determine the size of the parts.
200 mm / 10 parts = 20 mm per part (tines)

transfer board thickness
In our example, our board is 2 cm thick; this we now transfer to the board; and also draw left and right tines on all sides.

With the many strokes you can easily get through each other. It's best to hatch the parts that need to be worked out.
Drafting / Sawing
After sawing and prying out, your result should look like this:
Have fun with the work
Your hobbyist and Co. team
Thanks for your support
[Donations for our new camera](https://paypal.me/linerus)
great post, I really like this joint...... I don't know if you have checked us out yet but come over to the woodworking channel on Discord. We have a growing membership of many different styles and level of expertise. come on over and see if it's for you. Here is a link to the channel.... https://discord.gg/vM6VSbE
You can read about us here
Das ist eine professionelle Möglichkleit Holzbauteile zu verbinden. Aber Präzision ist gefragt. Welche Säge verwendet ihr dabei?
Wir verwenden meist eine Zinkensäge oder aber auch eine Japansäge.
Man kann diese aber auch mit einer Tischkreissäge herstellen.
Siehe https://steemit.com/woodworking/@basterundco/sxjum9c1
Gruß
Vielen Dank basterundco. Bei einer Tischkreissäge ist dann die Sägeblattstärke einzurechnen. Wenn ich es brauche, werde ich mir euren Link ansehen.