Windows 10 Tricks: 5 Windows 10 Tricks You Should Know
In Windows 10, we all use Windows PCs or laptops. At present, very few Windows 10 PCs are seen in the end of 2017-18, in which there is a version below Windows 10. Microsoft has always claimed that Windows 10 is still the best Windows version of their build. In their claim, Windows 10 has much more features than previous Windows versions, and it is much faster than before and Reliable.
However, today I will discuss five tricks of Windows 10 that you should know if you are a Windows 10 user. Maybe there are many of these tricks you already know and have been using for a long time. You may not have noticed and used even after they have been on Windows 10 for a long time. However, let's start by saying no.
Night light
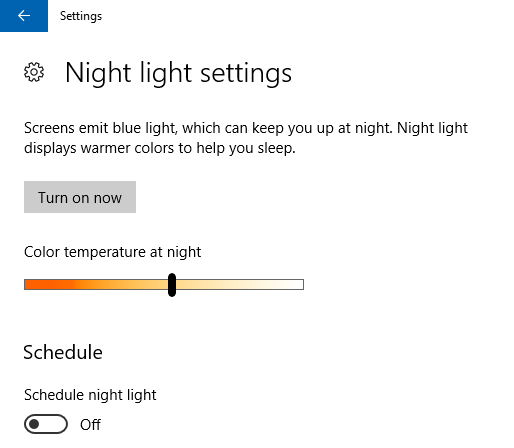
This feature is quite familiar to smartphone users. Night lights are basically a feature or a setting that will protect your eyes while using your device at night or help lower pressure on your eyes. If you go to the Display section from the settings menu of Windows 10 PC then you will get the Night Light option. From there, Night Light will be available on your display. You will see an array of colored shades on your display which will give your eyes light on the night while using the device. If you want, this shade will be deep or light, you can set it yourself as well.
If you have a hat for using a PC or laptop at night like me, then I would say you must use the light lights. As a result of this, you will have pain in your eye after looking at the screen or even if it is too short. If you want, you can set your routine as well so that the night lights will be automatically activated at your convenience and will be deactivated. But this feature is only available in Windows 10's latest Creators update. However, if you do not want to make any updates to the creator or if your Windows 10 version is a bit older and you do not want to upgrade, then you can activate Night Light using the F.lux software.
Smartphone Notification Sync
You may be able to mirror or synchronize your smartphones' notification PCs or laptops using many third-party software, such as using AirDroid, PushBullet etc. But you may not know much like a Windows device user that there is a default option for Windows 10 to sync notifications from the smartphone. And it must be aware that for any work, if it is built-in solution from third party software, it works better and is more relaxed.
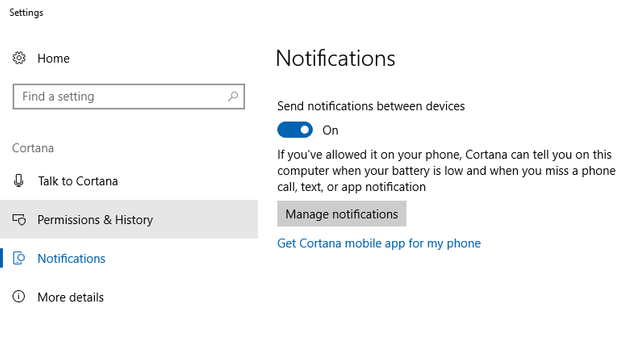
To sync all the notifications live from your smartphone to your PC, you only have to install the Android version of Microsoft Cortana on your smartphone and the Microsoft account that is logged in to your PC, the same Microsoft account will be required to login to your phone at the karta. After that you have to go to the settings menu of Windows 10 on the PC and go to the cortana settings. There will be an option in the cortana settings whose name is notification settings. Now you need to enable the Just Send Notification Between Devices option from notification settings.
Then you will get all the notifications that come to your PC at the same time. You can also reply to any notification message from your smartphone from PC. This feature is much more useful when you do any work on the PC and your phone will not be in the hands of your hands. And yes, for this feature to work, you have to have internet connection on both PCs and smartphones. For this feature, you also need the latest version of Windows 10.
And yes, you will not find the cortana app in the Play Store. Because, it is not officially universal in Bangladesh. If you want, you can download the Cortana app from this link.
Built In Disk Cleaner
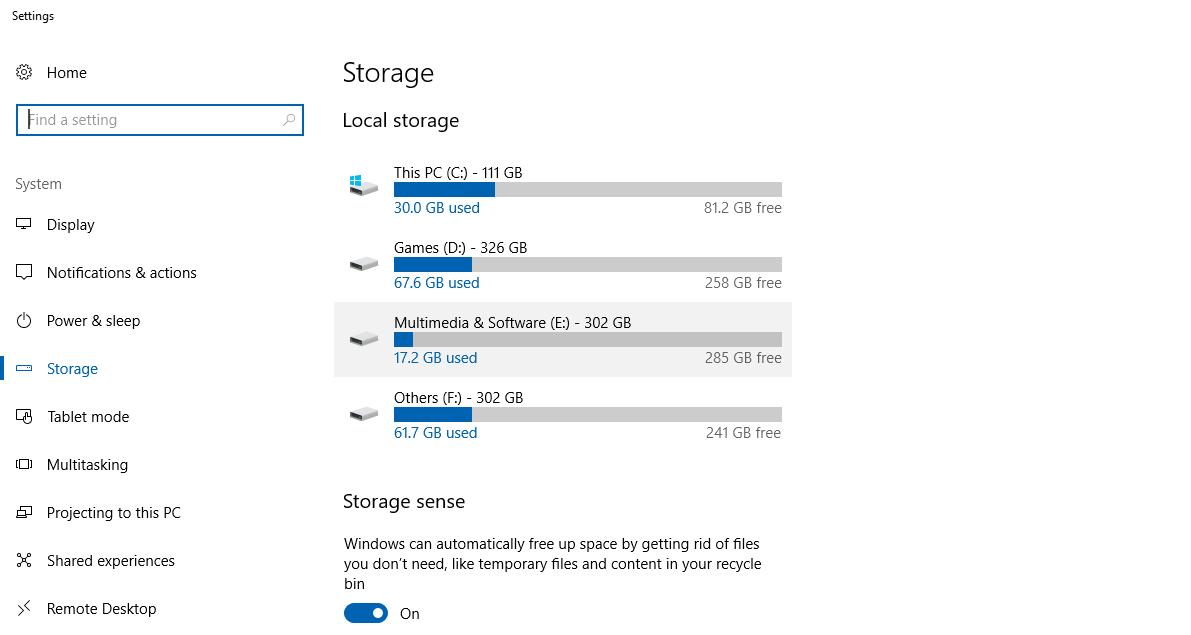
Many of us use a variety of third party programs to scan and delete unnecessary files on the PC. Many more such junk cleaner applications such as sicliner, pc cleaner etc. But such programs should not always be used. In many cases, these are necessary, but they are not suitable solutions to clean the files because they are third party programs. Because, many do not know that Windows 10 already has a built-in disc cleaner. You just have to go to the Settings menu of Windows 10 and go to the storage option from System Settings. Here you will find an option called Storage Sense.
If you enable this option, you will never have to worry about cleansing the disk. Whenever the number of unnecessary files increases on your PC, Windows itself will clean the disk and clean all unnecessary cache files and temporal files. And if you want to manually clean the disk, there is also a default tool in Windows. You just have to click the Start button and search for it by typing Disk Cleanup. Then you will be able to open the disk cleanup tool and you can select any drive from there to clean the file.
Desktop screenshot
I do not think there is a need to say anything about what the screenshot is and why it is needed. We all know what the screenshot is and what the requirements are. Although taking screenshots on a smartphone is a lot easier, but it is not as easy as the desktop / PC. Yes, taking screenshots on the desktop makes it easier to install a third partitionscreen program (eg: Greenshot). But there are also Windows's default First Party programs for taking screenshots, although many PC users do not know about this program.
Yes, you may know that the screenshots can be taken at any time by pressing the Insert PrintScreen button on the keyboard. However, you can not resize the screenshot or select a small area and take a screenshot. Your screenshot is copied to the clipboard and you have to paste the screenshot again into an image editor program, then edit it again or save it. To finish this whole work, it can be seen that taking a screenshot and taking small tasks like cropping takes more than 5 minutes.
But taking screenshots and simultaneously screenshots or select specific areas, there is another default program for screenshots called Snipping Tool. You will not always get this program in front of your eyes. So before you take a screenshot, you will need to open the program by searching from the Windows Start menu. Once you have written the Snipping Word in the search bar, you will find the program in the search result above. Then the program will open in a small Wide window.
Clicking on the New option will tell you to select an area with the mouse cursor, which you want to take screenshot of. Next, after selecting the area, the dialog box will be provided to save the screenshot and you can save the screenshot wherever you want. This program does not have much features like third party screenshots programs, but if you need to quickly make a Quicky screenshot this default program is best.
Built-in emoji input
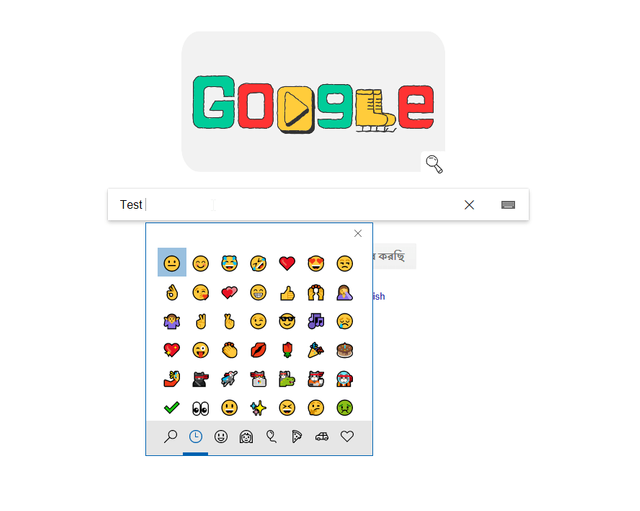
While using Windows PCs or laptops, there are fewer people who have never had trouble with interacting with emoji in a text field. Because, there is no option to interact emoji in the Windows device that we use when using the traditional hardware keyboard. So in order to emoji input in any text field in Windows, there was no way to paste emoji copy paste from anywhere. But many people do not know that the latest version of Windows 10 is the option to create the built-in updates for creatives update, and it works on Facebook, Twitter and all the websites or programs all over the world.
In simple words, wherever you can find some type of place in Windows, it will work. For this you only need to press the Windows key and the flower stop key while typing. Meaning while holding the Windows logo button on the keyboard, press the flower stop button. Then a small popup window will open in front of you, where all the emoji will be there and you can choose any emoji from there to enter text field. If you want, you can search the emoji emoji search by entering the name of this popup window.
So this was the 5 Windows 10 tricks you should know if you're a Windows 10 user. There are many more tricks that can be discussed any other time. Here's the end of today Hope you like today's article. If there are any questions or opinions, please tell in the comments section.
