Downloading, Installing and Configuring Decentralised wallets or networks - Part I
Introduction
Greetings dear friends, may this post serve to start a series of publications on how to execute the processes of downloading, installation and configuration of wallets or decentralised networks.
In this first post, I will show you a step-by-step on how to download, install and configure the MetaMask wallet using directly the Chrome browser, its Web Store and the Extensions section.
A simple way to download, install and configure the popular MetaMask wallet using the Chrome browser is as follows:
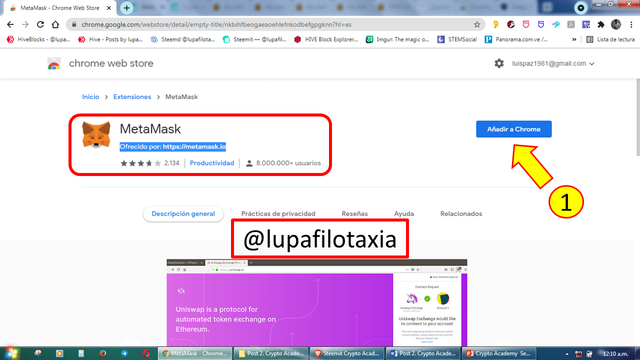
Step 1. The first step is to create an account on MetaMask, I recommend you use the Chrome browser and go to the Web Store / Extensions and search for MetaMask (please check that the product offered corresponds to https://metamask.io) then click on Add to Chrome.
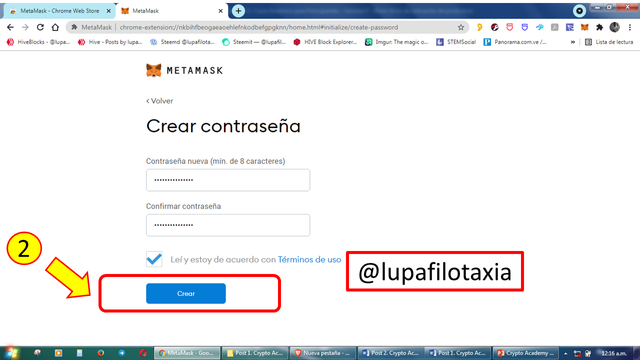
Step 2. Follow the procedure for creating a MetaMask wallet, save the recovery passphrase, accept the terms and conditions, assign and confirm a password, click Create, log in, and finally save the backup passphrase.
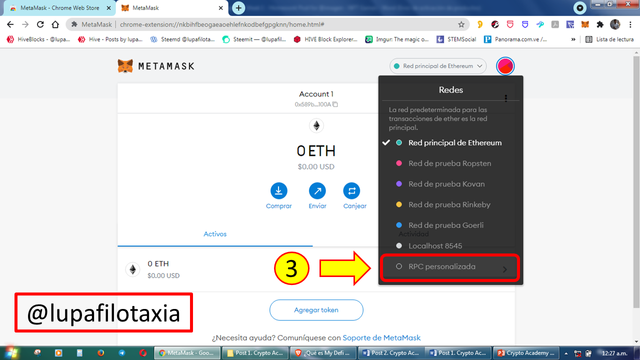
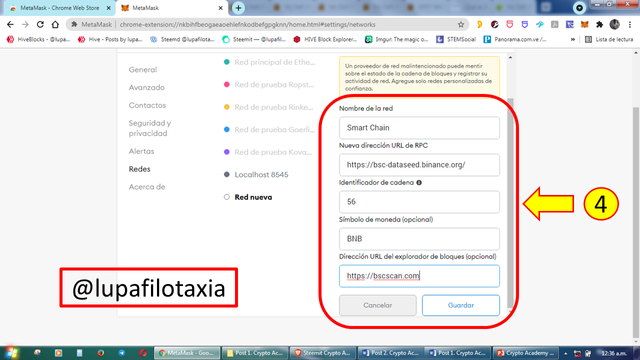
Step 3. When you login to your MetaMask account it will automatically connect to the Ethereum Core Network, however, you can also configure the Smart Chain Network (network that will be used to execute operations with the tokens that run on this important network), for this you will use the Custom RPC option.
Step 4. After clicking on the Custom RPC option, we must enter the official data of the Smart Chain Network and then click on save.
In the following post, I will describe a step-by-step description of how to add tokens to our MetaMask wallet, and how to attach the contract data of the tokens we are going to trade (most of this data can be found on the Coingecko.com portal).

OBSERVATION:
The cover image was designed by the author: @lupafilotaxia, incorporating image background: Source Academy.Binance

