Ionic 4: Implementing Hold and Press multiple select feature in ionic 4

Repository: Ionic Github Repository
Software Requirements:
Visual Studio Code(Or any preferred code editor),
npm, ionic.
What you will learn:
In this tutorial you would learn about how to manage your ionic/Electron app on whatever platform you choose to target covering these major concepts
- How to install and set up hammer.js events
- How to use create a multiple items select feature on an ionic page
- How managing modules affects performance with lazy loading
Tutorial
In this tutorial i would be going through a unique and easy method of implementing the press and hold feature for multiple select. If you're familiar with ionic 4 you would know that the press and hold feature has been removed meaning that they remove hammer.js from the starter packages to reduce download size and also apk size. Fear not, implementing this is relatively easy and i'm going to show you how to do something really awesome with it.
The idea of this tutorial is letting you implement this effect that you can see in galleries of touch and hold to select multiple items
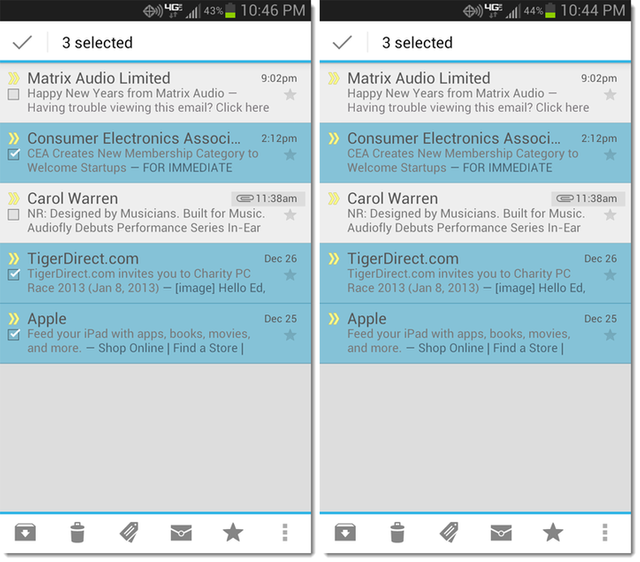
Image Source
So lets get to it
Setting Up Hammer.js
Firstly we would need to use press events and as i stated earlier that isn't included in ionic 4 so you would need to install it.
Start up a new project as usual
ionic start myPressApp blank
And after this is done you can then install hammer.js with npm
npm install hammer.js --save//Save flag used to save it as a dependency
Hammer.js is in your project but cant be used yet, you would need to add it to the app modules in you main.ts file.
Import the file import it into your main.ts file like this
import { enableProdMode } from '@angular/core';
import { platformBrowserDynamic } from '@angular/platform-browser-dynamic';

import { AppModule } from './app/app.module';
import { environment } from './environments/environment';
import  'hammerjs';//Imported here

if (environment.production) {
  enableProdMode();
}

platformBrowserDynamic().bootstrapModule(AppModule)
  .catch(err => console.log(err));
You would then add a dummy array that we would be using to test this feauture like this on the home.pagets
myArray = ['Item1','Item2','Item3','Item4','Item5','Item6']
And add this template to the homepage.html
<ion-header>
  <ion-toolbar>
    <ion-title>
      Ionic Blank
    </ion-title>
  </ion-toolbar>
</ion-header>

<ion-content padding>
    <ion-list>
        <ion-item *ngFor="let item of myArray; let i = index" (press)="onHold($event,item)" (click)="onClick($event,item)">
          <h2>{{ item }}</h2>
        </ion-item>
        <div class="nothing" *ngIf="myArray.length < 1">
          <h2>
              Nothing Here
          </h2>
        </div>
      </ion-list>
</ion-content>
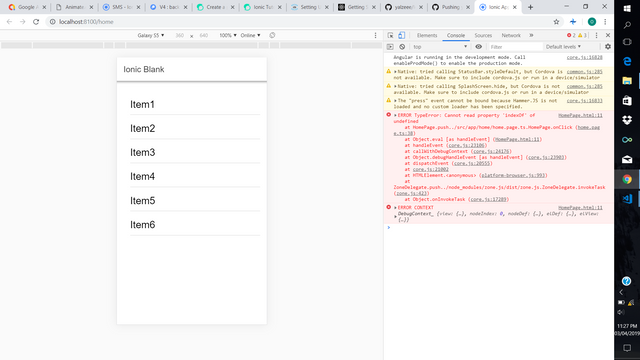
Now to test if this works you could run
ionic s //For the development server
And your app will load in your browser like this
.png)
Implementing multiple select
To implement the multiple select feature we would need to do equal work in our template and logic files. We would start by using a dummy list of buttons which we can click use to test this feature. So to do that you could use this within your home page as the template.
To test that the press events are working you could simply log events to your console and test the press events in your browser
onPress(){
    console.log('Press event works')
}
Now to the logic
We would need to handle press events on the initial contact for multiple select and simple click events after that so that the user wouldn't need to hold down on all elements after this. So this would involve both press and click events. The logic for both would look like this
//This handles hold events for intitial contact
onHold(event, item) {
    console.log('Held')
    console.log('event', event, 'item', item);
    const name = item.name;
    if (this.highlight[name]) {//Check if the item is already highlighted
      this.highlight[name] = false;
      const element = (event.target).closest('ion-item');
      this.renderer.setStyle(element, 'color', '');
      const index = this.selected.indexOf(item);
      this.selected.splice(index, 1);
    }
    else {
      this.highlight[name] = true;
      const element = (event.target).closest('ion-item');
      this.renderer.setStyle(element, 'color', '#FF7F50')
      this.selected.push(item);
    }
    console.log(this.selected);

  }
//This handles click events after the multiple select feature has been initialized
onClick(event, item) {
//These events happen when the user has already started the multiple select process with the hold feauture
    if (this.selected.indexOf(item) > -1) {
      const name = item.name;
      if (this.highlight[name]) {
        this.highlight[name] = false;
        const element = (event.target).closest('ion-item');
        this.renderer.setStyle(element, 'color', '');
        const index = this.selected.indexOf(item);
        this.selected.splice(index, 1);
      }
      else {
        this.highlight[name] = true;
        const element = (event.target).closest('ion-item');
        this.renderer.setStyle(element, 'color', '#FF7F50')
        this.selected.push(item);
      }

    }
    else if (this.selected.length > 0 && this.selected.indexOf(item) === -1) {
      console.log('This is the second possibility')
      const name = item.name;
      this.highlight[name] = true;
      const element = (event.target).closest('ion-item');//Change the color of the item being selected using renderer and change it back when it is unselected
      this.renderer.setStyle(element, 'color', '#FF7F50')
      this.selected.push(item);
    }

  }
}
As you see in the code above we are using an object to set the selected objects and whenever they are pressed. Also i am using a simple icon with a badge at the top to know the length of the selected items and to give the user a better idea of what he is doing. I did that by simply adding a badge with the length of the selected array.
This was done like this
<ion-buttons slot='end'>
      <ion-button><ion-icon name='trash'><ion-badge>{{ this.selected.length }}</ion-badge></ion-icon></ion-button>
    </ion-buttons>
With this you can modify your list to be whatever you want and also change the highlight color.
This is how it works
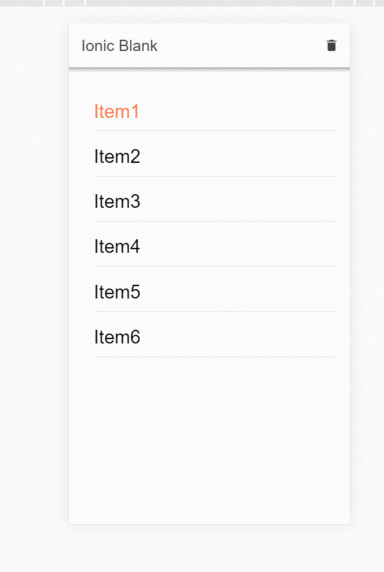
Of course you can change your styling for this but the functionality is completely usable and effective.
You can start up a new starter project with this by simply cloning this repo for a starter template. Simple clone the repo using
git clone https://github.com/yalzeee/Ionic-4-Press-and-Hold-Gallery
then you could install all dependecies for a starter project of ionic4 with the effect enabled
Thanks for reading
Repository Here
Thanks for reading.
Thank you for your contribution @yalzeee.
We've been reviewing your contribution and suggested the following points for your next tutorial:
Again: Use shorter paragraphs and give breaks between them. It will make it easier to read your tutorial.
Improve the structure of your tutorial, it sometimes becomes complicated and confusing to understand what you are explaining.
We suggest that in your code sections you place shorter, more brief and perceptible comments.
Using GIFs to show results is definitely better than standard still images.
Your contribution has been evaluated according to Utopian policies and guidelines, as well as a predefined set of questions pertaining to the category.
To view those questions and the relevant answers related to your post, click here.
Need help? Chat with us on Discord.
[utopian-moderator]
Thanks for the paragraphs tip
I'll certainly use all in the next
Thank you for your review, @portugalcoin! Keep up the good work!
Hi @yalzeee!
Your post was upvoted by @steem-ua, new Steem dApp, using UserAuthority for algorithmic post curation!
Your post is eligible for our upvote, thanks to our collaboration with @utopian-io!
Feel free to join our @steem-ua Discord server
Congratulations @yalzeee! You have completed the following achievement on the Steem blockchain and have been rewarded with new badge(s) :
You can view your badges on your Steem Board and compare to others on the Steem Ranking
If you no longer want to receive notifications, reply to this comment with the word
STOPDo not miss the last post from @steemitboard:
Vote for @Steemitboard as a witness to get one more award and increased upvotes!
Hey, @yalzeee!
Thanks for contributing on Utopian.
We’re already looking forward to your next contribution!
Get higher incentives and support Utopian.io!
Simply set @utopian.pay as a 5% (or higher) payout beneficiary on your contribution post (via SteemPlus or Steeditor).
Want to chat? Join us on Discord https://discord.gg/h52nFrV.
Vote for Utopian Witness!