#2 | Hello world. Setting views.py and urls.py, configuring settings.py - Django tutorial

Welcome to the second part of the web application development guide in Django.
Repository
https://github.com/Polianek/django-tutorial
What Will I Learn?
In this article we will create the correct first Hello world.
Requirements
Installed django (by pip3) and created first app (folder).
Difficulty
Basic
Tutorial Contents
I assume you have already set up a django as per the tips in the first article. If not, skip here (click) or simply install the django by command
pip3 install django and then upload the files from the previous article, which are available on my GitHub repository in folder #1.
Okay, at this point your folder tree looks like this:
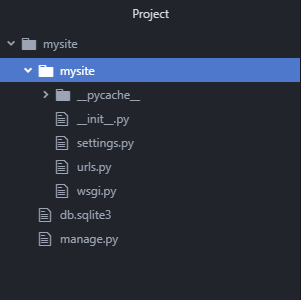
The selected folder is the application folder used mainly for the main settings (settings.py, urls.py). It is a bad practice to create your entire application in it, so now we will create a new application folder (more precisely, project) with a command
django-admin startproject sockshub due to the fact that our application will be used for inserting photos of socks ;)
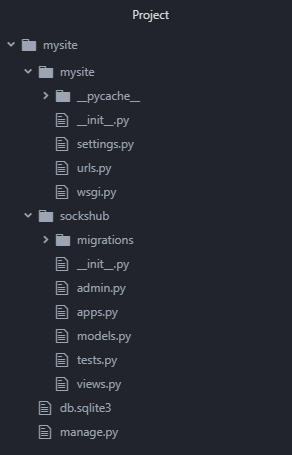
Your tree has grown into a folder with several new files - some other than in the 'mysite' folder.
A quick explanation of individual files that interest us:
- admin.py - allows you to edit the displayed models in the admin panel of our application (127.0.0.1/admin)
- models.py - one of the main parts of the application backend. The full source of behavior descriptions for all application data.
- views.py - here you can describe how to use your models. For example: to load only individual elements (instead of, for example, the entire database, ugh) or determine the operation of forms.
- urls.py - bundle of models and views with urls and templates.
- and settings.py (in the mysite folder) - configuration file, as the name suggests.
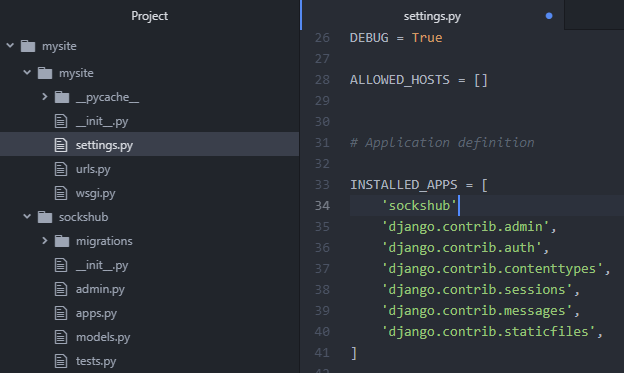
Open the settings.py file in the mysite folder and add
'sockshub', in INSTALLED_APPS. Save file. Thanks to this you have connected the main sockshub project folder to the application. (Because django is mainly a collection of projects creating one application - now I will describe these elements in this way)
It should look like this
Go to the urls.py file in the mysite folder. Import include from django.urls and add a link to the sockshub project in urlpatterns:
path('sockshub/', include('sockshub.urls')), Save file.
'sockshub/' means url, which will be a suffix to the page address (ie 127.0.0.1:8000).
include ('sockshub.urls') means that if we find ourselves under the aforementioned url django is to retrieve data from the 'urls.py' file of the 'sockshub' project - that's why 'sockshub.urls'.

It's time to create the first view and connect it to the url.
Create the urls.py file in the 'sockshub' folder and then add the following code. Save file.
from django.urls import path
from . import views

urlpatterns = [
    path('', views.index , name='index'),
]
The function name = 'index' is used for simpler reference to a given view - the practical application will show in the next article.
The code is very similar to the previous file, but in a slightly modified form. '', as you can guess is an empty path - that is, our url to this view will look like this:
url page + main url assigned to the project + url view = 127.0.0.1:8000 + /sockshub/ + (nothing) so the link will look like this: 127.0.0.1:8000/sockshub/
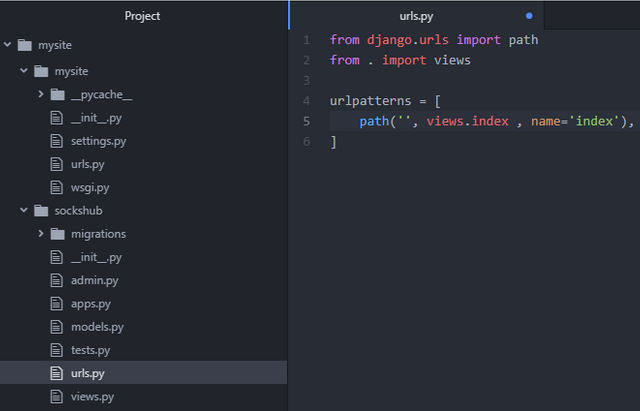
If we tried to launch the site at this point, we will receive a issue that "views.index" can not be found - this is because it has not been set yet.
Go to views.py and paste the code below, then save the file.
from django.http import HttpResponse
from django.shortcuts import render

def index(request):
    return HttpResponse('Hello world!')
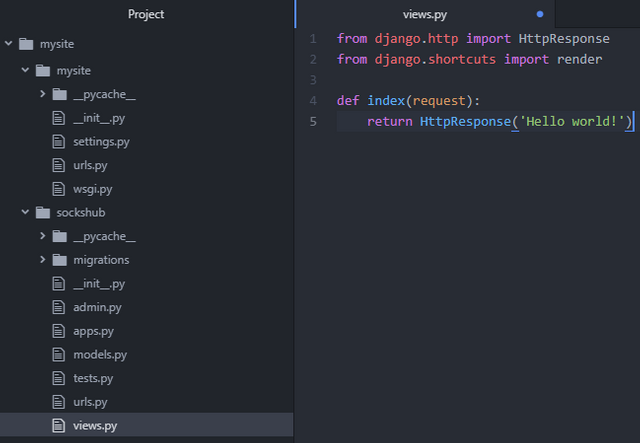
Because the code is easy to understand, there is not much to translate. We define the 'index' function by requesting a response return in the form of 'Hello world!' text. This script executes under the previously set url which is
127[..]/sockshub/.
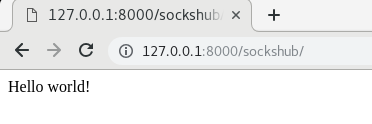
Congratulations! Everything works as it should ;) Your first Hello world in Django went quite quickly.
Good job.
Curriculum
Proof of Work Done
In the next article I will describe more broadly the use of Django in html, Cya.
Thank you for your contribution @valium.
After reviewing your tutorial, we suggest the following points below:
There are several online tutorials on the subject of Django. Try to make a more innovative tutorial for the open source community.
We suggest you post comments in the code sections. It helps users a lot to realize what you are developing.
Code sections are better displayed using the code markup, instead of placing them as screenshots.
Your tutorial is quite short for a good tutorial. We recommend you aim for capturing at least 2-3 concepts.
Need help? Write a ticket on https://support.utopian.io/.
Chat with us on Discord.
[utopian-moderator]
Thank you for your review, @portugalcoin! Keep up the good work!