Joomla Introduction | Understanding Joomla Administrator (Back End) And Front End | Umais Blogs About Joomla #2
Joomla Introduction | Understanding Joomla Administrator (Back End) And Front End | Umais Blogs About Joomla #2
In my last post, I explained what is Joomla and why it is better than other CMS. I also mentioned benefits of using Joomla. The post was left off by telling you to install Joomla using your hosting provider. Today I will explain different functions in Joomla's Administrator section which is also known as back end but first let me give you a little information about front end.
What Is Front End?
Everything you do on back end effects front end. Back end is used for managing your website and telling it how to behave, how to show posts and all that. Normal user can't access back end, they only have access to front end so only finished posts are published and showed to public on front end.
What is Back End?
First you will need to go to your site's backend, remember you must have Joomla installed before it. You can access your Joomla Site's backend by putting "/administrator" at the end of your site's url, you also need to login by using username and password you used when installing Joomla. After logging in you will see something like this.
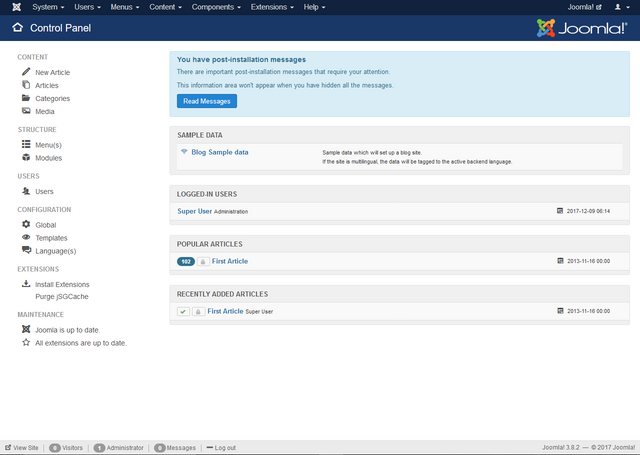
So this is Joomla's Backend or your Site's Backend, whatever you wanna call it. This is the place where you manage all your work like publishing articles, changing templates, adding extension and much more. This the place you'll visit a lot and normal user can't see this unless they have your username and password. So keep your password safe.
Options On Left Sidebar
I'm gonna explain all the options. At left side you have a side bar with lots of options
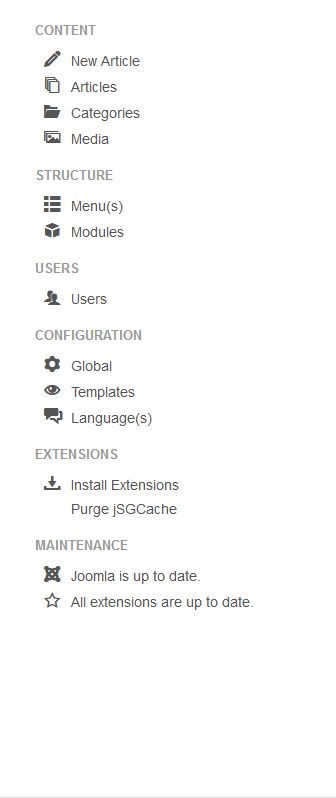
Let me explain each option one by one
New Article
First Option is New Article. You can go there to publish new articles. When you click on new article you will be sent to a page looking like this
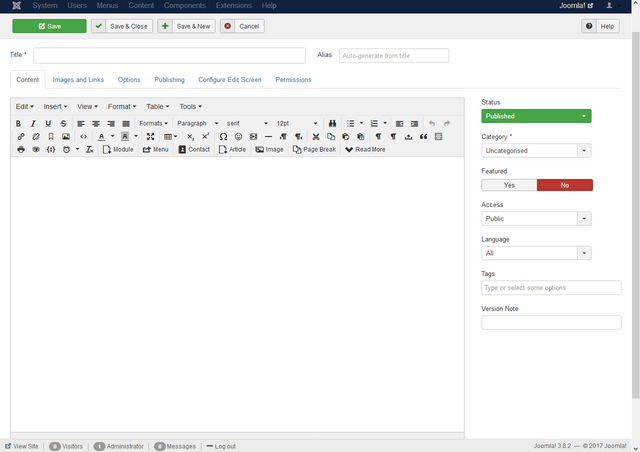
It is very much like Steemit's post editor but with much more functionality, I will explain more in next post as it will be based more on using Joomla.
Articles
Next option on left sidebar is Articles.

Clicking it will send you to a page like this.
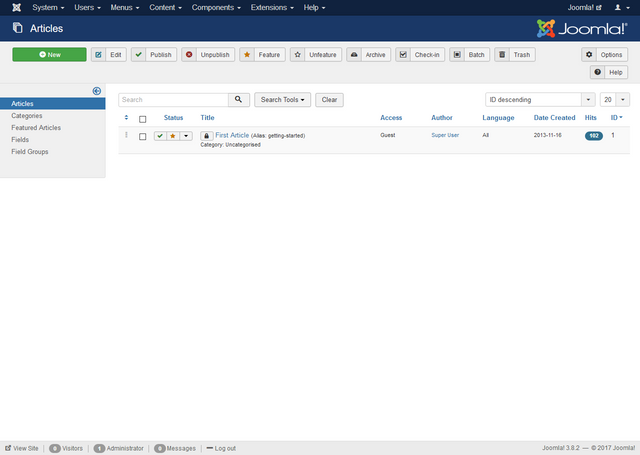
You can see all of the published posts here. This is also used for editing your previous published posts.
Categories
Third option is left sidebar is Categories.

What if you publish different types of articles like some are tutorials and some are well... simple blogging about your life, you also want both types of posts to not mix up. You can do this by making categories and this option is way to do it. When you click on it you will see page like this.
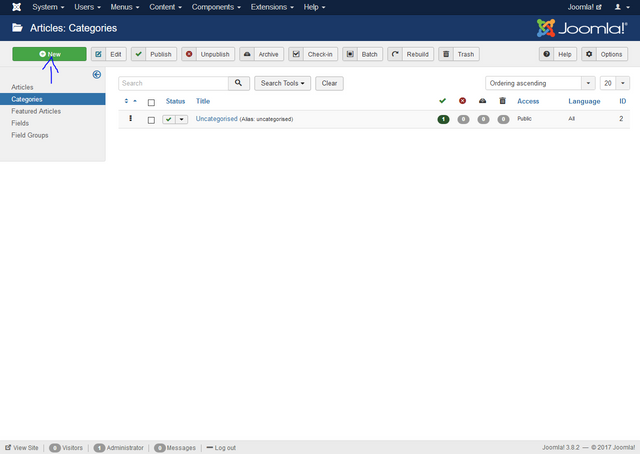
You can see you can create new categories here other than that you will also notice that there is default category known "uncategorized". Every post must have at least one category and if there's non it will be put in "uncategorized" category. Will give more info on next post.
Media
Fourth option is media.

Clicking on this will lead to a page like this.
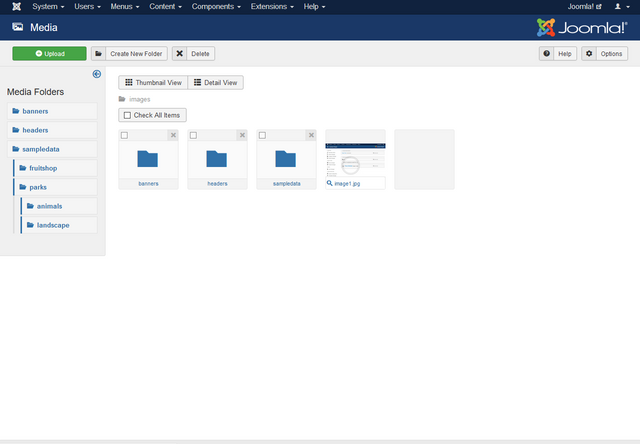
Here you can upload any media like images and videos, these media will be used in building your website.
Menus
Fifth option is Menu(s).

Menu can help the user to navigate around your site. You can add different pages, categories and even posts to your menu, A well sort menu is always appreciated by users. The clicking this option will lead to a page like this.
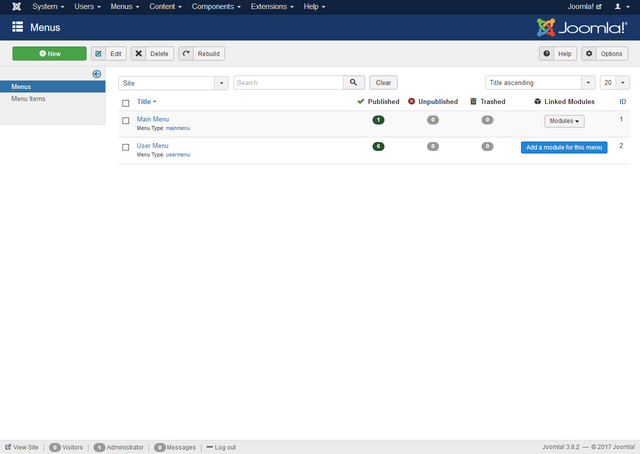
You can at top left you can add new custom menus. You also have some default menus.
Modules
Sixth option is Modules.

Modules are lightweight and flexible extensions used for page rendering. These modules are often “boxes” arranged around a component on a typical page. They work like widgets on windows, the can also used to assign different tasks. When you click on this option you will be sent to a page like this.
You can add new modules from the option on the top left. There are also some default modules you can see there.
Other options are a bit difficult to explain but still I will explain them as we go along.
Options On Top
There also some options on top. You will use these options a lot too.. so I will try to explain as much detail as possible.

Here's a top back end menu with some options
First is logo of Joomla, you can click it to return to the main control panel.
System
Second one which is named System have six options in drop down menu.
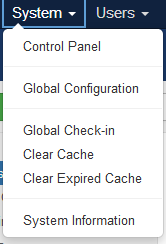
- Control Panel: It is another way to getting back to Joomla's Control Panel.
- Global Configuration: There are many options there. All the options which affects whole websites site like changing website's name, having SEO friendly urls and much more.
- Global Check-in: When a file in Joomla back-end is being edited, the file is automatically locked as checked-out with a little padlock icon. It means that this file is now only editable with the user who has checked it out. Multiple users then could not modify one file at the same time; thus, this helps to prevent overriding data or losing data upon saving so you can use this to check-in data. I will explain further as we go.
- Clear Cache: You can clear cache of your site here to make your site a bit faster.
- Clear Expired Cache: You can clear expired cache here.
- System Information: You can check your system's information like on what PHP your site is built on or what is your database's version. This is very helpful if you run onto some issues with your site.
You will be using 3, 4 and 5 options a lot to manage your site.
Users
Third one is Users which have eight options in drop down menu.
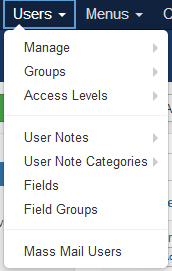
- Manage: You can add new users from here. This is very useful if you have multiple authors that use your website.
- Groups: You can even group your authors. If you have two authors writing about tech and two authors writing stories, you can group them. This makes managing a bit easy and it also looks more organized.
- Access Levels: You can give different permissions to different users.
- User Notes: It is very helpful if you have large amount of authors or users. You can give instructions, add rules and other many things.
- User Note Categories: Just like last one it is pretty helpful if you have large amount of users or authors. You could make different categories for different groups or for newbies :p.
- Mass Mail User: You can mail users by this option although if you have large amount of users I don't recommend it.
Menus
You can make new menu or see menu items here.
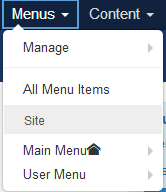
- Manage: You can add new menu to your site from here.
- All Menu Items: You can see all the menu items from here.
- Other Options: There might be some extra options there just to edit existing menus or adding new items to existing menus.
Content
You will make, edit and publish your posts from here. You can also create categories, fields or feature any article.
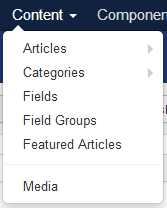
- Articles: You can see existing and publish new articles here.
- Categories: You can create or mange categories for your articles here.
- Featured Article: Feature any article from here.
- Media: You can add media from here
If you have newer version you will notice there are some other options. These options are fields and fields group they aren't that useful, at least not for me but still I'll explain them as we go.
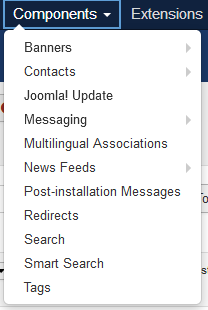
Components
You can see all the extensions, add ons and more things like that. I'm not gonna explain what each extension does and all these components are installed by default.
Extensions
You already what extensions are but it's time to go in little bit of detail.
Joomla have 5 types of extensions
- Components
- Modules
- Plugins
- Templates
- Languages
Components are at their own section because they are large software packages that you use from Joomla's core or either from Joomla's extension directory. They appear in different sections because they do a lot more than just plugin can do.
In Extensions section you can see and use different plugins, templates and all that. You can also install extensions from here.
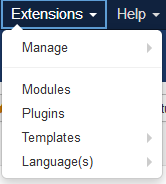
- Manage: You can install, update, manage, discover, see database and do much more from here.
Others options are just different kind of extensions.
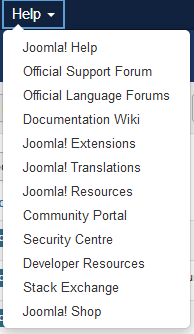
Help
Last one is help section you can get help on every type of topic there. You can also use search your problems on google to get some answers.
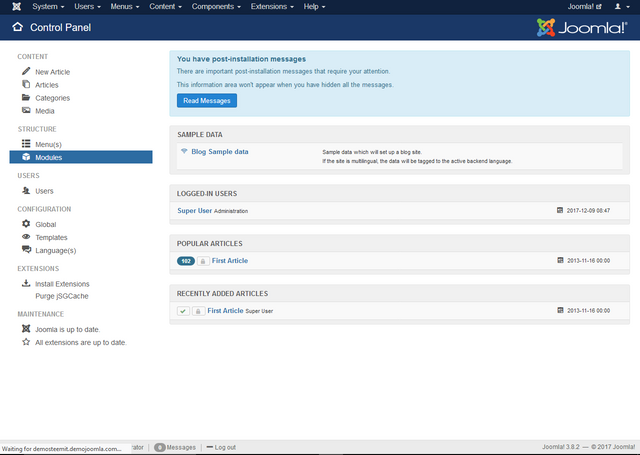
Message And Information Board
If you go back to main control panel, you will see a information or notification board.
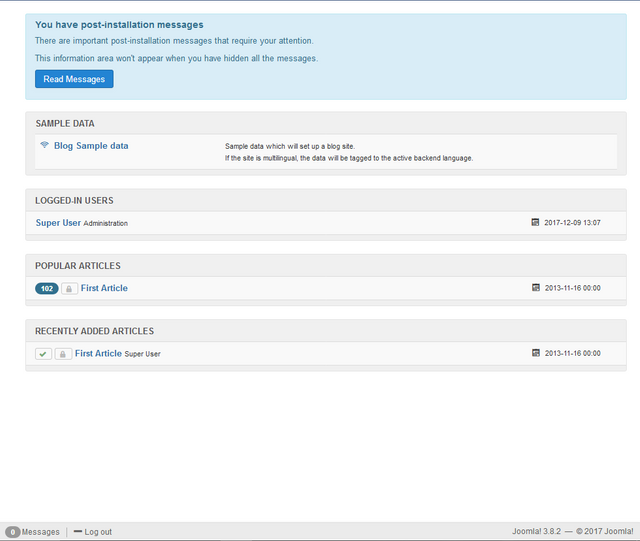
You will receive all the new notifications here and you can also get some basic but useful information that are listed below.
- Names of all the logged in users.
- Popular articles which are receiving more views than average.
- Recently added or newly published articles.
End Of Part 2 | Summary Of What We Learned In This Part
In this part we learned a little about front end. I explained briefly what each option does and where you need to go to do which task, I didn't explained some options but no problem I will definitely point them out in upcoming parts.
This is turning out to be a great series hope you'll learned something from these two parts and stay tune for upcoming ones. Till then...
Cya!
Posted on Utopian.io - Rewarding Open Source Contributors
Very comprehensive guide. The graphics help a lot. Nice work!
Thanks For Reading It. If you liked be sure to upvote
Stay tuned for upcoming parts.
I did like it. I thought I had voted when I read it but it must not have taken... I steem on my phone. Have a great day!
Congratulations! This post has been upvoted from the communal account, @minnowsupport, by Umais1209 from the Minnow Support Project. It's a witness project run by aggroed, ausbitbank, teamsteem, theprophet0, someguy123, neoxian, followbtcnews/crimsonclad, and netuoso. The goal is to help Steemit grow by supporting Minnows and creating a social network. Please find us in the Peace, Abundance, and Liberty Network (PALnet) Discord Channel. It's a completely public and open space to all members of the Steemit community who voluntarily choose to be there.
If you would like to delegate to the Minnow Support Project you can do so by clicking on the following links: 50SP, 100SP, 250SP, 500SP, 1000SP, 5000SP. Be sure to leave at least 50SP undelegated on your account.
Nice tutorial @umais
Thanks!
Thank you for the contribution. It has been approved.
You can contact us on Discord.
[utopian-moderator]
Thanks!
Hey @umais I am @utopian-io. I have just upvoted you!
Achievements
Suggestions
Get Noticed!
Community-Driven Witness!
I am the first and only Steem Community-Driven Witness. Participate on Discord. Lets GROW TOGETHER!
Up-vote this comment to grow my power and help Open Source contributions like this one. Want to chat? Join me on Discord https://discord.gg/Pc8HG9x