Tutorial (Godot Engine v3 - GDScript) - Generic screen wrapping Node!
 Tutorial

What Will I Learn?
I previously wrote an article which explained how to create a Sprite script to force it to wrap around the screen borders, aka Asteroids style. This is part of the "Space Invaders" clone in the beginner's tutorial set.
When I approached the Godot Engine development team in regards to a feature I felt it lacked (i.e. to be able to override base functions and properties), one of them suggested something that didn't initially click with me, UNTIL NOW.
"Why don't you build a Node that can be added to a child of any Node2D extended class, to perform the same action?"
Note: Node2D provides the 2D spatial position on the screen
After a little thought, and open to new ideas, I agreed! Why wasn't I using this very simple but effective technique?
Let me explain how this single thought, changed my view and thinking. It reduces the solution to the problem and produces both a very reusable as well as useful Node for my future developments; given I ever have a need to wrap an object around the screen!
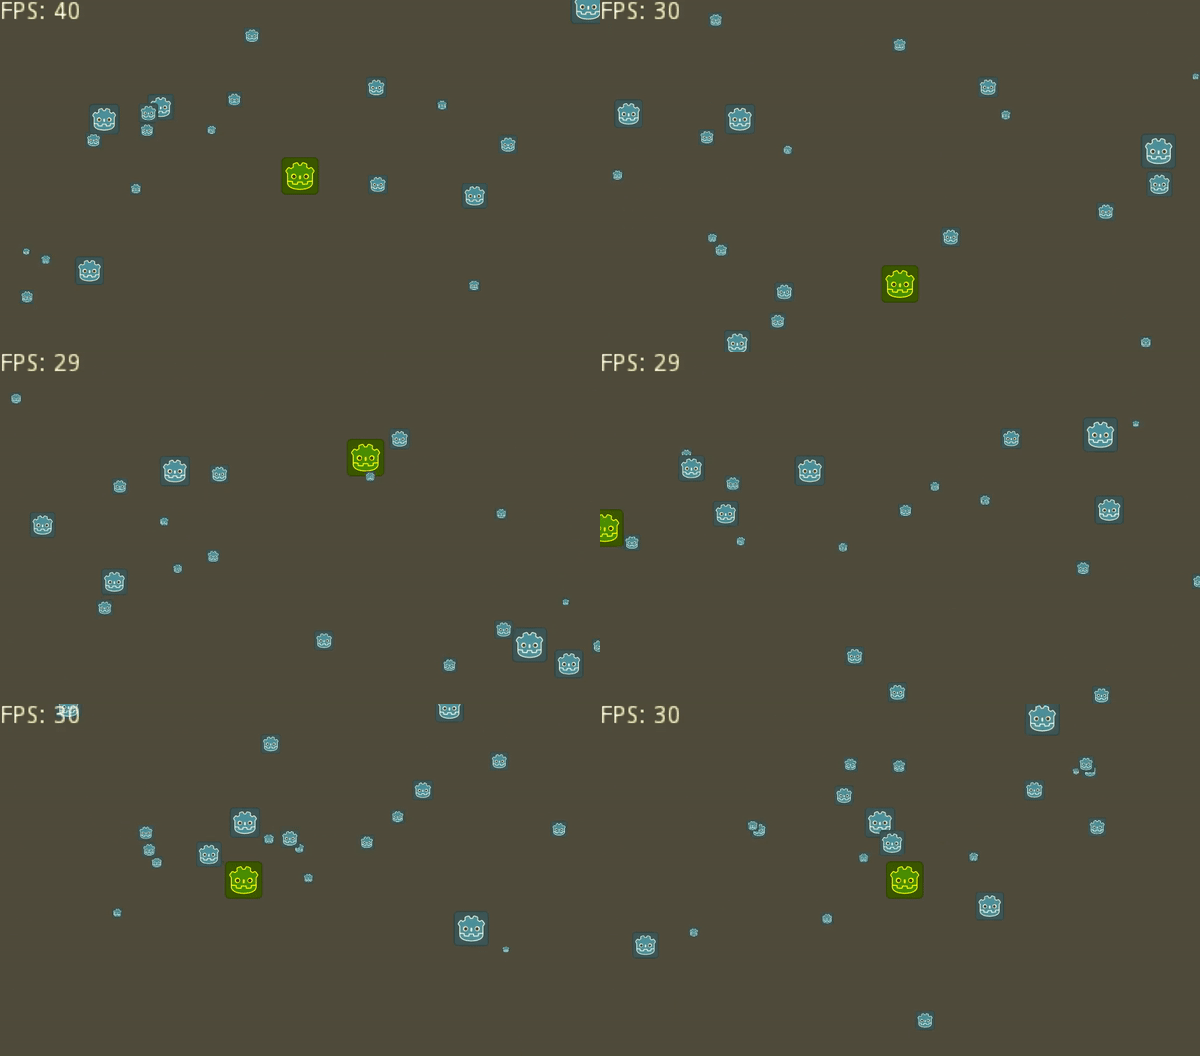
Assumptions
- You have installed Godot Engine v3.0
- You are familiar with GDScipt
You will
- Learn why this approach is better
- Learn how the new solution is coded
- Learn how the new Node is added to a Node2D class
Requirements
You must have installed Godot Engine v3.0.
All the code from this tutorial will be provided in a GitHub repository. I'll explain more about this, towards the end of the tutorial.
New approach to the solution
The previous solution required me to develop an extended Sprite class, containing the additional functionality to wrap the Sprite around the screen.
The issues with this is:
- The solution closely couples the implementation to Sprites!
What if I want to wrap a Node2D or one of the many other Node2D derivatives? I'd have to create a new custom class for each!
- The developer reusing the code would need to understand some basics of the class, i.e. it would have to be "extended" by their new Node
Whereas the new design offers a better approach. A Generic Node containing the functionality, which can be added to ANY Node2D derivative. The parent will automatically inherit the screen wrapping capability, purely by attachment.
This becomes a decoupled solution; easy to implement, i.e. simply add an instance!
NOTE: There is an important feature I dropped, since the last tutorial, from the screen wrapping requirements.
Following playtesting of the "Space Invaders" clone, I noticed there is little benefit of implementing a pixel-perfect wrap.
To recap, I demonstrated how a Sprite can be wrapped over the border, so that it split "in half" across each side.
However, the speed of the aliens actually negates this need! The implementation is a WASTE of valuable computation time, whilst playing. The player does not have time to notice! It would be noticeable with the player's ship because they continually monitor this, but it alone is not a reason for implementing a costly solution!
The solution here, therefore, has dropped the pixel perfect wrapping need. This reduces complexity and improves performance. There isn't a reason why it can't be implemented, but I've decided to drop it.
The Screen Wrap Node
In the example project (see the GitHub section below to obtain the code), there is a ScreenWrap folder:
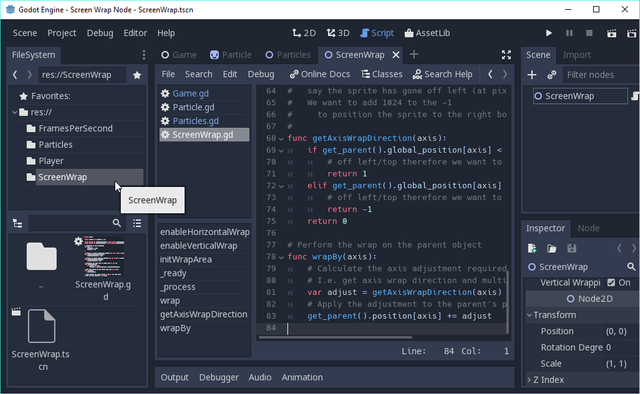
In it, there is a ScreenWrap.tscn The scene with an associated script.
This is ALL you need in your project to make a Node2D derived class wrap around the borders of the screen! Simply attach an instance to a base or extended Node2D Node, to grant the capability to it.
Let's examine the script:
extends Node

# Expose a Rectangle area to the tool so that it can be defined
export (Rect2) var wrapArea = null

# Expose two flags to determine which axes shall be wrapped; both defaulted true
export (bool) var horizontalWrapping = true
export (bool) var verticalWrapping = true
The base Node is extended
The wrap area is defined and exposed to the Node Inspector. If set null, it is automatically set to the screen size in the ready function
Two flags are also defined that allow axis wrapping to be enabled or disabled (you might only want one axis! Try testing this); the use of a flag here costs little in the overall performance, but disabling one will return CPU cycles.
# Dictionary of axis directions
var AXIS = {
    HORIZONTAL = "x",
    VERTICAL = "y"
}
Next is a simple dictionary containing a constant for the Horizontal and Vertical axes. These simply map to 'X' and 'Y', but (in my opinion) the use of which makes the code easier to read and understand. You 'could' replace the dictionary terms in the code with the constant values instead
Initialise the wrap area to screen size if not set
func initWrapArea():
    if wrapArea == null:
        wrapArea = Rect2(Vector2(), get_viewport().size)
The initWrapArea function sets the wrapArea if it has been left null. The viewport contains the size that bounds this Node
# When node ready, set the initial wrap area if not set
func _ready():
    initWrapArea()
Upon the Node being ready, the initWrapArea function is called. I've not used an onReady variable, because I need to allow for the value to be set in the Node Inspector tool
# Check whether the parent object is NOT in the wrap area,
# call the wrap function if it isn't
func _process(delta):
    if !wrapArea.has_point(get_parent().global_position):
        wrap()
The next frame process function is the 'magic' that enables this Node to influence the parent. This specific Node looks up at its parent and then controls it.
If the parent is positioned outside the wrapArea (i.e. the screen rectangle) then it is wrapped by triggering the wrap function
# The parent Node is NOT in wrap area, so it must be wrapped
# around until it is
func wrap():
    # If horizontal wrapping is enabled
    if horizontalWrapping:
        # Wrap by the horizontal axis
        wrapBy(AXIS.HORIZONTAL)
    # If vertical wrapping is enabled
    if verticalWrapping:
        # Wrap by the vertical axis
        wrapBy(AXIS.VERTICAL)
The wrap function checks the exposed flags for each axis. If enabled it then calls a generic function to wrapBy the given axis, i.e. if Horizontal, call the wrapBy function with 'X'
func getAxisWrapDirection(axis):
    if get_parent().global_position[axis] < wrapArea.position[axis]:
        # off left/top therefore we want to add width or height
        return 1
    elif get_parent().global_position[axis] > wrapArea.size[axis]:
        # off left/top therefore we want to subtract width or height
        return -1
    return 0
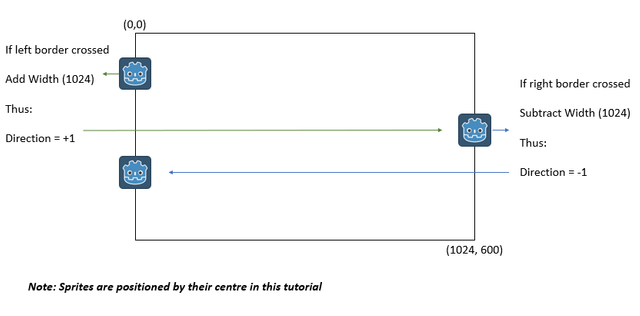
This function provides the logic to determine which end of left-right (horizontal axis) or up-down (vertical axis) border that the _Node has breached. It returns an integer value representing the direction that needs to be added, with the size of the axis, to the parent Node (see the next function)
As an illustration, given a horizontal wrap is occurring:
This logic also works for vertical wrapping, the direction multiplied by height is added to the 'Y' axis!
# Perform the wrap on the parent object
func wrapBy(axis):
    # Calculate the axis adjustment required
    # I.e. get axis wrap direction and multiply by axis size
    var adjust = getAxisWrapDirection(axis) * wrapArea.size[axis]
    # Apply the adjustment to the parent's position
    get_parent().position[axis] += adjust
The wrapBy function uses the axis provided and calculates the adjustment to add to the Parent Node. It calls the previous function to determine which direction that has to be multiply against the screen size of the axis. This result is then added to the Parent Node's position, causing it to wrap around the screen.
Implementing the Screen Wrap Node
Simply add the Screen Wrap Node as an instance to the Node you wish to wrap! For example, in the sample code, I've applied it to the Player Scene:
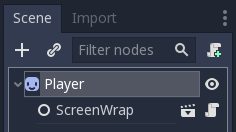
By the virtue of this Node being a child, it will automatically check and wrap the Player sprite around the screen (each frame via process):
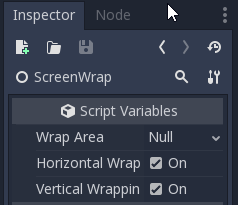
_Note: Don't forget you can enable/disable axis, i.e. if you only want top/bottom wrapping, disable Horizontal wrapping as it will return a few precious CPU cycles back (this will only be noticable where you have thousands of moving objects!)
I've also applied it to the Particle Scene:
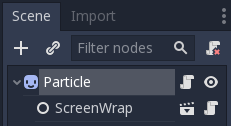
Thus proving the Node is reusable.
The exposed areaWrap for the Inspector
Some of you may question, "why have I exposed the areaWrap property?"
The code will automatically set it to the screen size, so why allow it to be set?
The answer isn't obvious, but let's think about it. What if I built a game in which the play area is not the entire screen size? In that scenario, you would need to wrap the region you are interested; hence I have made this feature available.
Smaller areas on the screen can be defined with Cameras and Viewports, therefore this need is real.
For many of you, it would make sense to remove this capability, but I knew I need this for my MAP scroller tutorial!
Finally
I hope you've understood why this is a better implementation. If you end up building a game with a need to wrap a Node2D extended class, please do reuse or extend this code!
I'm going to use this in the "Space Invader" clone as part of the tutorial series; for which I plan to continue with this weekend, given I have some spare time (whoop!).
Don't forget to check out the game on itch.io. I'm publishing the game in advance of tutorials, so it is worth you checking it out periodically! You'll be able to guess what is coming up in my posts!
Remember to comment and ask questions! I'm more than happy to interact with you.
Sample Project
I hope you've read through this Tutorial, as it will provide you with the hands-on skills that you simply can't learn from downloading the sample set of code.
However, for those wanting the code, please download from GitHub.
You should then Import the "Screen Wrap Node" folder into Godot Engine.
Other Tutorials
Beginners
Competent
Posted on Utopian.io - Rewarding Open Source Contributors
Note to any reader. IF you use this generic Node and utilise Godot's excellent 2D Aspect Ratio stretching capabilities, you will need to swap out the get_viewport().size and replace with projectSettings retrievals of the screen size! I'll post an update to this one.
I'm just adding this to the 'Space Invaders' clone tutorial and stumbled on my mistake! Forgetting that get_viewport provides its size, not the original screen size; which I intended!
Hey @sp33dy I am @utopian-io. I have just upvoted you!
Achievements
Community-Driven Witness!
I am the first and only Steem Community-Driven Witness. Participate on Discord. Lets GROW TOGETHER!
Up-vote this comment to grow my power and help Open Source contributions like this one. Want to chat? Join me on Discord https://discord.gg/Pc8HG9x
Thank you for the contribution. It has been approved.
You can contact us on Discord.
[utopian-moderator]