Arduino : "Using Buzzer To Make Melody"
What Will I Learn?
- You will learn to use the Passive Buzzer 5v
- You will learn how to generate Tones with Buzzer
- You will learn how to program arduino uno and buzzer to produce Music
Requirements
Hardware
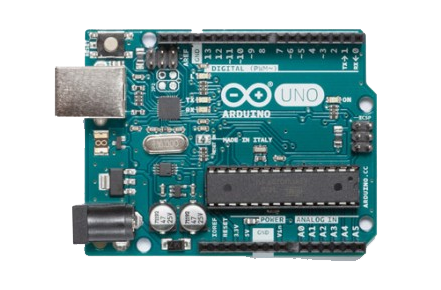
- Arduino Uno
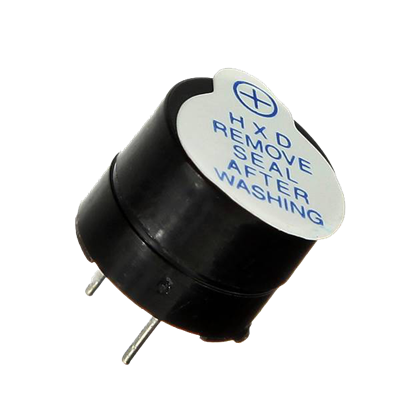
- Passive Buzzer 5v
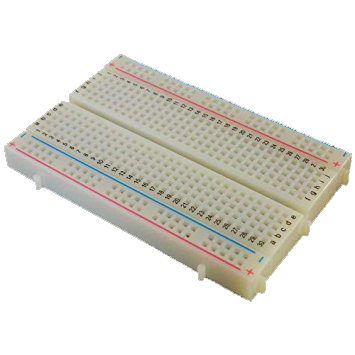
- Breadboard
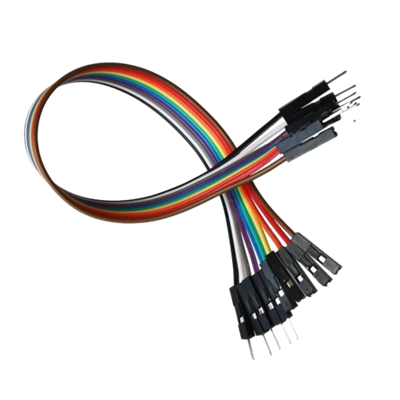
- Jumper Wires Male To Male
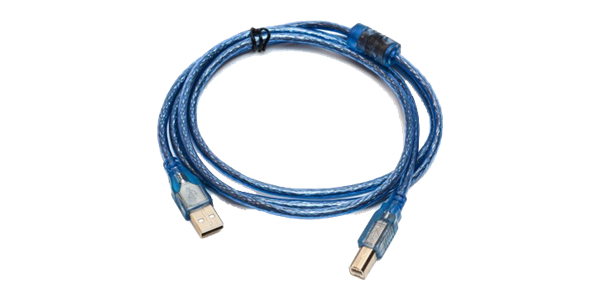
- USB type A to B cable
- Personal Computer (Laptop)

Software
- Arduino IDE
Knowledge
- Electronics and Robotics Basic
Difficulty
- Basic
Project Introduction
This is a simple project that utilizes the use of Buzzer with arduino uno. Buzzer connected to arduino uno board serves as a medium that can convert electrical signals into vibrations of sound. Where Arduino As a power source that controls the Tone that will come out. Controlling the tempo and the outgoing tone Buzzer can produce music or rhythm like a musical instrument.
Component Description
Arduino Uno - is a microcontroller board based on the ATmega328P (datasheet). It has 14 digital input/output pins (of which 6 can be used as PWM outputs), 6 analog inputs, a 16 MHz quartz crystal, a USB connection, a power jack, an ICSP header and a reset button. It contains everything needed to support the microcontroller; simply connect it to a computer with a USB cable or power it with a AC-to-DC adapter or battery to get started.(Source : Arduino.cc )
Buzzer - A buzzer or beeper is an audio signalling device, which may be mechanical, electromechanical, or piezoelectric (piezo for short). Typical uses of buzzers and beepers include alarm devices, timers, and confirmation of user input such as a mouse click or keystroke.(Source : Wikipedia)
Tutorial Contents
Step 1 : Prepare All Parts
You can buy from online store or directly to the Electronics Shop
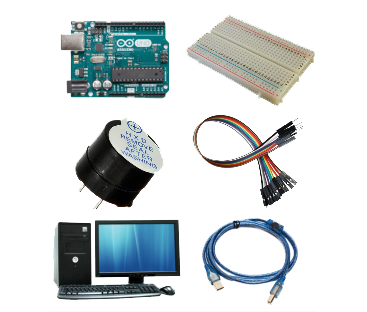
Step 2 : Build Circuit Architecture
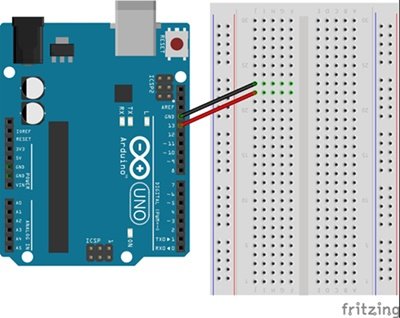
- Connect the GND pin of the arduino uno board into the top/bottom slot of the breadboard.
- Connect the pin number 13 of the arduino uno board into the top/bottom slot of the breadboard.
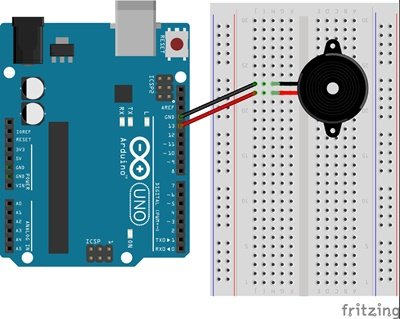
- Connect Buzzer to Breadboard parallel to the previous connection. The connection here is vertically connected making it ideal for the source.
Step 3 : Programing
- Connect Arduino to the computer with USB .
- Open the Arduino IDE > Chose your Board Type
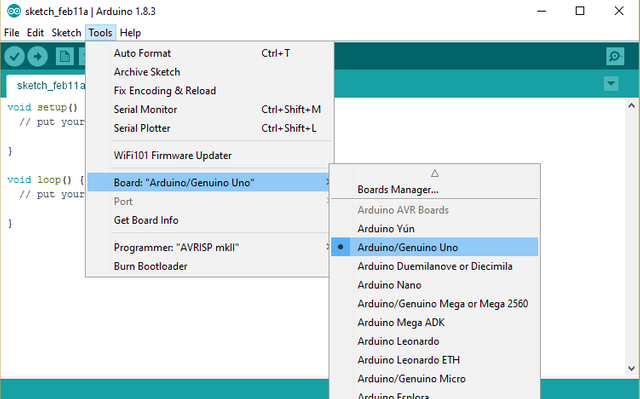
Copy the code below and paste it into your own sketch in the arduino software.
Simple Alarm
// Simple DigitalWrite Buzzer
int buzz = 13 ; //Buzzer Kutub Positiv (+) di pin 9
void setup() {
  // put your setup code here, to run once:
  pinMode(buzz,OUTPUT);
  }
void loop() {
  // put your main code here, to run repeatedly:
  digitalWrite(buzz,HIGH);
  delay(1000);
  digitalWrite(buzz,LOW);
  delay(1000);
}
You can test "Pirates of the Caribbean Theme Song" ( Source : GitHub )
const int buzzer = 13; //Define pin 13, can use other PWM pins  (5,6 or 9)
                       //Note pins 3 and 11 can't be used when using the tone function in Arduino Uno
const int songspeed = 1.5; //Change to 2 for a slower version of the song, the bigger the number the slower the song
//*****************************************
#define NOTE_C4  262   //Defining note frequency
#define NOTE_D4  294
#define NOTE_E4  330
#define NOTE_F4  349
#define NOTE_G4  392
#define NOTE_A4  440
#define NOTE_B4  494
#define NOTE_C5  523
#define NOTE_D5  587
#define NOTE_E5  659
#define NOTE_F5  698
#define NOTE_G5  784
#define NOTE_A5  880
#define NOTE_B5  988
//*****************************************
int notes[] = {       //Note of the song, 0 is a rest/pulse
   NOTE_E4, NOTE_G4, NOTE_A4, NOTE_A4, 0,
   NOTE_A4, NOTE_B4, NOTE_C5, NOTE_C5, 0,
   NOTE_C5, NOTE_D5, NOTE_B4, NOTE_B4, 0,
   NOTE_A4, NOTE_G4, NOTE_A4, 0,

   NOTE_E4, NOTE_G4, NOTE_A4, NOTE_A4, 0,
   NOTE_A4, NOTE_B4, NOTE_C5, NOTE_C5, 0,
   NOTE_C5, NOTE_D5, NOTE_B4, NOTE_B4, 0,
   NOTE_A4, NOTE_G4, NOTE_A4, 0,

   NOTE_E4, NOTE_G4, NOTE_A4, NOTE_A4, 0,
   NOTE_A4, NOTE_C5, NOTE_D5, NOTE_D5, 0,
   NOTE_D5, NOTE_E5, NOTE_F5, NOTE_F5, 0,
   NOTE_E5, NOTE_D5, NOTE_E5, NOTE_A4, 0,

   NOTE_A4, NOTE_B4, NOTE_C5, NOTE_C5, 0,
   NOTE_D5, NOTE_E5, NOTE_A4, 0,
   NOTE_A4, NOTE_C5, NOTE_B4, NOTE_B4, 0,
   NOTE_C5, NOTE_A4, NOTE_B4, 0,

   NOTE_A4, NOTE_A4,
   //Repeat of first part
   NOTE_A4, NOTE_B4, NOTE_C5, NOTE_C5, 0,
   NOTE_C5, NOTE_D5, NOTE_B4, NOTE_B4, 0,
   NOTE_A4, NOTE_G4, NOTE_A4, 0,

   NOTE_E4, NOTE_G4, NOTE_A4, NOTE_A4, 0,
   NOTE_A4, NOTE_B4, NOTE_C5, NOTE_C5, 0,
   NOTE_C5, NOTE_D5, NOTE_B4, NOTE_B4, 0,
   NOTE_A4, NOTE_G4, NOTE_A4, 0,

   NOTE_E4, NOTE_G4, NOTE_A4, NOTE_A4, 0,
   NOTE_A4, NOTE_C5, NOTE_D5, NOTE_D5, 0,
   NOTE_D5, NOTE_E5, NOTE_F5, NOTE_F5, 0,
   NOTE_E5, NOTE_D5, NOTE_E5, NOTE_A4, 0,

   NOTE_A4, NOTE_B4, NOTE_C5, NOTE_C5, 0,
   NOTE_D5, NOTE_E5, NOTE_A4, 0,
   NOTE_A4, NOTE_C5, NOTE_B4, NOTE_B4, 0,
   NOTE_C5, NOTE_A4, NOTE_B4, 0,
   //End of Repeat

   NOTE_E5, 0, 0, NOTE_F5, 0, 0,
   NOTE_E5, NOTE_E5, 0, NOTE_G5, 0, NOTE_E5, NOTE_D5, 0, 0,
   NOTE_D5, 0, 0, NOTE_C5, 0, 0,
   NOTE_B4, NOTE_C5, 0, NOTE_B4, 0, NOTE_A4,

   NOTE_E5, 0, 0, NOTE_F5, 0, 0,
   NOTE_E5, NOTE_E5, 0, NOTE_G5, 0, NOTE_E5, NOTE_D5, 0, 0,
   NOTE_D5, 0, 0, NOTE_C5, 0, 0,
   NOTE_B4, NOTE_C5, 0, NOTE_B4, 0, NOTE_A4
};
//*****************************************
int duration[] = {         //duration of each note (in ms) Quarter Note is set to 250 ms
  125, 125, 250, 125, 125,
  125, 125, 250, 125, 125,
  125, 125, 250, 125, 125,
  125, 125, 375, 125,

  125, 125, 250, 125, 125,
  125, 125, 250, 125, 125,
  125, 125, 250, 125, 125,
  125, 125, 375, 125,

  125, 125, 250, 125, 125,
  125, 125, 250, 125, 125,
  125, 125, 250, 125, 125,
  125, 125, 125, 250, 125,

  125, 125, 250, 125, 125,
  250, 125, 250, 125,
  125, 125, 250, 125, 125,
  125, 125, 375, 375,

  250, 125,
  //Rpeat of First Part
  125, 125, 250, 125, 125,
  125, 125, 250, 125, 125,
  125, 125, 375, 125,

  125, 125, 250, 125, 125,
  125, 125, 250, 125, 125,
  125, 125, 250, 125, 125,
  125, 125, 375, 125,

  125, 125, 250, 125, 125,
  125, 125, 250, 125, 125,
  125, 125, 250, 125, 125,
  125, 125, 125, 250, 125,

  125, 125, 250, 125, 125,
  250, 125, 250, 125,
  125, 125, 250, 125, 125,
  125, 125, 375, 375,
  //End of Repeat

  250, 125, 375, 250, 125, 375,
  125, 125, 125, 125, 125, 125, 125, 125, 375,
  250, 125, 375, 250, 125, 375,
  125, 125, 125, 125, 125, 500,

  250, 125, 375, 250, 125, 375,
  125, 125, 125, 125, 125, 125, 125, 125, 375,
  250, 125, 375, 250, 125, 375,
  125, 125, 125, 125, 125, 500
};

void setup() {
  for (int i=0;i<203;i++){              //203 is the total number of music notes in the song
  int wait = duration[i] * songspeed;
  tone(buzzer,notes[i],wait);          //tone(pin,frequency,duration)
  delay(wait);}                        //delay is used so it doesn't go to the next loop before tone is finished playing
  //You can click reset on Arduino to replay the song
}

void loop() {

}
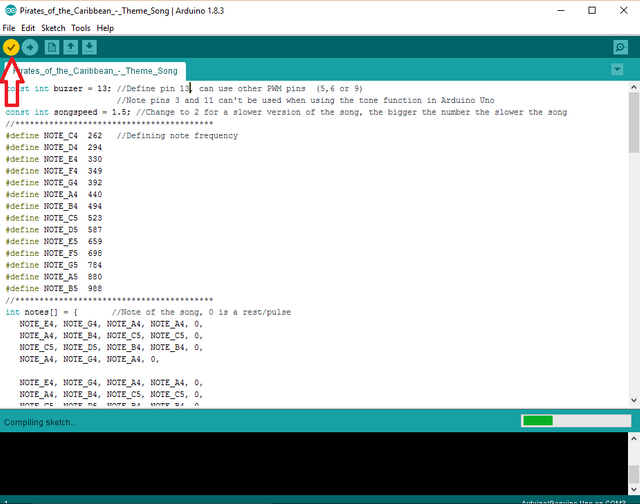
- After Copy the codes, click the "Verify button" to save and compile the sketch. This will also check for any errors in the program.
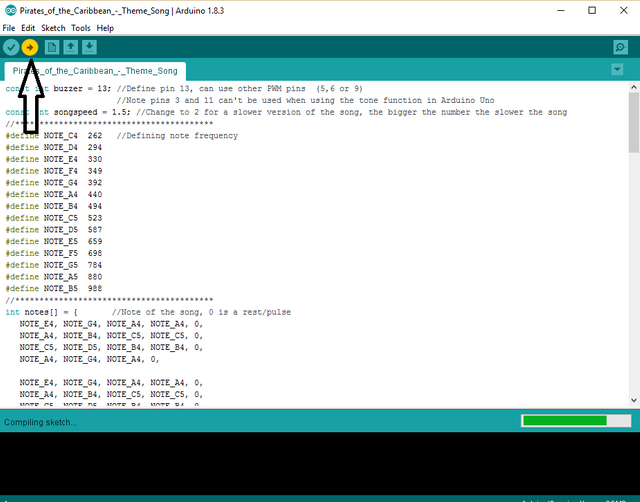
- If no errors is found , now you can click "Upload button" to start installing the program into the arduino uno board.
Posted on Utopian.io - Rewarding Open Source Contributors
Your contribution cannot be approved because it does not follow the Utopian Rules, and is considered as plagiarism. Plagiarism is not allowed on Utopian, and posts that engage in plagiarism will be flagged and hidden forever.
The code was copied from here
You can contact us on Discord.
[utopian-moderator]