Reviewing GIMP (part3): Overcoming contrast problems in photos using GIMP

Source
Contrast problems are very often we get in photography activities including me. portraits, selfies, or other activities almost every time we do. especially like me, this works in the world of photography. the type of contrast that we found is different. depending on how we take pictures, what devices do we use when taking pictures and how the weather's brightness is placed. This has a big effect on the contrast of each image produced.
Contrast is one of the important elements in photography. contrast clarifies the position of each element in a photo, which is the main element and which is a supporting element.
So, this time I will add a little insight and discuss contrast in photography so you understand. now, the contrast is not only between dark and bright light, but there are other elements in it.
There are three types of contrast, namely light, color, and texture.
1.Light Contrast

Source
Light contrast is often called light and dark. Use a light contrast technique that is often used when shooting silhouettes at sunrise and sunset.
2.Color contrast
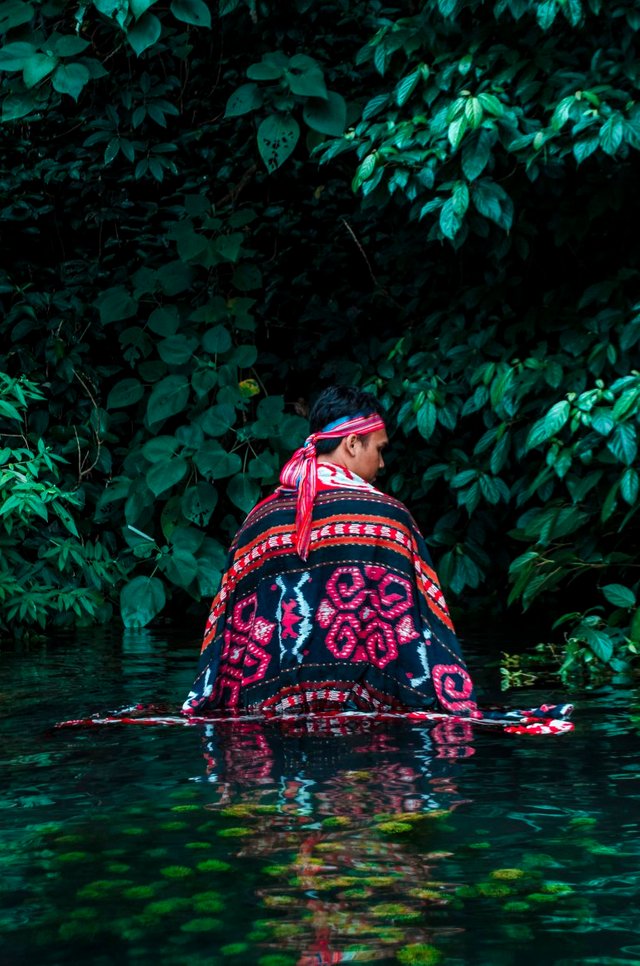
As the name suggests, color contrast is a color difference, for example between red and green, blue and yellow, etc. the point is to make a real difference if two or more colors are combined, where each color has its own strength.
3.Contrast Texture

Source
The contrasting texture is the difference between coarse and fine. Rough and smooth here is not from the sense of taste but based on the sense of sight, for example between the model and its opaque background.
Contrast does not have to be clear, for example between dark and light, red and blue, and rough and smooth. Sometimes photographers like soft contrast to produce calmer photos where the difference is not very visible, for example, dark and rather dark, red and pink, and the texture is strong and smooth.
Well, that's a brief explanation of the contrast. this can be an important note in terms of photography.
like my friend who is on vacation outside the area to meet with his best friend, they have time to take pictures together before parting. But that happened. he was not aware that the photos taken had excessive contrast so that all objects almost faded.
It didn't take long to think, I immediately tried to solve the photo problem using the GIMP software. at first, I had difficulty dealing with it because the photo was taken with an ordinary smartphone. but I'm still trying to overcome it using GIMP.
You can see the steps I use in GIMP to overcome contrast problems!
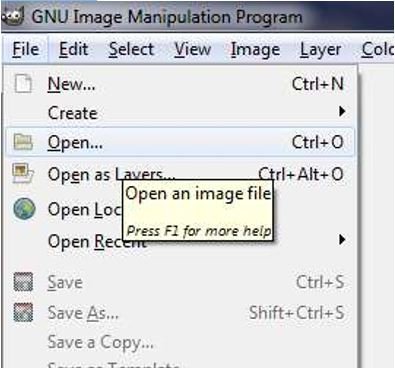
- First, with the CTRL + O shortcut or select the FILE menu> OPEN, look for the image you want and then click OPEN.
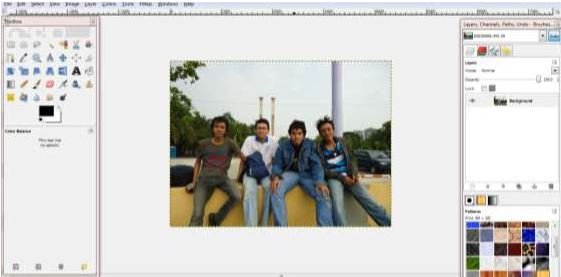
- After the image appears, you can see many coloring features that you can use in GIMP, depending on your tastes and needs.
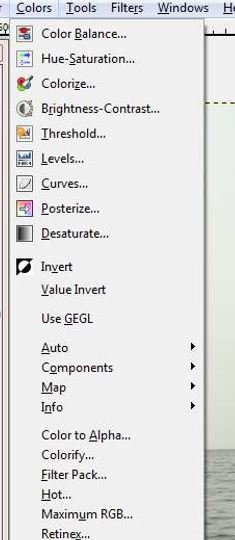
- Now that I try to apply the Feature to the Color Menu in the color menu, I apply Color Balance.
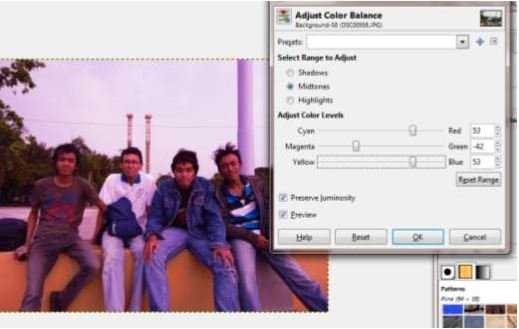
Color Balance is used to adjust the composition of colors based on the basic colors in the format of photos or images, there are 3 colors of coverage that will be adjusted, namely shadows, mid-tones, highlights (it is recommended to try all three because each photo will vary) and 6 basic colors Cyan, Magenta, Yellow, Red, Green, and Blue. Check Preview to see examples of changes.
- I apply Hue-Saturation
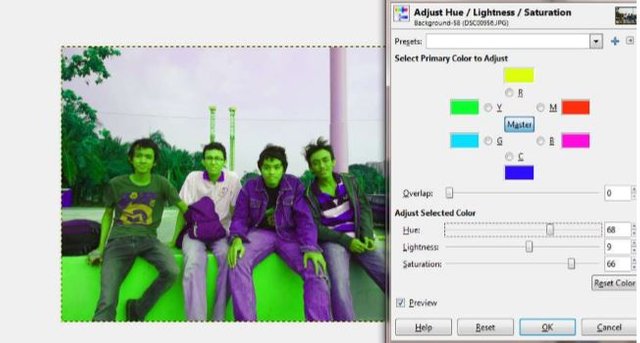
Hue-Saturation is used to adjust the color composition with a more specific method than the menu above. First, we determine first, what color (in the photo) will change, if you want it as a whole you can choose "Master". If so, adjust with 3 choices, Hue (color), lightness (Lighting), Saturation.
- I use the Colorize.
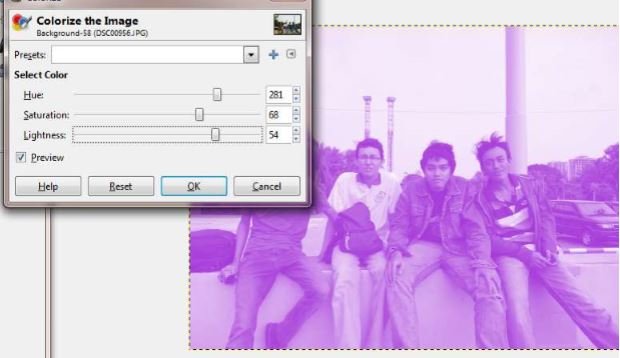
The color used to adjust the composition of colors by using automatic layers, so if our photos fix semi-transparent colors, saturation and light that can be adjusted, COOL !!!
- I Apply Brightness and Contrast implemented.
Brightness and Contrast are used to adjust the color composition with adjustments. This is a feature that most image manipulation programs have. This feature also won't change the color channel, so it stays on the channel, eg: red won't turn blue.
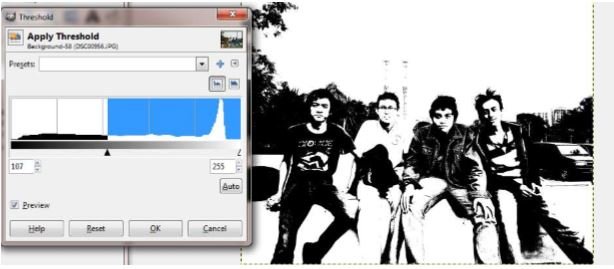
- I apply the Threshold.
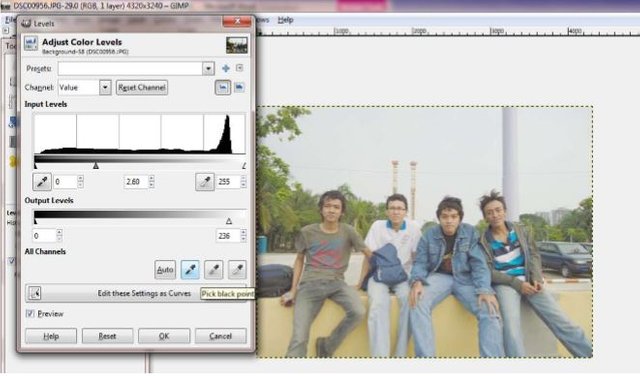
The threshold is used to change the color to black and white by adjusting the black level based on the base color and diagram in the window that appears. Usually, this feature is used as a combination of features in the filter menu.
- Then I use Level.

A level is used to adjust the color composition based on the black level set through the window that appears, this feature does not cause black and white on the photo, because it only adjusts blackish content in the photo.
- I use Curves to adjust the color composition like the previous menu but it is displayed in the form of a curve.
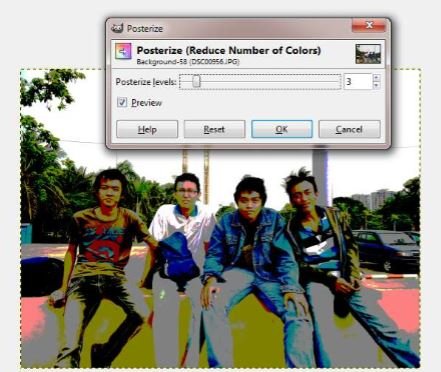
- The next step we can use Posterize to adjust the color composition by reducing the colors found in photos or images.
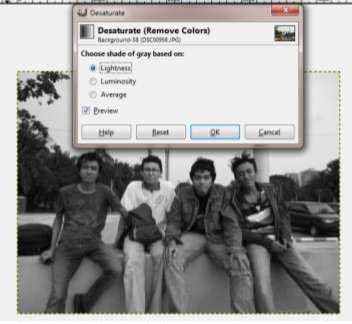
- Then, use Desaturate to adjust the color composition to black and white by returning saturation. So it becomes colorless.
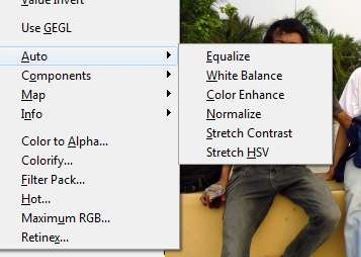
- Next, to the Autosub feature, everything will change the color composition automatically.
The following is an explanation of the above process:

Equate to equalize all colors at the same value.

The white balance will automatically change the composition of the color by matching the white value.
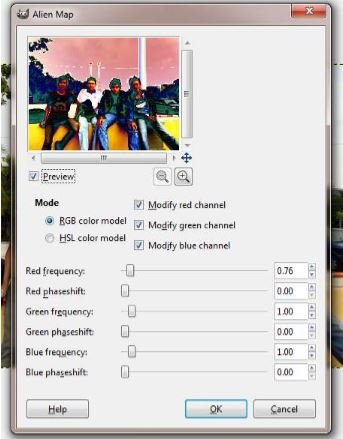
Color enhancements automatically enhance the color colors that are considered standard in GIMP. The alien map is one of the features that I like because the color transformation is cool, this feature has a method to change the composition of colors by adjusting the base color frequency in Photos.
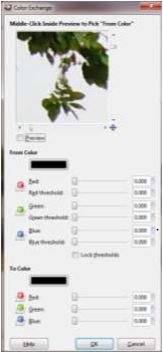
Color Exchange, have you ever heard of money exchange? yes ... more or less the same method, which is changing the color found in the image with the color we want.
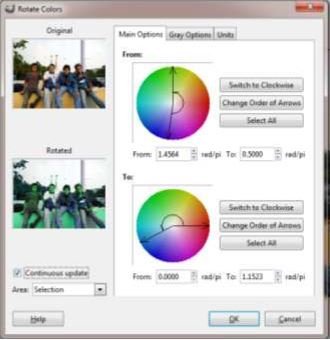
Rotate Color is a feature that changes the composition of colors by using a color circle that has an angle so that we can rotate to any part we want.
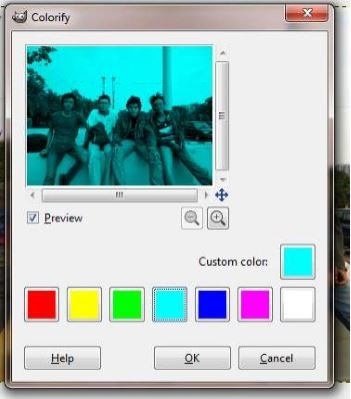
Colorfy is the same as colorize, but there are fundamental differences, namely this feature is simpler because it only adjusts the color layer, and there are already color templates provided.
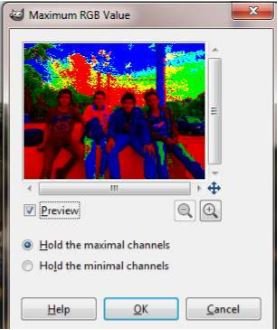
The last one is Maximum RGB, this feature makes RGB color composition, to its maximum point, so the colors in the photo look less and more contrast.
In my opinion, the above features are often used because it is easier and faster to handle it. There are many other ways to deal with contrast problems in GIMP software, but you must clearly understand the functions of the features in it. If you already understand the functions of the features in it, you can easily solve problems in photos.
Source
Software content reviews are based on my project and most of my experience. The image used is a screenshot on my device. Other images have a source link provided just below it.
Summary
I'm sure with this article, you start thinking twice about using more pro manipulation software like Adobe Photoshop, etc.
Well, it should be. Because if we compare GIMP software. he will excel in terms of the speed of his working process compared to pro software. Pro software is very superior in terms of features, but not in speed.
In this article, I have shared what personal search can do for you. I have also reviewed the software when I did it. In my next article, I will discuss other important points about this topic (personal exploration).
Follow my next blog and Don't hesitate if you want to ask. please leave your question in my comment column!

Hello, @riyandacountri!
Thank you for another interesting blog post about this image manipulation software. It really is a wonderful tool, and your series contains so much technical information related to the purpose of this project. Your post is informative and well-illustrated with relevant screenshots.
On the content side, I like all the information provided. The post is extensive and editorial, and I think that you did a really good job in providing valuable insights about your personal knowledge and experience of using GIMP. Keep up the good work.
That said, the writing of this post was not good enough, I'm afraid. There were serious issues of grammar, style and proofreading, making your post hard to comprehend. I would advise you to consider using grammar checker software in order to enhance the readability of your posts.
Your contribution has been evaluated according to Utopian policies and guidelines, as well as a predefined set of questions pertaining to the category.
To view those questions and the relevant answers related to your post, click here.
Need help? Chat with us on Discord.
[utopian-moderator]
Thank you for your review, @lordneroo! Keep up the good work!
Congratulations @riyandacountri! You have completed the following achievement on the Steem blockchain and have been rewarded with new badge(s) :
Click here to view your Board
If you no longer want to receive notifications, reply to this comment with the word
STOPTo support your work, I also upvoted your post!
Vote for @Steemitboard as a witness and get one more award and increased upvotes!
Hi @riyandacountri!
Your post was upvoted by @steem-ua, new Steem dApp, using UserAuthority for algorithmic post curation!
Your post is eligible for our upvote, thanks to our collaboration with @utopian-io!
Feel free to join our @steem-ua Discord server
Hey, @riyandacountri!
Thanks for contributing on Utopian.
We’re already looking forward to your next contribution!
Get higher incentives and support Utopian.io!
Simply set @utopian.pay as a 5% (or higher) payout beneficiary on your contribution post (via SteemPlus or Steeditor).
Want to chat? Join us on Discord https://discord.gg/h52nFrV.
Vote for Utopian Witness!