How to create Div tags in HTML and style it with CSS in order to make simple website layout
What Will I Learn?
- How to make Div tags in HTML
- How to style them with css
Requirements
- A computer System (Laptop or Desktop)
- Basic knowledge of HTML
- Basic knowledge of CSS
- You must know the basics on how to create a website
- You need Text Editor
- web browser
Difficulty
- Basic
Tutorial Contents
I will explain the important details and you will soon see how easy it is to create Div tags in HTML and style it with CSS.
HTML is s markup language the browser use to present content to users. Like links, text, images and so on. It’s a component which all websites and application on the web are built on.
The HTML <div> tag is used to define a section of a document. By using the div tag, one can group large sections of HTML elements together and format them with CSS. (CSS is a simple mechanism for adding style e.g., fonts, colour etc) to web documents.
You can think of CSS as decorations for your house. Without any decorations, it is bland and boring, but when you add decoration it spice up the environment and makes more attractive and inviting.
Getting started
step 1. The first stage in order for you to get started is for you to create the page Title just the way you want it to appear on your browser using any Text editor of your choice. For the purpose of this tutorial I will use Notepad++

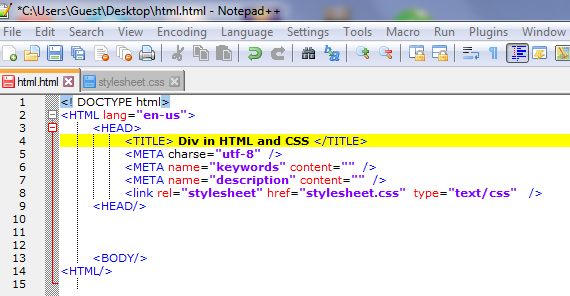
Step 2. Make a css style sheet, and then link it to your HTML page.
<link rel= “stylesheet” href= stylesheet.css” type="text/css"as shown below;
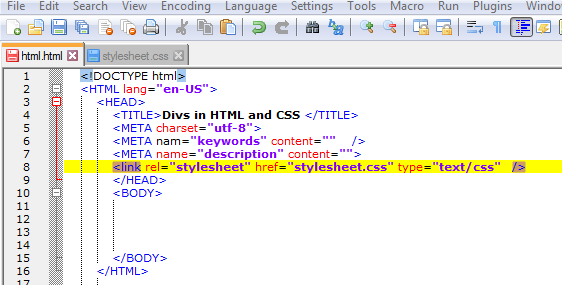
With this in mind we will be able to start styling using css.
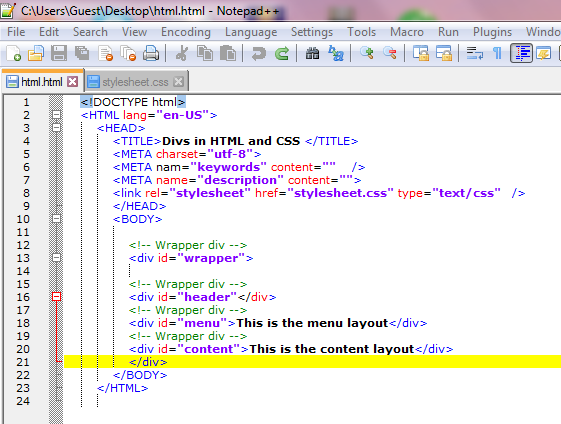
- Step 3. You have to make a layout which should consist of the following;
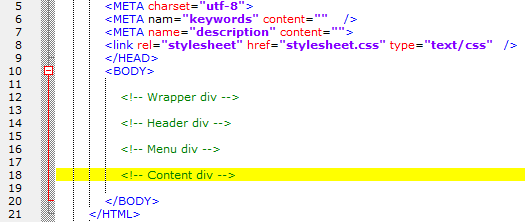
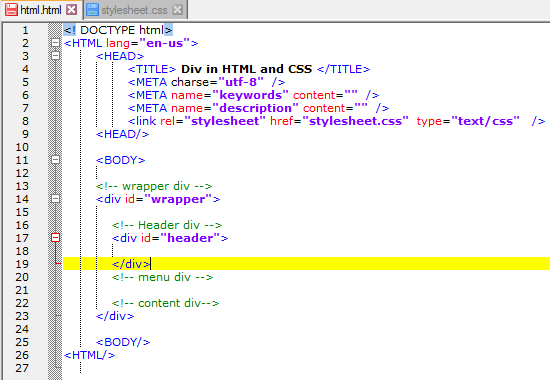
then you should start by making the wrapper div by creating an id tag called <div id="wrapper"> with the Header div, Menu div, and content div falling within the wrapper div
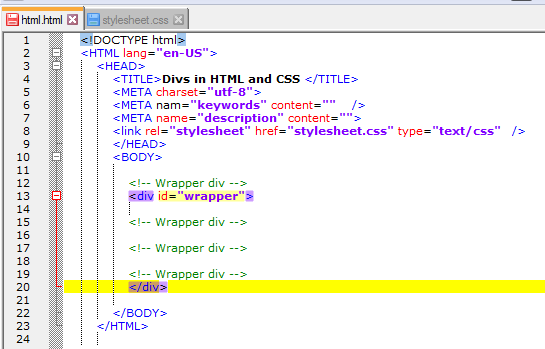
- step 4. the next thing is to go to your style sheet then type the styling name, to start with, am starting with "wrapper" with the following preferences
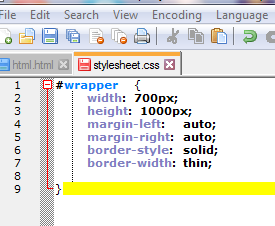
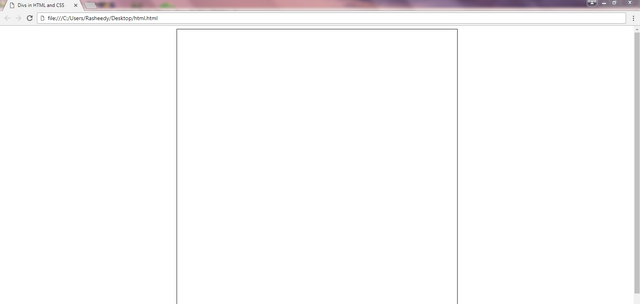
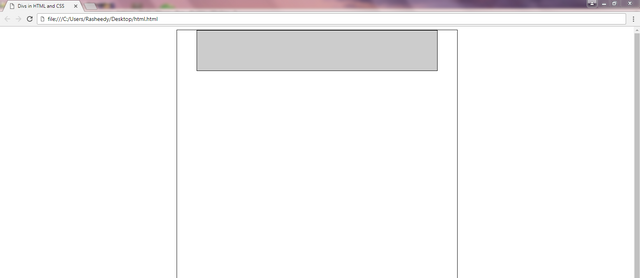
Then go to your browser and view it. you will have something like this below; 700 pixel high and 1000 pixel wide and it's place in the middle because the margin is set to auto
- step 5. The next thing is to add a "header div". And in order to achieve that you have to go back to your earlier created layouts, and do same to the heading layout just as that of "wrapper" above
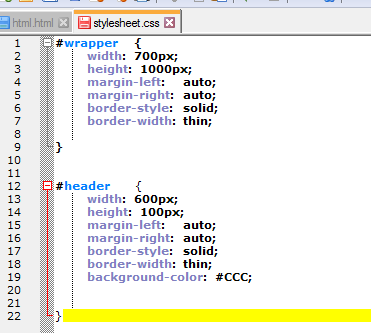
Then go to css stylsheet as well and add the header styling with the following preferences;
Browser preview should give you something like this; thats a <header div> located in the middle of the <wrapper div>
- step 6. At this stage, I will create the
<menu div>by creating an id tag called<div id="menu">and in the div tag, I will type "this is the menu Layout" when you view it in the browser
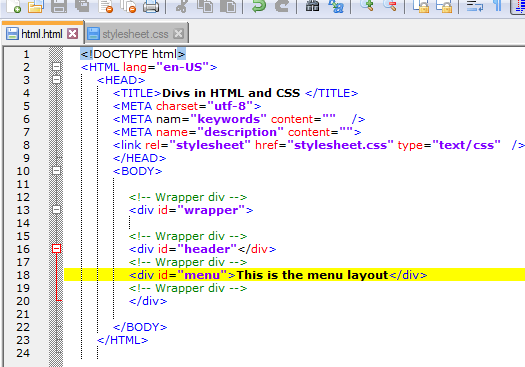
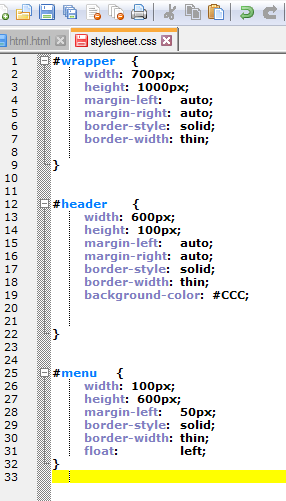
Then go to stylesheet and enter the menu styling preferences like this below;
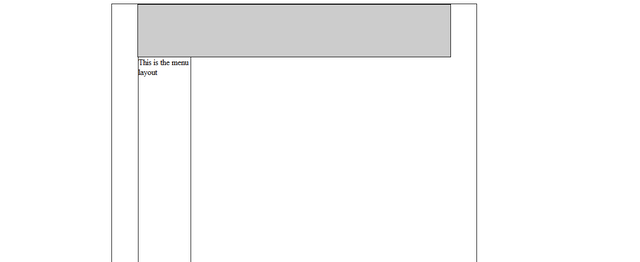
This is the Menu preview in the browser 100 pixel height and 600 pixel wide with a margin out of 50pixel and it float left in the wrapper div.
step 6. Finally to add the content div, go to the html document and create the <content div> by creating an id tag called <div id="content "> and in the div tag, I will type "this is the content Layout" when you view it in the browser
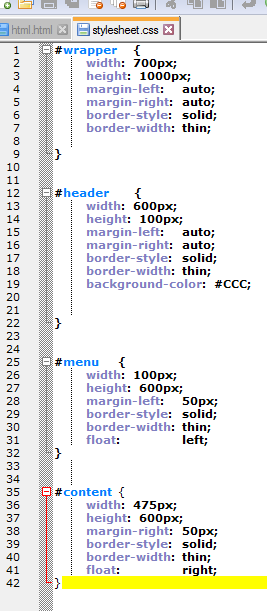
Then I will quickly go to stylesheet and enter the content styling preferences like this below;
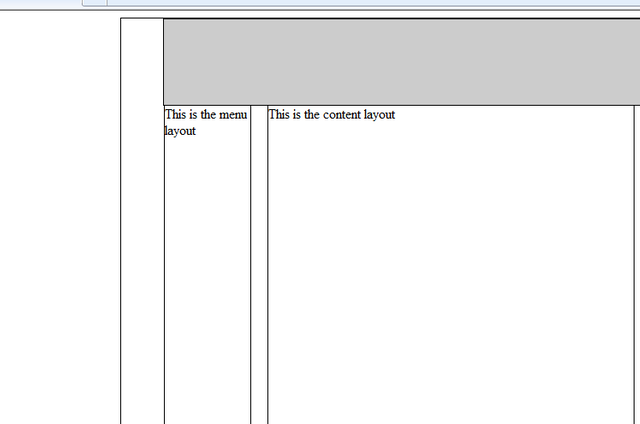
This is the browser preview of the content div, it is 475 pixel high and 600 pixel wide, it float to the right in the wrapper div...
Hope you find this tutorial useful, if so, upvote and resteem... Your comments and contribution is highly welcome.
- curriculum
This is the first tutorials on this series, so, just expect more!
Posted on Utopian.io - Rewarding Open Source Contributors
Your contribution cannot be approved because it does not follow the Utopian Rules.
TutorialsYou can contact us on Discord.
[utopian-moderator]
The post was posted under the tutorial category, please check it again.... Thanks!