Learning React-native : Part III
What will I learn?
- flow of data in react component
- What is modal and adding a modal in our application
- Using modal to display information and closing it
Requirements
- A laptop/PC with Mac OS/ Linux/ Windows
- Preinstalled node.js
- Preinstalled Code editor
Note: This tutorial is performed in Visual Studio Code in a laptop with Windows 10 Home, 64 bit OS
Difficulty
Intermediate, you must have good knowledge of JavaScript to catch up this tutorial.
Tutorial Content
In my previous session, I explained to you about components, state, props and how to use them efficiently to make a simple login screen. In this session, we will be learning about modal, data flow in react component etc.
Different flow of data in react components:
As in react native the data flow is one-directional many of us get confused in passing data within the components or between many components.
As we discussed in our previous tutorial, to pass data between components we require props and to handle data in the component we require state. That is true, but the flow of data can be different as per our situation.
What I mean to say is that there can be a various direction in which data can flow like:
- parent to child
- child to parent
- child to child
Parent to child:
Here parent component means the root of our application. In our application the parent component is App.js and all the other component can be termed as child component.
If we want to access the data of parent component in child component then we can pass it as prop to the child. It is the simplest and easiest way of data flow among the component.
For example: if I want to pass some data from ‘App.js’ to ‘TextInputComponent.js’ then we should do it by using props
export default class App extends React.Component {
  state={
      username:"programminghub",

  };

  render() {
    return (
      <View style={styles.container}>
        <TextInputComponent usernameProp={this.state.username}/>
      </View>
    );
  }
}
Here we are passing the username “programminghub” form our parent component ‘App.js’ to ‘TextInputComponent.js’. To access this value in ‘TextInputComponent’ we get it via
‘this.props.usernameProp’
class TextInputComponent extends Component{

    render(){
        return(

           <Text style={styles.textStyle}>{this.props.usernameProp}</Text>
        );
    }
}
This will give us the username that is ‘programminghub’ and will display output like this:
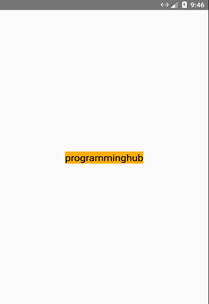
In this way, we can access or pass the data of parent component in our child component.
Child to parent:
In our previous tutorial, we used child to parent data communication as we passed the username and password from TextInputComponent.js to App.js. If you want to
If you want to learn more about it then you can view my previous tutorial as we have used this data flow in our previous tutorial.
Child to child
There are many situations where we want to pass the data from one child component to another child component. But, in order to pass the data between two component, we have to use our parent as an intermediary. First, we pass the data from component to the parent then the parent will send the data to next component by using props.
Modal
According to the official documentation of react native
The Modal component is a simple way to present content above an enclosing view.
Modal is like an alert dialog in android and IOS. It appears above the existing view. Same is the case of the modal. It presents the content above and enclosing view. Modal always takes the height of the entire screen. Typically, modal is used in cases where the user wants to display detail information of something like the list. But rather than using Modal it is best to use Navigator as it gives us more power on handling how to present content over the rest of application. But initially, we will start with Modal.
Modal is also a react native component. Now let us write some code:
Let us begin by creating a new java script file and name it ModalSample.js
To use modal in our file we first import it from “react-native”
import React,{Component} from "react";
import {Modal,StyleSheet} from "react-native";
Now let make our first Modal component. It can be done by:
class ModalSample extends Component {
    render() {
        return (
            <View style={styles.modalContentStyle}>
                <Modal>
                    <Text style={styles.textStyle}>This is the first use of modal </Text>
                </Modal>
            </View>

        );

    }
}
Here we can use the modal component simply by calling . Inside our modal, we have component to display some text on our screen. A modal always occupies the whole screen so if we had written other components below the it wouldn’t display anything:
<View style={styles.modalContentStyle}>
                <Modal>
                <Text style={styles.textStyle}>This is the first use of modal </Text>
                </Modal>
                <Text>Sample text</Text>
            </View>
Above code will display the text ‘This is the first use of modal’ but it won’t be displaying the text ‘Sample text’.
This is the thing we need to understand about Modal that it is a way to present content above the enclosing view and it occupies all the screen. So, whatever we want to display on our screen should be kept inside tag.
Modal can be triggered anywhere from the component hierarchy.
It has many props like: ‘visible’, ‘onRequestClose’, ‘onShow’, ‘transparent’, ‘animationType’ etc and so on.
(NOTE: A modal component doesn’t have style prop which means that we cannot apply any custom style in the Modal component).
Each of the attribute/prop can be used to specify certain property the modal.
Now, by running this code it will not show anything as the entry point of our application is ‘App.js’ we have to import our ‘ModalSample’ component in ‘App.js’ and use it in order to display it.
Open App.js an first import ModalSample.js
import ModalSample from './components/ModalSample';
And in your view simply call like this:
return (
      <View style={styles.container}>
        <TextInputComponent onInputAdded={this.onUsernamePasswordAdded}/>
        <Text>{this.state.username}</Text>
        <Text>{this.state.password}</Text>

        <ModalSample >
          </ModalSample>

      </View>
    );
Here ‘TextInputComponent’ is a custom component we made in our previous tutorial. Now let us see how the output looks like:
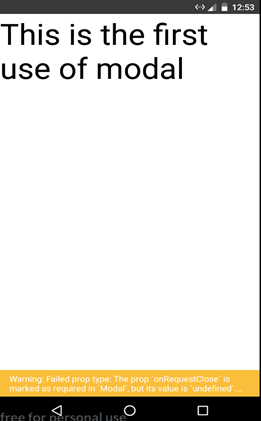
We successfully used a modal to display a text.
Here we can see the warning Failed prop type: onRequestClose is marked as required in ‘Modal’ because we haven’t defined our prop ‘onRequestClose’ in our ‘ModalSample.js’ modal.
We will be removing this warning later in the tutorial.
Now let us make use of all the above things and make a modal such that it will be only displayed when we press the submit button and the modal will display the username and password we typed.
In our previous tutorial, we created a custom component called ‘TextInputComponent’ where we handled user input and passed the input to our parent component App.js and displayed the input in the parent component. Now in this section, we will be displaying the user input information in Modal named LoginDetail.js. This will explain all type of data flow of react native also it teaches us to use Modal.
Let us make a new file and name it LoginDetail.js
Now, in order to display modal we will be requiring user’s input data from our parent component and if the user input is not null then only we will be displaying this modal otherwise we will be displaying our login screen.
So open App.js.
We already have the user input from in our App.js. We only need to pass it to PlaceDetail.js modal now. So, basically, it is the data flow from parent to child. Hence, we will be using props in this case.
render() {
    return (
      <View style={styles.container}>
        <TextInputComponent onInputAdded={this.onUsernamePasswordAdded}/>
        <LoginDetail
         loginCrendential={this.state.loginCrendential} />


      </View>
    );
  }
}
Here is the variable of PlaceDetail.js and we are passing the data from our Parent (App.js) to child (LoginDetail.js) using ‘loginCredentail’ self-made prop. Here we have stored username and password received from ‘TextInputComponent’ in an object called ‘loginCredential’ so we are passing this object ‘loginCredential’ so that we don’t have to pass username and password individually.
Now writing PlaceDetail.js that is our modal is a bit tricky one as we need to turn off its visibility if the username and password are empty. So instead of making PlaceDetail.js a component we will simply be returning a view if the username and password field is not empty. This seems a bit easier and we will also learn to import/export variables.
Now, in order to receive the loginCredential we have to write the following code:
const loginDetail=props=>{
       let modalContent=null;
       if(props.loginCrendential.username){
           modalContent=(
               <View>
                   <Text>The username is:{props.loginCrendential.username}</Text>
                   <Text>The password is:{props.loginCrendential.password}</Text>
                   </View>
           );
}
Here we are defining the variable named loginDetail so that we can export this variable in our App.js
As we have passed the loginCredential from App.js we have to receive it using props.
And if the username is not empty then we are returning a View having two component which will be displaying username and password. We have assigned this view to modalContent so that we can display it as component in our return method.
return(
    <Modal
    visible={props.loginCrendential.username!==""}
    animationType="slide"
    >
        {modalContent}
        <View>
             </View>
    </Modal>
);
};
In the return method, we have returned a Modal and it has two attributes:
Visible: The visibility of modal can be turned on and off as per our requirement. Here we have written
visible={props.loginCrendential.username!==""}
which means that it will be turned off if the username is empty and will visibility will be turned off it the username is empty.
animationType="slide"
it simply means that the modal will be opened with the sliding animation.
Now let us run it
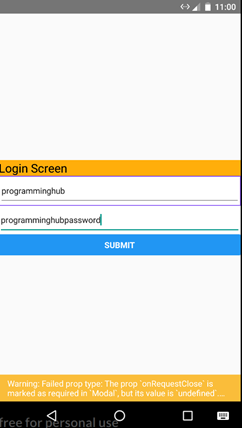
It will display the login screen as before. Now press submit button and check out what happens.
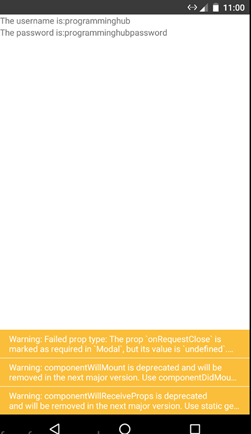
It then successfully displays another view with sliding animation and it displays our username and password as we typed. As you can see many warnings in the bottom of the screen don’t worry they will all be removed at the end.
Now we have successfully used modal to display our information. Now let us keep a close button to close our modal and display the previous screen.
For that let us create a button below {modalContent}.
<View>
            <Button title="Close" onPress={props.onModalClosed}/>
             </View>
We also need to add ‘onRequestClose’ prop in our modal in order to close the Modal
<Modal
onRequestClose={props.onModalClosed}
/>
This will remove our first warning.
There are two more waning saying ‘componentWillMount’ and ‘componentWillReceiveProps’ deprecated. It is because we have to upgrade the react native component to the latest version of the API provided by the component will soon be deprecated.
To upgrade the component, we should first install react-native-git-upgrade
After the installation is successful
Upgrade react native using react-native-git-upgrade. This will update the new version of react native and all of your warnings will be gone.
The title of our button will be Close and onPress event will trigger onModalClosed method. As when the modal is closed we have to set the value of loginCrential object key’s value to null. We will have to send the information to App.js when the user presses the close button. So, we used prop to send to information back to our parent component.
Now in our App.js
  <LoginDetail
          onModalClosed={this.modalClosedHandler}
         loginCrendential={this.state.loginCrendential} />
which means that whenever onModalClosed prop is triggered it triggers the method called ‘modalClosedHandler’ of App.js
modalClosedHandler = () => {
    this.setState({
      loginCrendential: {
        username:"",
        password:""
      }
    });
  };
In our modalClosedHandler we have simply update the state of username and password to empty.
Now let us run the application again.
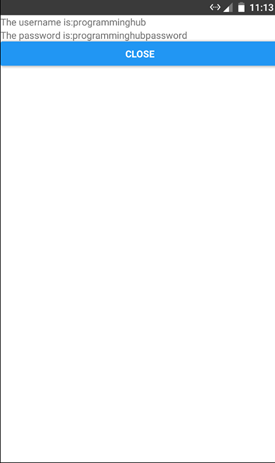
We successfully got the close button and when we press the close button we successfully got the initial screen and all the warnings are gone too.
The final code of App.js looks like this:
import React from 'react';
import { StyleSheet, Text, View,TextInput,Button,Image } from 'react-native';
import TextInputComponent from './components/TextInputComponent';
import LoginDetail from './components/LoginDetail';

export default class App extends React.Component {
  state={
    loginCrendential:{
          username:"",
          password:"",
    }

  };

  onUsernamePasswordAdded=(username,password)=>{
    console.log("inside input")
    this.setState({
      loginCrendential:
      {
          username:username,
          password:password,
      }

    });


  };


  modalClosedHandler = () => {
    this.setState({
      loginCrendential: {
        username:"",
        password:""
      }
    });
  };

  render() {
    return (
      <View style={styles.container}>
        <TextInputComponent onInputAdded={this.onUsernamePasswordAdded}/>

        <LoginDetail
          onModalClosed={this.modalClosedHandler}
         loginCrendential={this.state.loginCrendential} />


      </View>
    );
  }
}

const styles = StyleSheet.create({
  container: {
    flex: 1,

    width:"100%",
    height:"100%",
    alignItems: 'center',
    justifyContent: 'center',
  },
});


The final code of PlaceDetail.js looks like this:
import React  from "react";
import { Modal, StyleSheet, Text,Button, View } from "react-native";

const loginDetail=props=>{
       let modalContent=null;
       if(props.loginCrendential.username){
           modalContent=(
               <View>
                   <Text>The username is:{props.loginCrendential.username}</Text>
                   <Text>The password is:{props.loginCrendential.password}</Text>
                   </View>
           );
}
return(
    <Modal

    visible={props.loginCrendential.username!==""}
    animationType="slide"
    >
        {modalContent}

          <View>
            <Button title="Close" onPress={props.onModalClosed}/>
             </View>


    </Modal>
);
};

  export default loginDetail;
The code of TextInputComponet.js is the same as the previous one as we have only made the change in our App.js and PlaceDetail.js
If you have any confusion in this tutorial then you can ask me in the comment section below.
All above codes can be downloaded from my GitHub link. Click here to download.
CURRICULUM
Posted on Utopian.io - Rewarding Open Source Contributors
Thank you for your contribution.
While I seriously appreciate the work and explanation you have done here, but there were few issues that prevented me from accepting, as follows:
Need help? Write a ticket on https://support.utopian.io.
Chat with us on Discord.
[utopian-moderator]
Hey @mcfarhat, I just gave you a tip for your hard work on moderation. Upvote this comment to support the utopian moderators and increase your future rewards!
Thank you for the suggestion:
I thought of describing the warnings but eventually forgot to keep it. Sorry for that, I have corrected it.
For GitHub concern, I usually commit and update the existing Reacttutorials repository. Also, user can check commit history to get each commit to the respective part of this series and I guess all codes are written well in each part of the series in tutorial itself.
I have defined the password field explicit because in this tutorial my motive was simply to sent multiple user information rather
than single information 'username'. In the next tutorial, I will work on it.
Actually to your fourth suggestion I would like to say that I have added simple basic action because it is difficult for some users to directly understand the complex action. As it may take many days just to understand how data flows and how to add modal, I thought that if I explain to user simple matter first then they could understand easily.
Thank You