How To Make Realistic Screen Mockup With GIMP - Bagaimana membuat Realistic Screen Mockup Dengan GIMP
[English]
Hello Friends ... !!! today i will making a tutorial Realistic Screen Mockup. Mockup is a preview of a design concept that will show a real picture before it is applied. To create a mockup first you donwload the image you need.
The first step open the image file that will be mockup (Click File - Open).

Next click right on the Layer-Brushes select (Add Alpha Channel)
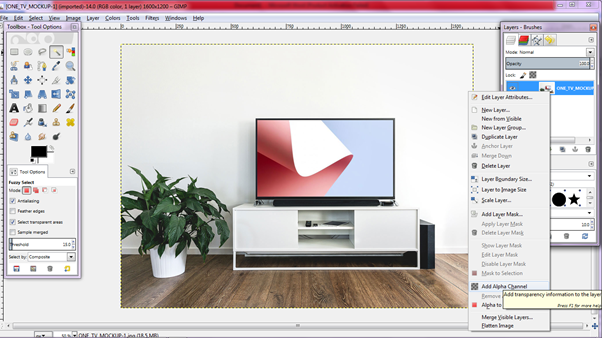
Press "U" on the keyboard to call the Fuzzy Select Tool which selects the area on the nearest colored streak.
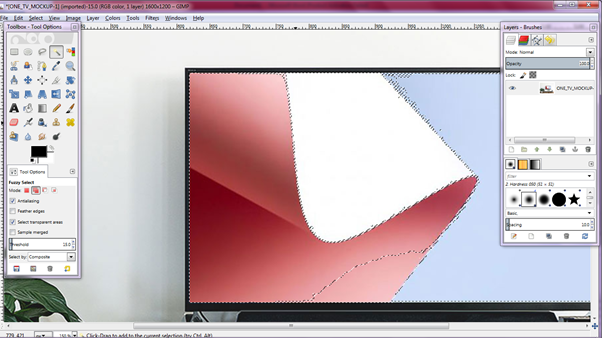
Select the object on the layer you want to select and to shoot the silver press "Shift" on the keyboard
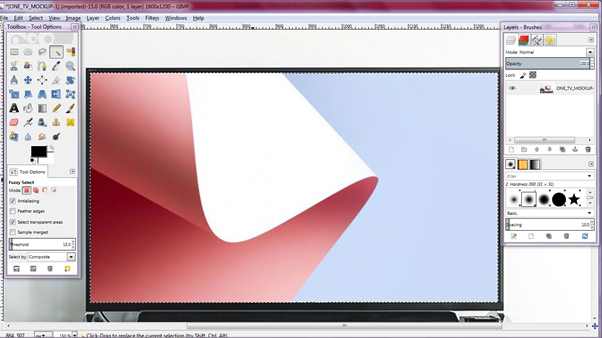
After the selected layer then select (Edit - Clear) to remove the selected layer.
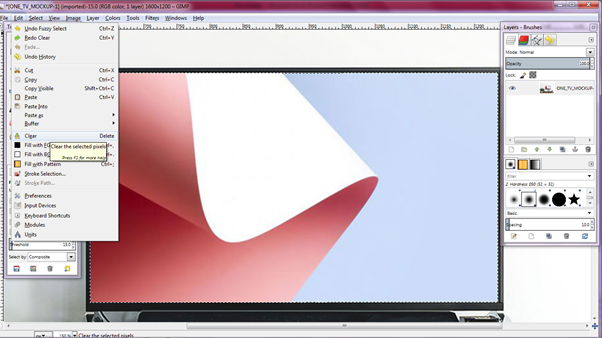
Open the image to be placed above the mockup layer by select (File – Open)
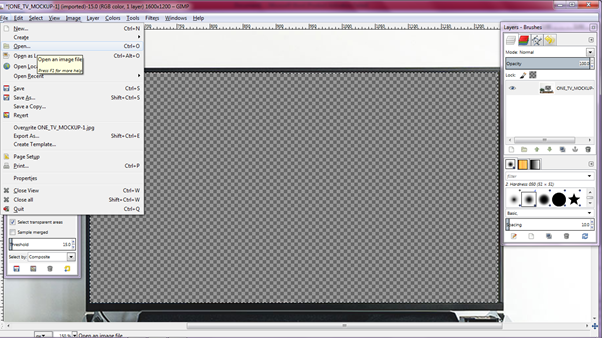
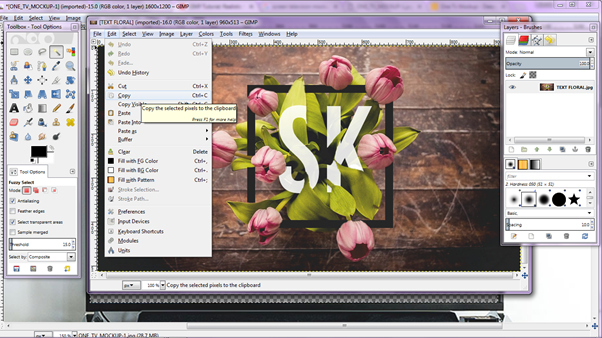
then the image will open, on select (Edit - Copy) to do an open image on the previous object.
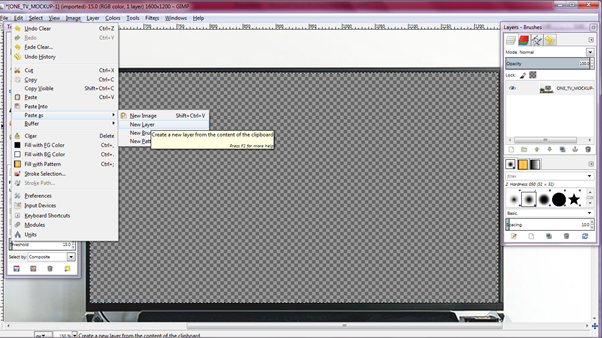
Click on select mockup layer (Edit - Paste As - New Layer) to create a new layer on Object.
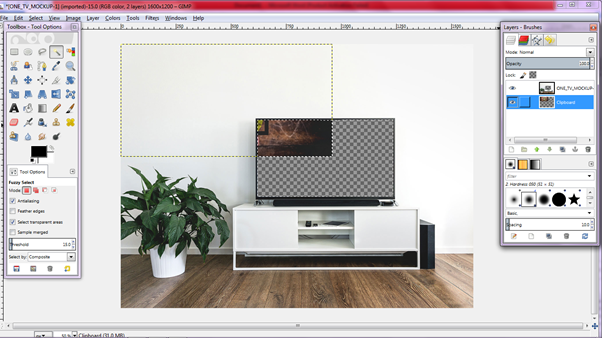
drag the image below the mockup layer and set the image display position to suit your likes.
Select (Select - None) to remove the selection on the layer.
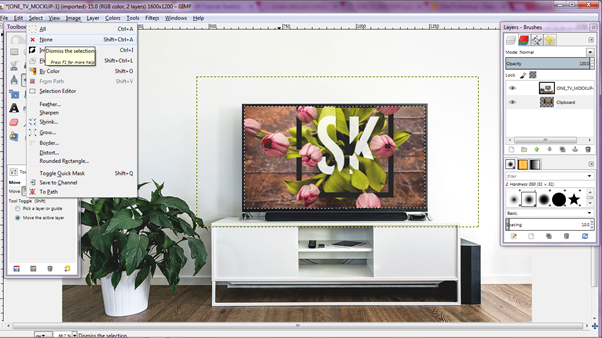
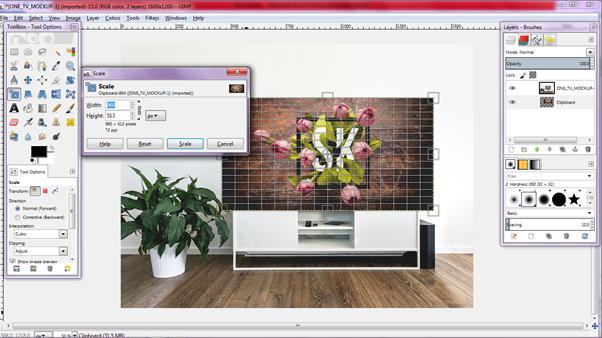
and press (Shift - T) to call the Scale Tool, and click on the image, then set the image size according to the mockup layer.
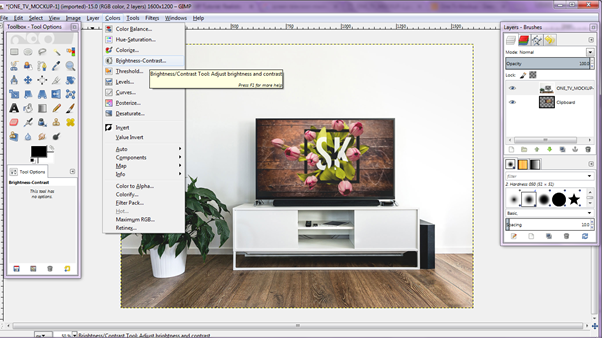
Give effect to mockup layer by select (Color - Brightness-Contrast) to make mockup layer more interesting.
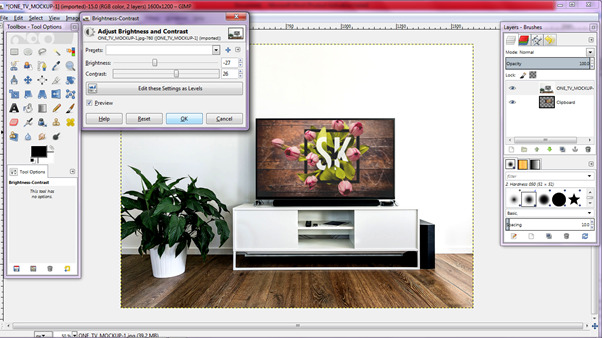
Set contrast brightness to your liking.
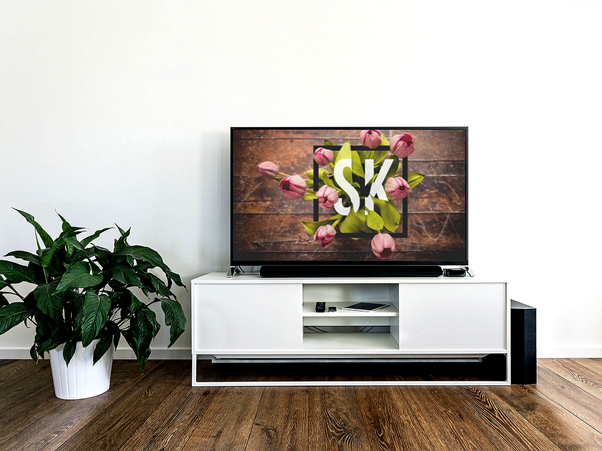
Here are last result :
 .
.
Donwload Project
Donwload Hasil
[Indonesia]
Hallo teman – teman ...!! hari ini aku mau buat tutorial Realistic Screen Mockup. Mockup adalah bentuk preview dari sebuah konsep desain yang akan memperlihatkan gambaran seperti nyata sebelum di terapkan. Untuk membuat mockup terlebih dahulu kamu donwload gambar yang di butuhkan.
Langkah pertama buka file gambar yang akan dijadikan mockup (Klik File – Open).

Selanjutnya klik kanan pada Layer-Brushes pilih (Add Alpa Channel).

Tekan “U” pada kayboard untuk memanggil Fuzzy Select Tool yang berfungsi memilih area pada basi warna terdekat.

Pilih objek pada layer yang akan di select dan untuk memanbah sileksi tekan “Shift” pada keyboard.

Setelah layer terseleksi maka pilih ( Edit – Clear ) untuk menghapus layer yang di seleksi.

Dan buka gambar yang akan di letakkan di atas layer mockup dengan pilih (File – Open ).

Kemudian gambar akan terbuka, pada pilih (Edit – Copy) untuk melakukan gambar terbuka pada objek sebelumnya.

Klik pada layer mockup pilih (Edit – Paste As – New Layer) untuk membuat layer baru pada Objek.

Tarik gambar tersebut di bawah layer mockup dan atur posisi layar gambar sesuaai dengan kamu suka.

Pilih ( Select – None ) untuk menghilangkan seleksi pada layer.

dan tekan (Shift – T) untuk memanggil Scale Tool, dan klik pada gambar, kemudian atur ukuran gambar sesuai dengan layer mockup.

Dan beri efek pada layer mockup dengan pilih ( Color – Brigthess-Contrass) untuk membuat layer mockup lebih menarik.

Atur contrass brigtness sesuai dengan keinginan kamu.

Dan inilah hasil akhir nya :
 .
.
Donwload Project
Donwload Hasil
Posted on Utopian.io - Rewarding Open Source Contributors
Thank you for the contribution. It has been approved.
You can contact us on Discord.
[utopian-moderator]
Your contribution cannot be approved yet because it is not as informative as other contributions. See the Utopian Rules. Please edit your contribution and add try to improve the length and detail of your contribution (or add more images/mockups/screenshots), to reapply for approval.
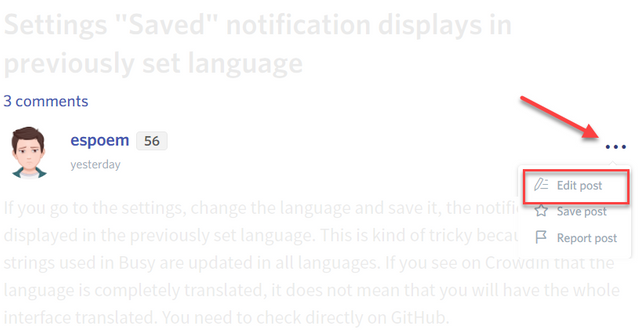
You may edit your post here, as shown below:
You can contact us on Discord.
[utopian-moderator]
Please check again
because, i have edited
thank you
Can you improve the resolution of imgages ?
please check my post
i have finished improve the resolution of image
thank you
Hey @pikakamal I am @utopian-io. I have just upvoted you!
Achievements
Suggestions
Get Noticed!
Community-Driven Witness!
I am the first and only Steem Community-Driven Witness. Participate on Discord. Lets GROW TOGETHER!
Up-vote this comment to grow my power and help Open Source contributions like this one. Want to chat? Join me on Discord https://discord.gg/Pc8HG9x