Build A Library Application With Graphql ExpressJs React-Apollo and MongoDB (Part 11)
Repository
React
https://github.com/facebook/react
Graphql
https://github.com/graphql/graphql-js
Apollo
https://github.com/apollographql/apollo-client
Express
https://github.com/expressjs/express
My Github Address
This Project Github Address
What Will I Learn?
- You will learn how to create a variables query with graphql.
- You will learn to access queries created with react.
- You will learn how to create a nested query with graphql.
- You will learn map fonksiyon in react.
Requirements
- text editor (I used visual studio code editor)
- Basic javascript information
- Basic react information
Difficulty
- Basic
Tutorial Contents
Hello to everyone,
In this tutorial, we will learn how to access the details of the selected books via the react with graphql query.We will access and use the query created with the BookDetails component.
We will access the IDs of the books in the BookList component and will access the details of the book based on that id.
I have divided the tutorial into the following sections so that we can grasp the issues better:
- Create Book Detail Query
- Creating State For Book Detail
- Show Book Details
- Design The Application
Let's start
Create Book Detail Query
In this section we will create the query required to access the details of the book and through this query we will find information about the author as well as the book's information.
We have already created the bookdetail component and will use the query we will create in this component.
Let's test it by creating a sample query in the GraphiQL field before creating the query. Thus, we avoid creating an incorrect query.
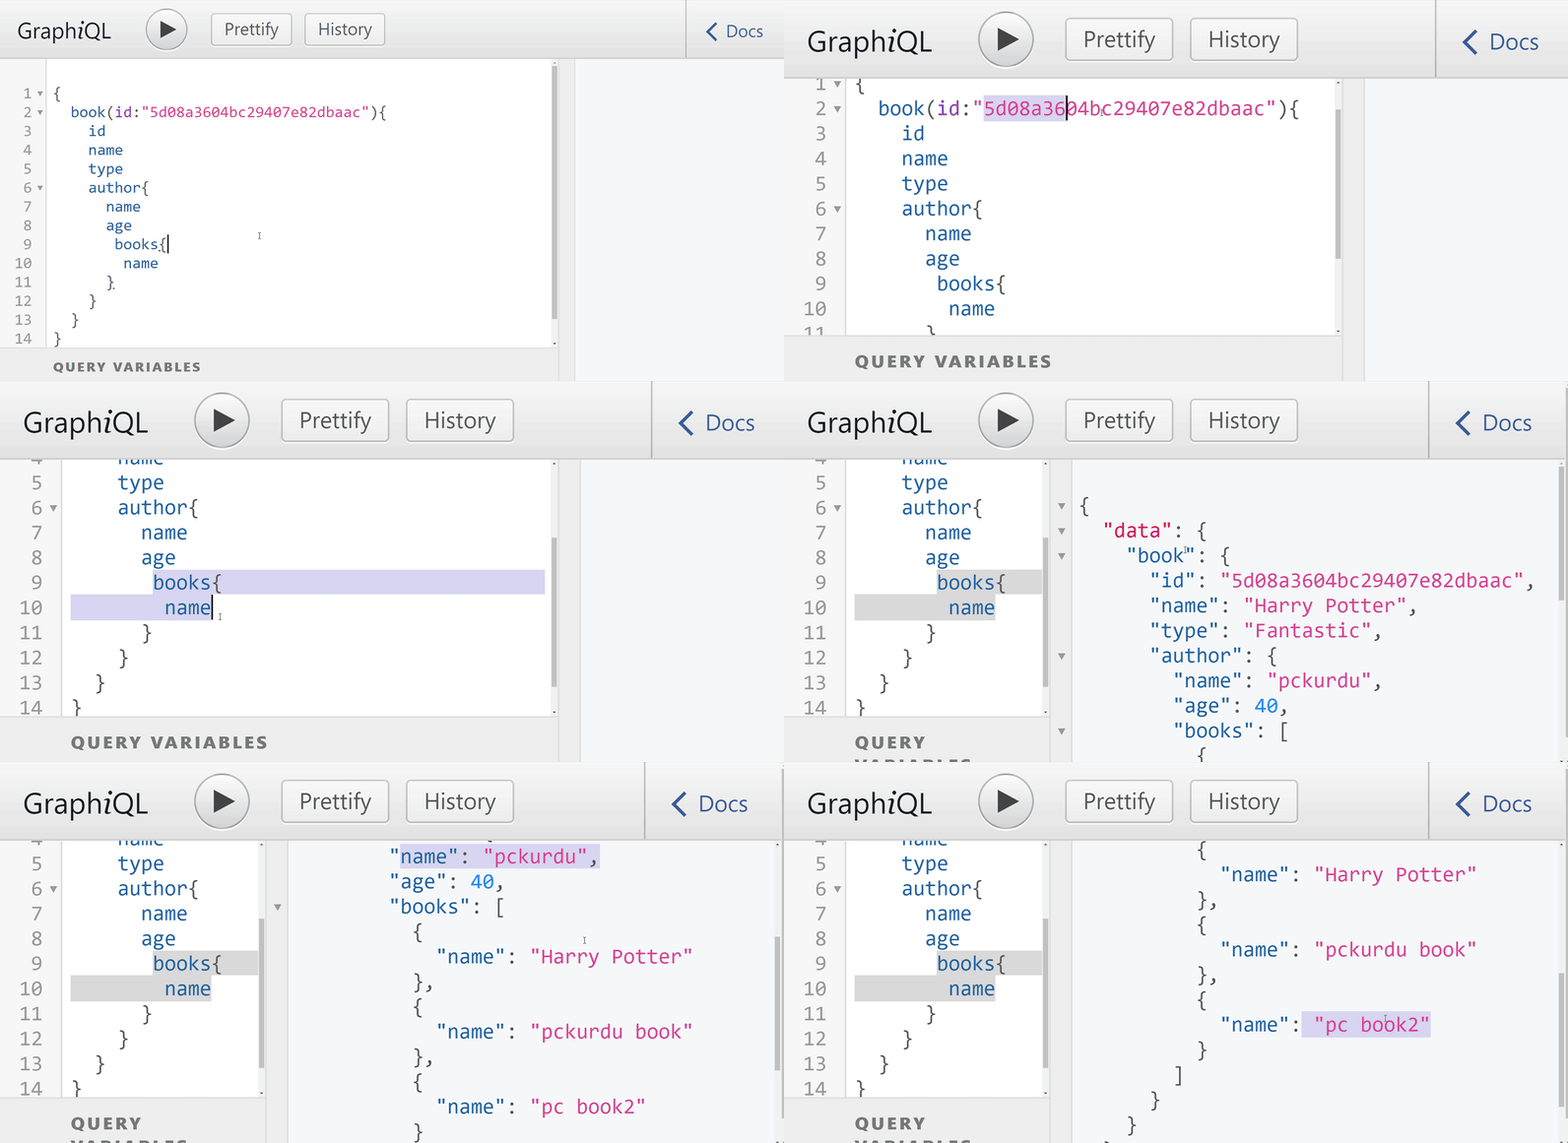
Since we want to see the details of a particular book, we can access it using the book's id and since mLab automatically generates the id of the data, we can access the data id on mLab.
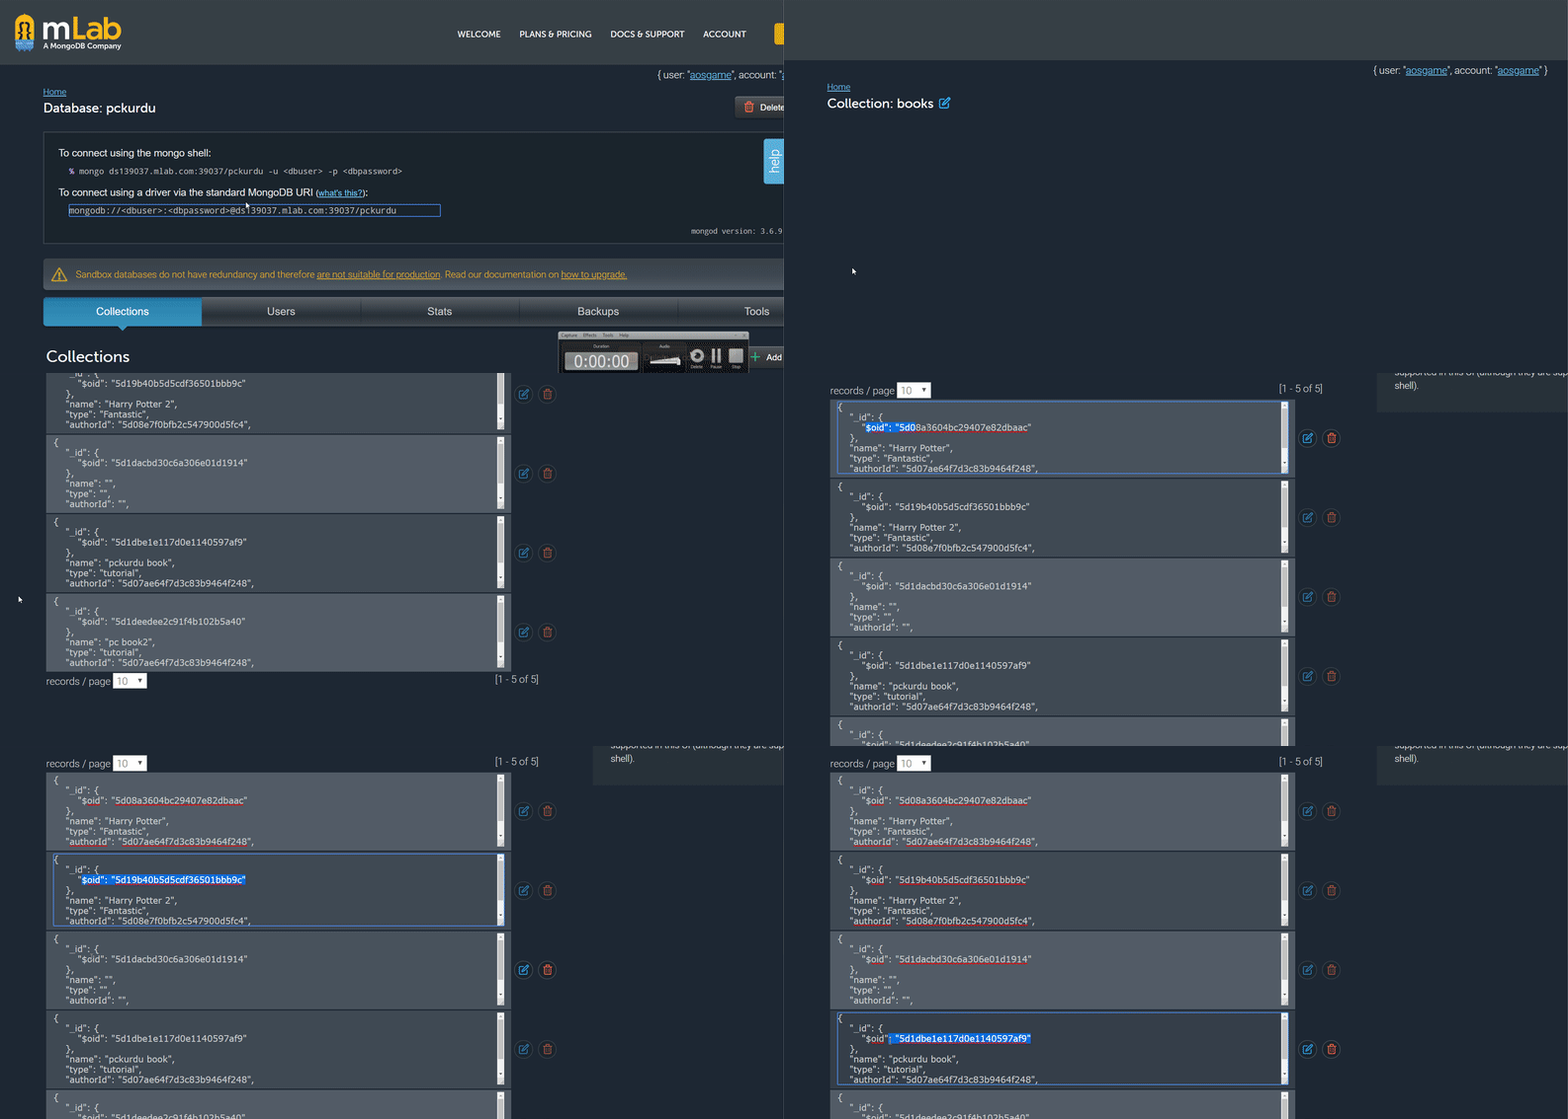
We need this id information when creating the query to access book information within the application but we don't know which book information the end user wants to see, so we keep the id as a variable. By clicking on the name of this book in the future we will bring the book information.
Let's create the query to use it in react.
In queries.js
//get book detail
const getBookQuery=gql`
    # set id as variable
    query($id:ID){
        #get book using variable
        book(id:$id){
            id
            name
            type
            # author information
            author{
                id
                name
                age
            }
        }
    }
`;
When we create such a query, we can access the information of the book very easily but not all of the author's books. Due to the feature of graphQL queries, we can produce nested queries very easily. All we need to do is to define the query that we will use inside before.
Since we have already defined the query of books, we can only list the books of that author when we write the query for these books for the author. The final version of the getBookQuery query is as follows.
//get book detail
const getBookQuery=gql`
    # set id as variable
    query($id:ID){
        #get book using variable
        book(id:$id){
            id
            name
            type
            # author information
            author{
                id
                name
                age
                #for author's books
                books{
                    id
                    name
                }
            }
        }
    }
`;
We will use this query in the BookDetail component so we should export this query.
//export query name
export {getAuthorsQuery,getBooksQuery,addBookMutation,getBookQuery};
In order to use this query in the BookDetail component, we must use the graphql module. To access this query, let's import this query and export it using graphql module.
ın BookDetail.js
//for use getBookQuery
import {getBookQuery} from '../queries/queries';
…
//export this component and getBookQuery
export default graphql(getBookQuery) (BookDetails)
So we can use this query in the BookDetail component.
Creating State For Book Detail
In this section, we will create state to access the id information of the books listed in the react application.
We will update this state when we click on any book from the list and send the updated state information to the BookDetail component.
First, let's create a state to access the book id information in the BookList component.
BookList.js
//for create state
constructor(props){
    super(props);
    this.state={
        //selected book id
        Selected:null
    }
}
We need to update this state using setState when clicking the li tags hosting the books. We can make li tags event with onClick.
<li key={book.id} onClick={(e)=>{this.setState({selected:book.id})}}>{book.name}</li>
So, when one of the books is clicked, the selected object will be populated with the id of that book.
We will send this selected object to the BookDetail component.
<div>
    <ul id="book-list">
   {/* use getBooks function */}
       {this.getBooks()}
   </ul>
   {/* use BookDetails component with selected object */}
       <BookDetails bookId={this.state.selected} />
</div>
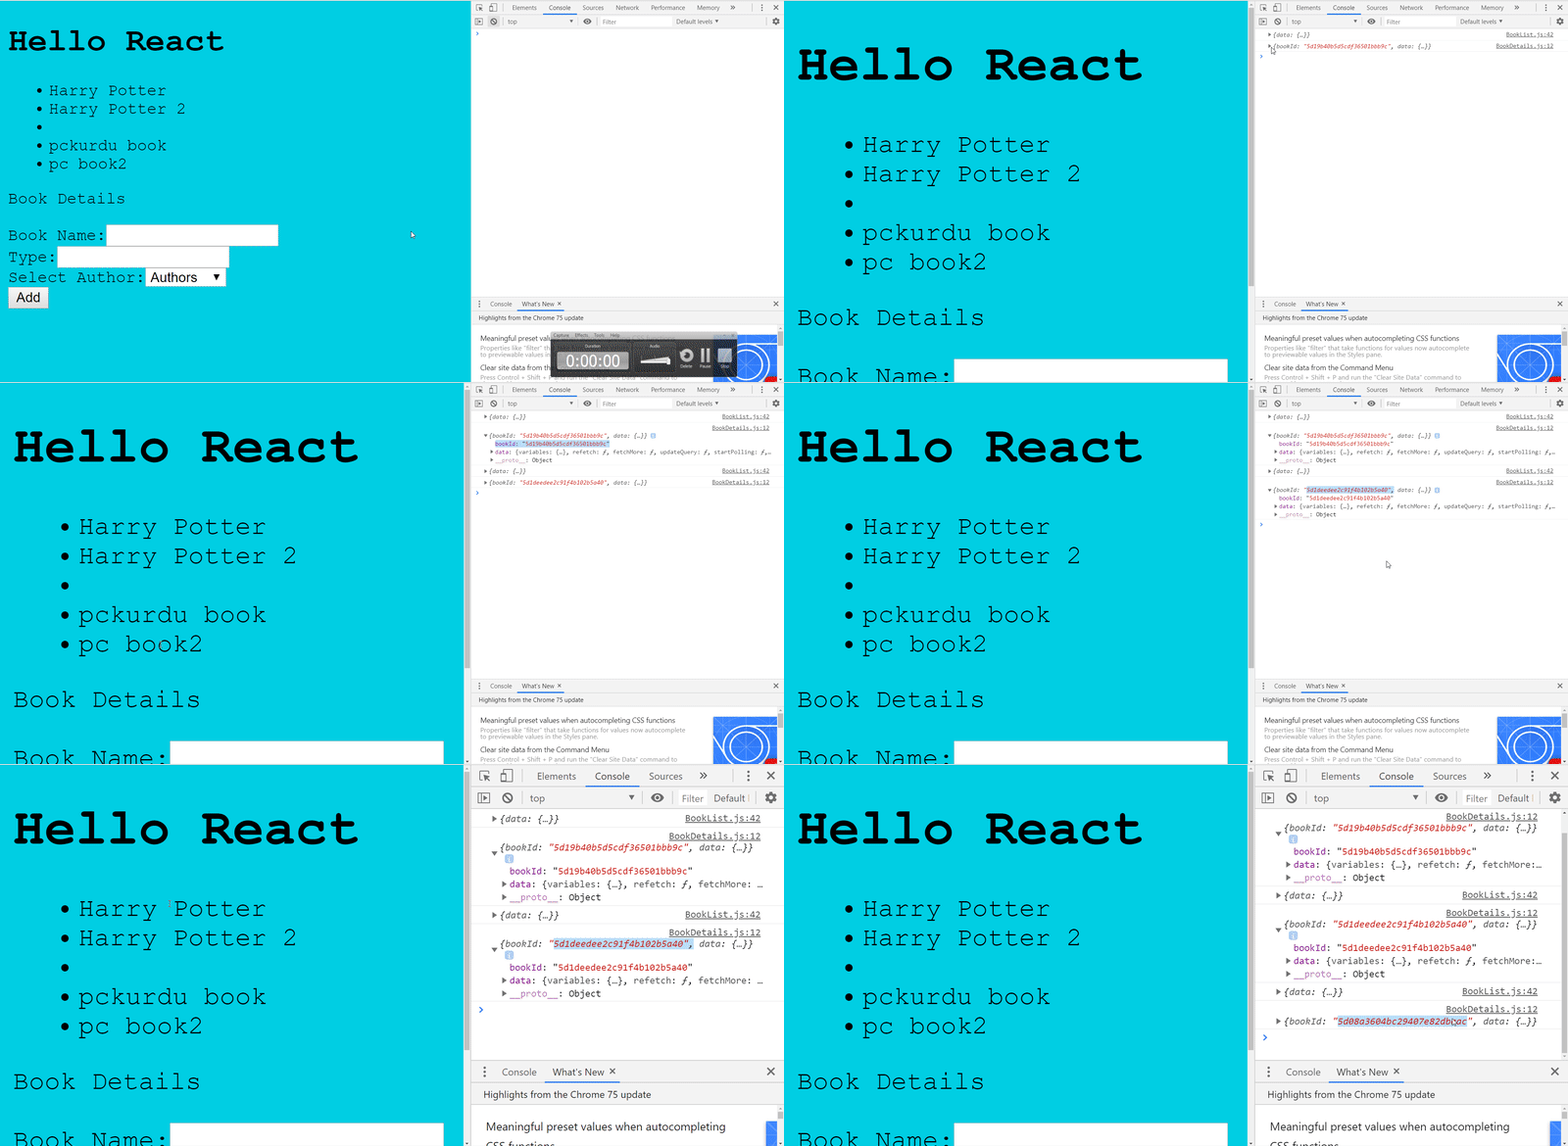
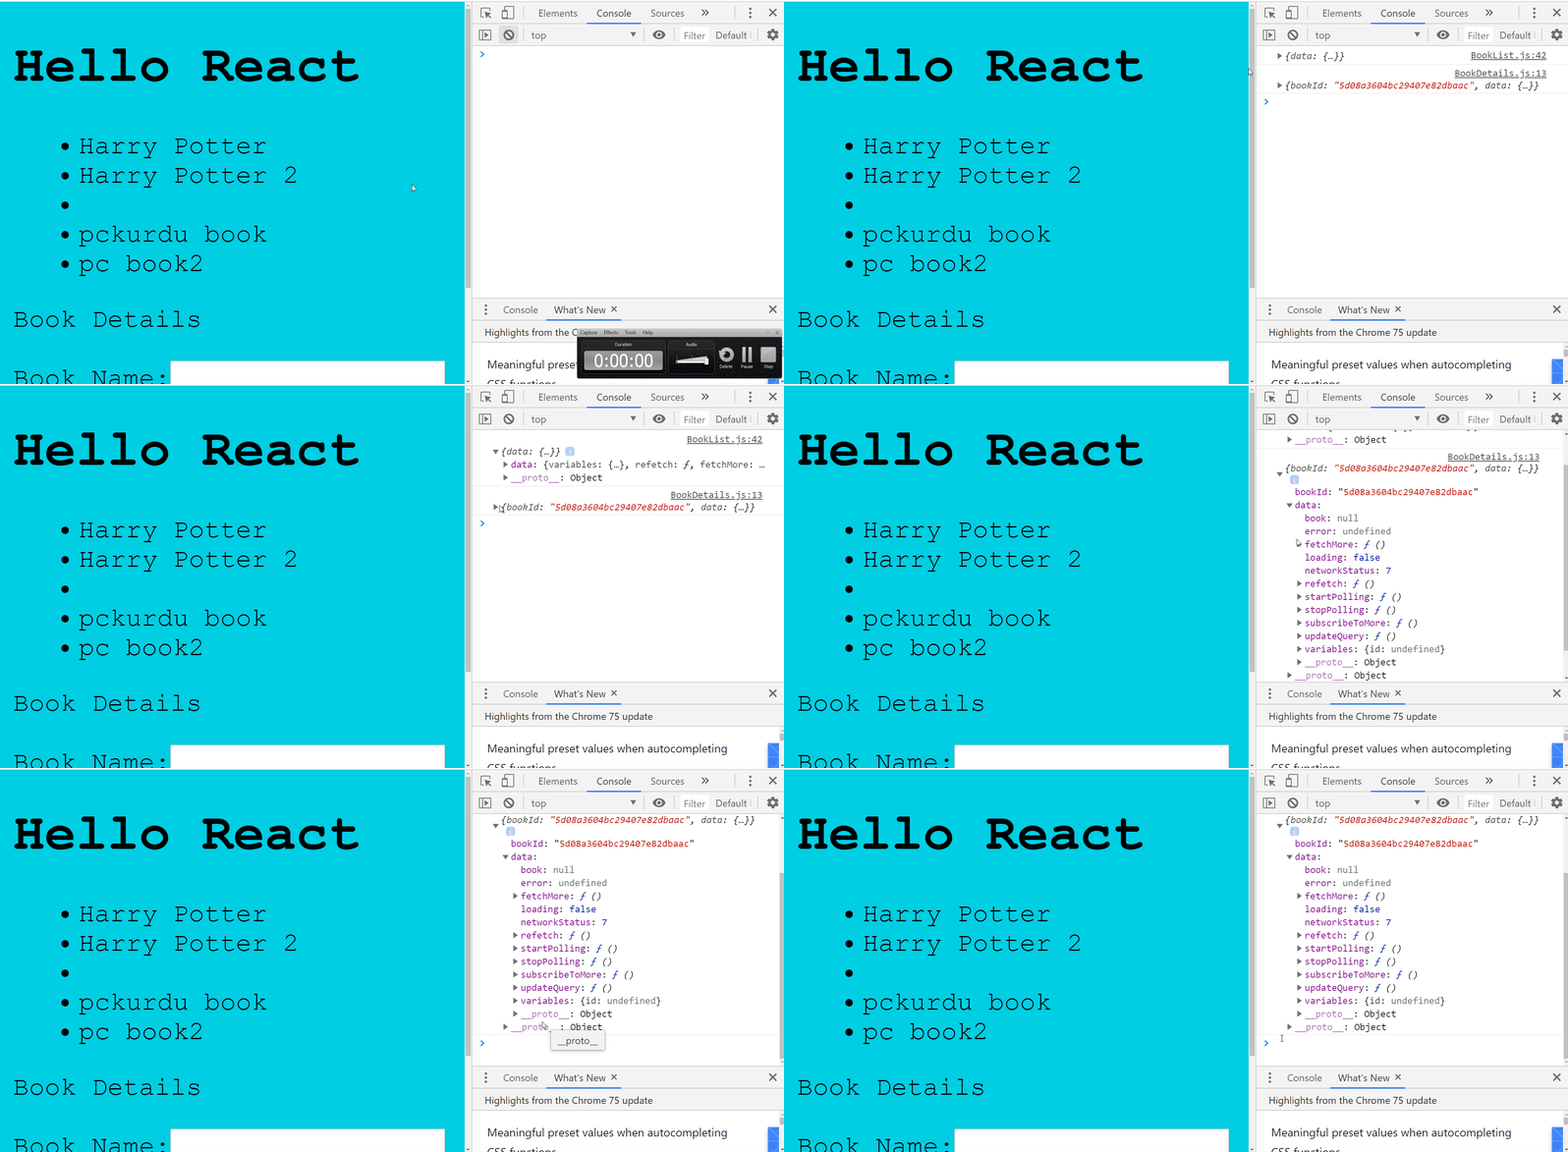
Thus, the id of the selected book is sent to the props object in the BookDetail component. Let's check that we received the data correctly.
In BookDetail.js
render(){
  //show props
  console.log(this.props);

  return(
    <div id="book-details">
            <p>Book Details</p>
    </div>
   );
}
Show Book Details
Since we can access the id property of the selected book from the BookDetail component, we can run the getBookQuery query. In this section, we will show the properties of the book in the BookDetail component.
First, we need to run graphql queries with variables. To do this, we must enter the bookId variable as an option at the time of export.
In BookDetail.js
//export this component and getBookQuery
export default graphql(getBookQuery,{
  options:(props)=>{
    return{
       //run getBookQuery with bookId
       variables:{
           id:props.bookId
       }
    }
  }
}) (BookDetails)
The data variable contained in the props object will now contain the information of the selected book.
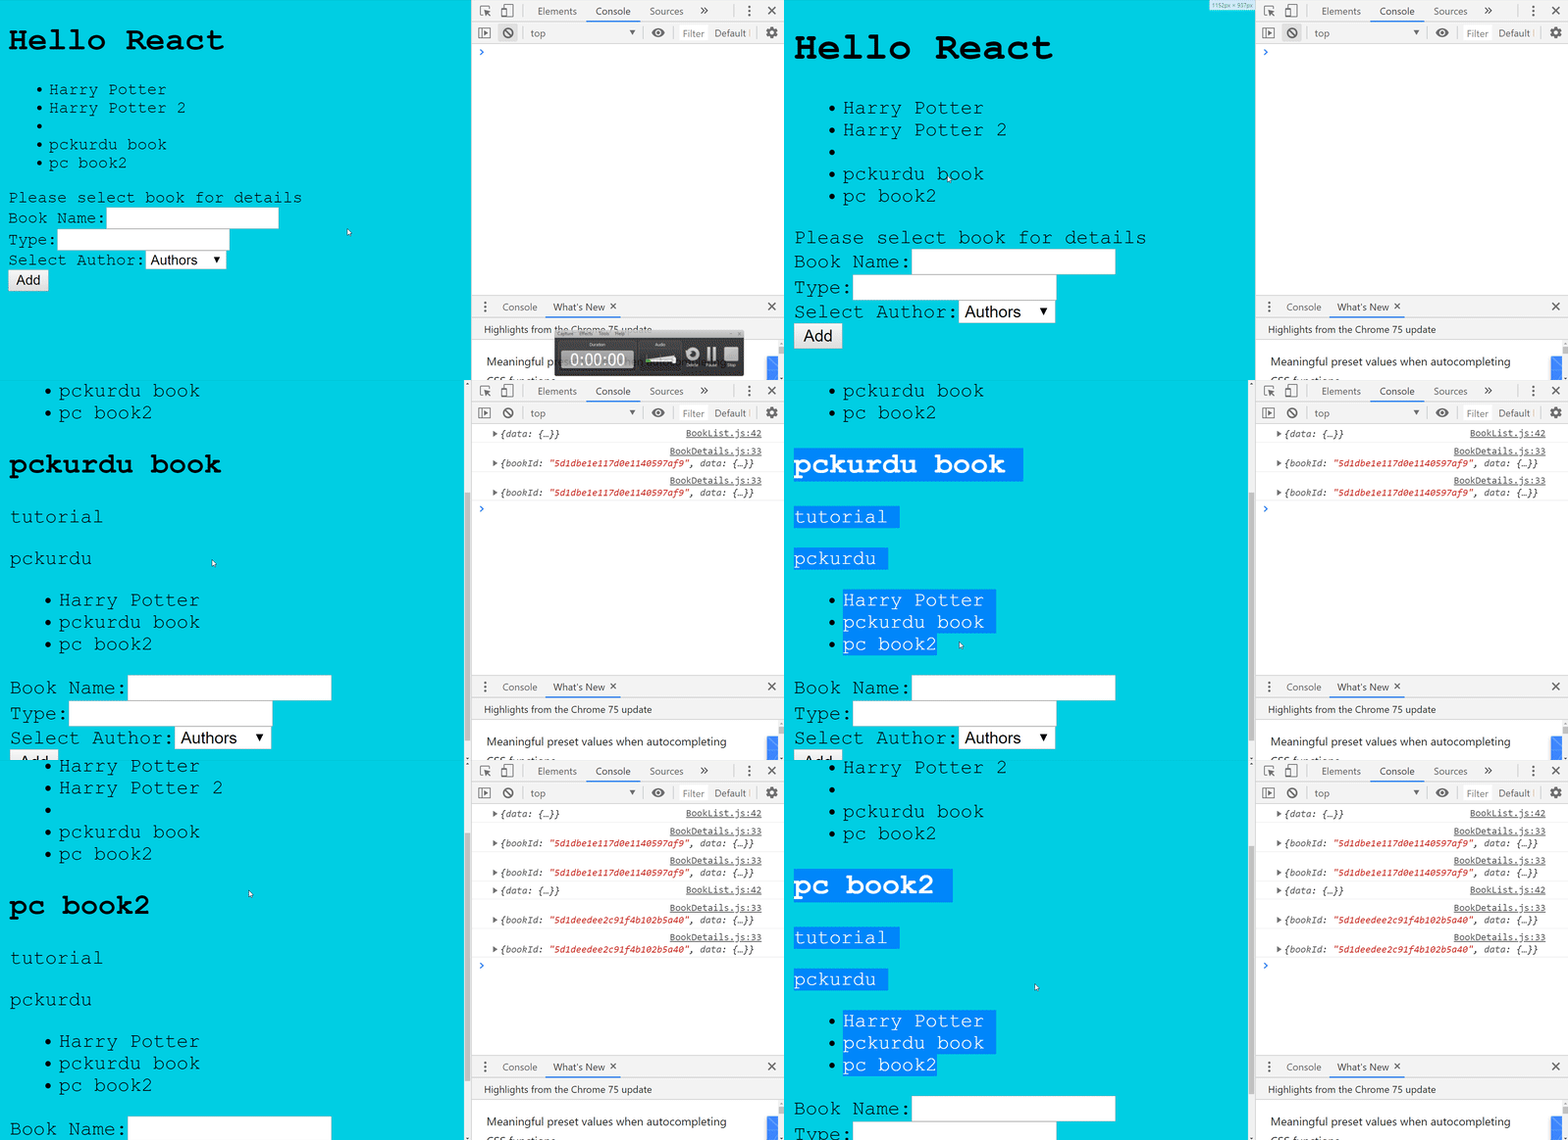
Then let's create the necessary elements to show the properties of the book on the screen with a function sequence.
showBookDetail(){
 //access to the book's information
 const {book}=this.props.data;
 //if there is a book
 if(book){
     return(
       //book information
       <div>
          <h2>{book.name}</h2>
          <p>{book.type}</p>
          <p>{book.author.name}</p>
              {/* comes author's other books  */}
       </div>
      )
  }
    else{
      return(<div>Please select book for details</div>)
   }
}
We will use the map function to list the author's other books. We can synchronize the key attribute of the map function to the id attribute of the book because the id of each book is different.
{/* comes author's other books  */}
<ul className="other-books">
  {book.author.books.map(b=>{
      return <li key={b.id}>{b.name}</li>
  })}
</ul>
Let's use this function that we created in return of component.
return(
   <div id="book-details">
        {this.showBookDetail()}
   </div>
);
Design The Application
After completing the application we can design. Since the design is not the subject of this tutorial, we will not go into detail.
Fill the index.css file with the following codes.
body{
    background: #00cec9;
    font-family: 'Courier New', Courier, monospace;
  }
  #main h1{
    color:#444;
    text-align: center;
  }
  #main{
    padding: 0px;
    box-sizing: border-box;
    width: 60%;
    height: 100%;
  }
  #book-list{
    padding: 0;
  }
  #book-list li{
    display: inline-block;
    margin: 12px;
    padding: 10px;
    border-radius: 10px;
    border:1px solid #880e4f;
    box-shadow: 3px 3px 5px rgba(0,0,0,0.3);
    cursor:pointer;
    color:#880e4f;
  }

  form{
    background: #747d8c;
    padding: 20px;
    position: fixed;
    left: 0;
    bottom: 0;
    width: 400px;
  }
  form .field{
    display: grid;
    grid-template-columns: 1fr 1fr;
    grid-gap: 10px;
  }
  form label{
    text-align: right;
    padding: 6px;
  }
  form input,form select{
    margin:4px 0;
    padding: 6px;
    box-sizing: border-box;

  }
  form button{
    color:#fff;
    font-size:1.5em;
    background: #6d214f;
    border:0;
    padding: 0 10px;
    border-radius: 10px;
    cursor:pointer;
    position: absolute;
    bottom: 10px;
    left:10px;
  }
  #book-details{
    position:fixed;
    top:0;
    right: 0;
    width: 40%;
    height: 100%;
    background: #82589f;
    padding: 30px;
    overflow: auto;
    box-shadow: -2px -3px 5px rgba(0,0, 0, 0.3);
    box-sizing: border-box;
    color:#fff;
  }
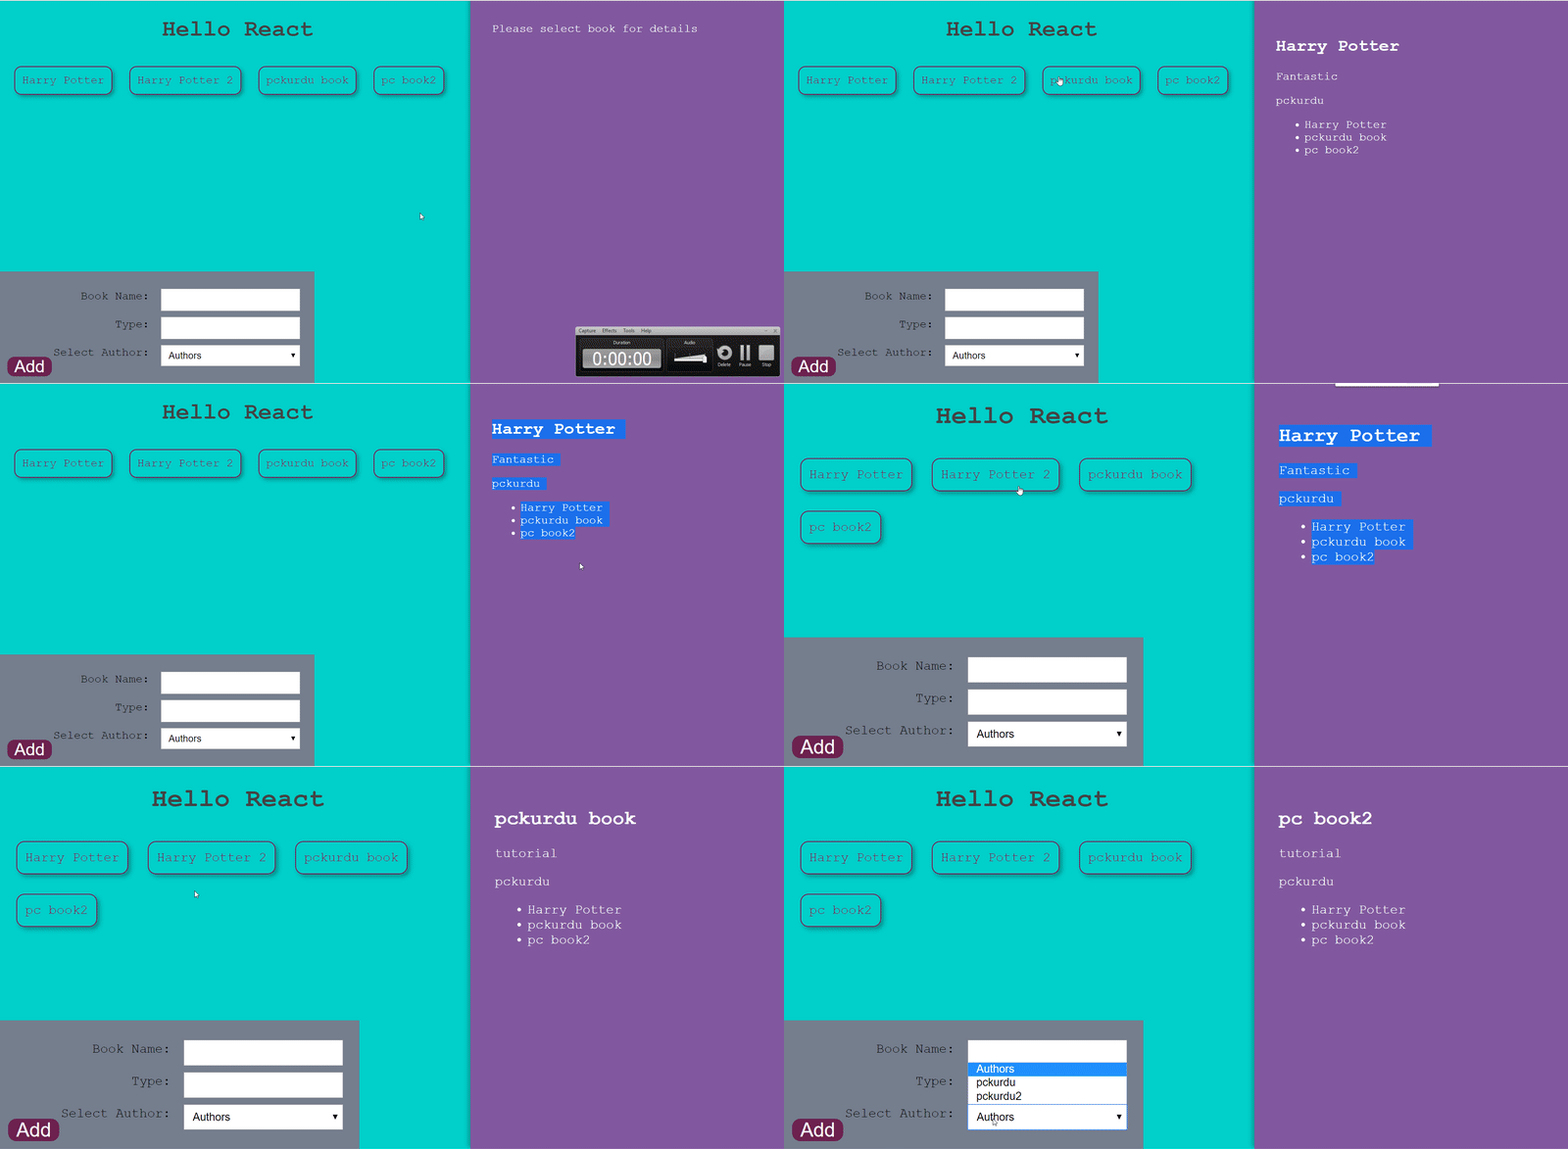
So we can create an application like the following gif.
Curriculum
Part 1 - Part 2- Part 3 - Part 4 - Part 5 - Part 6 - Part 7 - Part 8 - Part 9 - Part 10
Thank you for your contribution.
Tutorial does provide some added value, although the concepts each will probably be already well illustrated elsewhere. Still i like the effort put in here.
Your contribution has been evaluated according to Utopian policies and guidelines, as well as a predefined set of questions pertaining to the category.
To view those questions and the relevant answers related to your post, click here.
Need help? Chat with us on Discord.
[utopian-moderator]
Thank you for your review, @mcfarhat! Keep up the good work!
Hi @pckurdu!
Your post was upvoted by @steem-ua, new Steem dApp, using UserAuthority for algorithmic post curation!
Your post is eligible for our upvote, thanks to our collaboration with @utopian-io!
Feel free to join our @steem-ua Discord server
Hey, @pckurdu!
Thanks for contributing on Utopian.
We’re already looking forward to your next contribution!
Get higher incentives and support Utopian.io!
Simply set @utopian.pay as a 5% (or higher) payout beneficiary on your contribution post (via SteemPlus or Steeditor).
Want to chat? Join us on Discord https://discord.gg/h52nFrV.
Vote for Utopian Witness!