Build A Library Application With Graphql ExpressJs React-Apollo and MongoDB (Part 10)
Repository
React
https://github.com/facebook/react
Graphql
https://github.com/graphql/graphql-js
Apollo
https://github.com/apollographql/apollo-client
Express
https://github.com/expressjs/express
My Github Address
This Project Github Address
What Will I Learn?
- You will learn how to add data to mLab in react applications using mutation.
- You will learn how to create and use a parameterized mutation.
- You will learn how to force the end user not to pass parameters blank.
- You will learn how to use variables in mutation.
- You will learn the fetch event and its usage with graphql.
- You will learn create component in react.
Requirements
- text editor (I used visual studio code editor)
- Basic javascript information
- Basic react information
Difficulty
- Basic
Tutorial Contents
Hello to everyone,
In this tutorial, we will perform parameterized data insertion into mLab using mutation in react.
In the previous tutorial we created the mutation required to add data, but when the end user tried to add the book data without entering the parameters, he could add the data without any warning.This will not run the application properly and this will cause us problems.
We will use the parameter method to solve this problem and force the end user to don't keep each data full.
Then we will focus on another problem.When the book is added, we will eliminate the need to refresh the page to see the newly added book.We will re-fetch with graphql.
Finally, when the books in the book list are clicked in the application, we will create a component to show the result of the book detail query.
The headings of this tutorial are as follows:
- mLab Operations With React
- Create Re-fetching
- Create Book Detail Component
Let's start.
1- mLab Operations With React
In this section, we will use the react application to add book data to mLab.
We had to create mutation to add data with graphql and we created a mutation in the queries file with react. All we need to do is call this mutation in the AddBook component, and so the data will be added with the AddBook component props.
Then we will call the addBookMutation constant in the sendForm () function in the AddBook component.
In AddBook.js
//to trigger on submit event
sendForm(e){
     ...
    //addBookMutation in component props.
    this.props.addBookMutation();
}
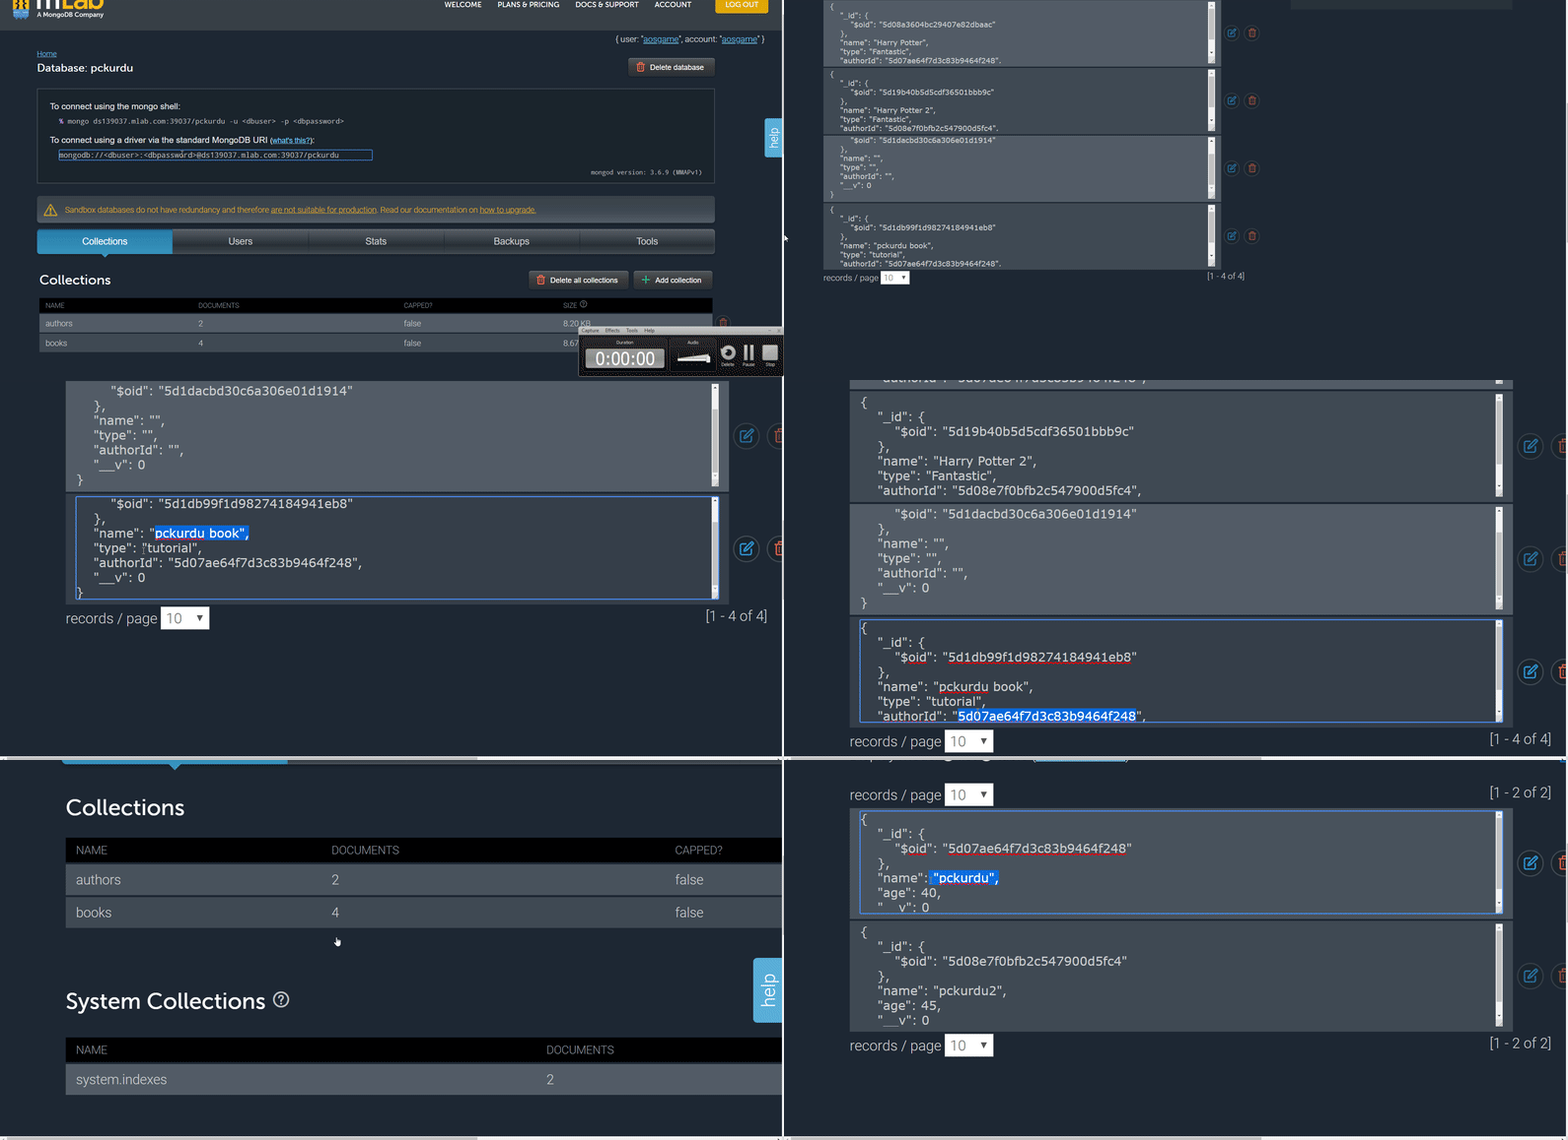
Let's we will add books through the application.
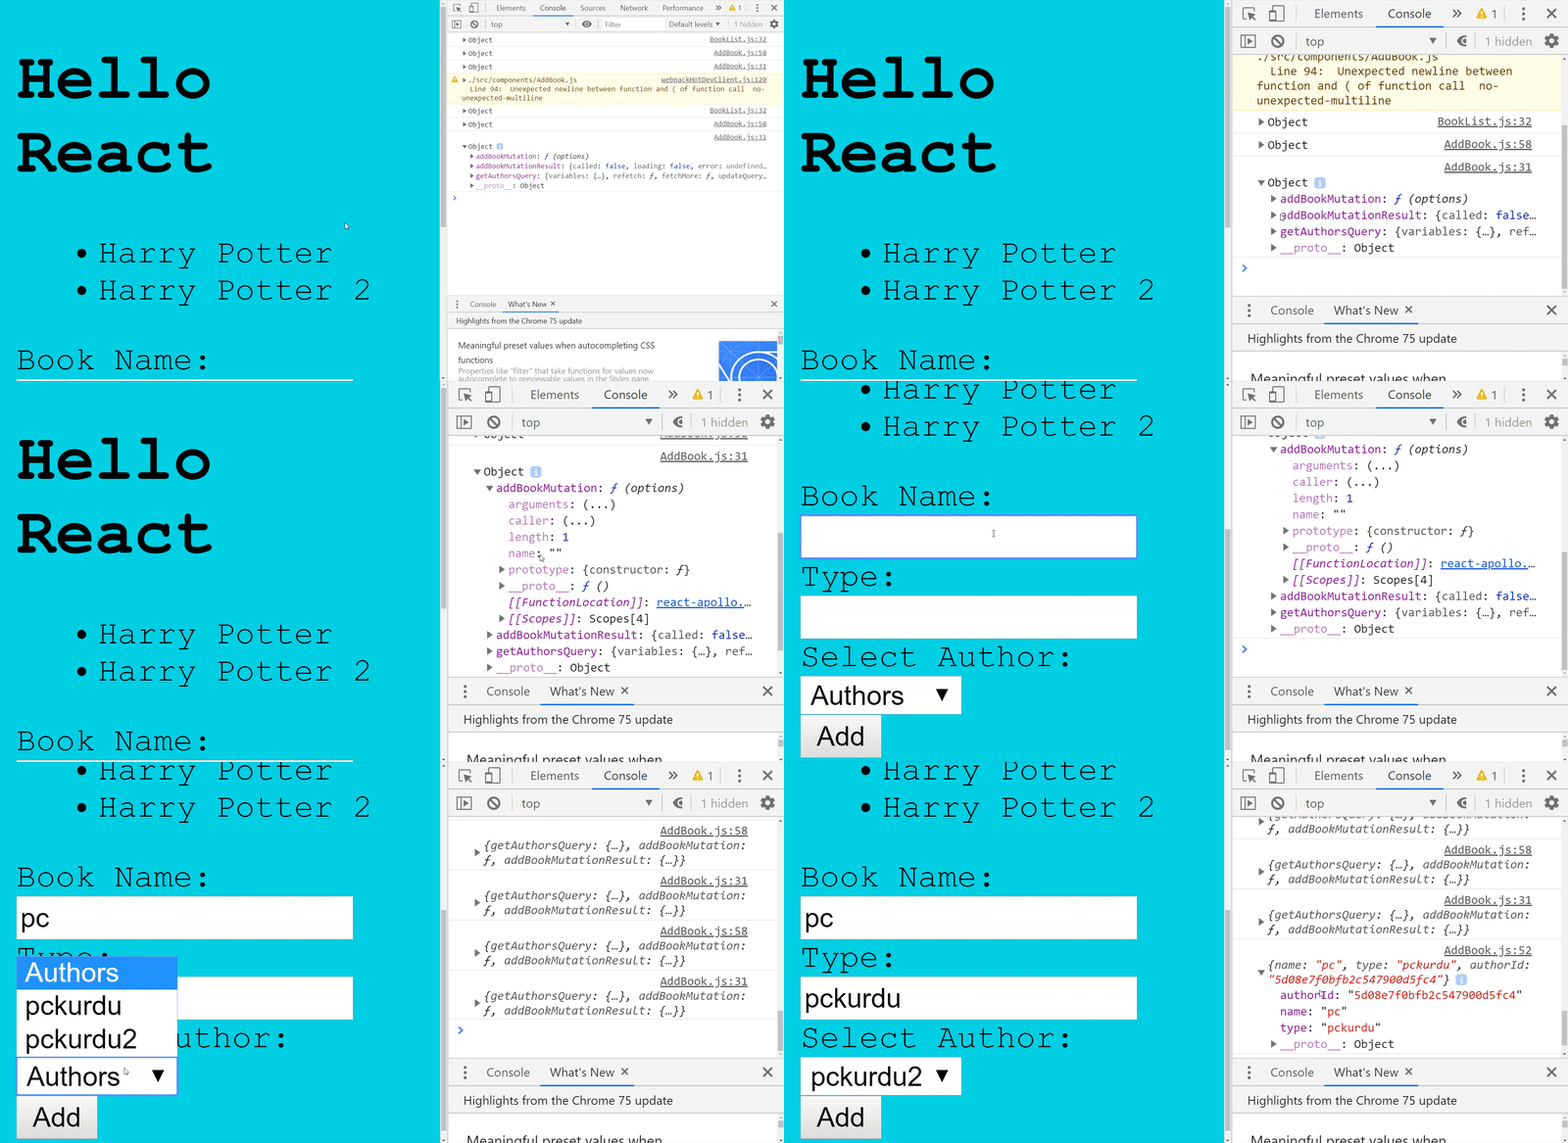
Let's we will examine the mLab database.
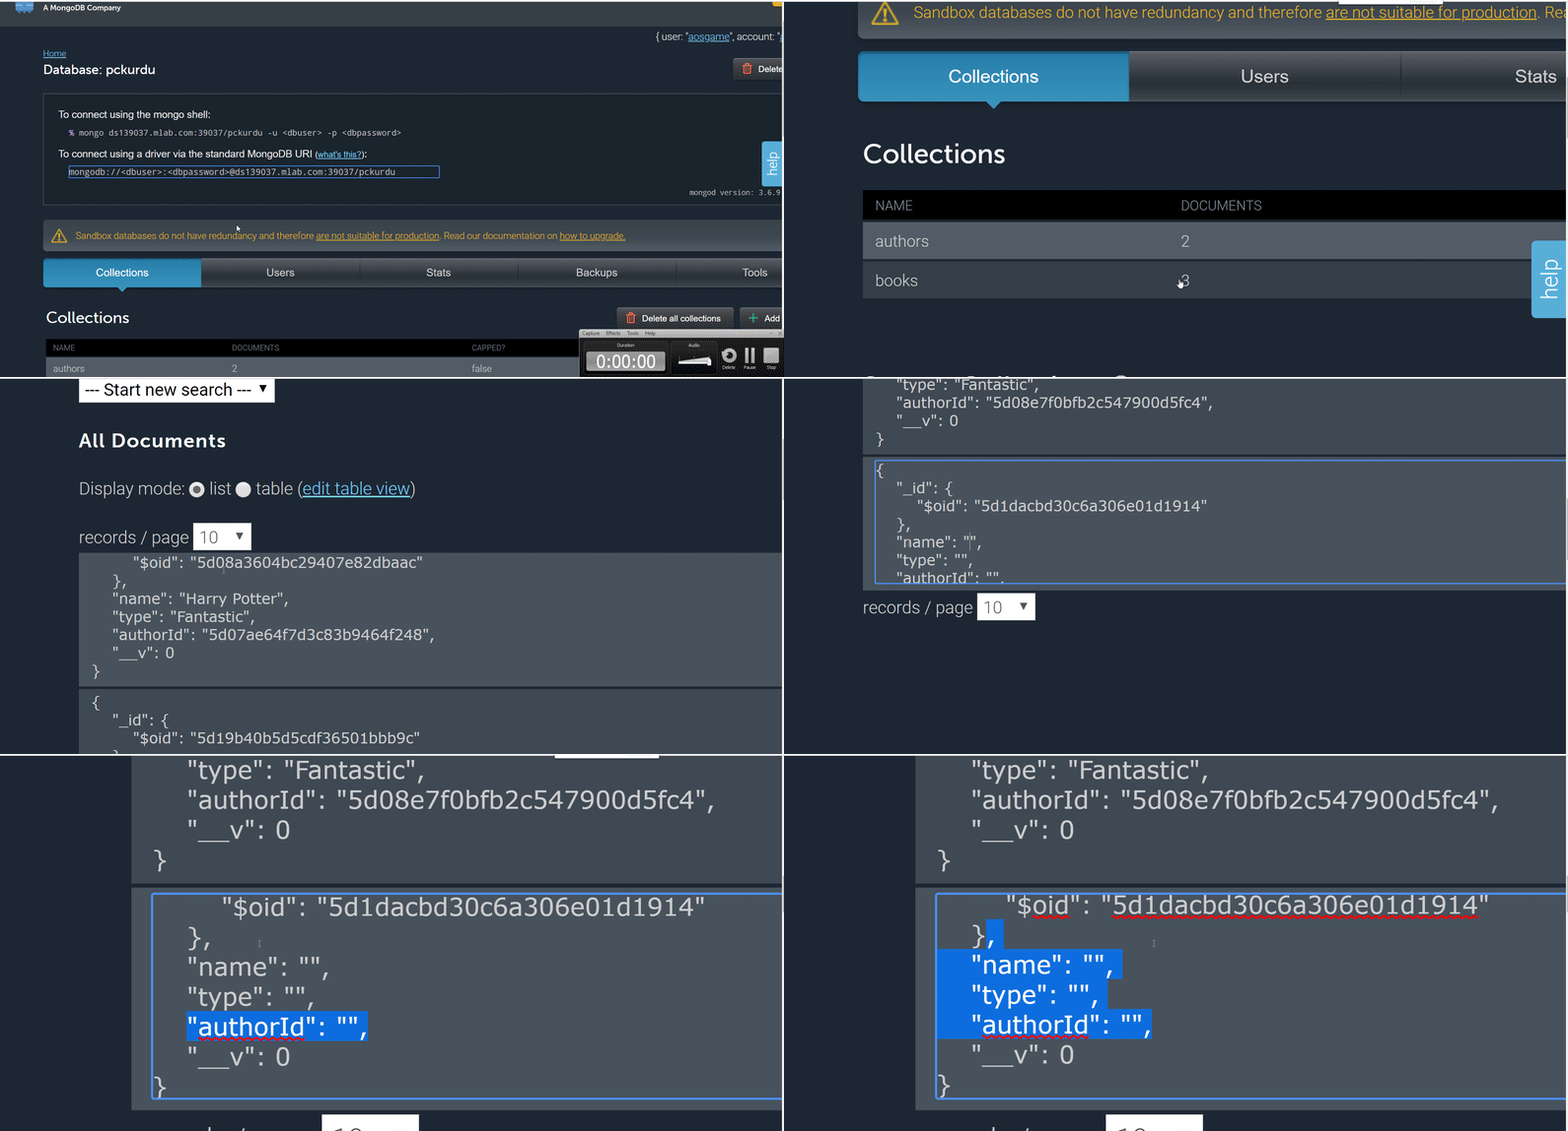
When we do this, we see that the data is added blank. We cannot add data by simply calling mutation in the props object of the component. We must also insert the data to be added during mutation invocation into the mutation.
In order to use variable parameters during data insertion with mutation, we must use the parameterized structure when creating mutations. We can change the data in the mutation formed by the parameterized structure within the component.
Let's we will edit the mutation we created to add books.
In queries.js
//creating mutation to add books
const addBookMutation=gql`

    # define mutation with parameters
    mutation($name:String!,$type:String!,$authorId:ID!){
    # use parameters
    addBook(
        name:$name,
        type:$type,
        authorId:$authorId)
        {
            id
            name
        }
    }

`;
We have now defined mutation with parameters. We have to give the name and type data of the book as a string. We have to enter the authorId data in ID type. We force the end user to fill in all the parameters ! sign is performing this coercion.
After performing this operation, we must give the parameters of this mutation where we use it. Let's we will edit the call to addBookMutation in the sendForm () function.
In AddBook.js
this.props.addBookMutation({
//use variables
   variables:{
      name:this.state.name,
      type:this.state.type,
      authorId:this.state.authorId
   }
});
We have sent the data stored in state to the mutation as variables using parameters so we sent the values of the form elements to the mLab database. While performing this process, we also performed react state and graphql mutation operations.
We can now add the book's data with the react app.
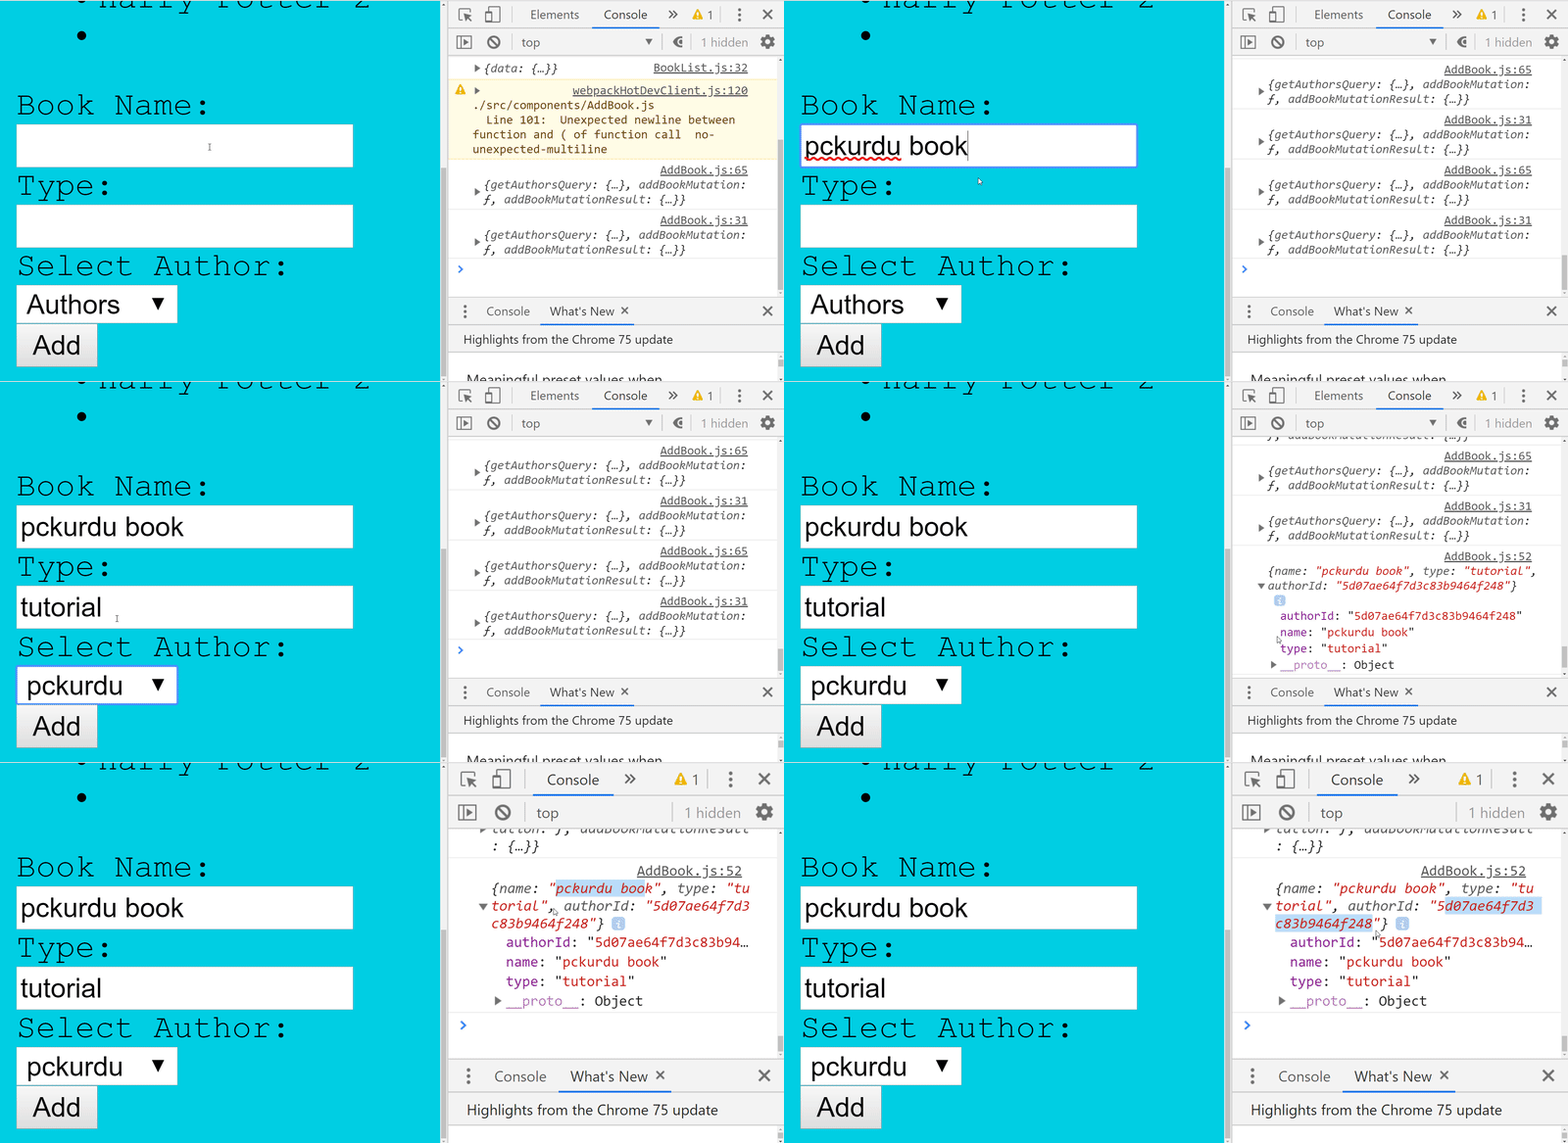
Thus, we added the book that we entered information in the react application to the mLab database.
2-Create Re-fetching
In this section we will automatically update the component information without having to refresh the page.
We kept the list of books on the top of our react application. In the previous section, we had added books. When we click the Add button to add books, the book is added to mLab, but the application needs to refresh the page to be aware of this addition.
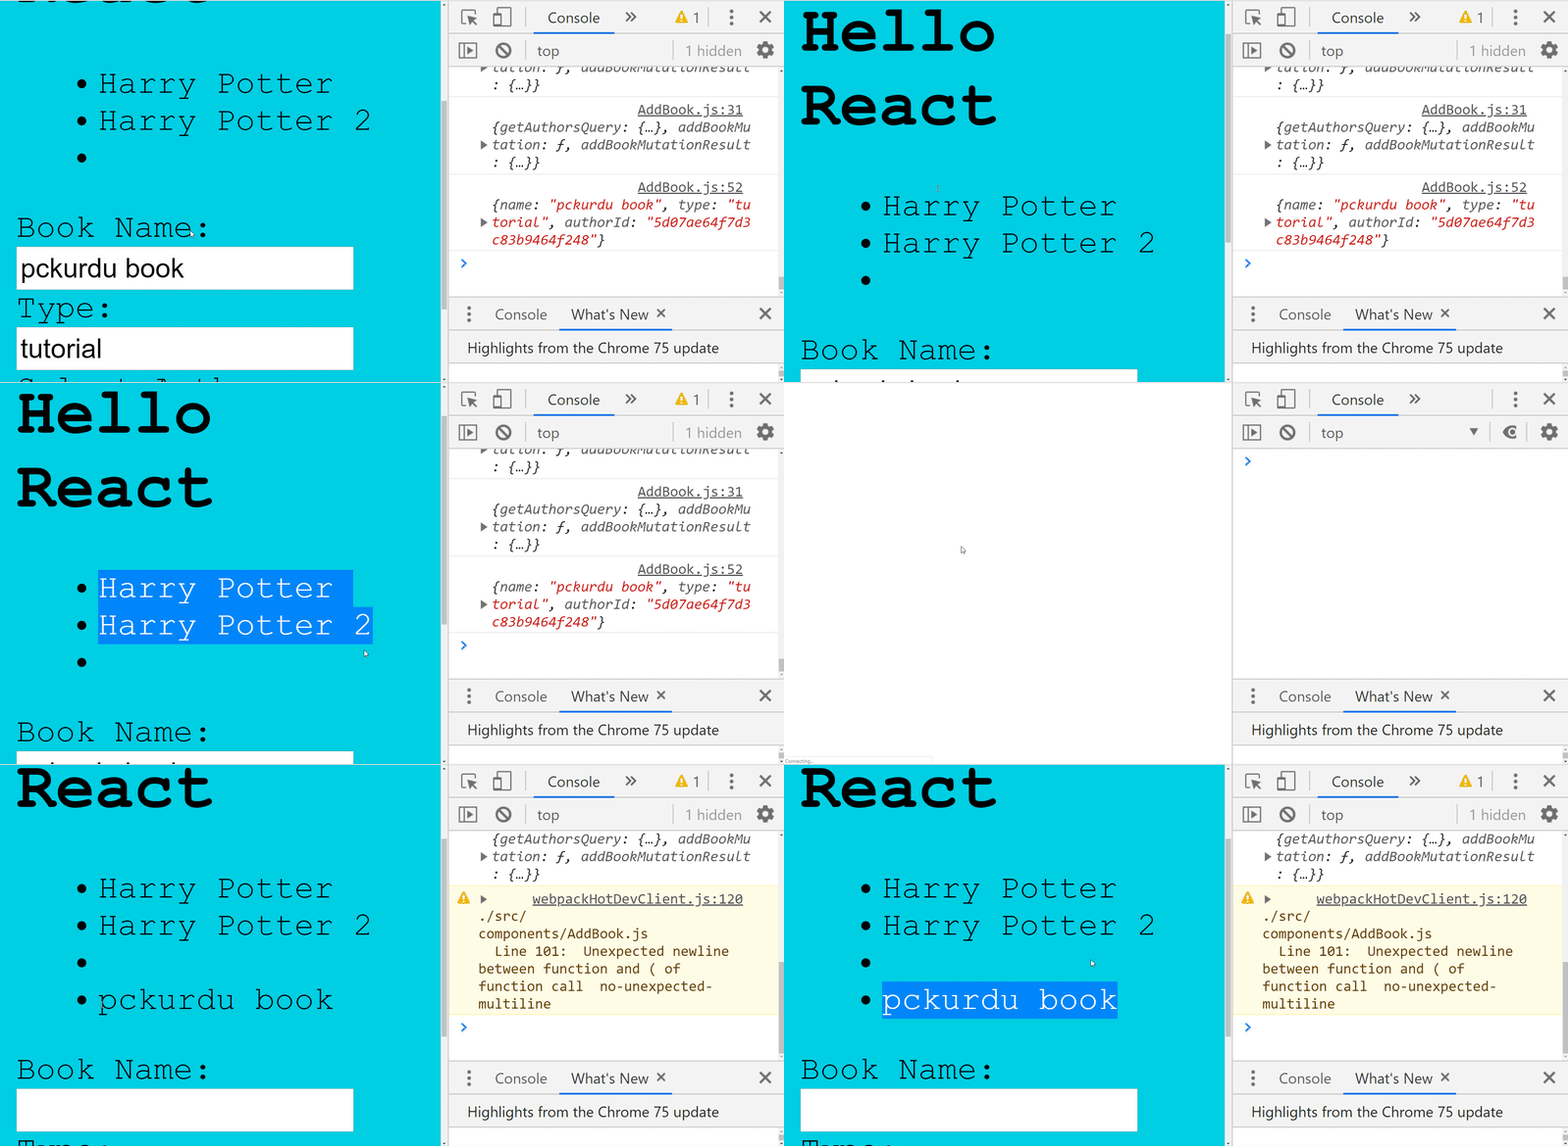
After you run addBookMutation to set the re-fetch event, the query should be triggered with the refetchQueries property. We need to run getBooksQuery to list all the books in mLab.
In AddBook.js
//addBookMutation in component props.
this.props.addBookMutation({
  //use variables
   variables:{
       name:this.state.name,
       type:this.state.type,
       authorId:this.state.authorId
  },
  refetchQueries:[{query:getBooksQuery}]//for fetching
});
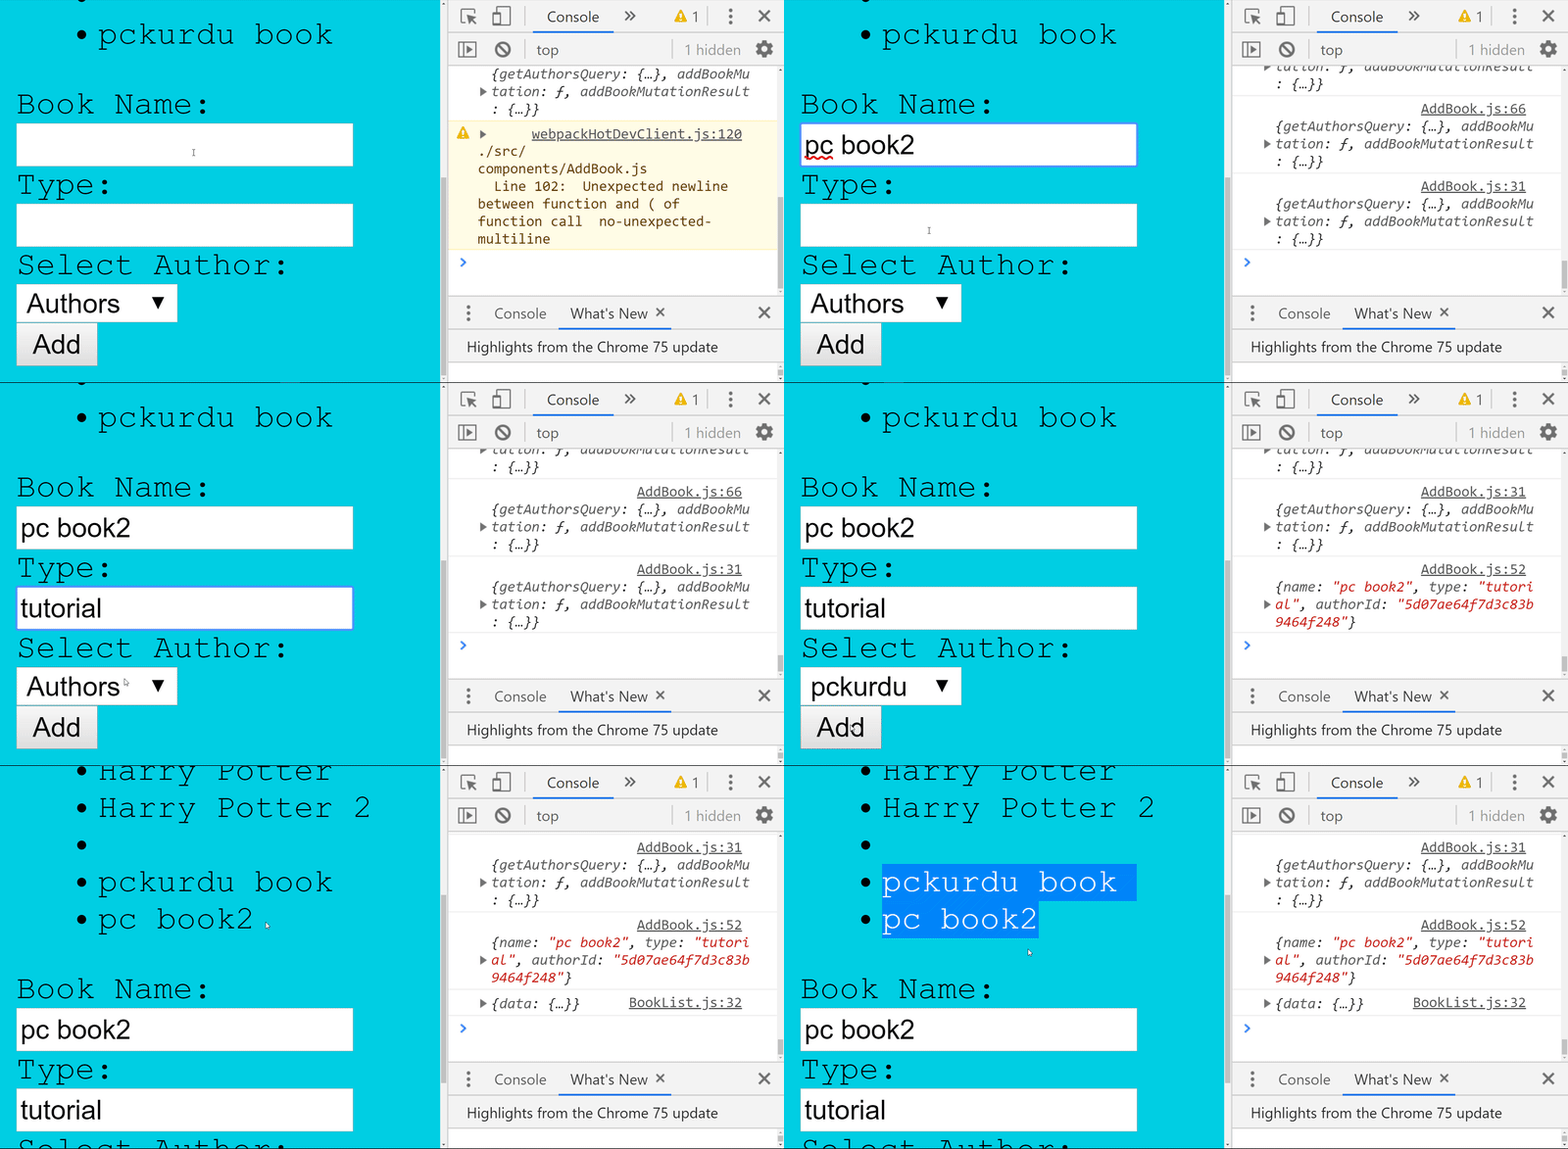
Let's import to import the getBooksQuery query and then let's test adding a new book in the application.
//Access the queries file
import {getAuthorsQuery,addBookMutation,getBooksQuery} from '../queries/queries';
3- Create Book Detail Component
In this section we will create a react component to show the details of the book so when we click on the title of the book, we will have detailed information about that book.
We add a file to the components folder located under the src folder to create a component. When we write the necessary codes for this component, it will act as a component.
Let's create the BookDetails.js file under the components folder.
In this file, I need the graphql module in the react-apollo packages to query the book's details.
In BookDetails.js
//for create component
import React,{Component} from 'react';
//for use graphql query
import {graphql} from 'react-apollo';
So we can now create the component class where we will show the details of the book.
//create component class
class BookDetails extends Component{
    render(){
        return(
            <div id="book-details">
                <p>Book Details</p>
            </div>
        );
    }
}

//export this component
export default BookDetails
We have basically created one component but haven't filled it with queries yet. Let's use this component in the BookList.js file.
In BookList.js
//import book details component
import BookDetails from './BookDetails';
…
return(
<div>
   <ul id="book-list">
     {/* use getBooks function */}
     {this.getBooks()}
   </ul>
  {/* use BookDetails component */}
  <BookDetails />
  </div>
)
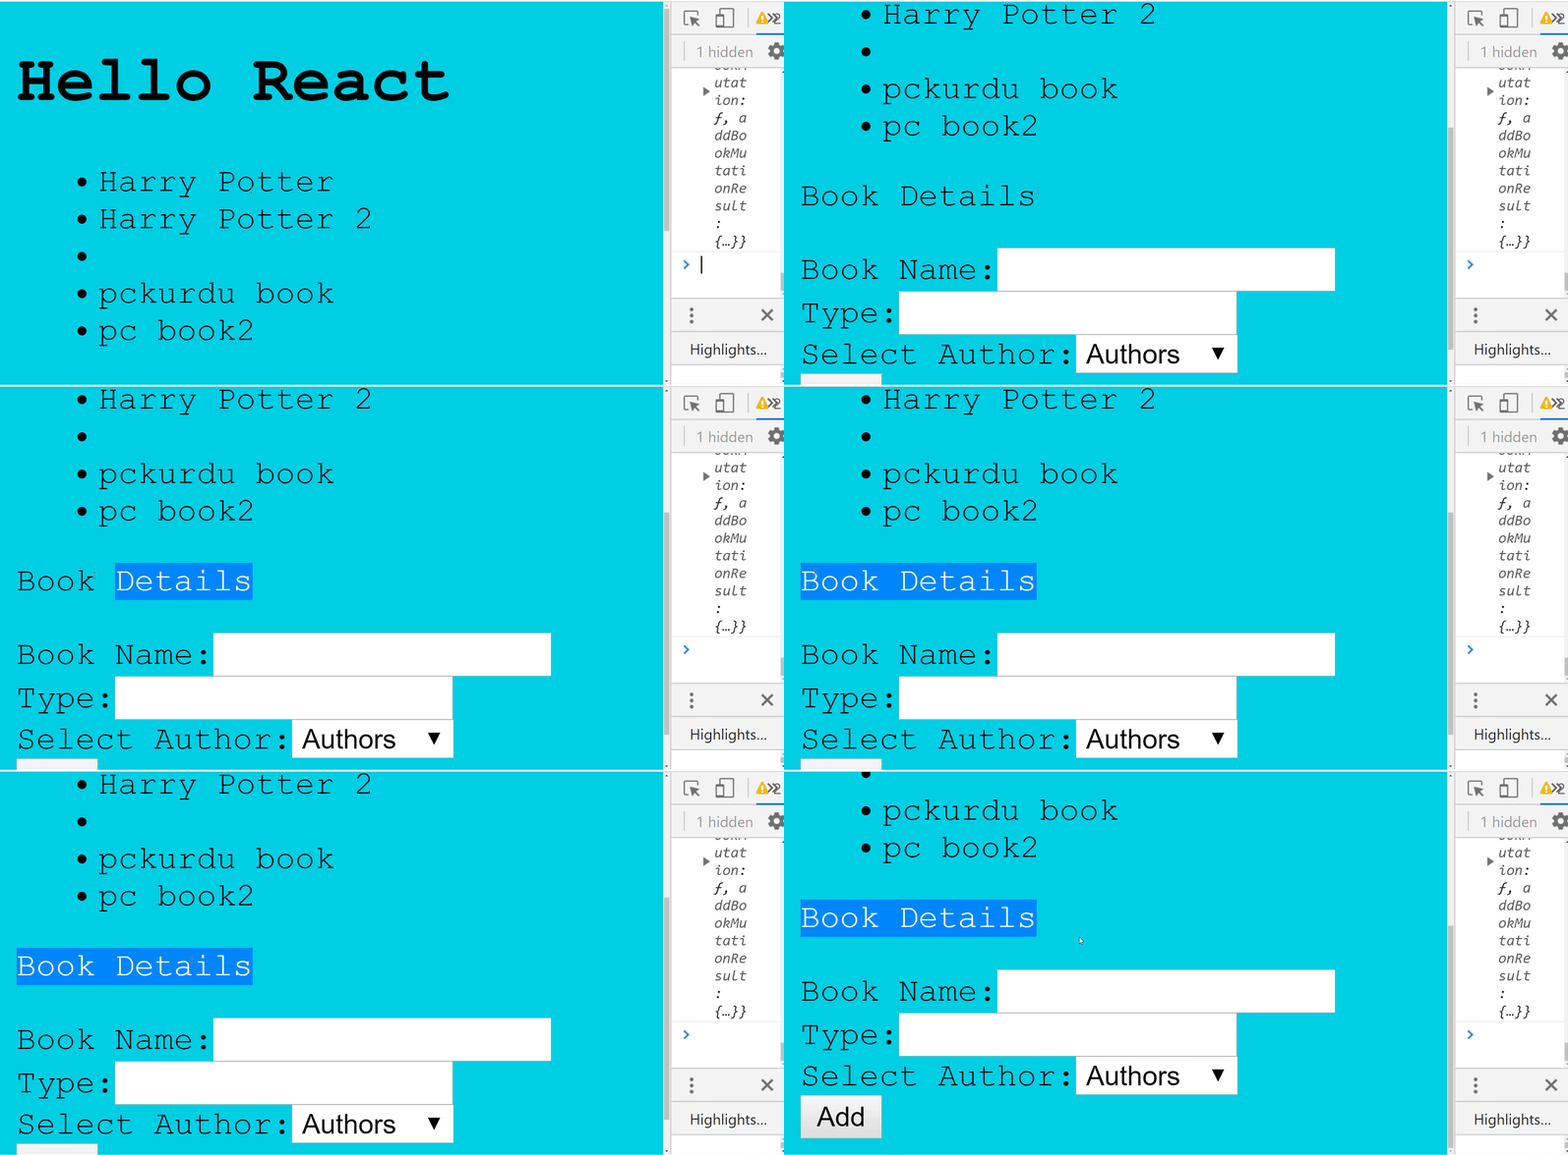
Thus, the component of which we will show the details of the book is ready. Let's test.
Curriculum
Part 1 - Part 2- Part 3 - Part 4 - Part 5 - Part 6 - Part 7 - Part 8 - Part 9
Thank you for your contribution @pckurdu.
After reviewing your tutorial we suggest the following points listed below:
Your tutorial is great! The structure and development of the contribution is very good.
Your tutorials have gotten better and better!
Thank you for your work in developing this tutorial.
Your contribution has been evaluated according to Utopian policies and guidelines, as well as a predefined set of questions pertaining to the category.
To view those questions and the relevant answers related to your post, click here.
Need help? Chat with us on Discord.
[utopian-moderator]
Thank you for your review, @portugalcoin! Keep up the good work!
Hey, @pckurdu!
Thanks for contributing on Utopian.
We’re already looking forward to your next contribution!
Get higher incentives and support Utopian.io!
Simply set @utopian.pay as a 5% (or higher) payout beneficiary on your contribution post (via SteemPlus or Steeditor).
Want to chat? Join us on Discord https://discord.gg/h52nFrV.
Vote for Utopian Witness!