GIMP (open-source) tutorial: Understanding luminosity masks !
What are luminosity masks?
- Luminosity Masks can be considered as a kind of layer masks having some specific tone in a picture.
- These are basically derived from image data and focused around certain tone value ranges.
What wil we learn ?
This tutorial will help you in brightening up an image’s mild tone without affecting its actual highLights and shadows, splitting image’s tone with other colors, improving contract in specific darkest shadow regions.
Before starting the shadow we are assuming that you have appropriate knowledge and informations about layer masks.
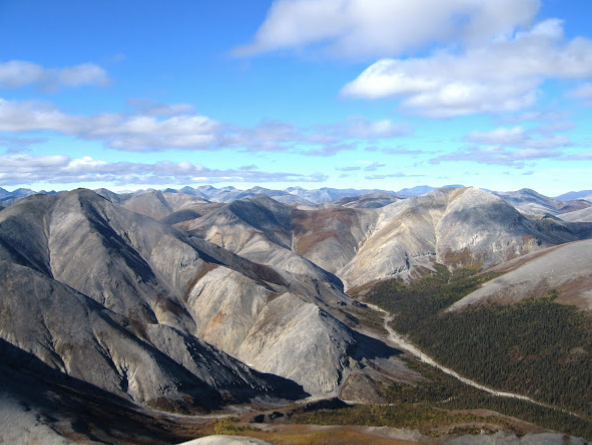
We will be using a sample image throughout this tutorial.
Original sample image is provided below.

- The aim of this tutorial is to build GIMP channels with respect to the follow six different regions of the luminosity as shown below in the image.
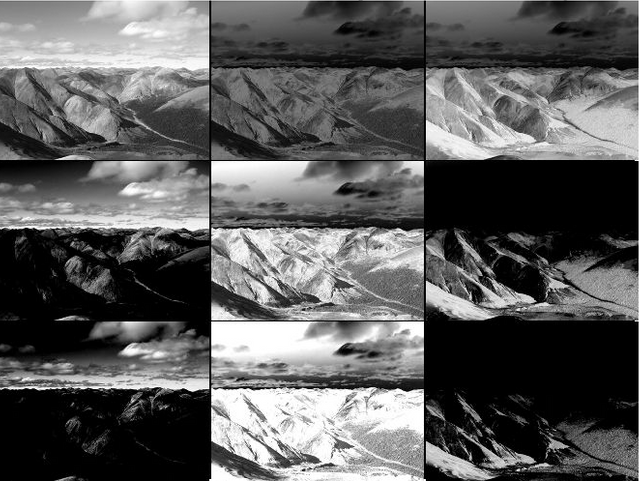
MASK CREATION
- First of all, image's Luminosity representation is required to create masks.
- To get this, we have to duplicate the base layer and desaturate it by considering luminosity as a conversion option.
DUPLICATING THE BASE LAYER
- Base layer can be duplicated either by menu or by simply clicking right on base layer available there in layer dialog.“Layer>>>Duplicate Layer”
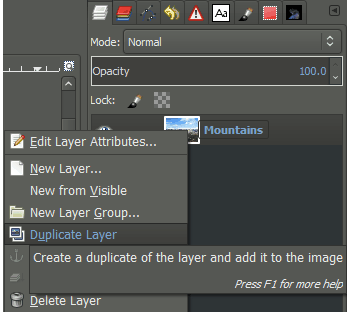
DESATURATING THE DUPLICATED LAYER
By consider luminosity as method, desaturating the duplicated layer.
**Color>>>Desaturate **
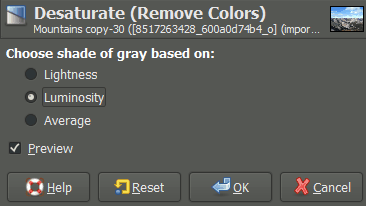
Here, “Light Channel” is represented by the above given color image desaturated copy.
Now, our aim is to create a new layer on this basis of this layer.
CREATING NEW “LIGHTS CHANNEL”
It can be done by simply using channels dialog. If you are able to reach that dialog section, manually you can go through, windows>>Dockable Dialog>>Channel
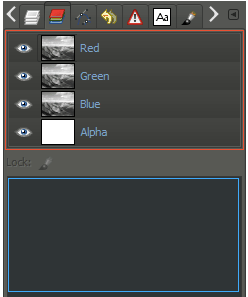
Here on the top half of the window area, you will get an entry for every channel in target image (Green, alpha, blue, Red). Also, you will get the list of previously defined channels on the bottom.
Now to create a fresh “Light channel” we have to drag down any of the available channels of RGB to the below appearing window.
Due to desaturation all the RGB channels has same data and thus we can use any of them.
Now, it's time to rename the newly generated channel meaningfully by just double clicking on its name and entering or typing a new meaningful name.
By following the procedure, we got new channel Lights “L”.
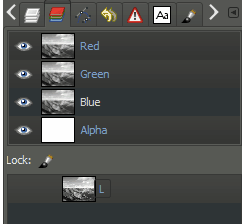
We can use this newly created channel “Lights” to create channel “Darks”.
CREATING A NEW “DARKS CHANNEL”
The creation procedure of channel “darks” involves reverse process as used in channel “Lights”.
We can create “Darks Channel” with the help of few simple operations.
Select entire image
Select>>All
Subtract the channel “Lights”
Right click On “Lights” channel>>”subtract from selection”
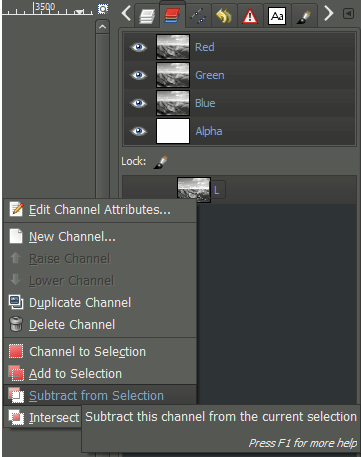
Here you will be able to see new selections on your image representing reverse channel “Lights”.
CREATING A NEW CHANNEL “DARKS”
- Using This SelectionFirst of all we have to save the current image.
- To save the image:Select>>Save the channelA new channel will be created in the channel dialog.
- You can double click on its name to give this new channel a meaningful name (Like D).
CREATING MORE DARKER MASKS
- By now, we have created two channels, “Lights” and “Darks” respectively.
- To create another channels to target more darker and darkest regions, you can do this by simply subtracting the channel “Lights”.
- Right after you subtract the channel “Lights”, it's important to save and name it appropriately. Usually, we make three “Darks” levels:
D
DD
DDD
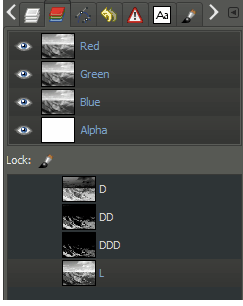
CREATING LIGHTER MASKS
By now, we have created three “Dark channels” and one “Lights” channel. Now it's time to create two more “Lights channel” for Lighter tones.It involves similar in reverse procedures as in “Dark channels”.
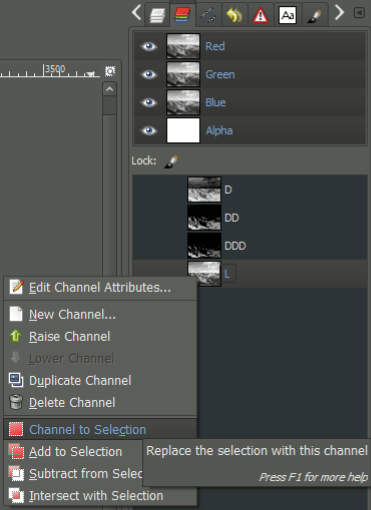
Selection Of channel “Lights”Right click on “Lights” channel and activate it.
Now it's time to subtract channel “Darks” from channel “Lights” and save it a a new channel ( NAME IT APPROPRIATELY like “LL” CHANNEL or anything that you want).
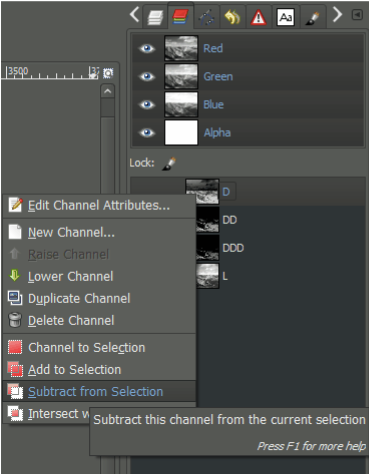
Subtracting channel “D” from channel “L”.
Also, to achieve more enhanced Light channel you can subtract channel “D” again and again.
MID TONE CHANNEL
By know, we have 3 different channel “Lights” (L,LL,LLL) and 3 different channel “Darks” (D,DD,DDD).
Mid tone channels can be easily generated with these channels. Here, we will be intersecting “Darks” and “Lights” channel to generate mid tone channels.
CHANNELS INTERSECTIONS FOR MID TONE
- Select Channel “L”
- Click right >>>>Channel to selection
- Right Click “D” Channel
- Select “Intersect with selection”
- Save Selection
- Select>>>Save to Channel
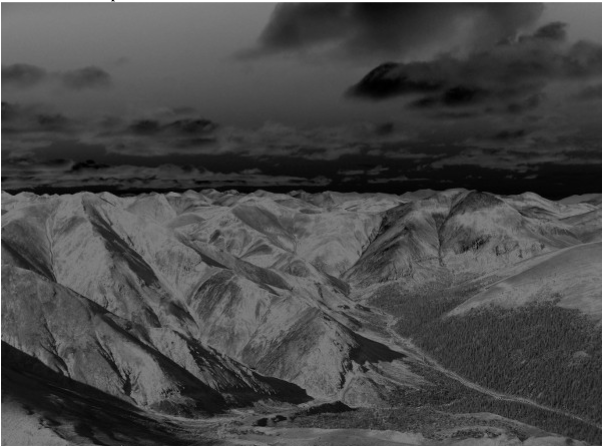
- Repeat every level to create MM and MMM by intersecting DD/LL and DDD/LLL.
- Below is the sample of a mid-tone mask
USING THE CREATED MASKS
- Now it's time to focus on our main motive. Now we will mask specific tonal ranges in our image.
- To do so, we will isolate particular changes in the image for manipulation purposes.
SPLIT TONING
- Now we have the base layer for our original sample image.
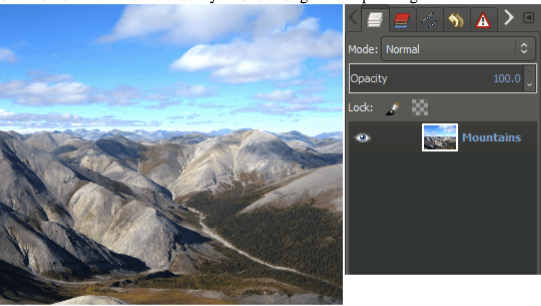
CREATING DUPLICATES
- We need two duplicate copies of the base layers to tone Lighter and darker values respectively.
- Duplicating the first layerLayer>>Duplicate and rename it appropriately with little description ( like Dark (original) or anything that you want).
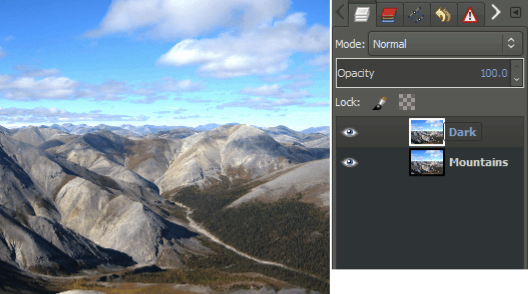
ADDING A MASK
- Now it's time to add layer mask. Simply click Right on the layer and select “add layer mask”
- Here you will get options to initialize layer masks to “channel” and choose anyone luminosity mask from drop down menu.
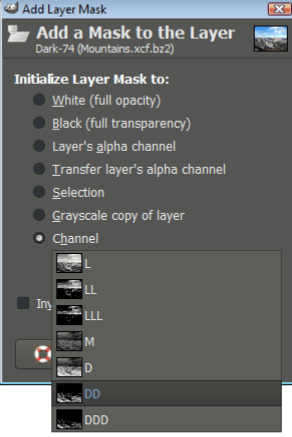
ADJUSTING THE LAYER
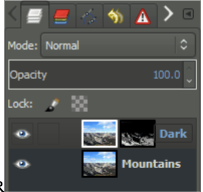
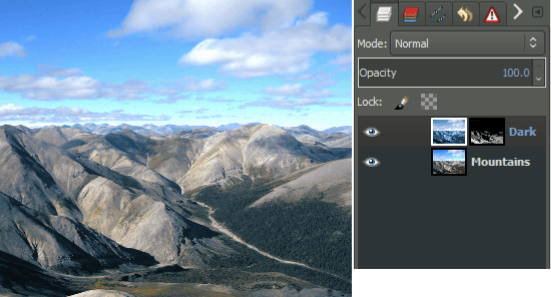
- Here you will get Darker layer ( DD Masks), it will not allow you to customize and you will be able to apply it to darker tones only.
- Ensure that you have selected it's layer, not it's mask. Otherwise, anything that you will do with that will affect its mask and layer will remain untouched.
- Now, we have to modify its color. There so many different approaches to modify its color. However, here we will be toning the image with blue color with the combination of DD mask, it will restrict to modify only dark or darker tones.
- Here we will use colorize option.Colors>>ColorizeHere, Hue slider is set to 200.
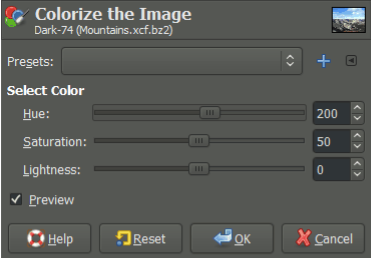
- Now, here you have to check your image canvas to visualise the changes. Move the hue slider to see its effects on your image.
- Below we have provided four images for your illustration. Hue is changed in each of these images.
- Notice the color shifts here.
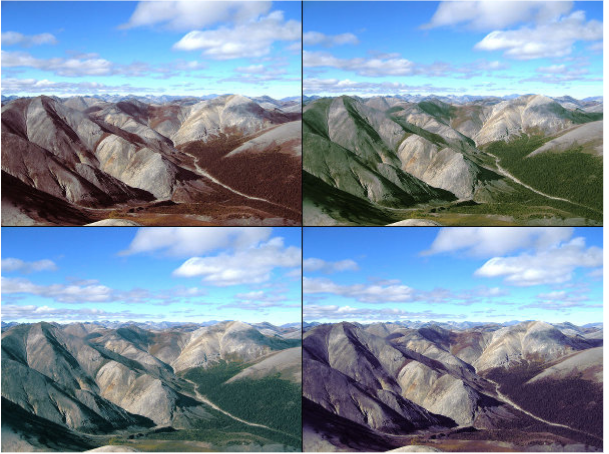
*After choosing Hue of 200.
REPEAT FOR LIGHT TONES
Now, just repeat the every step that we used above for Light tones. So you have to again duplicate the layer, and add layer mask this time using LL channel.
Here, I have chosen hue of 25
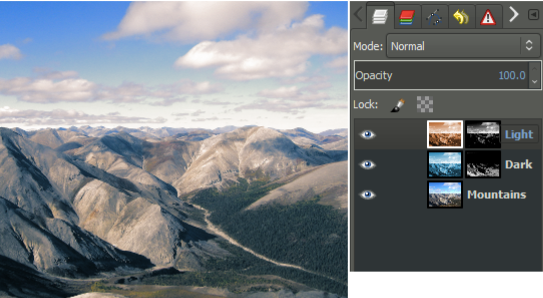
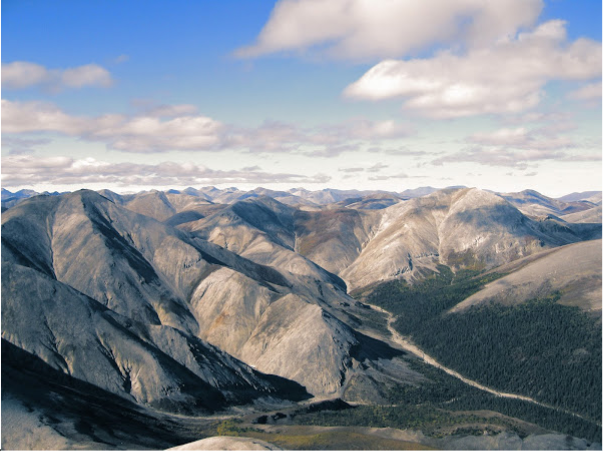
Finally, here is the final result that we got after all the steps and procedures.
AS COMPARED TO THE ORIGINAL SAMPLE IMAGE
MID TONE MASKS
The mid tone masks are very interesting.
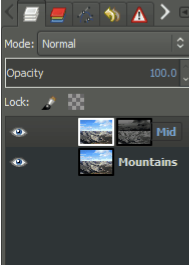
We have just deleted all the layers and get back to the basic image layer.
For this mask, we just need to duplicate base layer and then we will be applying a layer mask to the base layer.
We have chosen basic mid tone mask M. Here we will apply little aggressive compression to the curves with the help of “ Adjust Color Curves”.
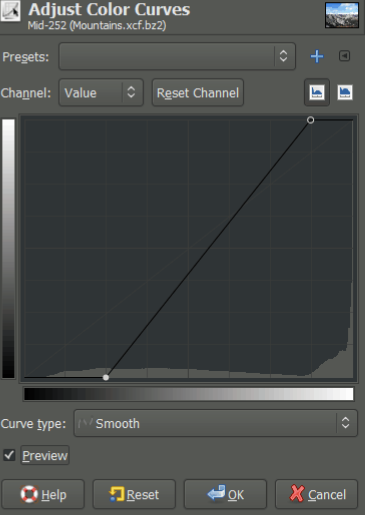
IMAGE AFTER USING Mid Tone Masks
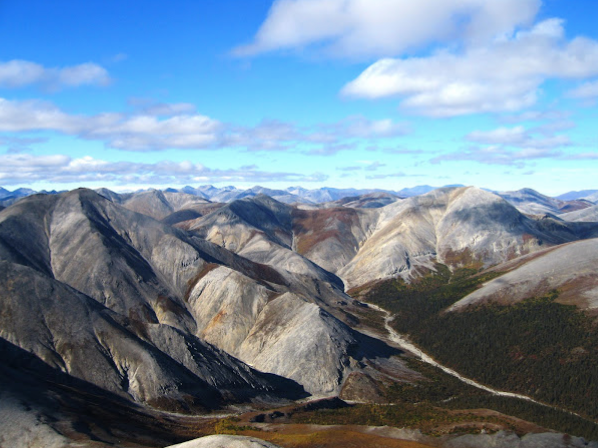
Comparing with our original sample image
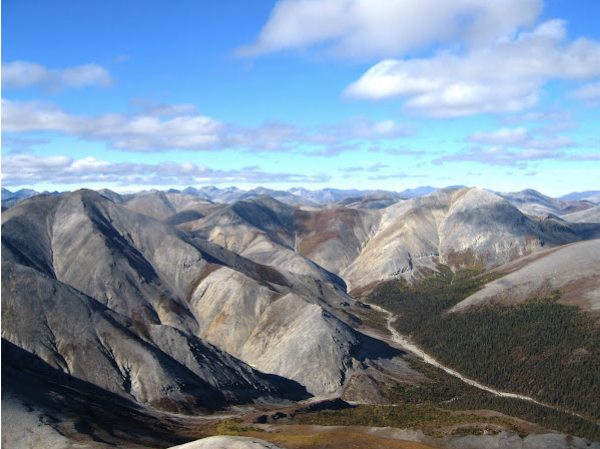
CONCLUSION:
Hope the above tutorial helped you and now you know how to brighten up an image’s mild tone without affecting its actual highLights and shadows, splitting image’s tone with other colors, improving contrast in specific darkest shadow regions.
Posted on Utopian.io - Rewarding Open Source Contributors
Thank you for the contribution. It has been approved.
You can contact us on Discord.
[utopian-moderator]
Hey @osblog I am @utopian-io. I have just upvoted you!
Achievements
Suggestions
Get Noticed!
Community-Driven Witness!
I am the first and only Steem Community-Driven Witness. Participate on Discord. Lets GROW TOGETHER!
Up-vote this comment to grow my power and help Open Source contributions like this one. Want to chat? Join me on Discord https://discord.gg/Pc8HG9x
Congratulations @osblog! You have completed some achievement on Steemit and have been rewarded with new badge(s) :
Click on any badge to view your own Board of Honor on SteemitBoard.
For more information about SteemitBoard, click here
If you no longer want to receive notifications, reply to this comment with the word
STOP