Tank Fire Game Using HTML SVG (Part-2)
Repository
Tank Fire Game Using HTML SVG (Part-2)
What Will I Learn?
- You will learn how to build games using
HTML5 SVG. - You will learn to create svg objects more easily using
Pablojs. - You will learn to move the svg object.
- You will learn to restrict the movement of svg elements within playgrounds.
- You will learn
rect()function. - You will learn
setInterval()andclearInterval()functions. - You will learn
remove()function.
Requirements
Difficulty
- Basic
Tutorial Contents
In the previous article we created the tank object for the game from multiple svg elements and moved the tank.
We will fire from our tank and plan our best fire for our game in this article.
Fire was not like moving the tank. We were using the keyboard keys to move the tank, but when we fire, the fire will automatically travel along the given direction.
I will use the setInterval() function with javascript. So when we are fired we will have moved the fire at certain intervals.
Here we are going to shoot according to the direction of the tank we should not forget.
Setting Up The Bullet
I will draw the width from the tank's gun element for bullet, because I know that the tank will come out of the hood area.
Screenshot 1
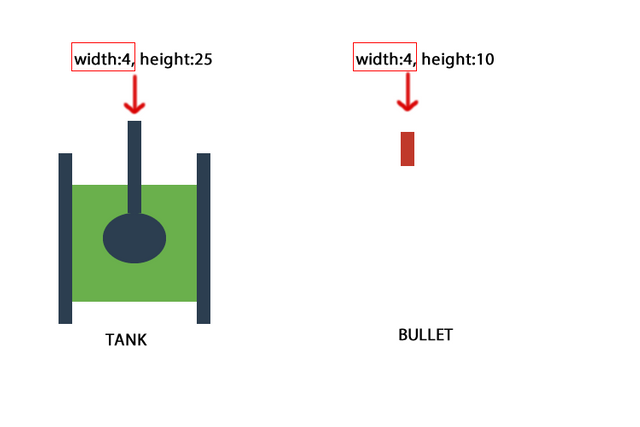
We must set the height of the marble to 10px and the width to 4px in the downward and upward movement of the tank.
The height and width of the bullet must be changed when the tank is moving to the right and to the left.
Screenshot 2
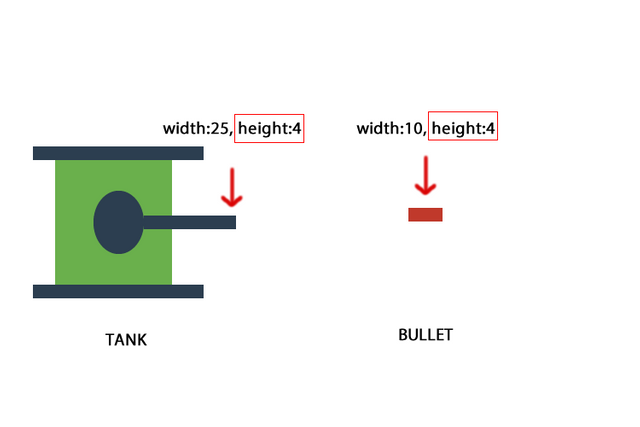
We must adjust the dimensions of the bullet to the direction the tank is going.
We need to know the x, y coordinates and the direction of the tank so that we can create bullets.
Then we create the fireBuilder() function.
function fireBuilder(direction,x,y){
}
I'll use the rect() method found in pablojs when creating bullets. We can draw a rectangle by giving the coordinates of the left top point while creating a rectangle.
By setting the width and height properties of the rect() method we can determine the dimensions of the rectangle we want to create.
We can adjust the x and y coordinates of the bullet according to the variables tankX and tankY. We will set the height and width according to the direction variable.
Movement of a Bullet
I will use the setInterval() method since the bullet will be in constant motion after being created. With this method, we can repeat the desired events at certain intervals.
We can provide the movement of the marble by changing the x, y coordinates according to the direction of the tank.
Screenshot 3
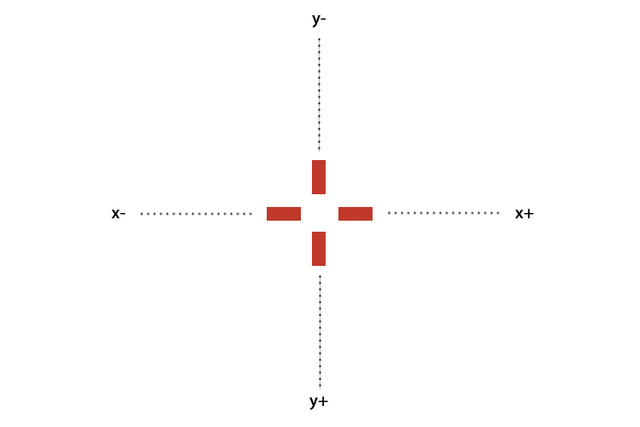
We change the x and y points of the marble, as shown in the picture above, to allow the movement of the marble. I will set these changes to 5 units so that the bullet goes faster.
We can start coding inside the fireBuilder() function.
Since we work with the svg elements, we need to create this svg object first before we can modify an svg object.
I want the tank to fire when the space key is pressed from the keyboard, and I will run this fireBuilder () function, but if there is no fire object in the environment, changes to this object will not be visible on the screen.
So let's first create a single fire object and set the x and y coordinates so that it is not visible on the screen.
var fire=svg.rect({
 x:-1000,
 y:-1000,
 width:4, height:10,
 fill: '#c0392b',
});
There is now one fire object in the environment.
Let's set the fire for direction up.
  if(direction=="up"){
    var fireinterval=setInterval(function(){
      fire=svg.rect({
       x:x-2,
       y:y,
       width:4, height:10,
       fill: '#c0392b',
     });
     y=y-5;// //the direction of advance is set.
   }, 10);
  }
I set the width and height properties as if going upwards, and drawn a rectangle to the center of the tank.
When the direction variable is down, all we have to do is change the direction of the flight of the bullet. Since the bullet will go down, I need to increase the variable y.
if(direction=="down"){
    var fireinterval=setInterval(function(){

      fire=svg.rect({
       x:x-2,
       y:y,
       width:4, height:10,
       fill: '#c0392b',
     });
     y=y+5;//the direction of advance is set.
   }, 10);
  }
We must change the width and height when the direction of the bullet is right or left side and we need to readjust the starting points of the marble according to the center points of the tank.
if(direction=="left"){
    var fireinterval=setInterval(function(){
      fire=svg.rect({
       x:x,
       y:y-2,
       width:10, height:4,
       fill: '#c0392b',
     });
     x=x-5;
   }, 10);
  }
  if(direction=="right"){
    var fireinterval=setInterval(function(){

      fire=svg.rect({
       x:x,
       y:y-2,
       width:10, height:4,
       fill: '#c0392b',
     });
     x=x+5;
   }, 10);
  }
Thus we gave bullet the ability to move according to the tank.
Bullet Firing
It is enough to run the fireBuilder() function when the space key is pressed to fire the bullet.
In jquery klave keys, we can see that the space key is pressed when the code == 32 in the function we have captured, because the space key has an exponent of 32.
In keydown()
if(code==32){
       console.log(direction,tankX,tankY);
     }
Let's first examine the center points and the direction of our tank.
Screenshot 4
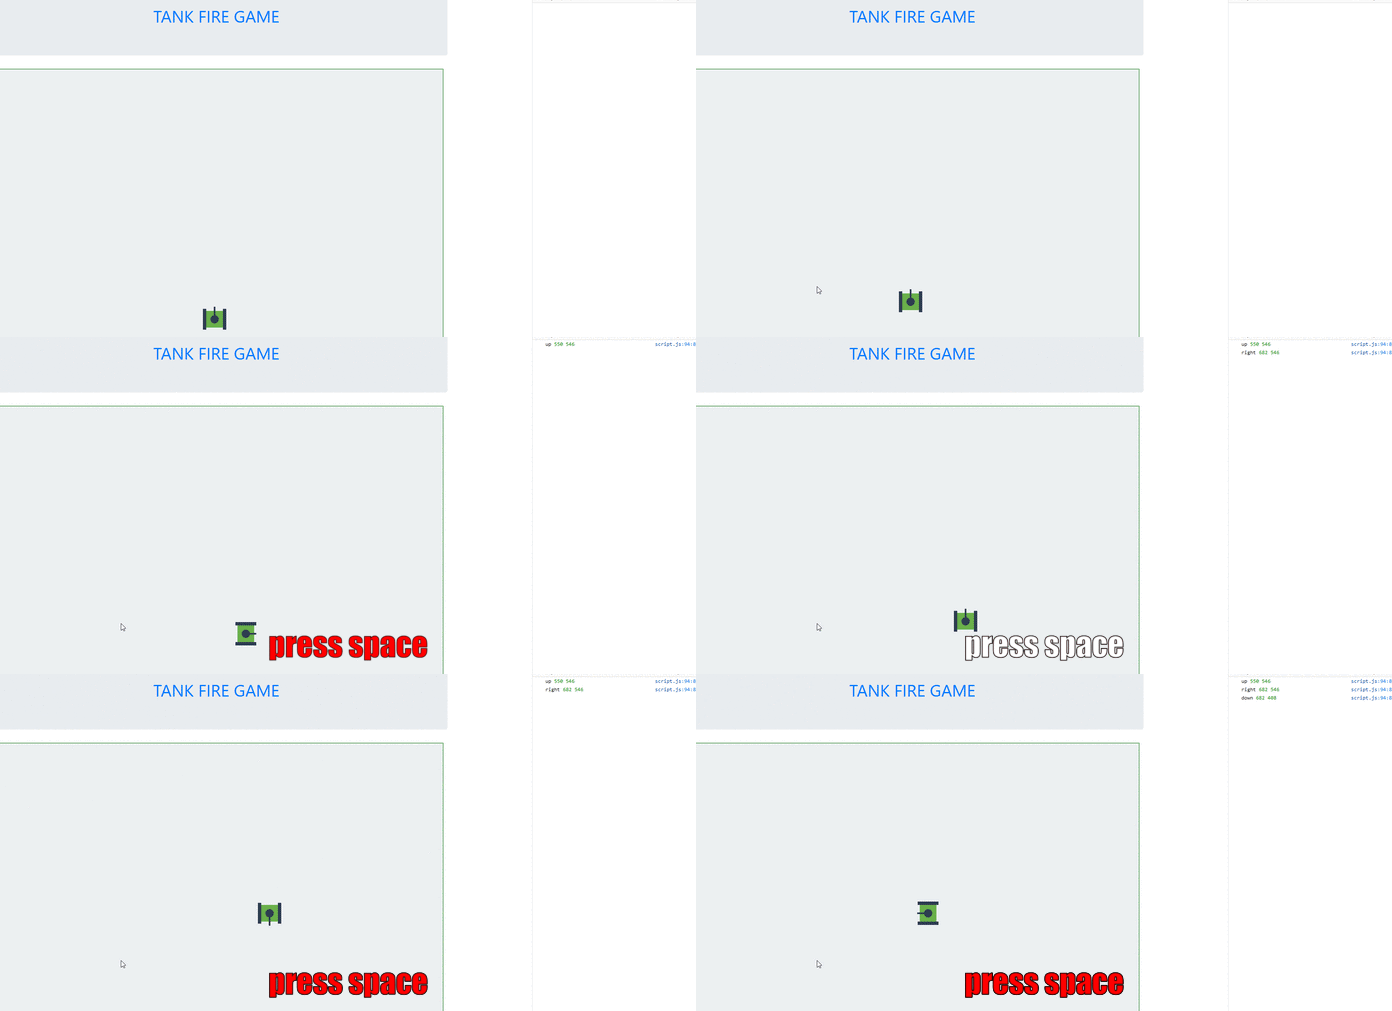
We can now write the fireBuilder() method.
if(code==32){
       fireBuilder(direction,tankX,tankY);
     }
Screenshot 5
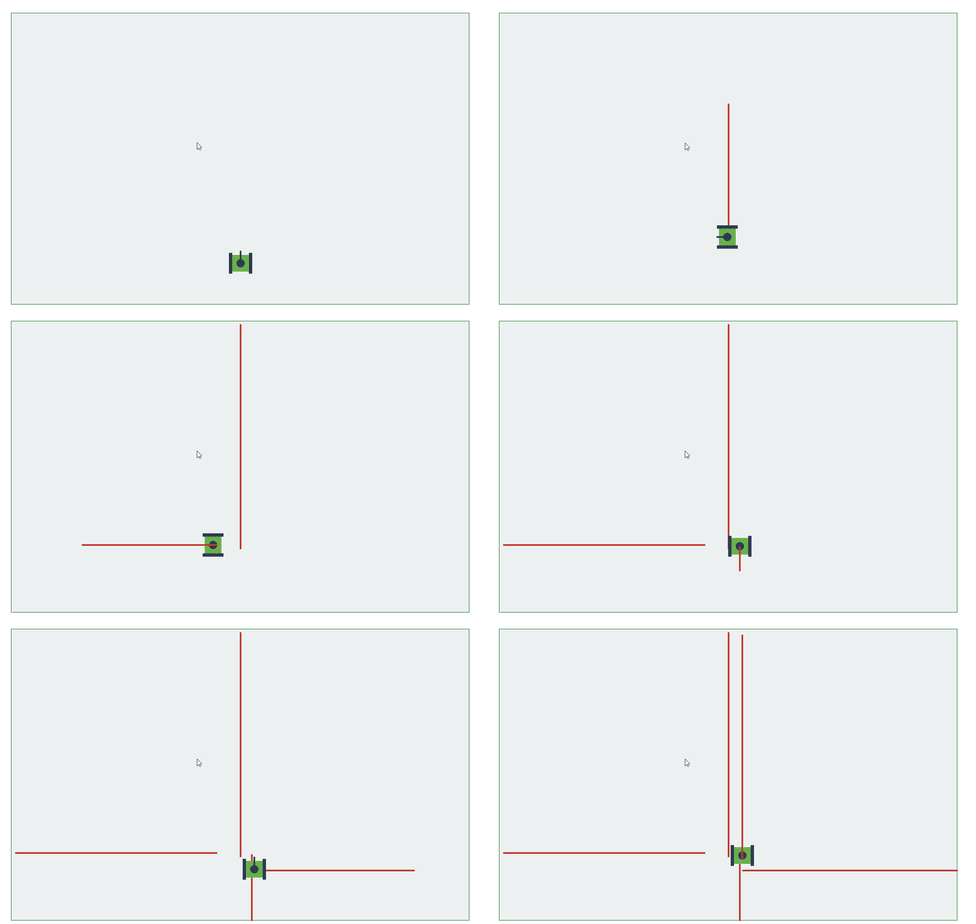
As a result of such coding, the tank seem to throw light, it seem is not throwing bullets.
In order to solve this problem, it is enough to delete the old rectangle while creating each new rectangle in setInterval.
We use the remove() method for deletion, and the thing we should not forget is that we should not delete the rectangle before drawing the rectangle.
if(direction=="up"){

    var fireinterval=setInterval(function(){

      fire.remove();
…
}
}
if(direction=="down"){

    var fireinterval=setInterval(function(){

      fire.remove();
…
}
}

if(direction=="left"){

    var fireinterval=setInterval(function(){

      fire.remove();
…
}
}

if(direction=="right"){

    var fireinterval=setInterval(function(){

      fire.remove();
…
}
}
Screenshot 6
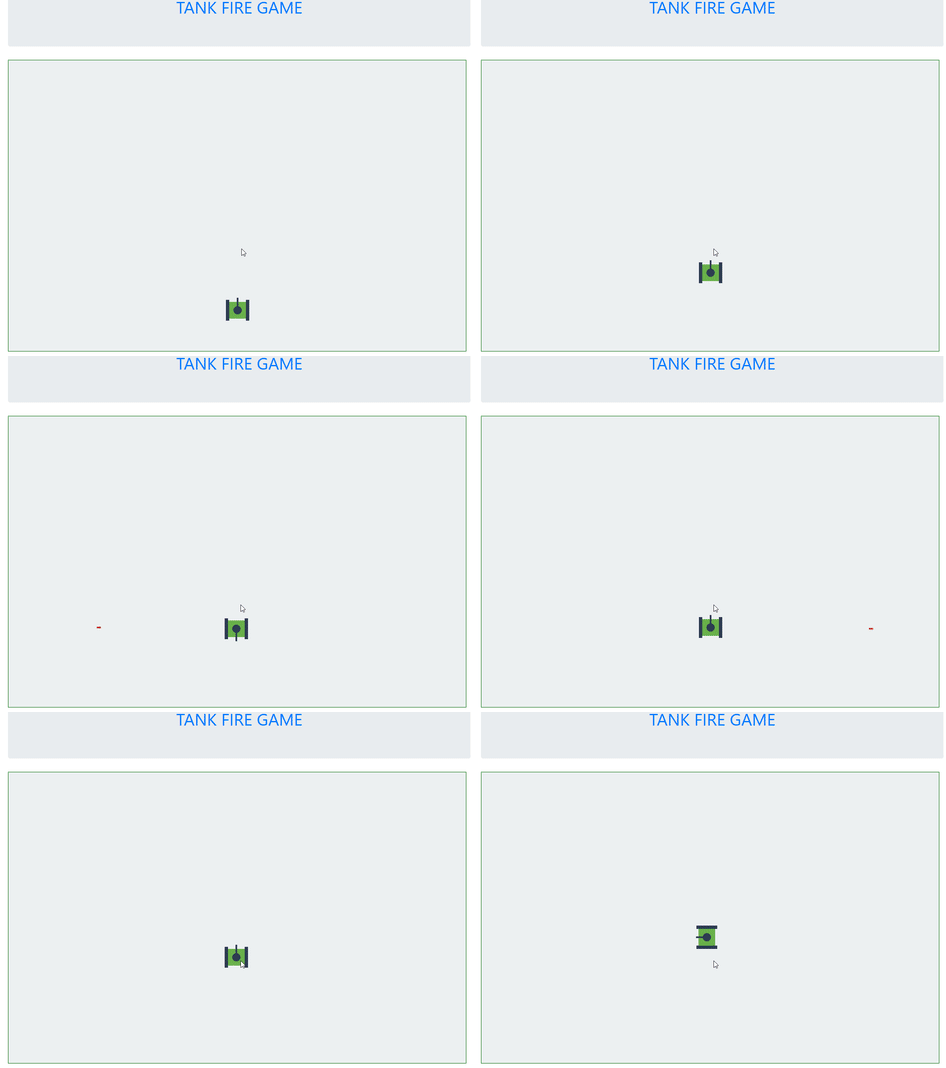
Thus we got the bullet shot but if we leave it like this, we play a simple game because the tank will fire whenever the space key is pressed, and it will be very easy to hit the obstacles that we will add in the progressive tutorials.
So let's limit the fire of the tank.
Tank can not shoot until the fire exits the game field.
Create a flag variable and equalize to 1. If flag variable 1, fireBuilder () method works and flag value is set to zero.
When the bullets cross the playing field boundaries, the flag value is made again 1.
So there is only one bullet on the playing field and the tank can not shoot any other as long as the bullet is in the playground.
We made our game a little harder.
Create flag
var fireFlag=1;
ıf flag equals 1, run a fireBuilder() function and set flag zero.
if(fireFlag==1){

         fireBuilder(direction,tankX,tankY);
         fireFlag=0;
       }
The tank can not throw more than one fire.
In direction up
if(y<=0){
       clearInterval(fireinterval);
       fire.remove();
       fireFlag=1;
     }
In direction down
if(y>=700){
       clearInterval(fireinterval);
       fire.remove();
       fireFlag=1;
     }
In direction left
if(x<=0){
       clearInterval(fireinterval);
       fire.remove();
       fireFlag=1;
     }
In direction right
if(x>=1100){
       clearInterval(fireinterval);
       fire.remove();
       fireFlag=1;
     }
Here I reset the flag and stopped the setInterval() method. We can stop the interval () method, which run with the clearInterval(interval_value) method.
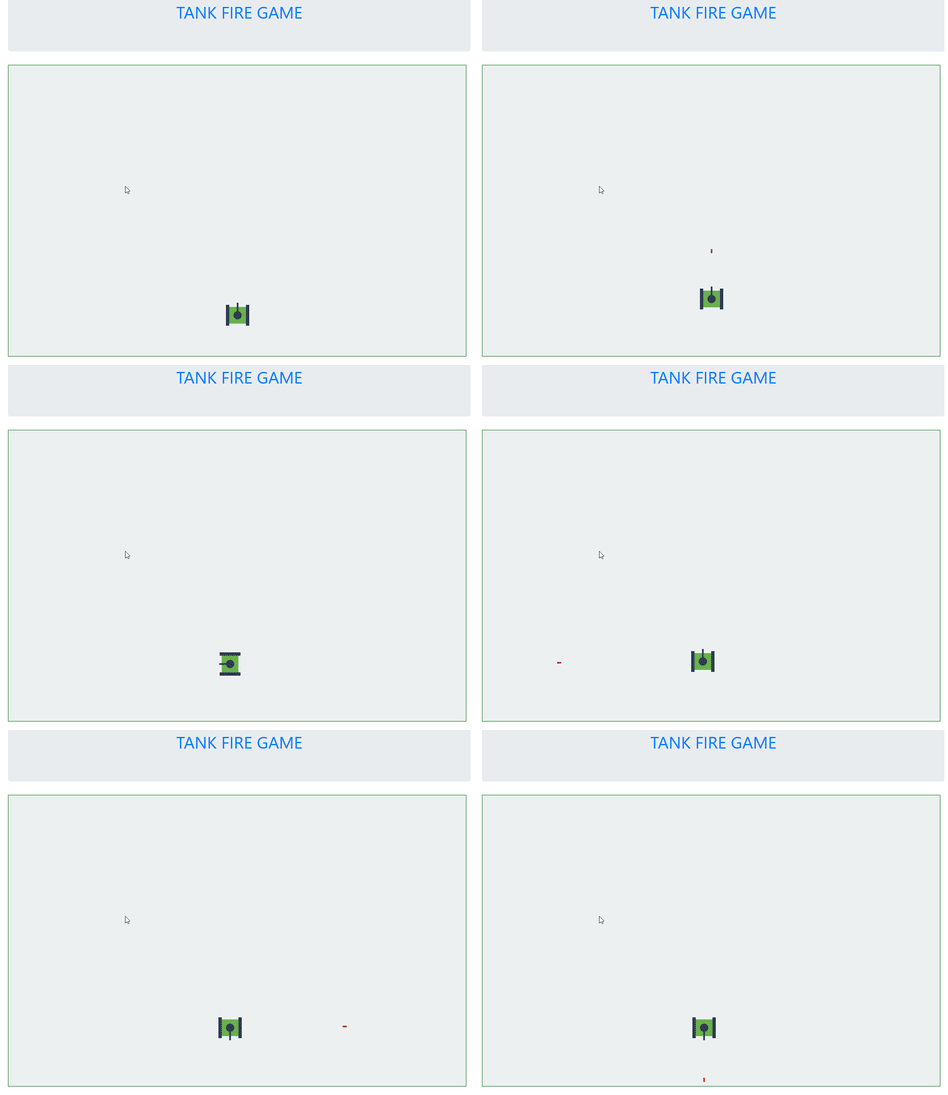
Now our tank is firing like we want.
Screenshot 7
Curriculum
Tank Fire Game Using HTML SVG (Part-1)
Hi @onepice,
This is a great tutorial focusing on game development for which it is about tank firing game (I played games like these when I was a kid hehe). The GIF photos after the code snippets are very engaging, it shows the implementation. of the codes being written. Additionally, I’d like to ask regarding the screenshot for the x and y axes coordinates, does the
+y coordinates going downward from (0, 0)? I’m just curious since in the Cartesian coordinate system,+y coordinates is located above the (0,0) or origin.Hey @josephace135
Here's a tip for your valuable feedback! @Utopian-io loves and incentivises informative comments.
Contributing on Utopian
Learn how to contribute on our website.
Want to chat? Join us on Discord https://discord.gg/h52nFrV.
Vote for Utopian Witness!
Thank you for your comment. The origin of the SVG elements is the upper left corner.X axis increases as the right side increases and increases as the y axis goes down
Hi @onepice!
Your post was upvoted by @steem-ua, new Steem dApp, using UserAuthority for algorithmic post curation!
Your post is eligible for our upvote, thanks to our collaboration with @utopian-io!
Feel free to join our @steem-ua Discord server
Hey, @onepice!
Thanks for contributing on Utopian.
We’re already looking forward to your next contribution!
Get higher incentives and support Utopian.io!
Simply set @utopian.pay as a 5% (or higher) payout beneficiary on your contribution post (via SteemPlus or Steeditor).
Want to chat? Join us on Discord https://discord.gg/h52nFrV.
Vote for Utopian Witness!