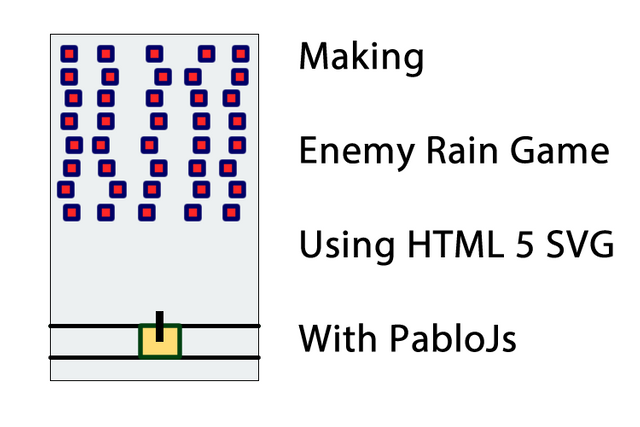
Making Enemy Rain Game Using HTML 5 SVG With PabloJs(Part-2)
Repository
Making Enemy Rain Game Using HTML 5 SVG With PabloJs(Part-2)
What Will I Learn?
- You will learn how to build games using
HTML5 SVG. - You will learn to create svg objects more easily using
Pablojs. - You will learn
line()function. - You will learn how to move multiple objects together.
- You will learn how to move an object on a horizontal axis.
- You will you will learn how to limit objects by play area.
Requirements
Difficulty
- Basic
Tutorial Contents
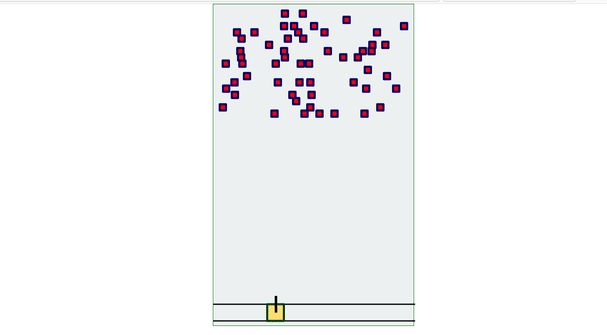
In my previous article, we created enemies randomly and made them move.
We kept the enemies created in an array so we could access the falls. Now can create a protector and hit enemies.
In this article I'll create one protector and make it move only in the horizontal direction. This protector will move over two lines and will try to shoot down the falling enemies.
Let's start.
For a better understanding of the subject, it will be divided into sub-topics:
- create protector
- move protector
- create bullet
- move bullet
Create Protector
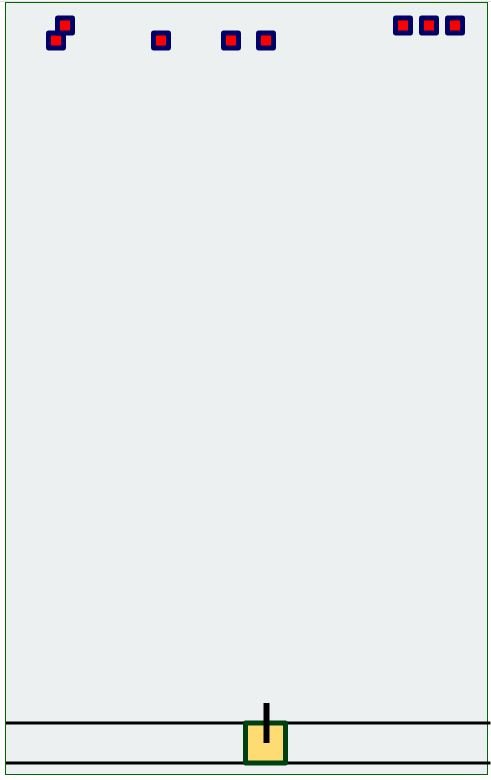
We need a protector to prevent enemies from reaching our borders.
The following picture shows how a protector will be.
Screenshot 1
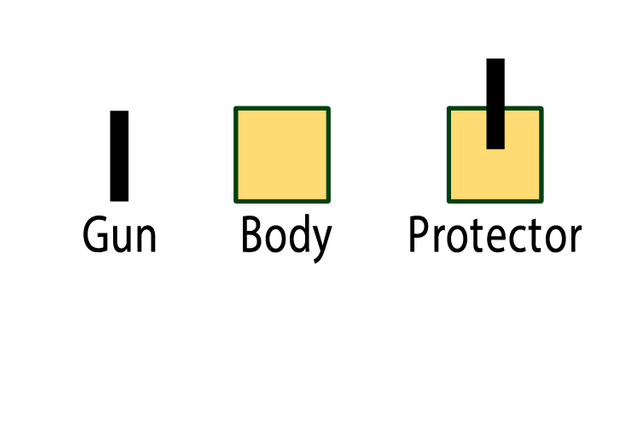
A protector consists of two svg objects. Both of this object are rectangular and the body part has stroke. We can place the gun on the body of this protector and draw it but how do we move the two as united?
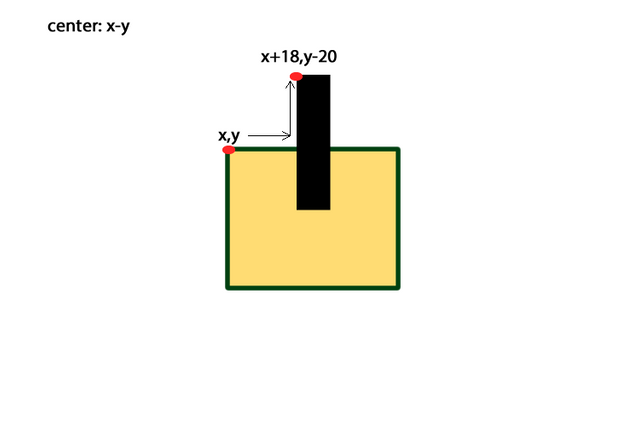
If we create this gun and body within a function and determine a center point that will be valid in both objects, we can move together.
I will set the upper left point of the body as the center and adjust the x and y points of the gun according to this center point.
The pictures below will show you the operations on the shapes.
Screenshot 2
So we can create our function but first, let's define a variable that will store the body and the gun in it. These variables will be useful to us during movement.
var protectorBody;
var protectorGun;
Now we can define our function with x and y parameter.
I don't define parameters for color and other properties because I won't change color, the protector will always stay the same color.
function protectorBuilder(x,y){
      protectorBody=svg.rect({
        x:x, y:y,
        width:40, height:40,
        fill:  '#FFDC73',
        stroke:'#004010',
        'stroke-width': 5,
        'stroke-linejoin': 'round'
    });

      protectorGun=svg.rect({
          x:x+18, y:y-20,
          width:6, height:40,
          fill:  '#black'
      });

}
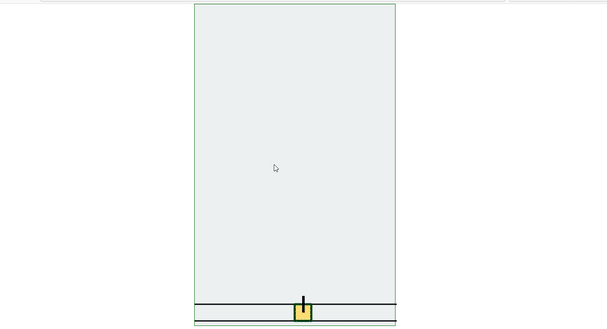
Using this function we can create the protector at the point we want but for the functionality of our game I'm placing the bottom line of the game field.
var protectorX=240;
var protectorY=720;

protectorBuilder(protectorX,protectorY);
Thus the protector takes its place at the bottom when the game is started.
The picture below shows the starting moment of the game.
Screenshot 3
So we made the protector drawing. It's time to move.
Move Protector
We will move the protector on a horizontal axis.
We will use the left and right arrow keys of the keyboard for movement of the protector.
Let's draw two lines horizontally to create a more elegant image and let the image look as if the protector was moving on these rails.
The line() function is used to draw lines using pablojs. We can draw the line by giving start and end points.
I create a line() function in a function to draw two lines so I will increase readability and simplify operations.
function lineBuilder(x1,y1,x2,y2){
    svg.line({
      x1: x1,
      y1: y1,
      x2: x2,
      y2: y2,
      stroke: 'black',
      'stroke-width': 3
  });
}
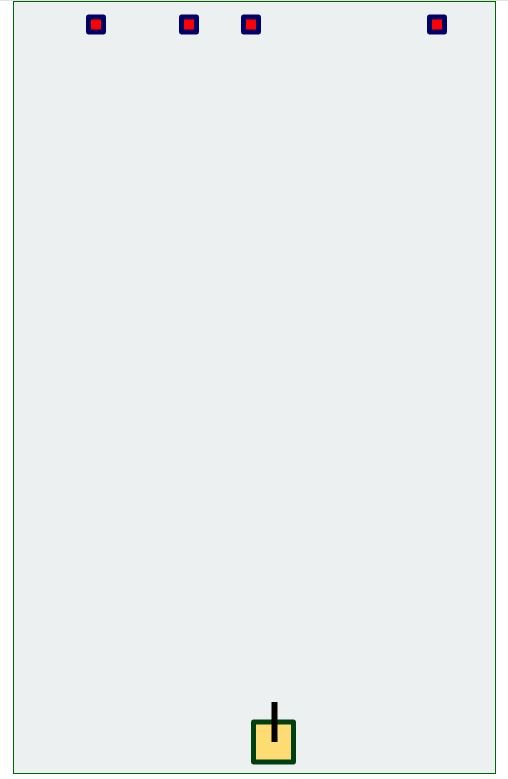
I will create two lines using this function, and these lines will pass under and over the protector.
//create line
lineBuilder(0,720,485,720);
lineBuilder(0,760,485,760);
The picture below shows the starting moment of the game.
Screenshot 4
So we have drawn the rails. It's time create movement.
We must capture the moment the keyboard is pressed to move the protector.
With the keydown() function, we can capture the key pressed on the keyboard. If we send the event as a parameter to this function, we can find the key code with event.which.
The left button 37 of the code 39 represents the right button because we want the protector to move right and left.
If the left button is pressed, we must reduce the position of the protector in the x coordinate. If the right button is pressed, we must increase the x position of the protector.
If we call protectorBuilder() again after changing the x point, we can create the protector in its new location. First of all, we must delete the old position.
$(document).keydown(function(event){//the moment the keyboard is pressed in jquery
     //37 left - 39  right

     var code =  event.which;//get the code of the key pressed

     if(code==37){//left key pressed
       protectorBody.remove();
       protectorGun.remove();
       protectorX=protectorX-5;

       protectorBuilder(protectorX,protectorY);

     }
     if(code==39){//right key pressed
       protectorBody.remove();
       protectorGun.remove();
       protectorX=protectorX+5;

       protectorBuilder(protectorX,protectorY);

     }

   });
The following shows the movement of the gif protector.
Screenshot 5
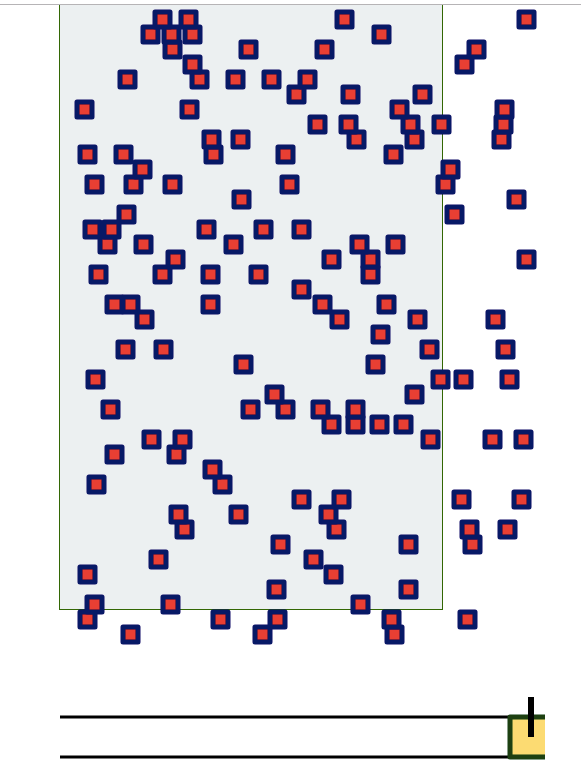
We do not specify the right and left boundaries when we write such code. We can lose the protector in screen because we do not specify the boundaries.
In order to solve this problem, if x point is greater than 0 when the left direction key is pressed, x must be decreased and x point must be increased by x if it is less than 450 when right direction key is pressed.
In fact the if command will do our job.
if(protectorX>0)// if x is greater than zero
if(protectorX<450)// if x is less than 450
Here is the new state of keydown().
var code =  event.which;//get the code of the key pressed

     if(code==37){//left key pressed
       protectorBody.remove();
       protectorGun.remove();
       if(protectorX>0) // if x is greater than zero
       protectorX=protectorX-5;

       protectorBuilder(protectorX,protectorY);

     }

     if(code==39){//right key pressed
       protectorBody.remove();
       protectorGun.remove();
       if(protectorX<450) // if x is less than 450
       protectorX=protectorX+5;

       protectorBuilder(protectorX,protectorY);

     }
Now protector can fire.
Create Bullet
A bullet should come out of the protector's gun and move upwards along the y-axis. We can create a rectangle for bullets.
With the help of a function can create the bullet.
var bullet;
function bulletBuilder(x,y){
      bullet=svg.rect({
        x:x, y:y,
        width:6, height:10,
        fill:  'red'
    });
}
I will use the keyboard's space key to fire. The space key code is 32.
Let's check that this key is pressed in the keydown() function.
var bulletX;
var bulletY;
if(code==32){//space key pressed
           bulletX=protectorGun.attr('x');
           bulletY=protectorGun.attr('y');
           bulletBuilder(bulletX,bulletY);
       }
     }
Let's place a flag to not fire another bullet until the bullet disappears and fire this flag at zero and change the flag value after firing.
var bulletFlag=0;
if(code==32){//space key pressed
         if(bulletFlag==0){
           bulletX=protectorGun.attr('x');
           bulletY=protectorGun.attr('y');
           bulletBuilder(bulletX,bulletY);
           bulletFlag=1;
       }
     }
Move Bullet
If we change the position of the bullet with certain movements after firing the bullet, we move the bullet.
We need the setInterval() function to do this.
Let's increase the y point of the bullet when bulletFlag is a non-zero value thus, the bullet will move upwards.
var bulletInterval=setInterval(function(){
   if(bulletFlag==1){
     bullet.remove();
     bulletY=bulletY-15;
     bulletBuilder(bulletX,bulletY);
     }

   },10);
In order to be able to fire again, we must make the bulletFlag value zero at the moment when the bullet disappears from the playing field.
  var bulletInterval=setInterval(function(){
   if(bulletFlag==1){
     bullet.remove();
     bulletY=bulletY-15;
     bulletBuilder(bulletX,bulletY);

       if(bulletY<-10)// bullets, outside the playground
           bulletFlag=0;

     }

   },10);
Thus we were able to fire the bullet :)
The image below shows a bullet that protector fire.
Screenshot 6
Curriculum
Making Enemy Rain Game Using HTML 5 SVG With PabloJs(Part-1)
Thank you for your contribution @onepice.
After reviewing your tutorial we suggest the following points to improve your contributions:
We tested your game and it looked like this when we opened the page:
We find your games very interesting with HMTL, SVG and PabloJS but it is becoming repetitive with the functionalities that you are teaching. We suggest you change the subject in your tutorials so users can learn new and innovative things.
We hope you will consider our review and change the subject of your next tutorial.
We look forward to your next contribution.
Your contribution has been evaluated according to Utopian policies and guidelines, as well as a predefined set of questions pertaining to the category.
To view those questions and the relevant answers related to your post, click here.
Need help? Write a ticket on https://support.utopian.io/.
Chat with us on Discord.
[utopian-moderator]
Thank you for your review, @portugalcoin!
So far this week you've reviewed 5 contributions. Keep up the good work!
Hi @onepice!
Your post was upvoted by @steem-ua, new Steem dApp, using UserAuthority for algorithmic post curation!
Your post is eligible for our upvote, thanks to our collaboration with @utopian-io!
Feel free to join our @steem-ua Discord server
Hey, @onepice!
Thanks for contributing on Utopian.
We’re already looking forward to your next contribution!
Get higher incentives and support Utopian.io!
Simply set @utopian.pay as a 5% (or higher) payout beneficiary on your contribution post (via SteemPlus or Steeditor).
Want to chat? Join us on Discord https://discord.gg/h52nFrV.
Vote for Utopian Witness!