Create Scenes And Scene Transitions At Phaser3 Library

Repository
Create-Scenes-And-Scene-Transitions-At-Phaser3-Library
What Will I Learn?
- You will learn how to adjust the background color of the game.
- You will learn the center of the game area by page with
autoCenter. - You will learn how to create a scene using
Phaser.Class. - You will learn how to switch between multiple scenes.
- You will learn how to activate the game objects with
setInteractive(). - You will learn
scene.start()andscene.pause()functions.
Requirements
- Have basic html5 and javascript knowledge.
- Visual Studio Code
Difficulty
- Basic
Tutorial Contents
In this article we will learn to create a scene with phaser3.If we want to create a game using the phaser3 library, it is necessary to create a scene because the game elements are in the scene. Game elements perform the necessary actions in the scene.
One scene to create a game is enough in phaser but we can create in the game with more than one scene. Of course there are differences between creating multiple scenes and create a scene.
In this article we will go through an example to learn about these differences.
We will create two scenes in our example. In the first scene will write only start. Clicking on this start will switch to the second scene and a ship will move. To show the scenes stop feature, we will write a pause on the second scene and the scene will be paused when clicked.
Create Game Config
I'm skipping the process of creating the index.html page for how I've previously shown how to create a game with phaser3 in my articles. You can see my github repo.
Let's create a config object.
//settings required to configure the game
var config = {
    type: Phaser.AUTO,
    width: 800,
    height:  600,
    physics: {
        default: 'arcade'
    }
};
var game = new Phaser.Game(config);
If we make such a setting, the background color of the game will be black by default.With this config object, we can set the background color of the game. Using the backgroundColor property, we can convert the background to a color we want.
var config = {
    type: Phaser.AUTO,
    width: 800,
    height:  600,
    physics: {
        default: 'arcade'
    },
    //set background color
    backgroundColor: 0x27ae60
};
We catch the following image when we make such a setting.

By default, the game field starts at the top left of the page.
If we want the game field to be in the middle of the page, we have to define the scale property in the config object. By adjusting the autoCenter property in the scale, we can position the playground where we want it.
//settings required to configure the game
var config = {
    type: Phaser.AUTO,
    width: 800,
    height:  600,
    physics: {
        default: 'arcade'
    },
    //set background color
    backgroundColor: 0x27ae60,
    scale: {
        //we place it in the middle of the page.
        autoCenter: Phaser.Scale.CENTER_BOTH
    },
};
The Phaser.Scale.CENTER_BOTH feature allows the playing field to center the page.

Create First Scene
In earlier articles we talked about how to create a game scene. In this article we will learn a different way of creating a scene.
We'll create a scene using the Class property in Phaser and we will create stage functions within this class.
//create a scene with class
var GameScene1 = new Phaser.Class({

    //The scene is noted
    Extends: Phaser.Scene,

    initialize:

    function GameScene ()
    {
        //We create the scene and set the key.
        Phaser.Scene.call(this, { key: 'GameScene1'});
    },

    preload: function ()
    {
    },

    create: function ()
    {

    }

});
We are making a key to the scene in the constructor function of the scene class. We can adjust scene transitions with the help of this key.
So we created a basic scene. In the game's config object, if we type the name of this class in the scene, we will prepare the scene for the game.
//set scene
scene:GameScene1
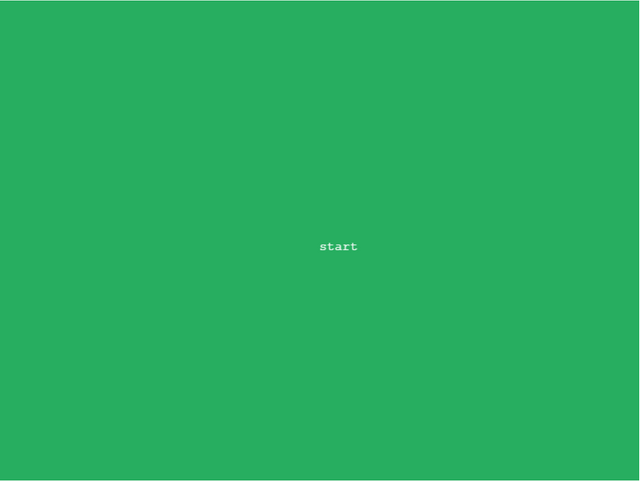
Let's check if the scene has occurred and we define a text in the create() function of the class GameScene1.
create: function ()
    {
        //write start
        var txt1 = this.add.text(400,300, 'start');
    }

Create Second Scene
We will create the second scene to perform the transition.
//create a scene with class
var GameScene2 = new Phaser.Class({

    Extends: Phaser.Scene,

    initialize:

    function GameScene ()
    {
        Phaser.Scene.call(this, { key: 'GameScene2' });
    },

    preload: function ()
    {

    },

    create: function ()
    {

    },

    update:function(){

    }
});
We also created GameScene2 using the class. We have to load the game on two scenes while the game is loading. So you will know that the phaser will be used in the game in two scenes.
//set scenes
scene:[GameScene1,GameScene2]
Since we are going to load more than one scene in the scene property in the config object, we should use the array structure.
Let's load one ship in the second scene and move it in the -X direction.
preload: function ()
    {
        //load ship
        this.load.image('ship','assets/ship.png');
    },

    create: function ()
    {
        //Create the ship object
        var ship=this.physics.add.sprite(500,300,'ship');
        //Move ship object
        ship.setVelocityX(-10);
    }
Setting The Transition Between Scenes
The order in which scenes are displayed can be defined in config. The first value in the defined array is displayed first. If we write the second scene first, the second scene will work.
//set scenes
 scene:[GameScene2,GameScene1]

When we click on the 'start' text in the first scene, let's do the transition to the second scene.
We must first make the start text clickable. With the setInteractive() function, we can interact with game objects and with the pointerdown feature, we can capture mouse click events.
create: function ()
    {
        //write start
        var txt1 = this.add.text(400,300, 'start');
        //Let txt1 object interactively
        //pointerdown feature with mouse click
        txt1.setInteractive().on('pointerdown', function() {
            //Let's start another scene with start
            this.scene.scene.start('GameScene2');
        });
    }
With scene.start(), the current active scene is stopped and pass the another scene. We can determine which scene to enter by typing the key property of the scene as a parameter to the start () function.
The second scene works when we click on start text.

Pause The Scene
We need to use the scene.pause() function to pause events that occur in the scene.
We will write pause in the upper left corner of the scene screen and we make this text clickable and acitve the mouse click event.
create: function ()
    {
        //Create the ship object
        var ship=this.physics.add.sprite(500,300,'ship');
        //Move ship object
        ship.setVelocityX(-10);

        var txt2 = this.add.text(100,50, 'pause');
        //Let txt1 object interactively
        //pointerdown feature with mouse click
        txt2.setInteractive().on('pointerdown', function() {
            //Let's pause scene with pause
           this.scene.scene.pause('GameScene2');
        });
    },
Now when we click on the pause text, the game elements in the scene are paused.

Proof of Work Done
https://github.com/onepicesteem/Create-Scenes-And-Scene-Transitions-At-Phaser3-Library
Thank you for your contribution @onepice.
After reviewing your tutorial we suggest the following points listed below:
We suggest you add more new features. Your tutorials start to get repetitive.
The subject on phaser is interesting but pretty basic to the tutorial. Bring more innovative features to make your tutorials a little different.
We look forward to seeing new features in your next tutorial.
Your contribution has been evaluated according to Utopian policies and guidelines, as well as a predefined set of questions pertaining to the category.
To view those questions and the relevant answers related to your post, click here.
Need help? Chat with us on Discord.
[utopian-moderator]
Thank you for your review, @portugalcoin! Keep up the good work!
Hi @onepice!
Your post was upvoted by @steem-ua, new Steem dApp, using UserAuthority for algorithmic post curation!
Your post is eligible for our upvote, thanks to our collaboration with @utopian-io!
Feel free to join our @steem-ua Discord server
Hey, @onepice!
Thanks for contributing on Utopian.
We’re already looking forward to your next contribution!
Get higher incentives and support Utopian.io!
Simply set @utopian.pay as a 5% (or higher) payout beneficiary on your contribution post (via SteemPlus or Steeditor).
Want to chat? Join us on Discord https://discord.gg/h52nFrV.
Vote for Utopian Witness!