Java (Spring Framework) - First App with Connection to MySQL Database
Hello, world!
In this article, I will clearly guide you how to build java application with connection to database. Slightly different, because of Spring, one of the most popular Java framework as a main controller that will provide service and data connecting to/from database.
OK. Let us go!
Murez Nasution
Attention!
All of experiments in this article has been tested and run well on the Windows platform. Other platforms never already tested, and some functionality would not run properly. Thank you.
Requirements
- Any current JDK.
- MySQL Community version 5.6 or later.
Attention!

Source: https://spring.io/guides/gs/accessing-data-mysql/ - Any text editor or IDE (recommended to use IntelliJ IDEA)
- Your passion and free time.
Implementation
After all needs are met, here is a general steps that we will do.
Overview
We will try to create a simple product management project, which the product consists of attributes: name, price and stock. And the available services are add new product, update the existing product and delete old product. Here is the general steps:
- Settings up Database
1.1. Create Database
1.2. Grant User Access - Settings up Project
2.1. Create New Project
2.2. Build Gradle
2.3 Application Properties - Create Entity Class
- Create Controller
- Create Auto-Repository Interface and Launcher
Make sure each of the following steps is done correctly, so that you can get the expected results.
1.1. Create Database
Open Command Prompt
Directly access to directory MySQL/bin
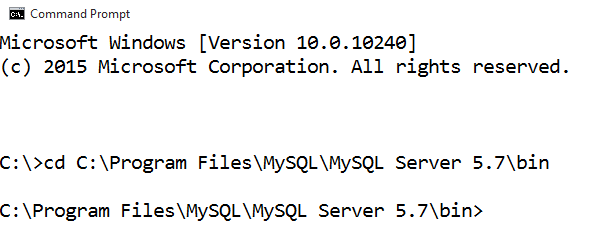
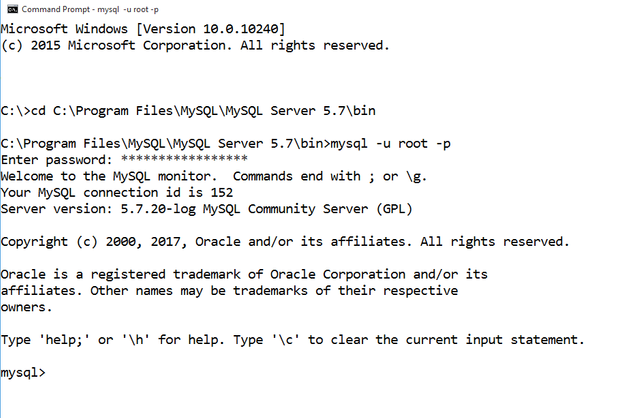
MySQL Database Login
Type: mysql -u root -p, and hit Enter. Then, enter your root password.
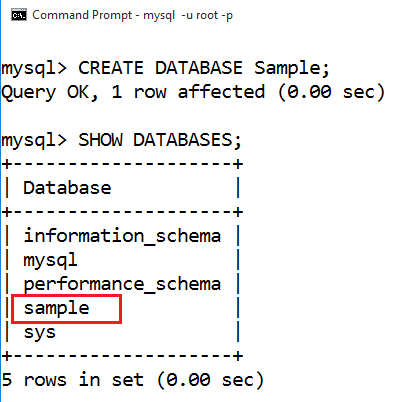
Create Database Sample
Type: CREATE DATABASE Sample, and hit Enter.
1.2. Grant User Access
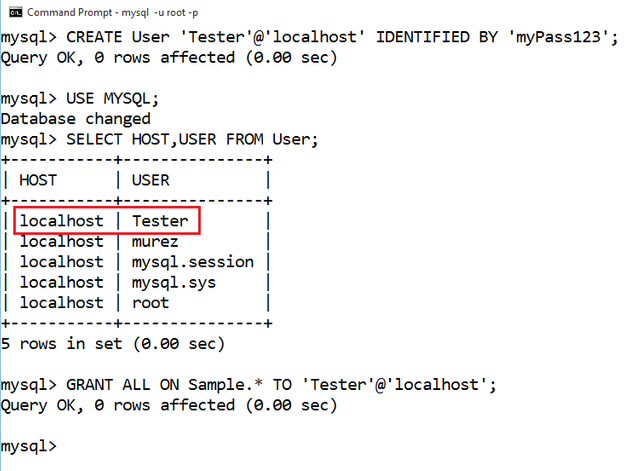
Create User of Tester
Type: CREATE User 'Tester'@'localhost' IDENTIFIED BY 'myPass123';, and hit Enter.
Gives All the Privileges to the Tester
Type: GRANT ALL ON Sample.* TO 'Tester'@'localhost';, and hit Enter.
2.1. Create New Project
Open IntelliJ IDEA
- After IDE is ready, Click File > New > Project...
- On the left side, choose Gradle project, as seen below
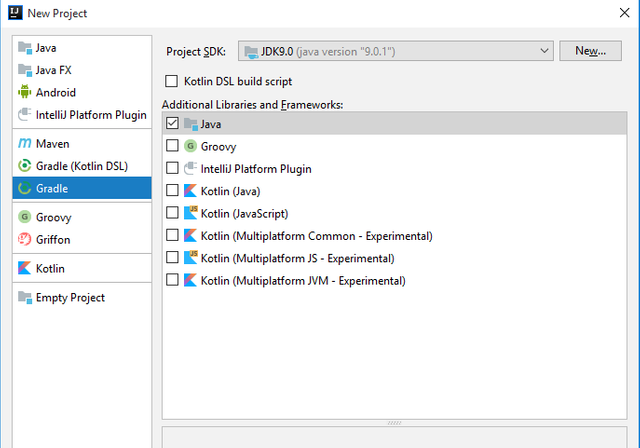
Click Next. - On field of ArtifactId type Sample, or any else you want to. You can make custom on version too. Click Next.
- Checked option of Use auto-import.
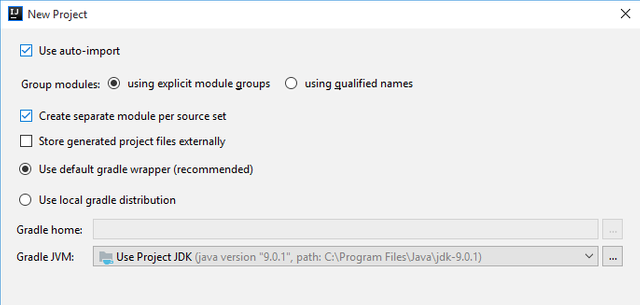
That's all and then click Next, and Finish.
2.2. Build Gradle
- After building project has already done, edit file: build.gradle. And all of its contents will be as follows:
version '1.0-SNAPSHOT'
buildscript {
    repositories {
        mavenCentral()
    }
    dependencies {
        classpath("org.springframework.boot:spring-boot-gradle-plugin:1.5.9.RELEASE")
    }
}
apply plugin: 'java'
apply plugin: 'eclipse'
apply plugin: 'idea'
apply plugin: 'org.springframework.boot'
jar {
    baseName = 'murez-db'
    version =  '0.1.0'
}
repositories {
    mavenCentral()
}
sourceCompatibility = 1.8
targetCompatibility = 1.8
dependencies {
   /*
     * Required on JDK 9
     * compile 'javax.xml.bind:jaxb-api:2.3.0'
     */
    compile("org.springframework.boot:spring-boot-starter-web")
    compile 'org.springframework.boot:spring-boot-starter-data-jpa'
    compile 'mysql:mysql-connector-java'
    testCompile('org.springframework.boot:spring-boot-starter-test')
}
Attention!
JDK 9 has done some changes forjava.xml.bindand other Java EE modules. So, it has deprecated and removed from default classpath. And alsojavax.xml.bindis sub-package ofjava.xml.bindmodule and will not be available on classpath by default in JDK 9.
Solution:
- Add
javax.xml.bindon classpath, we can add using following command:
--add-modules java.xml.bind- We can use Maven and Gradle to include
javax.xml.bindin our project.Maven
<dependency>
     <groupId>javax.xml.bind</groupId>
     <artifactId>jaxb-api</artifactId>
     <version>2.3.0</version>
</dependency>
Gradle
compile 'javax.xml.bind:jaxb-api:2.3.0'Source: https://docs.oracle.com/javase/9/docs/api/java.xml.bind-summary.html
2.3 Application Properties
Add a resource file in directory: src/main/resources/application.properties, type as follows:
spring.jpa.hibernate.ddl-auto=create
spring.datasource.url=jdbc:mysql://localhost:3306/sample
spring.datasource.username=Tester
spring.datasource.password=myPass123
3. Create Entity Class
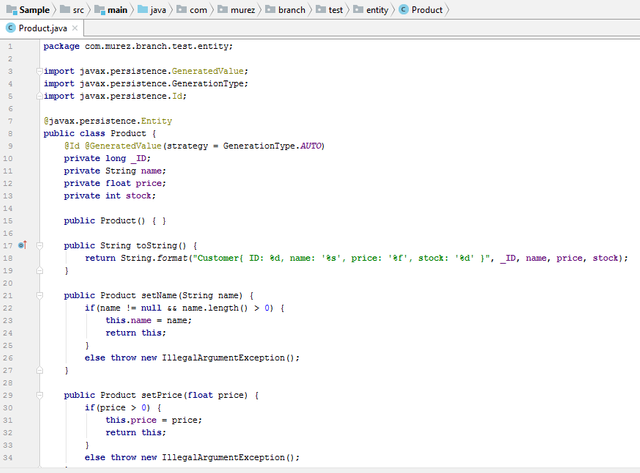
Right click on src/main/java directory. And on pop-up dialog, type: com.murez.branch.test.entity.Product.
Next, type this code:
package com.murez.branch.test.entity;
import javax.persistence.GeneratedValue;
import javax.persistence.GenerationType;
import javax.persistence.Id;
@javax.persistence.Entity
public class Product {
    @Id @GeneratedValue(strategy = GenerationType.AUTO)
    private long _ID;
    private String name;
    private float price;
    private int stock;
public Product() { }
   @Override
    public String toString() {
        return String.format("Customer{ ID: %d, name: '%s', price: '%f', stock: '%d' }", _ID, name, price, stock);
    }
    public Product setName(String name) {
        if(name != null && name.length() > 0) {
            this.name = name;
            return this;
        }
        else throw new IllegalArgumentException();
    }
    public Product setPrice(float price) {
        if(price > 0) {
            this.price = price;
            return this;
        }
        else throw new IllegalArgumentException();
    }
    public Product setStock(int stock) {
        if(stock > 0) {
            this.stock = stock;
            return this;
        }
        else throw new IllegalArgumentException();
    }
public void setID(long ID) { this._ID = ID; }
public final String getName() { return name; }
public final float getPrice() { return price; }
public final int getStock() { return stock; }
    public final long getID() { return _ID; }
}
4. Create Controller
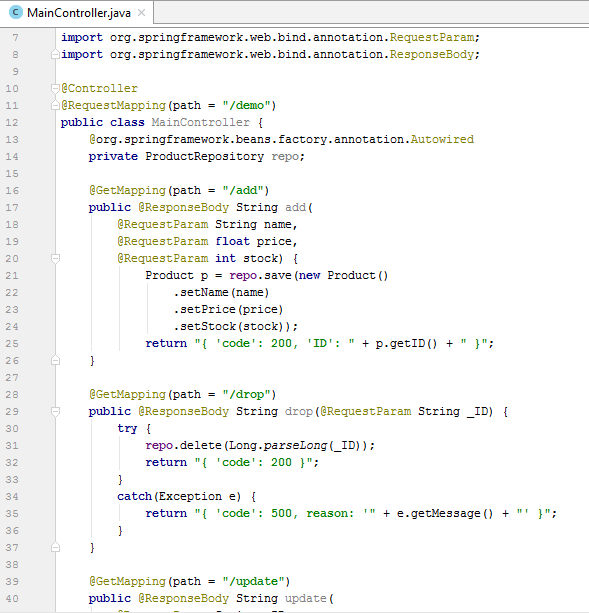
Do as previous step, but the package and class is: com.murez.branch.test.MainController
package com.murez.branch.test;
import com.murez.branch.test.entity.Product;
import org.springframework.stereotype.Controller;
import org.springframework.web.bind.annotation.GetMapping;
import org.springframework.web.bind.annotation.RequestMapping;
import org.springframework.web.bind.annotation.RequestParam;
import org.springframework.web.bind.annotation.ResponseBody;
@Controller
@RequestMapping(path = "/demo")
public class MainController {
    @org.springframework.beans.factory.annotation.Autowired
    private ProductRepository repo;
    @GetMapping(path = "/add")
    public @ResponseBody String add(
        @RequestParam String name,
        @RequestParam float price,
        @RequestParam int stock) {
            Product p = repo.save(new Product()
                .setName(name)
                .setPrice(price)
                .setStock(stock));
            return "{ 'code': 200, 'ID': " + p.getID() + " }";
    }
    @GetMapping(path = "/drop")
    public @ResponseBody String drop(@RequestParam String _ID) {
        try {
            repo.delete(Long.parseLong(_ID));
            return "{ 'code': 200 }";
        }
        catch(Exception e) {
            return "{ 'code': 500, reason: '" + e.getMessage() + "' }";
        }
    }
    @GetMapping(path = "/update")
    public @ResponseBody String update(
        @RequestParam String _ID,
        @RequestParam String name,
        @RequestParam String price,
        @RequestParam String stock) {
            if(name == null || name.length() < 1)
                return "{ 'code': 500, 'reason': 'Invalid name' }";
            try {
                Product p = repo.findOne(Long.parseLong(_ID))
                    .setName(name)
                    .setPrice(Float.parseFloat(price))
                    .setStock(Integer.parseInt(stock));
                repo.save(p);
                return "{ 'code': 200 }";
            } catch(Exception e) {
                return "{ 'code': 500, 'reason': '" + e.getMessage() + "' }";
            }
    }
    @GetMapping(path = "/all")
    public @ResponseBody Iterable<Product> getProducts() {
        return repo.findAll();
    }
}
5. Create Auto-Repository Interface and Launcher
Auto-Repository Interface
Create class com.murez.branch.test.ProductRepository
package com.murez.branch.test;
import com.murez.branch.test.entity.Product;
import org.springframework.data.repository.CrudRepository;
public interface ProductRepository extends CrudRepository<Product, Long> { }
This class will be automatically implemented by Spring in a bean.
Main Function
Create class com.murez.branch.test.App
package com.murez.branch.test;
@org.springframework.boot.autoconfigure.SpringBootApplication
public class App {
    public static void main(String[] args) {
        org.springframework.boot.SpringApplication.run(App.class, args);
    }
}
Deployment
Using
./gradlew bootRun
Open Command Prompt, and access to project directory. Then hitgradlew bootRun. The result as seen below,

Using JAR File
- Open Command Prompt, and access to project directory. Then hit
gradlew build. The result as seen below,

- Then, hit
java -jar build/libs/murez-db-0.1.0.jar. The result as the same as seen before.

- Open Command Prompt, and access to project directory. Then hit
Test
Open your browser and hit several URL as follows:
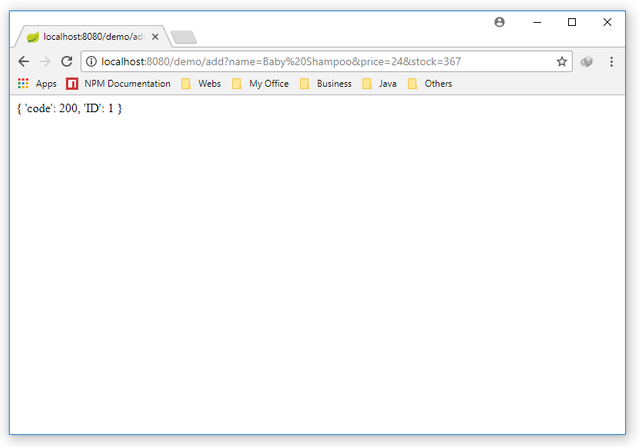
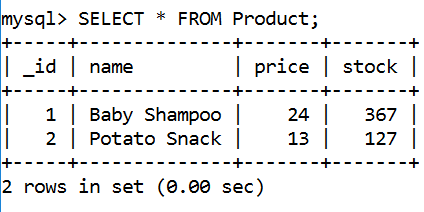
Add New Product
http://localhost:8080/demo/add?name=Baby Shampoo&price=24&stock=367http://localhost:8080/demo/add?name=Potato Snack&price=13&stock=127
Result
Response
Records
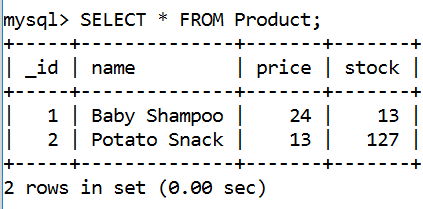
2. Update an Existing Product
http://localhost:8080/demo/update?name=Baby%20Shampoo&price=24&stock=13&_ID=1
Records
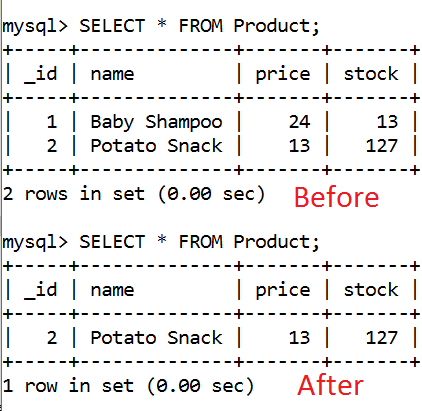
3. Drop Old Product
http://localhost:8080/demo/drop?_ID=1
Records
Thank you!
Share with Heart.
Posted on Utopian.io - Rewarding Open Source Contributors
Thank you for the contribution. It has been approved.
You can contact us on Discord.
[utopian-moderator]
You are welcome.
Thank you.
Hey @murez-nst I am @utopian-io. I have just upvoted you!
Achievements
Suggestions
Get Noticed!
Community-Driven Witness!
I am the first and only Steem Community-Driven Witness. Participate on Discord. Lets GROW TOGETHER!
Up-vote this comment to grow my power and help Open Source contributions like this one. Want to chat? Join me on Discord https://discord.gg/Pc8HG9x