Create a Simple Chatbox with jQuery Ajax and PHP PDO
What Will I Learn?
Uploading files with php is probably something that is not too much of a "scary" scare for website programmers, but if you ever try to create a file uploader with codeigniter, it can be an annoying and dizzying experience. In this tutorial, I will share how to create uploaders with codeigniter and ajax that not only work optimally, but still at MVC.
Requirements
- Codeigniter
- Jquery
- AjaxFileUpload
Difficulty
- Advanced
Tutorial Contents
First, make sure you have Codeigniter, jquery, and AjaxFileUpload script.
In this tutorial you are expected to have understood and can use codeigniter and jquery, if not please learn those two things first.
Create a databse and a table with the file name.
CREATE TABLE `files` (
  `id` int NOT NULL AUTO_INCREMENT PRIMARY KEY,
  `filename` varchar(255) NOT NULL,
  `title` varchar(100) NOT NULL
);
Phase 1 Create upload form
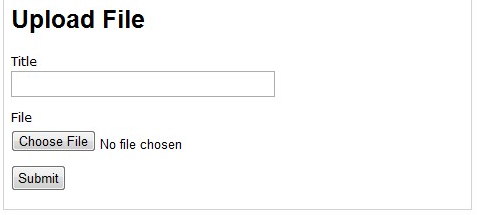
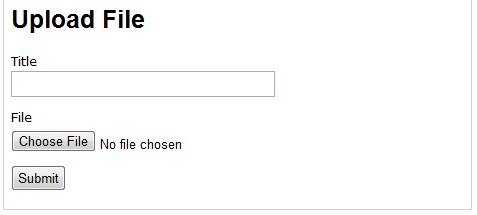
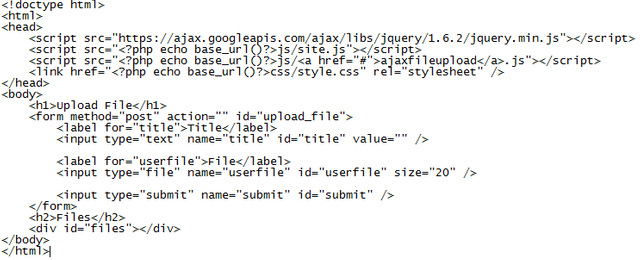
First, we need to create upload form as interface to upload file, copy the following code and save it with the name upload.php
Step 2 Create a controller
Create a controller as a bridge between view and model files, copy the following code, save it with the name upload.php
class Upload extends CI_Controller
{
    public function __construct()
    {
        parent::__construct();
        $this->load->model('files_model');
        $this->load->database();
        $this->load->helper('url');
    }
    public function index()
    {
        $this->load->view('upload');
    }
}
Stage 3 Create Custom Javascript
To handle submit form in view, we create a javascript file which will be used to process input from user. Copy the following code and save it with the name of site.js
$(function() {
$('#upload_file').submit(function(e) {
e.preventDefault();
$.ajaxFileUpload({
url :'./upload/upload_file/',
secureuri :false,
fileElementId :'userfile',
dataType : 'json',
data : {
'title' : $('#title').val()
},
success : function (data, status)
{
if(data.status != 'error')
{
$('#files').html('Reloading files...
');
refresh_files();
$('#title').val('');
}
alert(data.msg);
}
});
return false;
});
});
In this section we create a form handler with javascript on the client server side, and send the data content via ajax. If no error occurs, we refresh the file list, clear title and we show the response alerts.
Stage 4 Create a function to upload files
Controller
To upload a file, the url to be used is / upload / upload_file /, so we have to create a new method in the upload controller, copy the following code and place it on the upload controller we have created earlier.
public function upload_file()
{
    $status = "";
    $msg = "";
    $file_element_name = 'userfile';
    if (empty($_POST['title']))
    {
        $status = "error";
        $msg = "Please enter a title";
    }
    if ($status != "error")
    {
        $config['upload_path'] = './files/';
        $config['allowed_types'] = 'gif|jpg|png|doc|txt';
        $config['max_size'] = 1024 * 8;
        $config['encrypt_name'] = TRUE;
        $this->load->library('upload', $config);
        if (!$this->upload->do_upload($file_element_name))
        {
            $status = 'error';
            $msg = $this->upload->display_errors('', '');
        }
        else
        {
            $data = $this->upload->data();
            $file_id = $this->files_model->insert_file($data['file_name'], $_POST['title']);
            if($file_id)
            {
                $status = "success";
                $msg = "File successfully uploaded";
            }
            else
            {
                unlink($data['full_path']);
                $status = "error";
                $msg = "Something went wrong when saving the file, please try again.";
            }
        }
        @unlink($_FILES[$file_element_name]);
    }
    echo json_encode(array('status' => $status, 'msg' => $msg));
}
We make a simple check to see if the title entry contains a value or not. If the value title is not empty we load the default upload libraries codeigniter.
Next. we try to upload the file. If successful, we save the title and file name into the databse.
Model
In accordance with the MVC concept, we create a model to handle the functions associated with the database. Copy the following code and save it with file_model.php name
class Files_Model extends CI_Model {
    public function insert_file($filename, $title)
    {
        $data = array(
            'filename'      => $filename,
            'title'         => $title
        );
        $this->db->insert('files', $data);
        return $this->db->insert_id();
    }
}
Upload Folder
Next we create a folder to accommodate the files that will be uploaded on our web root folder with the file name, make sure the folder can be accessed (writable) by the server.
Step 5 Create List of uploaded files
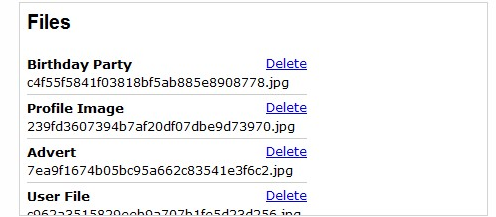
Open the site.js file we created earlier, then enter the following code:
function refresh_files()
{
    $.get('./upload/files/')
    .success(function (data){
        $('#files').html(data);
    });
}
This function will enter data into the varibale file contained in the view to display the list of uploaded files, we must call this function at the beginning when the page load to display the list of uploaded files. For that we have to put this function in document.ready.function at the top of the file.
refresh_files();
Controller
To display a list of uploaded files, the url to be used is / upload / files /, so we have to create a new method in the upload controller, copy the following code and place it on the upload controller we have created earlier.
public function files()
{
    $files = $this->files_model->get_files();
    $this->load->view('files', array('files' => $files));
}
Model
To retrieve the uploaded file data from the database, we create the get_files function, insert the following code into the files_model.php we created earlier.
public function get_files()
{
    return $this->db->select()
            ->from('files')
            ->get()
            ->result();
}
View
We need to create a view to display a list of uploaded files, create a new file with file.php name, and paste the following code:
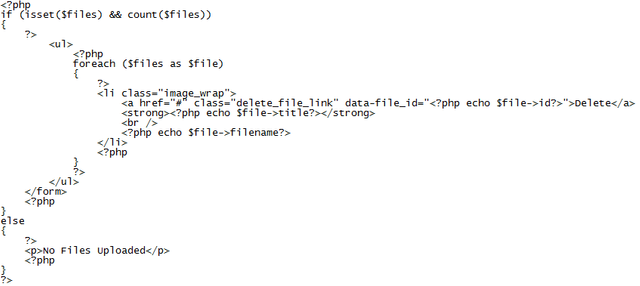
Through this view we will display the title and file name respectively. We also added a link to delete files, each of which has the ID attribute of the file stored in the database.
Delete Files
To be able to delete files that we upload, we create a new function to handle it.
Javascript
Copy dan masukkan kode berikut pada document.ready.function:
$('.delete_file_link').live('click', function(e) {
e.preventDefault();
if (confirm('Are you sure you want to delete this file?'))
{
var link = $(this);
$.ajax({
url : './upload/delete_file/' + link.data('file_id'),
dataType : 'json',
success : function (data)
{
files = $(#files);
if (data.status === "success")
{
link.parents('li').fadeOut('fast', function() {
$(this).remove();
if (files.find('li').length == 0)
{
files.html('No Files Uploaded
');
}
});
}
else
{
alert(data.msg);
}
}
});
}
});
When the delete link is clicked, we show the delete confirmation dialog. If confirm ok then we call the function / upload / delete_file.
Controller
As explained above, the url we will access to delete the file is / upload / delete_file, so we create the delete_file function, enter the following code in the upload controller.
public function delete_file($file_id)
{
    if ($this->files_model->delete_file($file_id))
    {
        $status = 'success';
        $msg = 'File successfully deleted';
    }
    else
    {
        $status = 'error';
        $msg = 'Something went wrong when deleteing the file, please try again';
    }
    echo json_encode(array('status' => $status, 'msg' => $msg));
}
Model
Open files_model.php and enter the following code:
public function delete_file($file_id)
{
    $file = $this->get_file($file_id);
    if (!$this->db->where('id', $file_id)->delete('files'))
    {
        return FALSE;
    }
    unlink('./files/' . $file->filename);
    return TRUE;
}
public function get_file($file_id)
{
    return $this->db->select()
            ->from('files')
            ->where('id', $file_id)
            ->get()
            ->row();
}
Since we only send the ID, we need to get the file name, so we create a new method to load the file. Once loaded, we delete the record and delete the file from the server.
Done! If you run it, you should be able to upload the file, see it appear, and then delete it.
Posted on Utopian.io - Rewarding Open Source Contributors
Boost Your Post. Send 0.100 STEEM or SBD and your post url on memo and we will resteem your post on 5000+ followers. check our account to see the follower count.
Your contribution cannot be approved because it does not follow the Utopian Rules, and is considered as plagiarism. Plagiarism is not allowed on Utopian, and posts that engage in plagiarism will be flagged and hidden forever.
You can contact us on Discord.
[utopian-moderator]
Congratulations @joxaaxl! You received a personal award!
Click here to view your Board
Do not miss the last post from @steemitboard:
Vote for @Steemitboard as a witness and get one more award and increased upvotes!
Congratulations @joxaaxl! You received a personal award!
You can view your badges on your Steem Board and compare to others on the Steem Ranking
Vote for @Steemitboard as a witness to get one more award and increased upvotes!