(Part 11) Decentralized Exchange - Deploying With Ganache And Truffle(PT 11)
Repository
https://github.com/igormuba/DEX/tree/master/Class%2011
What Will I Learn?
- Compile and deploy multiple contracts with Truffle to Ganache
- Call functions with truffle
- Deploy contracts with Remix to Ganache
- Deploy to the real Ethereum blockchain with either Truffle and Remix
Requirements
- Internet connection.
- Code editor.
- Browser.
Difficulty
- Intermediary.
Tutorial Contents
Introduction
On this series, we have covered the creation of a decentralized exchange. We haven't implemented the front end, we have focused just on the blockchain storage and logic, that is, the back end.
What is left for us to do is to deploy the contract. For that, I have chosen the Truffle + Ganache tools, which are the ones I am most used to. You could use Remix with Ganache and I will also show you how to do that to deploy the contract on a private testnet (important for future front end testing). The steps to deploy on the real Ethereum main network are the same, you just need to choose a node from the real blockchain instead of Ganache, but the steps on either truffle framework or on Remix itself are the same.
Setting the truffle environment.
I will, later in this tutorial, show how can you do the same with Remix. But if you want to get truffle, you can get it by clicking here. Notice that you also need node package manager and git tools for this. If you use macOS Mojave you will be prompt during the installation to install git tools (thank you, Apple), if you use Linux, chances are you also have git tools. If you use Windows, or your Linux distributions does not come packed with git tools, you can get them by clicking here.
If you have the code from the last section, which is the fully working decentralized exchange, you have to save them, and on a new folder (to keep things clean) create a new truffle project with
truffle init
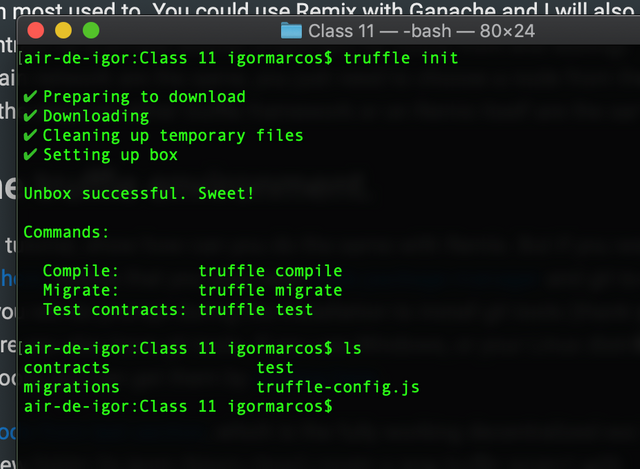
This will give you the skeleton of the truffle working environment.
Contract compilation
Now, copy the contracts (the token is optional but useful for testing purposes) into the contracts folder inside the folder where you have initiated the truffle development environment:
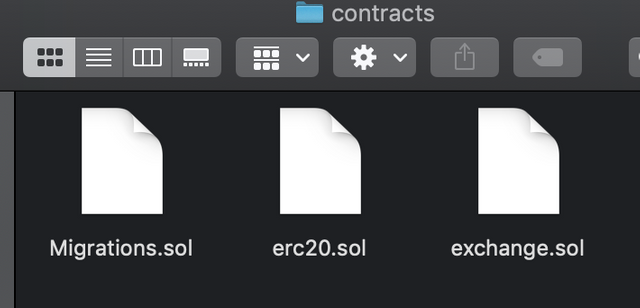
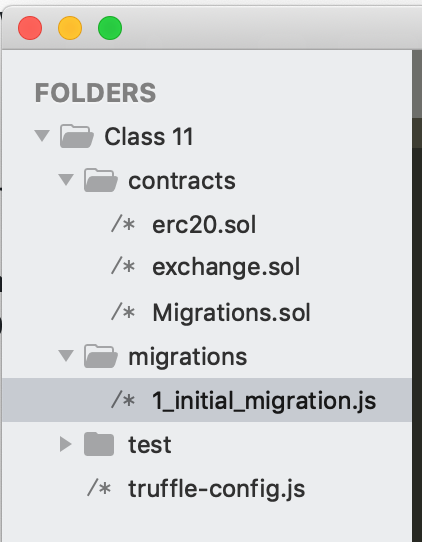
Now, inside the folder migrations, we need to create the migrations file to tell truffle how we want to deploy the token. We will do nothing fancy yet, just literally deploy the exchange and the token so that we can test them later.
The code for the file 2_initial_migrations.js that we have created inside the migrations folder is:
//variables to map the contracts to useful variables
let exchange = artifacts.require("exchange");
let erc20 = artifacts.require("erc20");

//module to deploy
module.exports = function(deployer) {
//deploys the exchange contract
  deployer.deploy(exchange);
//deploys the token contract
  deployer.deploy(erc20);
};
Notice that, for this project, the deployment order does not matter. In more advanced cases, depending on what you are trying to do, the order matter and how you link one contract to the order too, but not here.
Now, compile the contract. Open the console of your operating system and navigate with the cd command to the folder the project is at:

Now, run the command truffle compile:
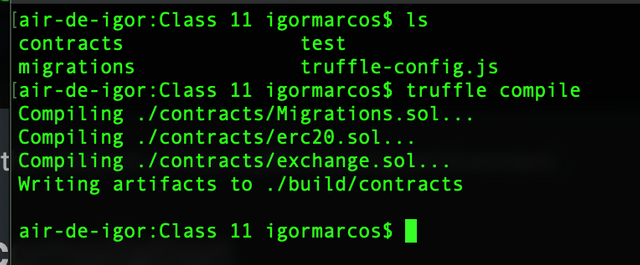
Note: if, for whatever reason, your output is not equal to mine, try running truffle compile with sudo, as sudo truffle compile. It happened to me before, when I did truffle compile I got no output, no error, nothing, but it did not compile either, I solved by doing sudo. I don't really know why does this happen as it has only happened to me the first time I sudo'ed truffle, and apparently, not everyone else has this problem. Just reporting in case you face it too.
What it does is, it creates the JSON files so that your computer knows how to use the functions from the contract.
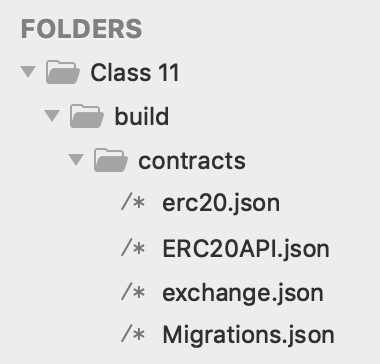
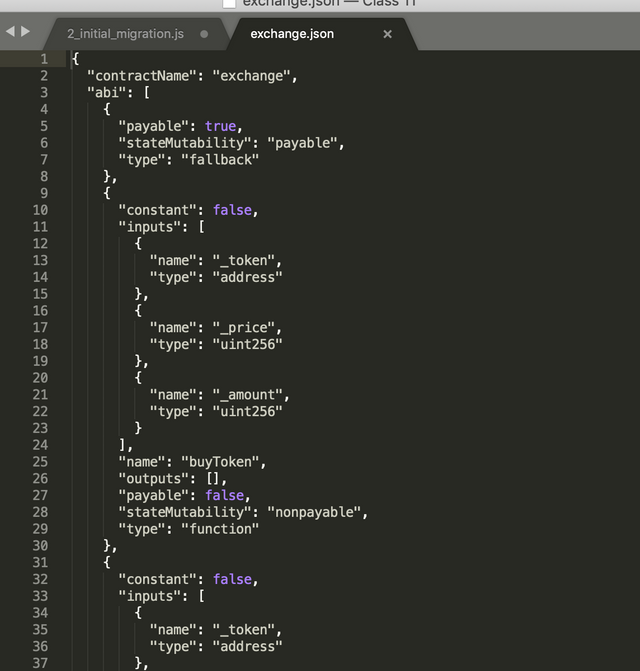
We can say that Ethereum nodes (that includes Ganache, the testing node we will use to run the tests) are "json machines", they receive requests in .json and then do their job on the Ethereum virtual machine, but all the communication between the users and the Ethereum node is done in JSON, and that includes both the requests we send and the responses we receive.
Network and deployment
Before we can deploy the contract to a network, we must specify the node we want to use to send the contract and all the deployment data and fees.
In our case, we are using Ganache:
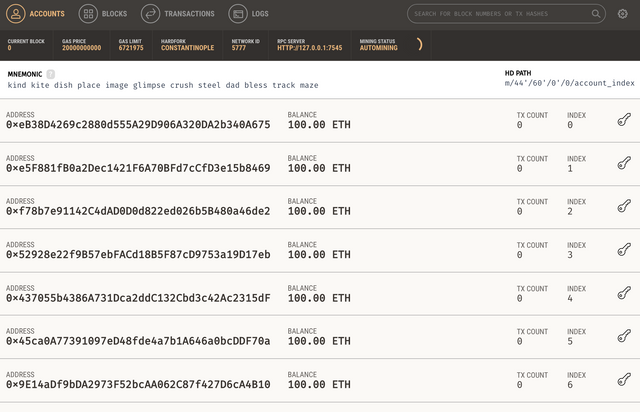
Ganache works exactly like a regular Ethereum node, except it is in a testing environment. Every time you close the node it resets, and it doesn't unnecessarily mine blocks.
How can it work without mining blocks? Well, it actually does mine blocks, but only when it receives a request, and stops mining when it fulfills the request. You will see that in practice later. For now, take note of the address and port you are using to run Ganache. Usually, it is 127.0.0.1:7545, like mine, is.
Now, back to the truffle project, find the truffle-config.js file.
On it, you will need to uncomment the `development settings:
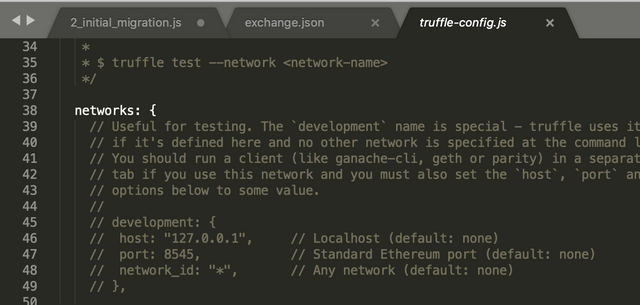
And of course, put the correct address and port numbers:
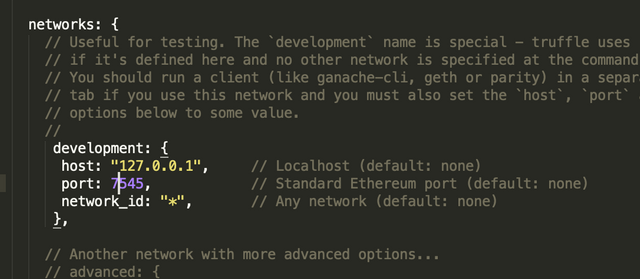
After saving everything, it is finally time to deploy. Dot it on the same folder as the root of the project, like the compile command, with truffle migrate.
You will see a huge output:
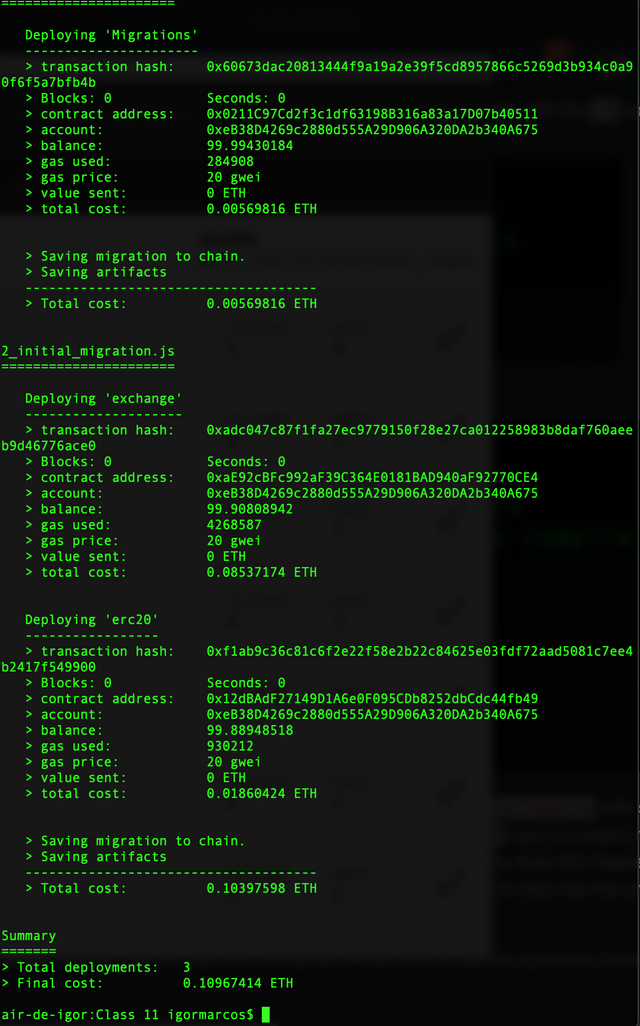
And, just like e have predicted, it is VERY EXPENSIVE to deploy this huge contract:

Note: On the screenshot above you see that there were 3 deployments, but we have written only two. That is because the deployment itself is managed by a deployment contract. So you will always, with truffle, deploy your contracts +1.
And take a Look at what happened in Ganache:

It took 5 blocks to deploy everything. as now it is waiting for requests to mine the other blocks.
Interacting with the deployed contract
Truffle comes with a console to interact with deployed contracts. So let us see how we can do this.
By running truffle console, we start the console where we can work with the deployed contracts.

To work with the contracts, we create an instance. An instance is a variable that holds the information of the contract, pretty much like the variable on the migrations file we have created!
So, I will create two variables, one for the token and one for the exchange, with:
let exchange = await exchange.deployed()
let erc20 = await erc20.deployed()
By typing exchange on the console I get a lot of information from the exchange, but what matter is the address. The address of the exchange contract is 0xaE92cBFc992aF39C364E0181BAD940aF92770CE4:

To approve the exchange to move my token balance (necessary to deposit) I do erc20.approve("0xaE92cBFc992aF39C364E0181BAD940aF92770CE4", 100) and that gives me the response:
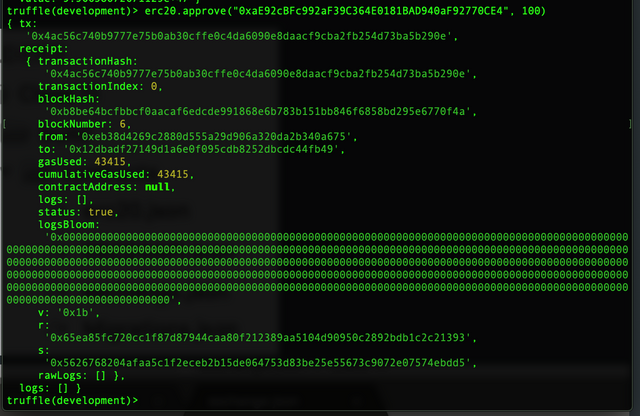
We can confirm that it was approved with erc20.allowance("0xeB38D4269c2880d555A29D906A320DA2b340A675","0xaE92cBFc992aF39C364E0181BAD940aF92770CE4")
And the response is:

But wait, we have approved the exchange to move up to 100 tokens, why does it say 64? Well, because it is not 64 in decimal, it is hexadecimal! And 64 in hex means 100!
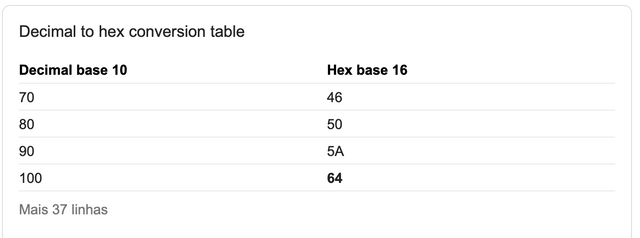
And that is how you deploy the exchange. From there on, you can repeat all the tests we have done in the previous tutorial, but with truffle this time. It is not hard. Just remember to declare the variable linking to the contract, and then to call the functions it is as simples as contract.function!
Deploy to Ganache with Remix
Now, if you don't want to use Truffle, for whatever reason, maybe because you are not familiar with it, or because Remix has a very nice and easy to use interface, you can still deploy to Ganache with Remix. Here is how you do it.
First, I close an open Ganache, so it resets the blockchain, it has zero blocks and all balances are on the default (100).
Now, got to Remix, you need to make sure you are using remix at HTTP and not https, HTTP will give you an error when trying to do it.
On the run tab choose Web3 provider as the environment:

Click ok and put there the address and port, just like on the configuration we have done on Truffle:
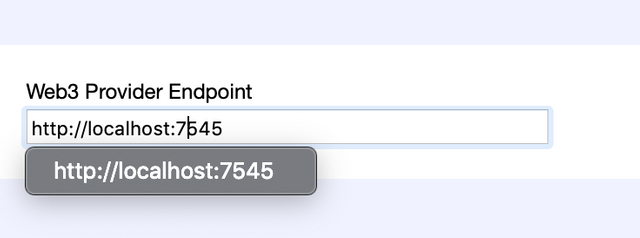
Now, it will work exactly like we are used to do. Compile and run just like we have done on Remix this whole tutorial. Simple and easy.
And when you deploy there, Ganache will mine the blocks, just like with Truffle (but maybe cheaper because it does not need the migrations contract):
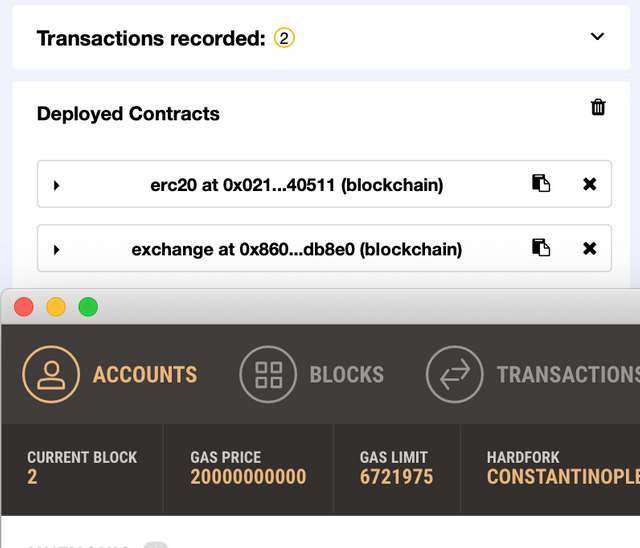
Deploying to the real Ethereum blockchain
To deploy your contract to the real Ethereum blockchain, on Remix you need to have an injected web3 interface, for example, Metamask, and select:

This will delegate to Metamask the task of selecting the blockchain. Which is quite easy, inside metamask you can switch with a single click between popular testnets, the real Ethereum blockchain and even Ganache on your computer!
On Truffle, to deploy to Ethereum is a bit more complicated, because you will need to run an Ethereum node on your computer. But once you get your node running, the steps are the same. Parity wallet is a nice alternative to Ganache, in this case!
Curriculum
Latest tutorial of the series:
First tutorial of the series:
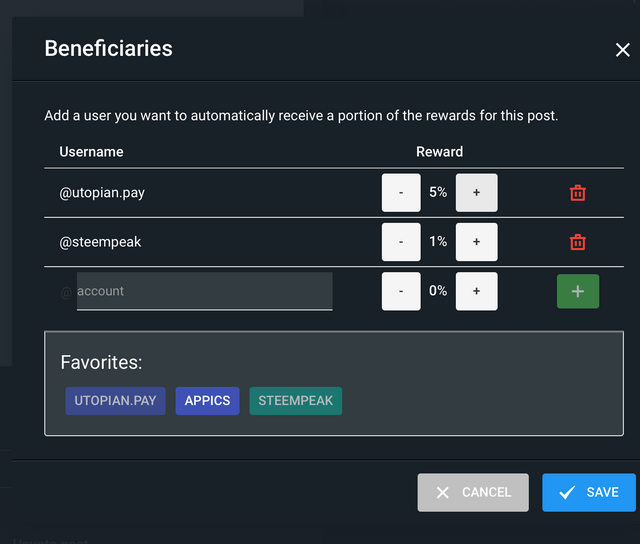
Beneficiaries
This post has as beneficiaries
- @utopian.pay with 5%
- @steempeak with 1%
using the SteemPeak beneficiary tool
Thank you for your contribution @igormuba.
You always put the results during the tutorial and this is very important for the reader to understand well what you are developing.
The idea of placing the larger images is great.
As always a great job.
Looking forward to your upcoming tutorials.
Your contribution has been evaluated according to Utopian policies and guidelines, as well as a predefined set of questions pertaining to the category.
To view those questions and the relevant answers related to your post, click here.
Need help? Chat with us on Discord.
[utopian-moderator]
Hi, thank you for commenting on the things I have done right. If I have written a good tutorial, a big part of the quality is thanks to reviewers like you, writing critics and suggesting where I can improve. The skills I had to grow on writing have value both for Utopian and for myself even in real life.
Thank you and the other reviewers very much.
Thank you for your review, @portugalcoin! Keep up the good work!
Hi, @igormuba!
You just got a 0.21% upvote from SteemPlus!
To get higher upvotes, earn more SteemPlus Points (SPP). On your Steemit wallet, check your SPP balance and click on "How to earn SPP?" to find out all the ways to earn.
If you're not using SteemPlus yet, please check our last posts in here to see the many ways in which SteemPlus can improve your Steem experience on Steemit and Busy.
Hi @igormuba!
Your post was upvoted by @steem-ua, new Steem dApp, using UserAuthority for algorithmic post curation!
Your post is eligible for our upvote, thanks to our collaboration with @utopian-io!
Feel free to join our @steem-ua Discord server
That is awesome , cool and great !!!!
Your work with exchange systems are amazing!!!
Realy awesome!!
Hi, I am not sure if I understood right your questions, but I will try to answer, and you can ask me again if I misunderstood something or my answers are not clear.
Note that if you want to deploy on the real blockchain, not on Ganache testing environment, you need to connect to an Ethereum node. The simplest way is to use Remix+Metamask to deploy to the real blockchain.
Thanks, ok i note this testing tools, it's interesting!!! sorry my eng not well:(
I am not a native English speaker either, I am also always learning and improving my language :)
Hey, @igormuba!
Thanks for contributing on Utopian.
We’re already looking forward to your next contribution!
Get higher incentives and support Utopian.io!
Simply set @utopian.pay as a 5% (or higher) payout beneficiary on your contribution post (via SteemPlus or Steeditor).
Want to chat? Join us on Discord https://discord.gg/h52nFrV.
Vote for Utopian Witness!