How to Make a Sunlight Effect from a window with GIMP | GIMP Tutorial
Hi all my friends, on this occasion I again share the tutorial using GIMP software. In this tutorial I will share "How to Make a Sunlight Effect from a window with GIMP" to you guys. The tutorial I gave at this time belongs to the easy category. Although the editing process is so easy, but the resulting effect is very visible as the original.
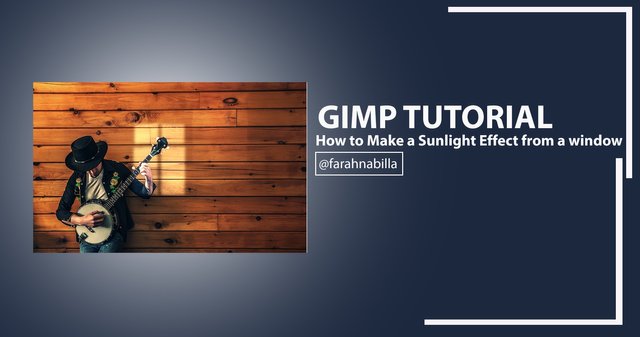
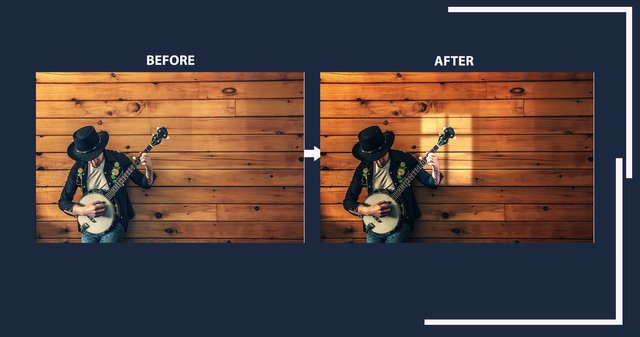
By utilizing the Color Curves command, we can create a sunlight effect from the window using the GIMP application. As a tool, select a window image and make a selection around the window, remove the window visibility layer, reactivate the main photo layer and apply the curves command to create a brighter effect according to the contours of the window. To keep your photos undamaged, backup your photos by doubling the layers.
To begin the editing process, you must first prepare the GIMP software first. If any of you do not have GIMP software, please download below:
Download GIMP - Via BitTorrent And Directly
And if you already have GIMP software and want to start learning to make sunlight effect from window with GIMP, please follow the steps below.
How to Make a Sunlight Effect from a window with GIMP
First of all, prepare the first sample of the photo you want to edit. If you want to use the same photo as me, please CLICK HERE.
Next open your GIMP software, and enter the photo you want to edit. How to click Menu File> Open> Find and Select the image you want to edit.
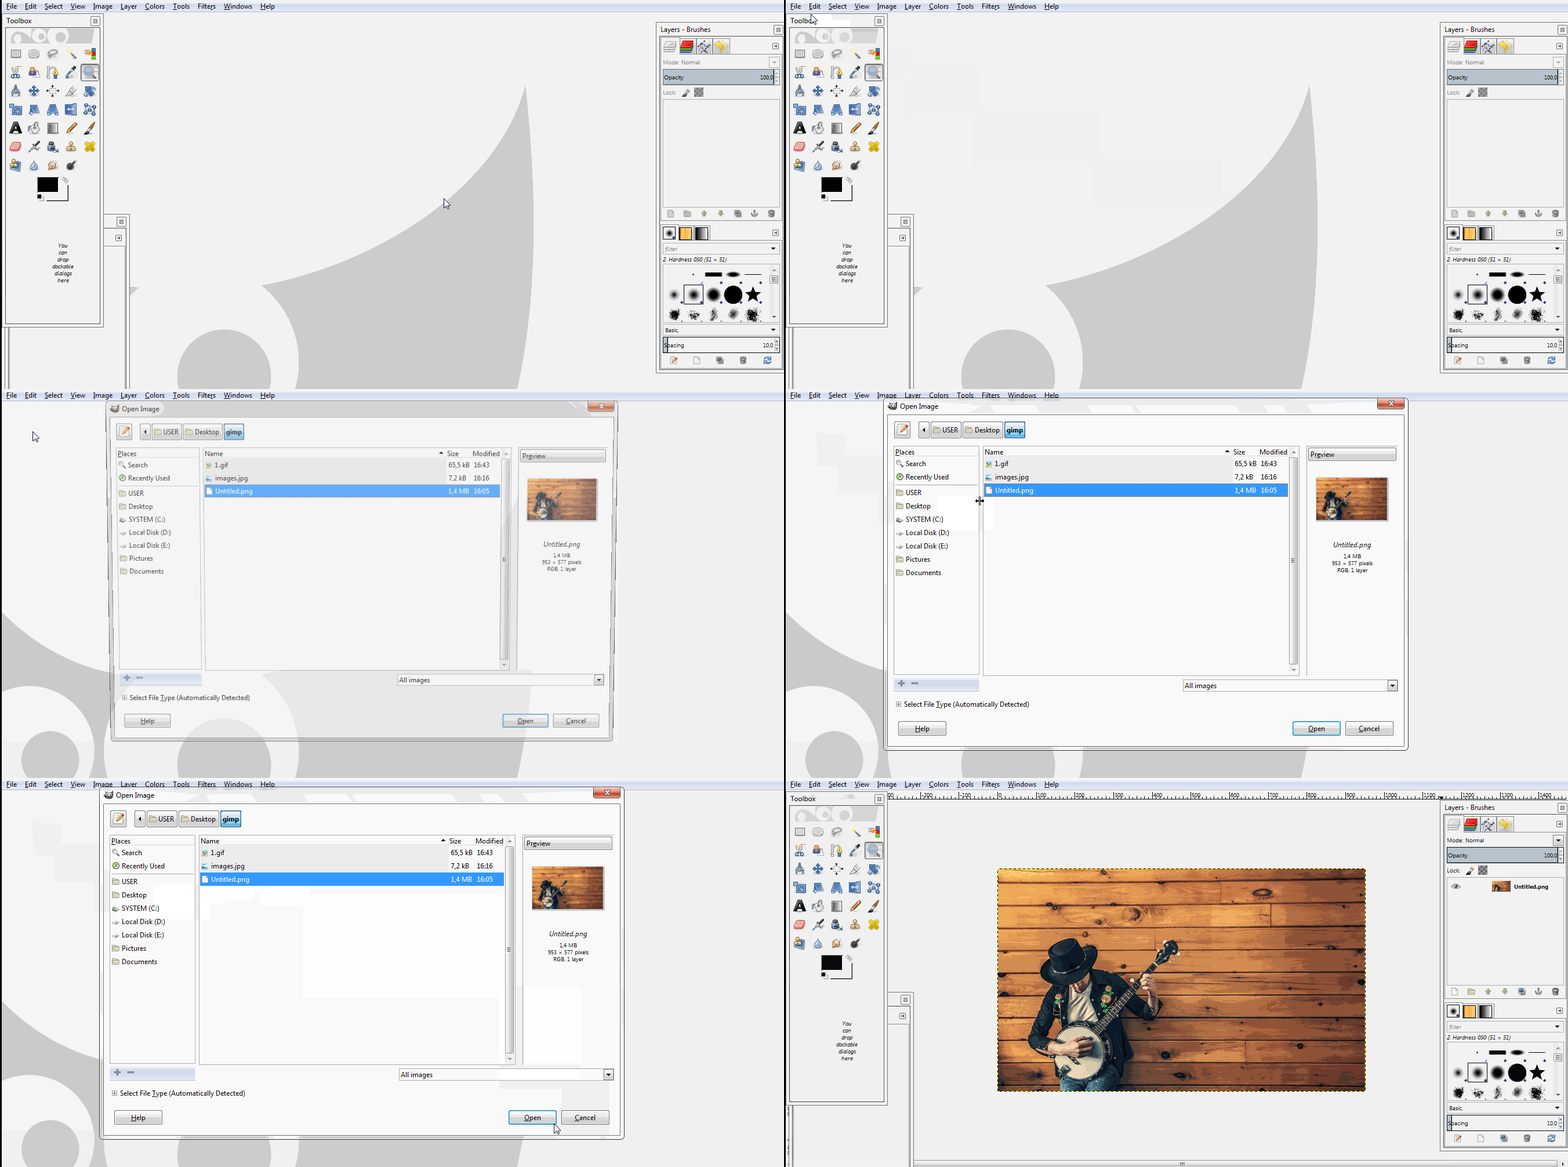
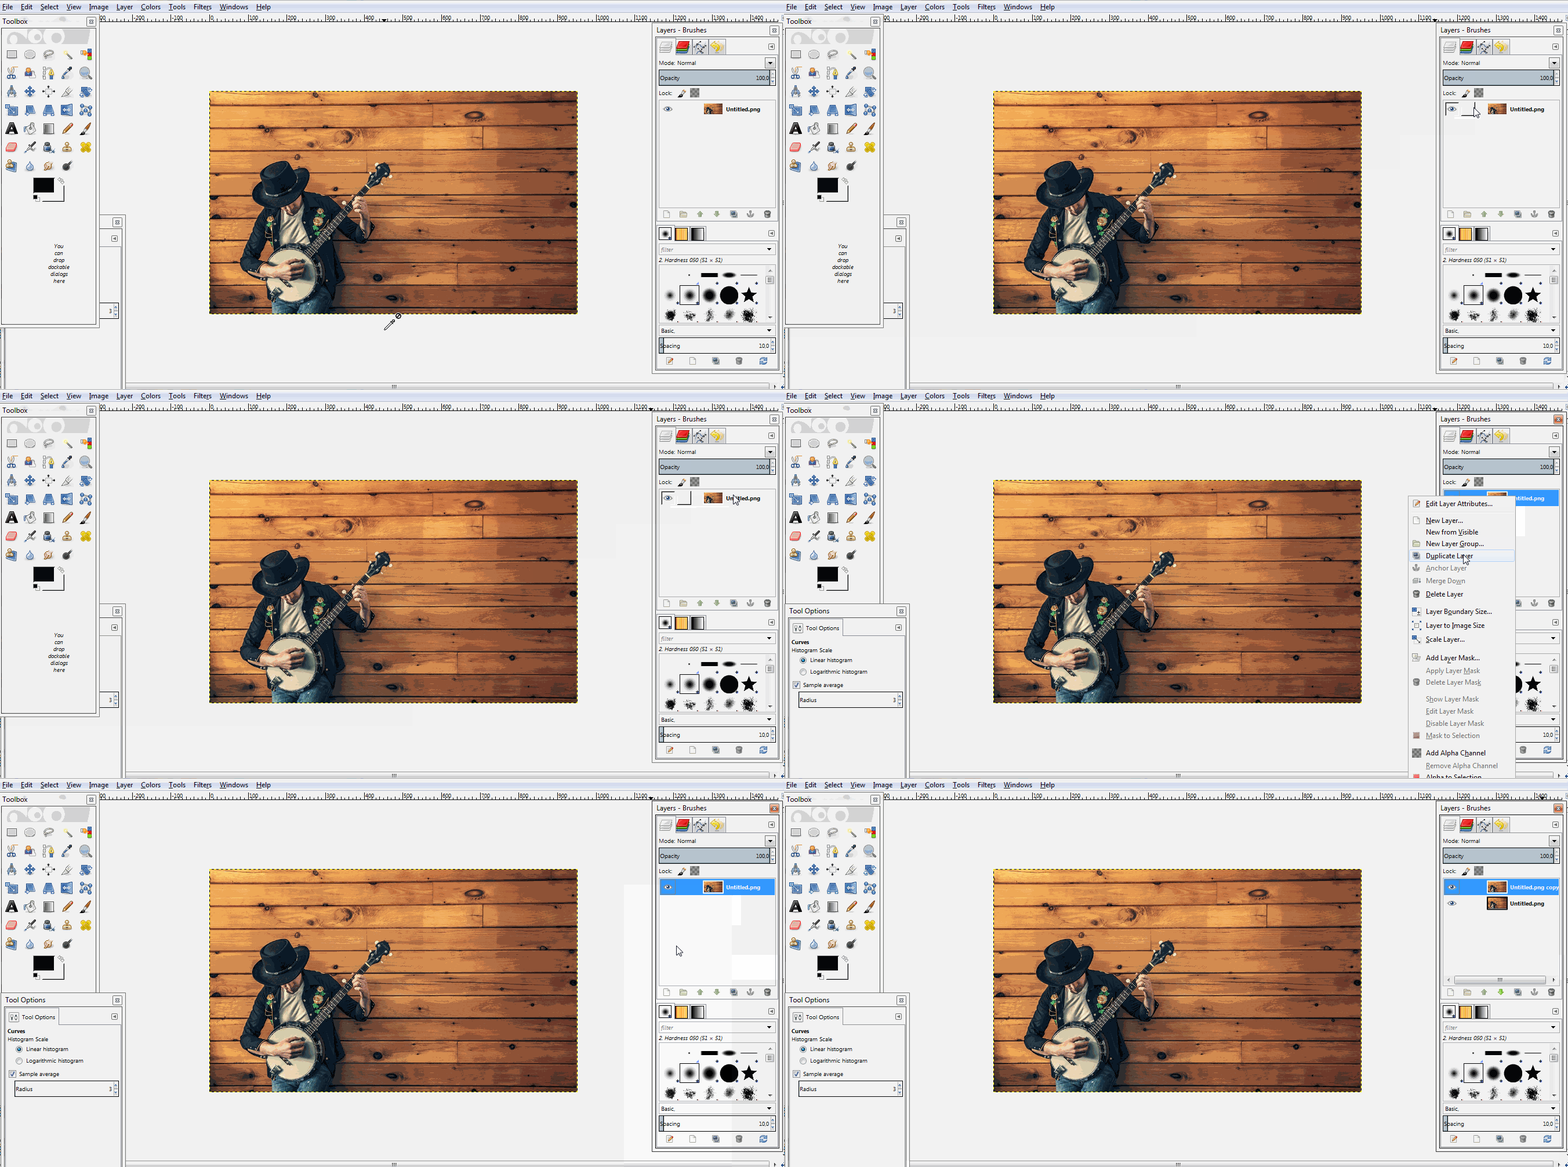
Next duplicate the Image Layer. Right-click on Layer, then select "Duplicate Layer".
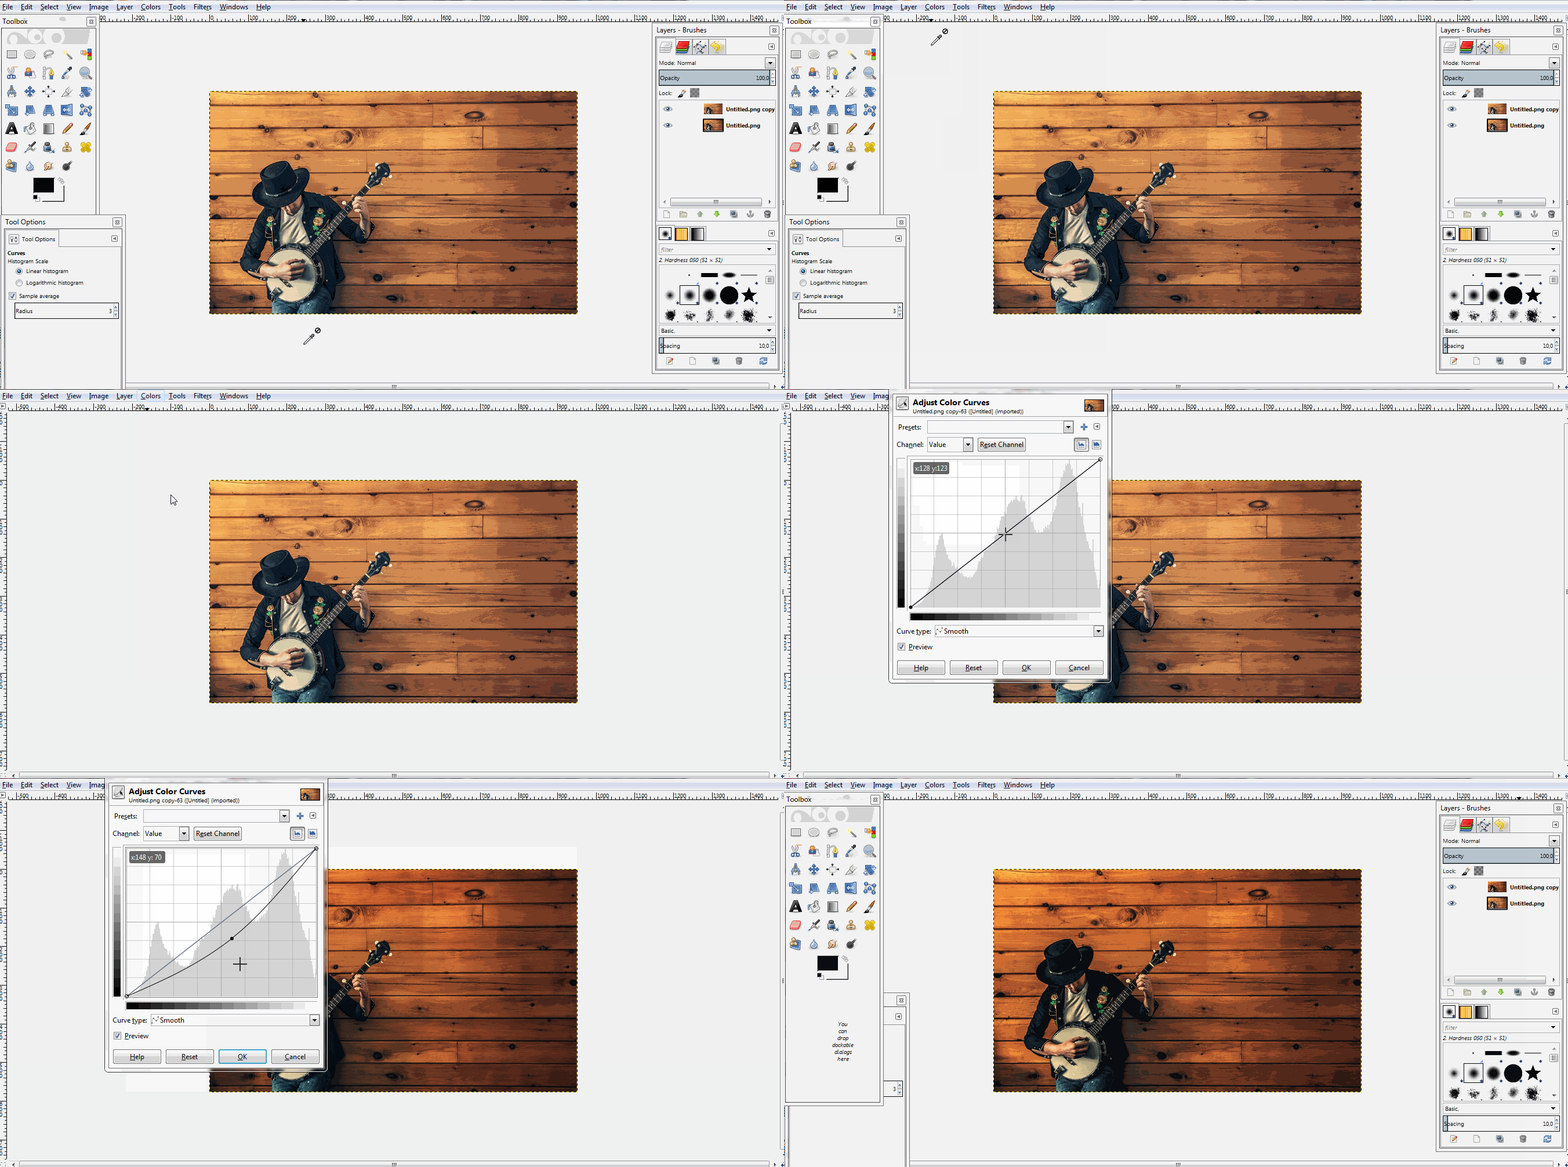
Next, reduce the light on the photo, so the sunlight effect becomes better. How to Click Menu Color > Curves > Pull the curve line down > Last Click OK.
Next, make a selection like a window shape. The trick, first prepare a window image (if not already have it, CLICK HERE). Then enter the window image by clicking File > Open As Layer > Then locate and insert window image.
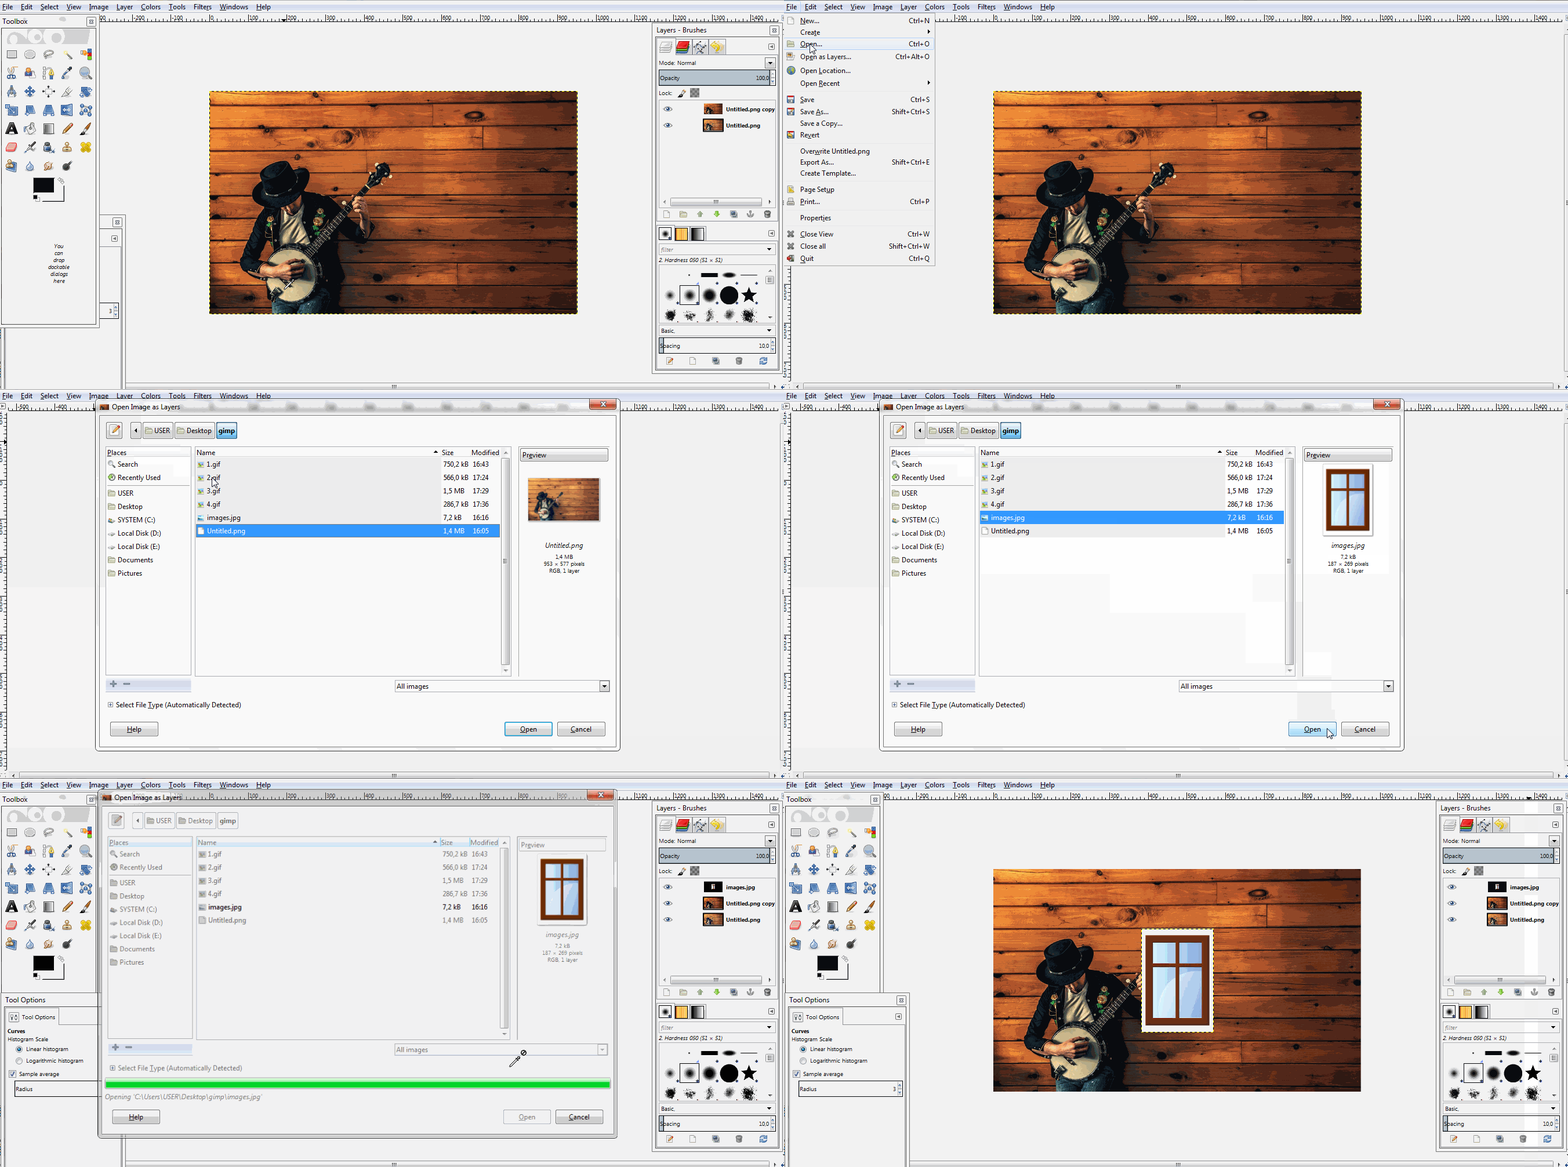
Next determine the size of the window shape, how to click "Scale Tool", and drag the size you want. If appropriate, click "Scale".
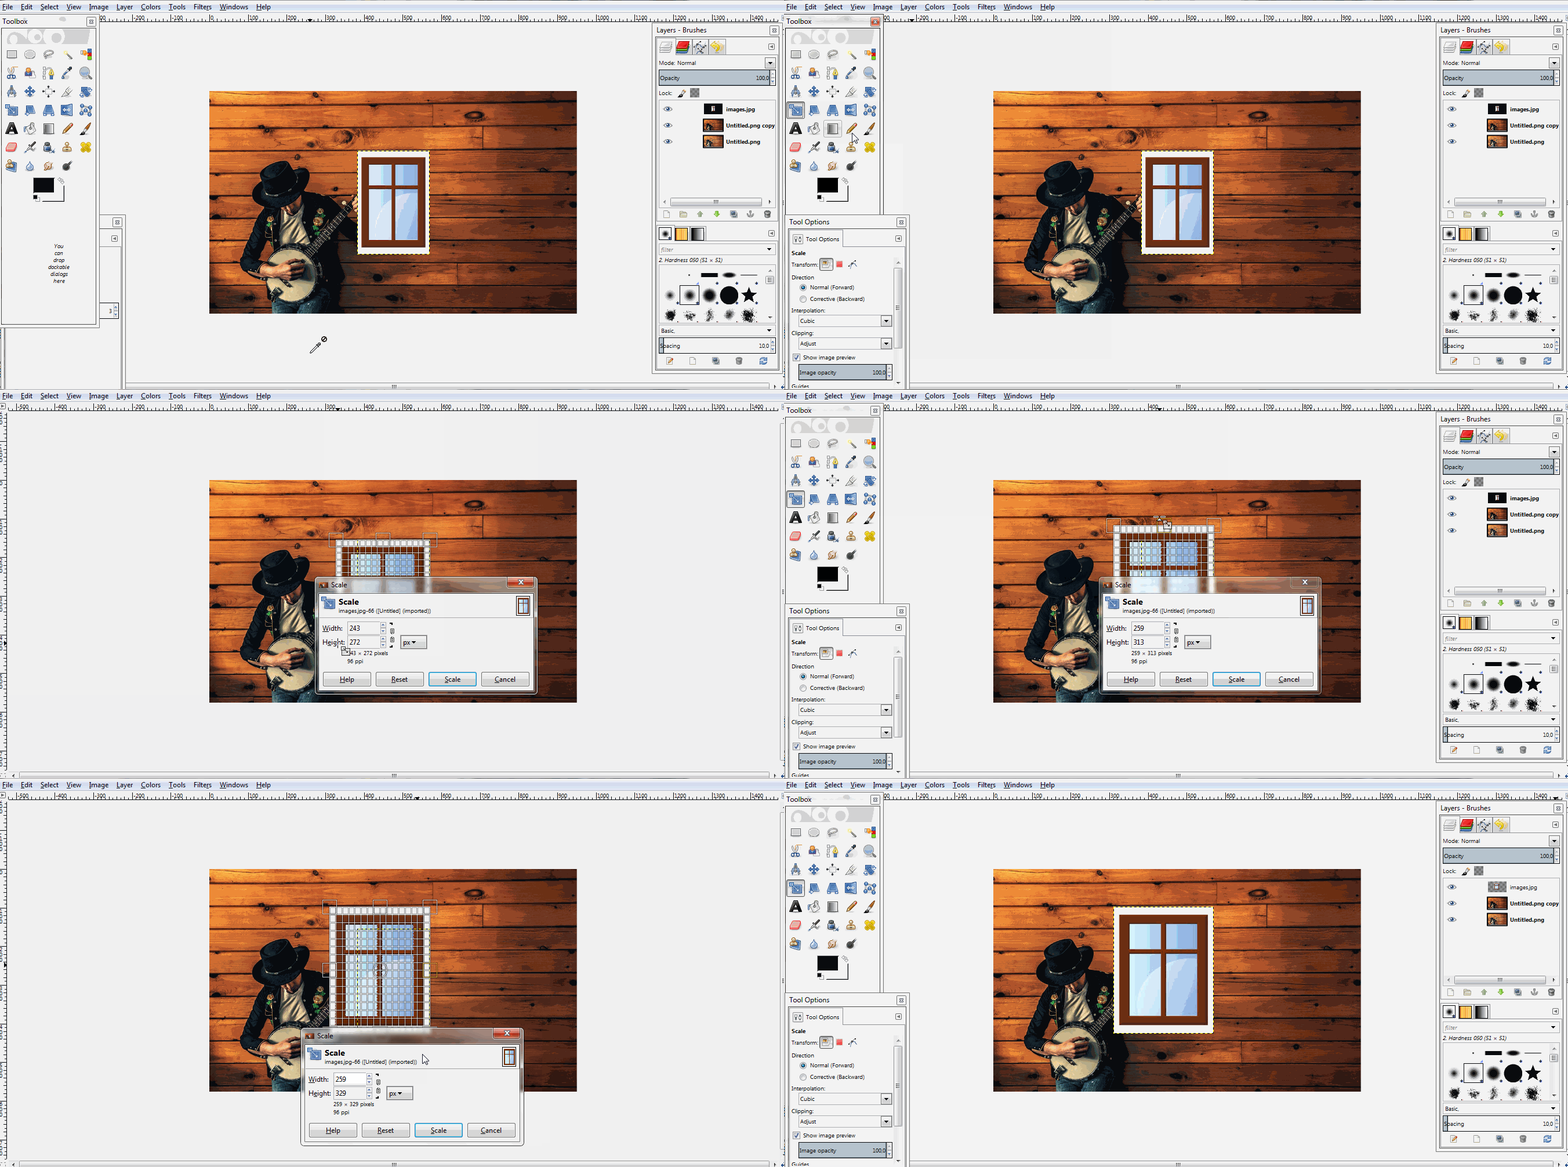
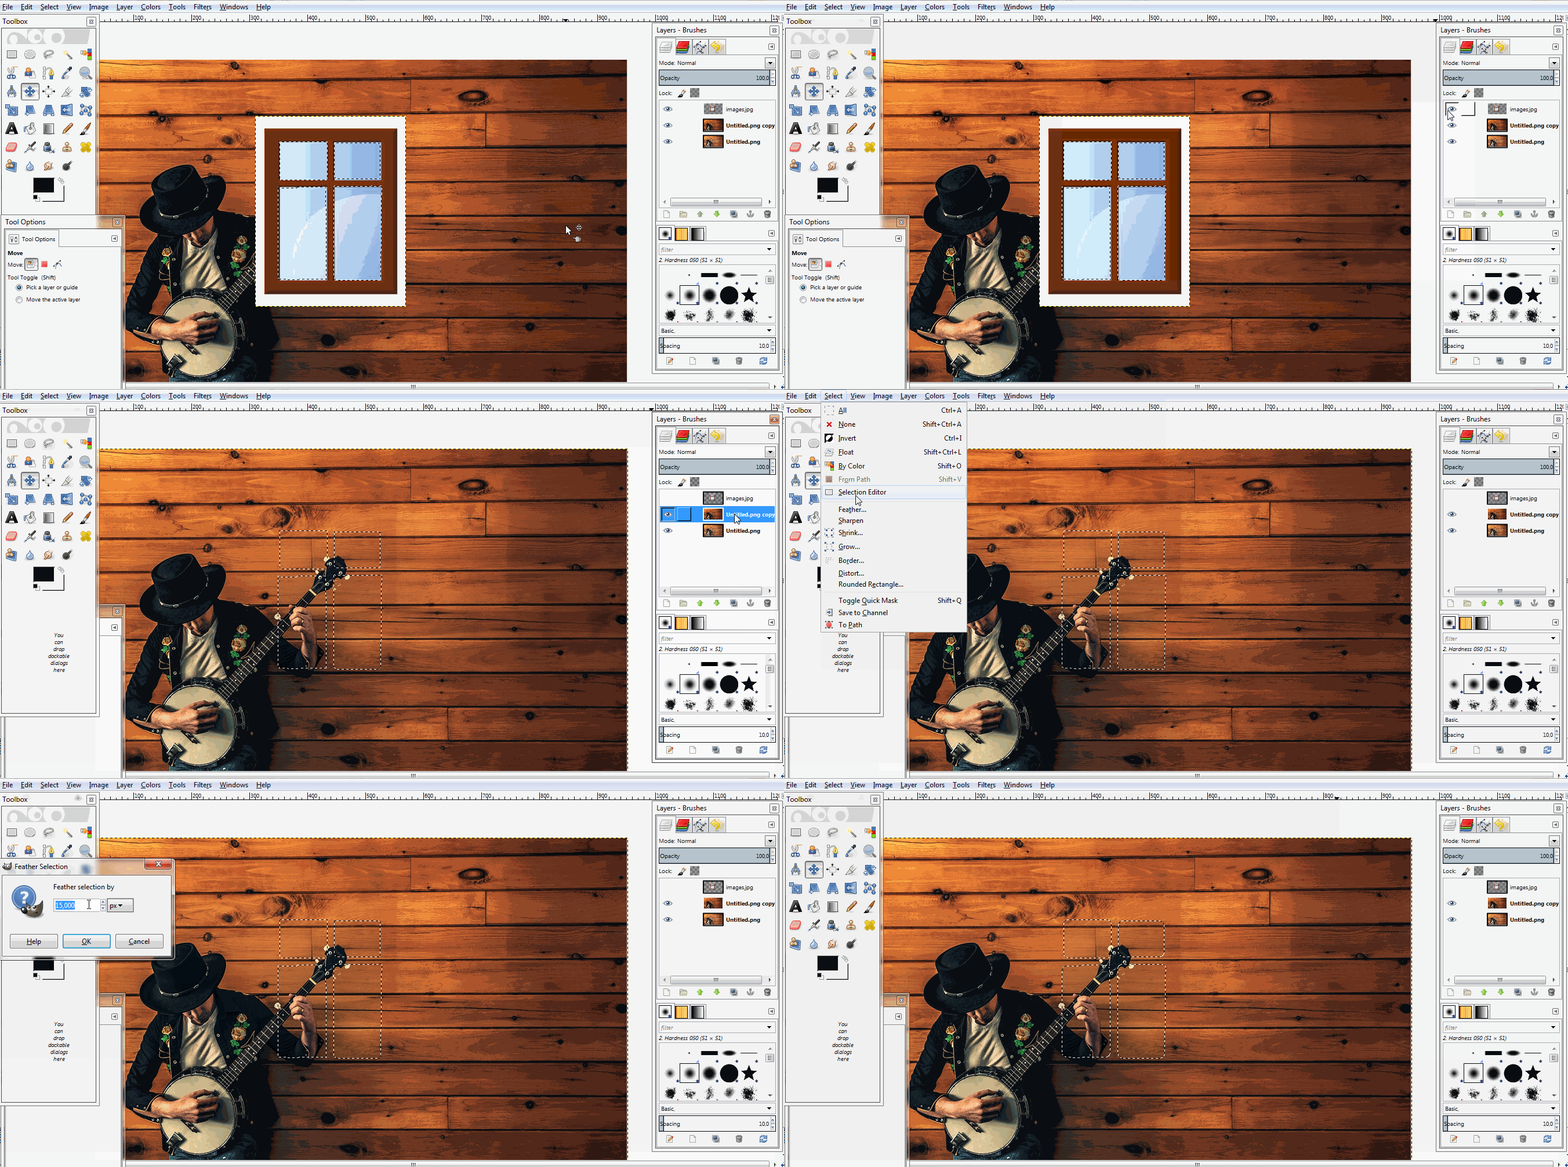
Next make a window-shaped selection using "Scissors Tool". Make a selection like the example image below. Every Column selection made, do not forget to press the "Enter" key.
Enlarge image first, to simplify the selection process.

Next hide the Window layer and click on the duplicate layer. Add "Feather Selection" to smooth the selection. How to click Menu Select > Feather .. > And fill "15.000 px" > Last click OK.
Next we will give the sunlight on the selection. How to click Menu Color > Curves > And pull the curve upwards line like the example picture below. And to eliminate the selection, press CTRL + T.
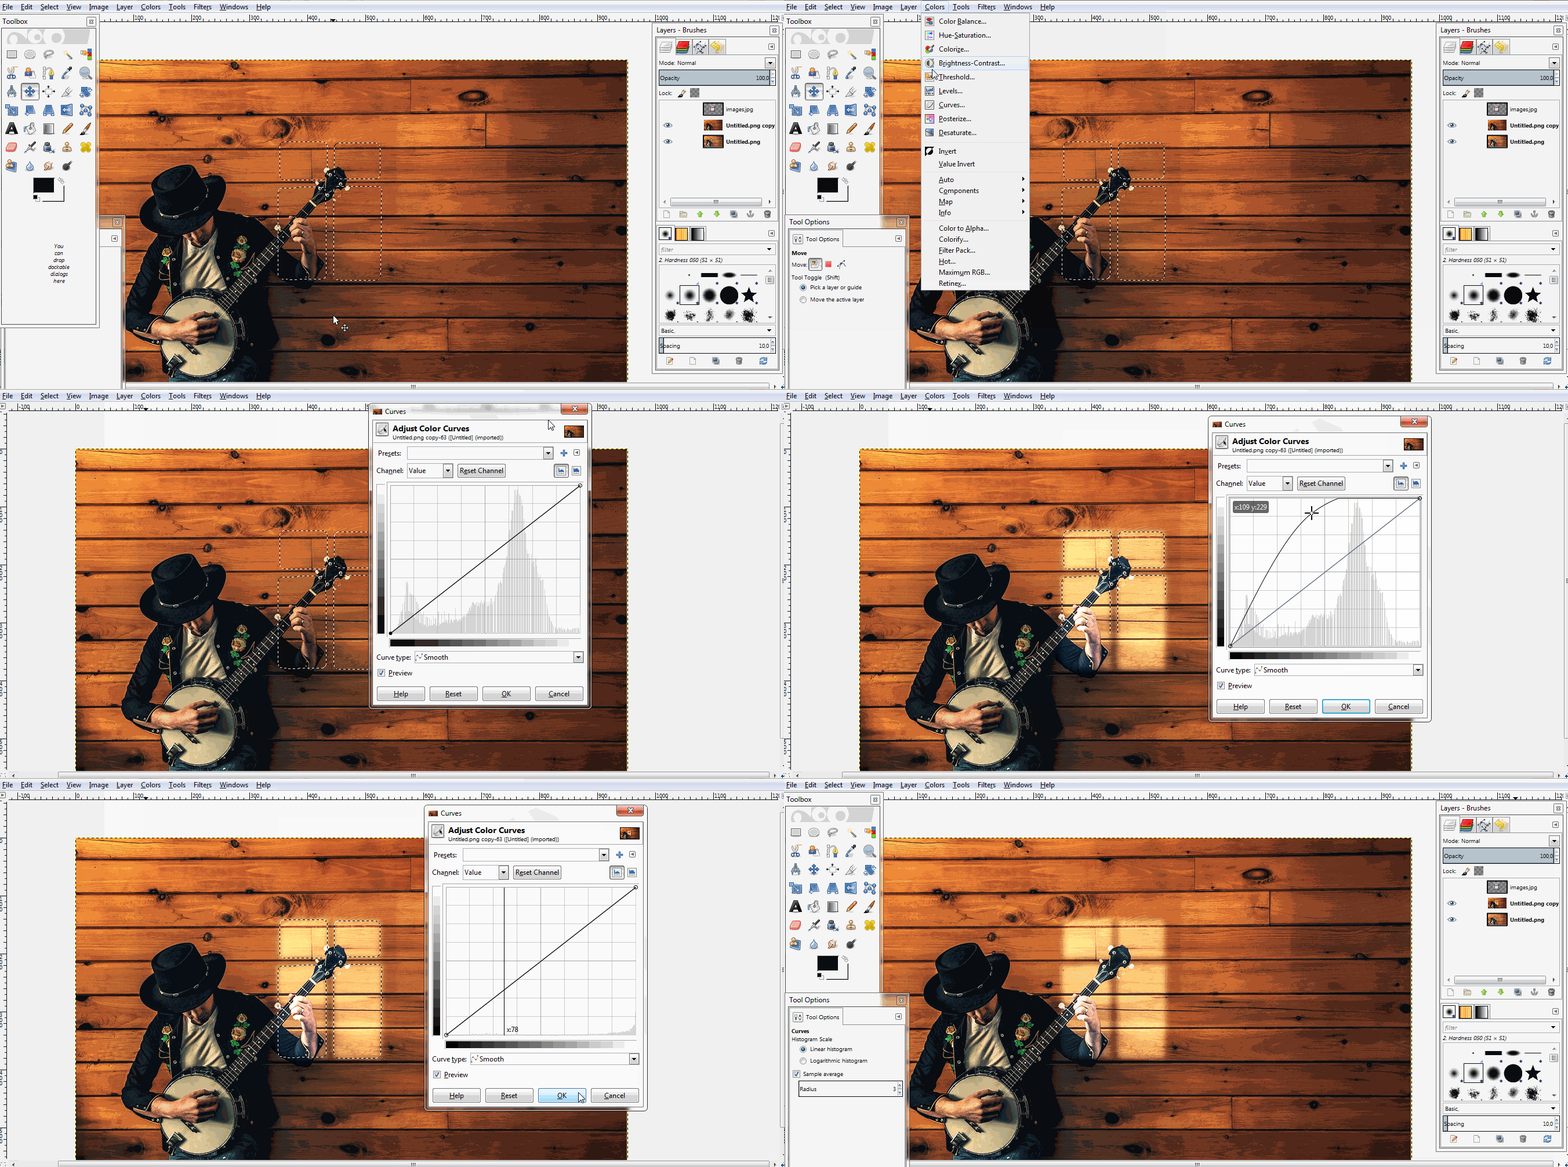
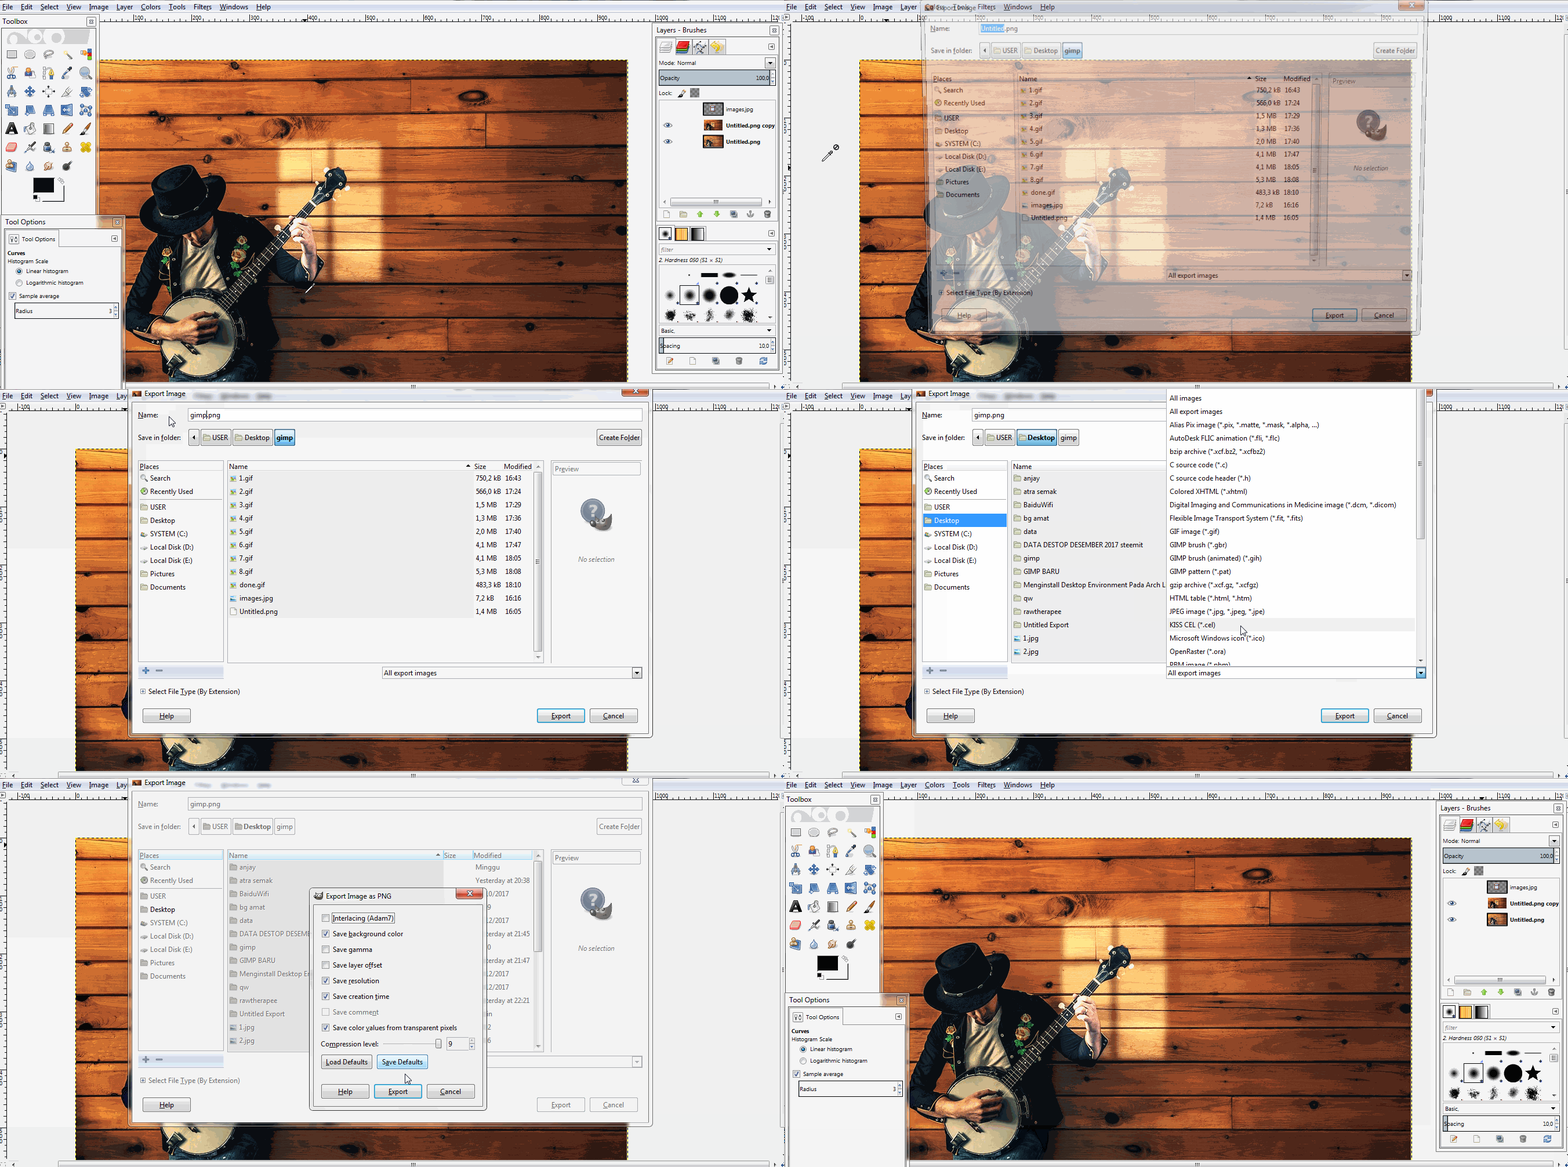
Editing process is done. If you want to save or export the photos you have edited, click File > Export As ... > Set File name > Set File Format and Where File is saved> Finally click Export.
To see the edits I made, see the picture below:
Hopefully this tutorial "How to Make a Sunlight Effect from a window" above can be useful, and thanks for visiting my post.
Thank You
Posted on Utopian.io - Rewarding Open Source Contributors