MPU6050 3 Axis Gyroscope & Accelerometer Module Setup, Arduino Library Use Shown With an Example Project - Tutorial
Introduction
This is a tutorial of an open source Arduino library, which lets you turn your Arduino to a “Gyroscope”, with a MPU6050 Triple Axis Gyroscope & Accelerometer module, that measures roll, pitch and yaw motions. I will show you how to install the library to Arduino IDE and make an example project with the library, throughout this tutorial while giving information gyroscopes and their working principle.
What Will I Learn?
In this tutorial you will learn:
- General knowledge about gyroscopes.
- How to install MPU6050 Triple Axis Gyroscope & Accelerometer library to Arduino IDE.
- How to use MPU6050 library and how to use It’s functions.
- How to apply gyroscope project using the library functions.
Requirements
This tutorials requirements are:
- Arduino UNO or equivalent microprocessor.
- Arduino IDE (Download here)
- MPU6050 Arduino library (Download here)
- MPU6050 Axis Gyroscope & Accelerometer module, breadboard, 5 jumper cables.
Difficulty
This tutorials difficulty is:
- Intermediate
Tutorial Contents
What is a Gyroscope and How It Works
Gyroscope is a device that measures angular velocity. Gyroscopes have four main elements, a frame that holds other elements, a rotor, a gimbal and a flywheel. Gyroscopes are a spinning disc in which the axis of rotation is free to assume any orientation by itself. As it rotates, axis orientation will not change by any other force. Gyroscopes have many uses such as inertial navigation systems, gyrocompasses, camera stabilizers, accelerometers, heading indicators, smart phones and space telescopes. Gyroscopes can be both analog and digital, for our example project we’ll use a digital one.
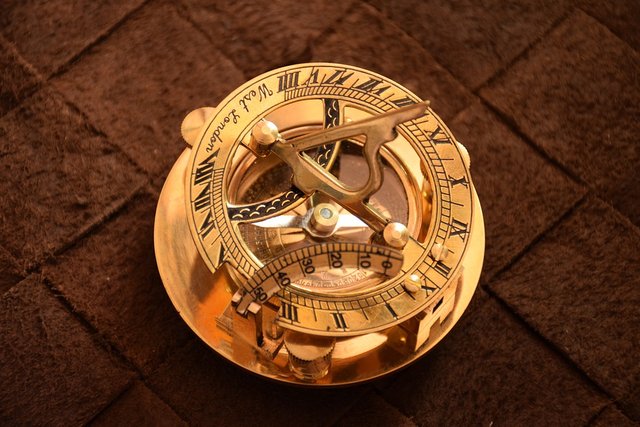
A traditional gyroscope. Image Source (Royalty free)
How to Install MPU6050 Library to Arduino IDE
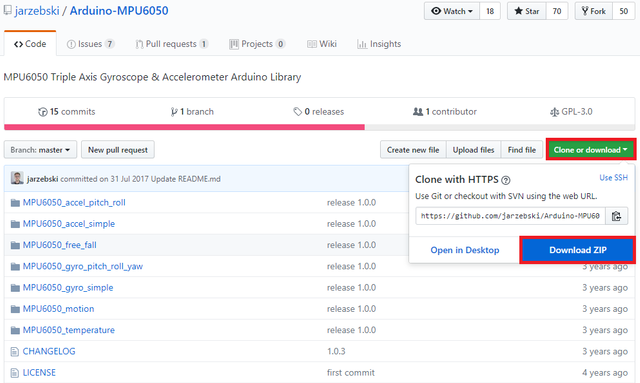
1. Download the library from https://github.com/jarzebski/Arduino-MPU6050.
2. Open Arduino IDE. Then go to and select Sketch->Include Library->Add .ZIP Library.
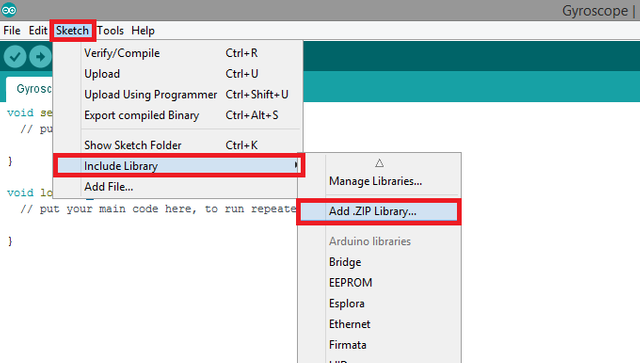
3. Choose Arduino-MPU6050-master.zip file and click to Open.
An Example Project Using MPU6050 Arduino Library
I'll show you step by step how to use the MPU6050 Triple Axis Gyroscope & Accelerometer Arduino library with a simple example. In this example project, we will make a gyroscope which will measure roll, pitch and yaw motions. To do this procedure first we must calibrate and set the sensitivity of the gyroscope module. Then we need to make Arduino read the data from gyroscope module in order to do calculations. The we will make Arduino print the roll, pitch and yaw values to serial monitor. See the steps for how to do these actions. Connections for MPU6050 Triple Axis Gyroscope & Accelerometer module to Arduino is shown below.
If you use this library in your other projects please tell in the comments.

Connection diagram for MPU6050 Triple Axis Gyroscope & Accelerometer module to Arduino. Made with Fritzing.
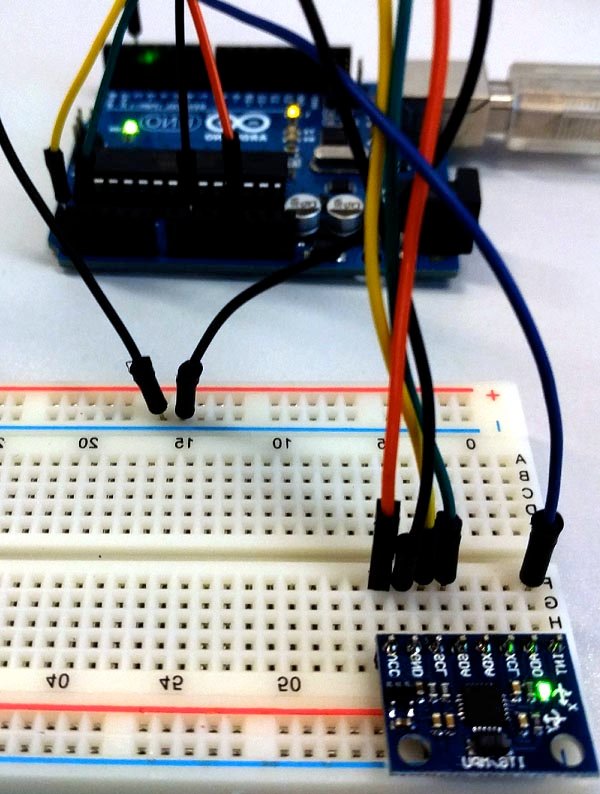
Finished gyroscope project.
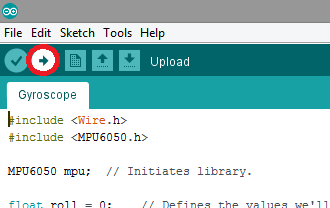
1. Open a new sketch and save it as "Gyroscope”.
2. To add our libraries to our sketch, type #include <Wire.h> and #include <MPU6050.h> at the beginning of the code.
3. Initiate the library to add the library functions we’ll use. Then define the (float) values that we'll use for roll, pitch and yaw measurements. Then define a timer and a time step that we’ll use during measurements.

4. In the void setup() function, add the code that starts the serial connection at 115200 baud rates. Then initialize the MPU6050 Triple Axis Gyroscope & Accelerometer module with a while loop. After you’ve initialized the module, add a warning to the user if the MPU6050 module is disconnected, with a print function in the while loop, then add a delay.

5. Add the library function that calibrates the gyroscope. Make sure you don't move the MPU6050 Triple Axis Gyroscope & Accelerometer module during calibration. Then add the library function that sets threshold sensitivity. Set the threshold value 3. See you modules datasheet or experiment for optimal setting.

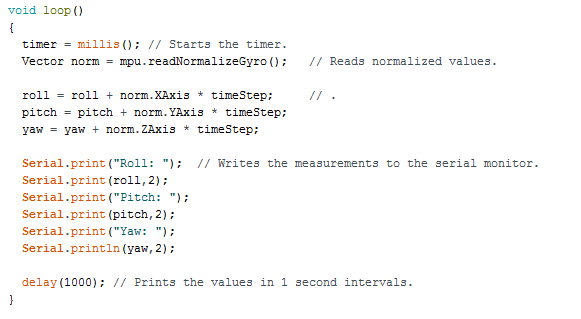
6. In the void loop() function, first add the code that starts the timer, then add the library function that reads the values from the MPU6050 module. Then add the equations that will calculate roll, pitch and yaw movements respectively. After that add the print functions to print the measurements to the serial monitor. Add a 1 second (1000ms) delay to print the roll, pitch and yaw values at 1 second intervals.
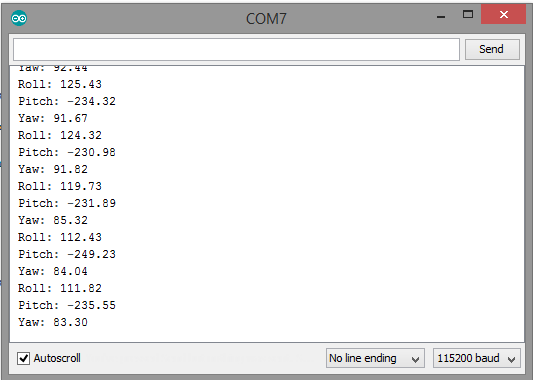
7. Click “Verify” and then “Upload” in order to compile and execute your codes. You should see a readings screen like this. Make sure your COM port and board setting is set right and power supply is on. Please double check the ground connections and all your wirings before running the code.
Conclusion
In this tutorial I’ve shown how to install “MPU6050 Triple Axis Gyroscope & Accelerometer” Arduino library, written by GitHub user “jarzebski” to Arduino IDE, showing how to use the library functions with an example, while giving information about gyroscopes.
I hope that you enjoyed this tutorial and the information that I’ve given. Thank you for reading.
If you want more information about the library and the source use the link below.
Github: https://github.com/jarzebski/Arduino-MPU6050
Code
#include <Wire.h>
#include <MPU6050.h>

MPU6050 mpu;  // Initiates library.

float roll = 0;    // Defines the values we'll use for
float pitch = 0;  // roll, pitch and yaw measurements.
float yaw = 0;

void setup()
{
  Serial.begin(115200); // Starts the serial connection at 115200 baud rates.

  while(!mpu.begin(MPU6050_SCALE_2000DPS, MPU6050_RANGE_2G))  // Initializes MPU6050 module.
  {
    Serial.println("MPU6050 module cannot be initiated."); // Sends a warning to the user if the MPU6050 module is disconnected.
    delay(1000);
  }


  mpu.calibrateGyro();    // Calibrate the gyroscope. Don't move the module during calibration.

  mpu.setThreshold(3);    // Sets threshold sensitivity. Default value is 3.

}

void loop()
{

  Vector norm = mpu.readNormalizeGyro();   // Reads normalized values.

  roll = roll + norm.XAxis * timeStep;     // Calculates roll, pitch and yaw movements.
  pitch = pitch + norm.YAxis * timeStep;
  yaw = yaw + norm.ZAxis * timeStep;

  Serial.print("Roll: ");  // Writes the measurements to the serial monitor.
  Serial.println(roll,2);
  Serial.print("Pitch: ");
  Serial.println(pitch,2);
  Serial.print("Yaw: ");
  Serial.println(yaw,2);

  delay(1000); // Prints the values in 1 second intervals.
}
Previous Tutorials
- Adafruit PCA9685 PWM Servo Driver Setup, Arduino Library Use Shown With an Example Project
- Making a Telegram Chat Bot With the TelegramBot Arduino Library and ESP8266 Wifi Module
- DS3232 Real Time Clock Module Setup, Arduino Library Use Shown With an Example Project
- HC-05 Bluetooth Modülü Kurulumu ve Kütüphane Kullanımı - Turkish Tutorial
Posted on Utopian.io - Rewarding Open Source Contributors
Thank you for the contribution. It has been approved.
You can contact us on Discord.
[utopian-moderator]
Hey @drencolha I am @utopian-io. I have just upvoted you!
Achievements
Suggestions
Get Noticed!
Community-Driven Witness!
I am the first and only Steem Community-Driven Witness. Participate on Discord. Lets GROW TOGETHER!
Up-vote this comment to grow my power and help Open Source contributions like this one. Want to chat? Join me on Discord https://discord.gg/Pc8HG9x