How to create JWT Token authorization in ASP.NET Core 2.0 Project.
Hello
Today I want to present how to make custom JWT Tokens authorization in ASP.NET Core 2.0 project.

JSON Web Tokens it is an open standard that allows transmitting data between parties as a JSON object in a compact and secure way. They are usually used in authentication and information exchange scenarios.
First of all we have to create new project:
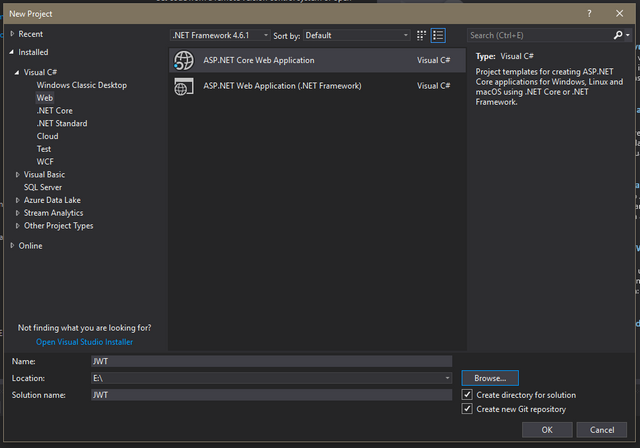
I'm using Visual Studio 2017 Community.
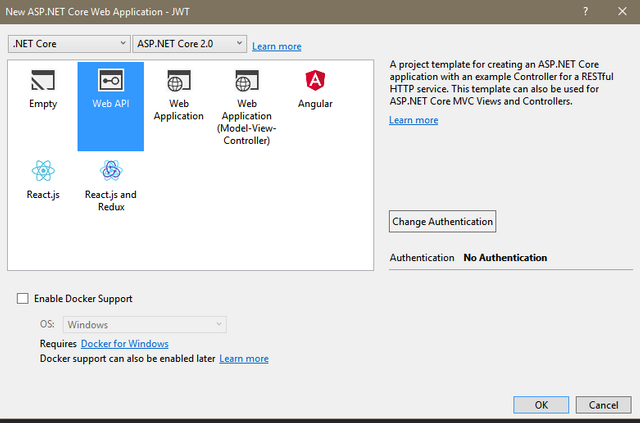
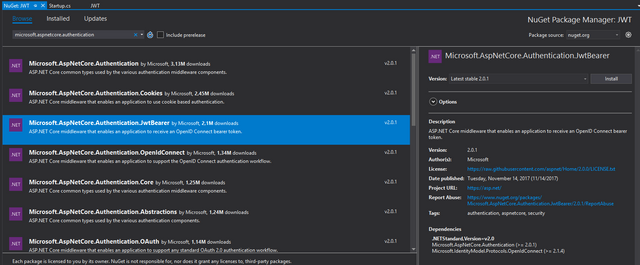
At the beginning we have to download and install library with JWT. I recommend you use Nuget.
So, we have to find: Microsoft.AspNetCore.Authentication.JwtBearer it is library from Microsoft to manage JWT.
Then in our appsetings.json:
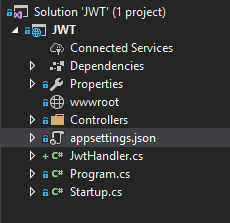
we have to create section witch will be responsible for our Token settings:
{
  "Logging": {
    "IncludeScopes": false,
    "Debug": {
      "LogLevel": {
        "Default": "Warning"
      }
    },
    "Console": {
      "LogLevel": {
        "Default": "Warning"
      }
    }
  },
  "Token": {
    "Key": "SuperSecretKey1234%",
    "ExpireMinutes": "5"
  }
}
Then we have to go to Startup.cs:
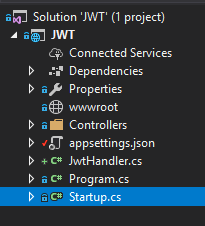
and write this code:
 services.AddAuthentication(JwtBearerDefaults.AuthenticationScheme)
                .AddJwtBearer(options =>
                {
                    options.TokenValidationParameters = new TokenValidationParameters()
                    {
                        ValidateLifetime = true,
                        ValidateIssuerSigningKey = true,
                        ValidateAudience = false,
                        IssuerSigningKey = new SymmetricSecurityKey(Encoding.UTF8.GetBytes(Configuration["Tokens:Key"]))
                    };
                });
Its mean that we will use authentication and it will be JWT authentication. What is more in this function we can define how our verification will looks like. I defined that our token will be verified by time and secret key.
app.UseAuthentication();
When we have defined our token settings, we can start creating our tokens!
Let's make class and name it: JwtHandler. In this class we will have just one method: Create Token.
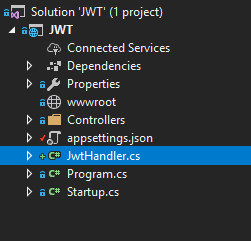
This method should looks like this:
public class JwtHandler : IJwtHandler
    {
        private readonly IConfiguration _configuration;

        public JwtHandler(IConfiguration configuration)
        {
            _configuration = configuration;
        }

        public JwtDTO CreateToken(Guid userId, string role)
        {
            var now = DateTime.UtcNow;
            var claims = new Claim[]
            {
                new Claim(JwtRegisteredClaimNames.Sub, userId.ToString()),
                new Claim(JwtRegisteredClaimNames.UniqueName, userId.ToString()),
                new Claim(ClaimTypes.Role, role),
                new Claim(JwtRegisteredClaimNames.Jti, Guid.NewGuid().ToString()),
                new Claim(JwtRegisteredClaimNames.Iat, now.ToTimeStamp().ToString(), ClaimValueTypes.Integer64),
            };

            var signingCredentials = new SigningCredentials(
                new SymmetricSecurityKey(Encoding.UTF8.GetBytes(_configuration["Token:Key"]))
                , SecurityAlgorithms.HmacSha256);

            var expiry = now.AddMinutes(double.Parse(_configuration["Token:ExpireMinutes"]));

            var jwt = new JwtSecurityToken(
                claims: claims,
                notBefore: now,
                expires: expiry,
                signingCredentials: signingCredentials
            );

            var token = new JwtSecurityTokenHandler().WriteToken(jwt);

            return new JwtDTO()
            {
                Token = token,
                Expiry = expiry.ToTimeStamp()
            };
        }
    }
That is all, we have created authorization with JWT Tokens. When we have use it, we have to attribut [Authorize] to our method in Controller. Like this:
[HttpGet]
[Route("auth")]
[Authorize]
public IActionResult GetAuth()
{
      return Content("This method require authorization");
}
If you like this tutorial please give a Like.
Thanks!
Posted on Utopian.io - Rewarding Open Source Contributors
Your contribution cannot be approved yet. See the Utopian Rules. Please edit your contribution to reapply for approval.
You may edit your post here, as shown below:
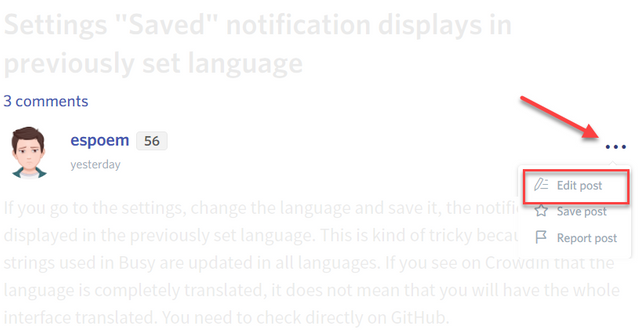
You can contact us on Discord.
[utopian-moderator]
Sorry for that. I changed picture to code box. Can you check again?
Please put all the code used in the tutorial into code box!
fixed, sorry again for my mistake.
Thank you for the contribution. It has been approved.
You can contact us on Discord.
[utopian-moderator]
Hey @babelek I am @utopian-io. I have just upvoted you!
Achievements
Suggestions
Get Noticed!
Community-Driven Witness!
I am the first and only Steem Community-Driven Witness. Participate on Discord. Lets GROW TOGETHER!
Up-vote this comment to grow my power and help Open Source contributions like this one. Want to chat? Join me on Discord https://discord.gg/Pc8HG9x