Using Your Smartphone as Microphone to Record Your Gaming Commentary (or any other Commentary) and How to Edit in Audacity: A Basic Guide for Beginners

"Which microphone is the best for those who are just starting out?"
There are a bunch of cheap microphones out there in Amazon, E-Bay and CD-R King-- usually they are the ones you simply plug in your PC's USB port. But often times, they don't really sound, well... good.
Either they sound too muffled (in which you have to buy a preamp as well), or they sound like talking inside an empty can.
But if you have a smartphone (especially ones issued in 2015 onwards which has 2 built-in microphones-- the 2nd one is for noise cancellation), you can actually use that in recording your commentary instead of using those cheap microphones especially since--believe it or not--recording using your phone actually sounds better.
To each on his own of course. There are mid-range microphones in the market which sound pretty decent. But if you don't wanna spend off the bat and just wanna use what you already have such as your phone, then read on.
Whether you're recording a gameplay, a how-to tutorial, a review, or an unboxing video, to start recording your commentary, here are the very basic items you'll need:
- Smartphone with built-in 2 microphones
- Blankets/Styrofoam/Pillow
- Carpet/Yoga Mat/Extra blanket on the floor
- A really good headset/earphones (or at least 2 budget ones: 1 with treble boost and another 1 with bass boost)
You can upgrade these items into something more professional later on when doing commentary is becoming more than a hobby. But we all got to start somewhere and this is ok for beginners, especially we don't wanna fall in the trap of thinking that more expensive gears = overnight success. Sadly, it isn't.
This guide is divided into 4 parts:
- Tips When Recording Using Your Smartphone
- How to Edit in Audacity
- How to Automate Editing in Audacity
- Finishing Touches
I . Tips When Recording Using Your Smartphone
- Surround your recording area with some blankets, or put either a styrofoam or pillows on the wall infront of where you'll be facing when you're recording, and depending on how echoey your room is, you may also add a blanket behind you and on the floor for added sound cushion.
- Position your phone slightly on the side, either left or right, and not directly infront of you to reduce the popping sound (sibilance), like when pronouncing words with "S".
- You may use a pop filter between you and your phone as added filter. Don't wrap your phone with socks. I've tried it and it made my commentary sound muffled. Plus it might cover the 2nd mic in your phone that filters the background white noise and you might experience more difficulty removing it later.
- Wait for the ideal time to record (less noise from your family in the house as well as neighbors, and no one calling and interrupting your recording), so preferably at night or early in the morning while they're still asleep. If you're lucky to have a really quiet place 24/7, just proceed right away below. If you're unlucky (like me) with noisy dogs in the neighbor (and sometimes the annoying maid) that make noises whenever they want, then… I don't really know what to do yet. Either I start over or let them in the recording (and just painfully edit them out in audacity, or just screw it. They make it in my video and I just add my reaction about them especially when I'm recording both my gameplay and commentary live instead of doing post commentary.
- Once it's night time (or whenever your ideal recording time is), turn off the AC/fan/any appliances nearby which emits some sound (except refrigerators I guess. Just move in another room).
- Press record either on your phone's recorder or video camera (depends on how you want to record your commentary, if you want to include a face cam or not), but don't start your commentary yet! Record the white noise of your room for 5-15 seconds first.
- Start recording your commentary. Yey!
- After recording, transfer your audio file to your PC, then download and install Audacity
II. How to Edit in Audacity
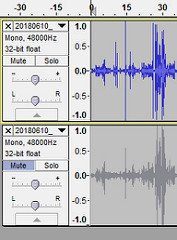
1. Split Stereo to Mono then mute one of the tracks
Plug in your headphones and then import your audio to Audacity (File>Import). If it's on stereo (which is most likely, unless your phone has a built-in mono setting, but usually phones record in stereo), split it to mono first. Unless you're recording some ASMR or want your commentary to have a surround-sound effect which has disorienting effects on your audience (if that's what you're aiming for ala Horizon Zero Dawn), then you can skip this step.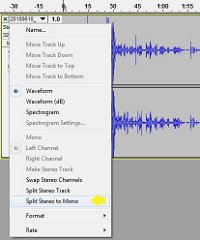
Listen to one track at a time by muting the other one, and then decide which track sounds better. Mute the other track and start editing your chosen track.
2. Noise Reduction
Select/highlight the first 5-15 seconds where you're recording just the white noise in your room earlier and has no commentary, then go to Effect >Noise Reduction.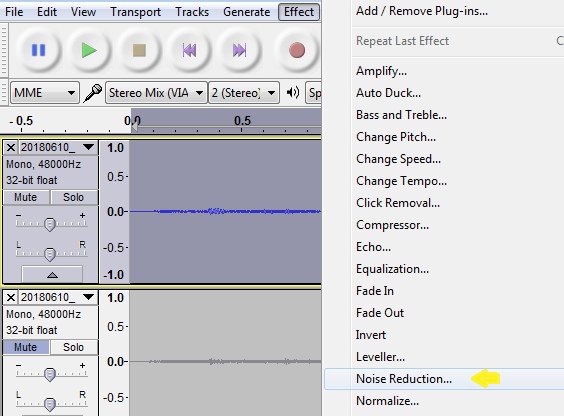
Ignore Step 2 below first and just click Get Noise Profile.
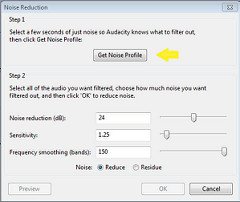
Then go to Noise Reduction again and you can first experiment with the settings below and adjust depending on the level of white noise you have in your room, but this is how my settings look like (I record in my bedroom which is pretty small but it has a high ceiling and noisy people and dogs outside sometimes--even if my windows are closed, they can still be heard. Ugh.),
Click Ok then after it's done removing the white noise, listen and check if it has removed the white noise well without making your commentary sound muffled (if yes, click Undo and then reduce the Sensitivity maybe). It's better to leave some traces of white noise which you can cover up by adding a bit of (hopefully soothing and non-distracting) background music in your commentary later on, instead of sounding muffled.
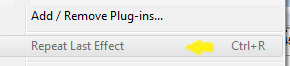
Later on, once you have your desired Noise Reduction settings, you can just click Effect>Repeat Last Effect after clicking Get Noise Profile.
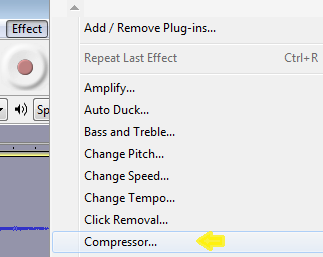
3. Compressor (optional)
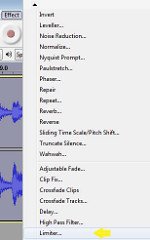
Usually this is a required step in post production. If you're good in doing commentaries (no weird habits that may annoy the audience like saying "tsk" or any smacking lips sound), proceed and do this step. If not (like me), you may skip this step because it highlights those habits even more and I often end up painfully editing them out later (if I'm not too busy and lazy). This levels out your audio, so the louder parts are reduced a bit, and the quieter parts are tuned up. Highly useful for your audience to hear that sarcastic side comments you mutter under your breath. But it's very annoying if you have a bad habit like me of smacking lips and such (professional voice actors advise hydrating 2 hours before doing commentaries to reduce the annoying mouth sounds-- I'm still working on it :P).Click the track you're editing and press Ctrl+A (or whatever keyboard shortcut it is you're using to Select All), then go to Effect>Compressor:
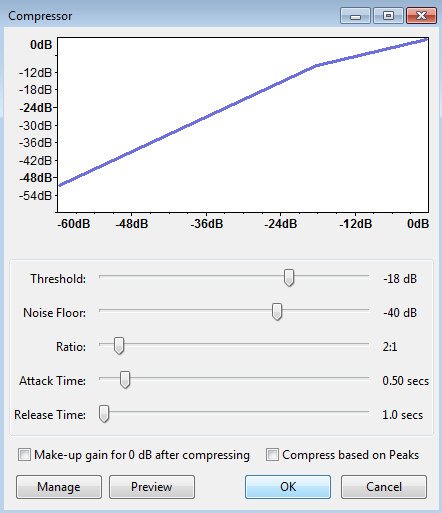
I don't really understand what these settings mean anymore, but this is what mine looks like (I think it's the default one, except for Threshold maybe, I probably adjusted it a bit. I can't remember anymore, sorry).
4. Normalize
To make your audio sound a little more pleasing and balanced by having uniform peak amplitude across the track, go to Effect>Normalize: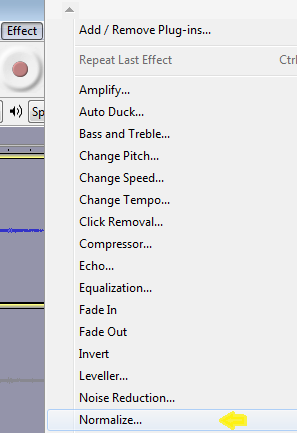
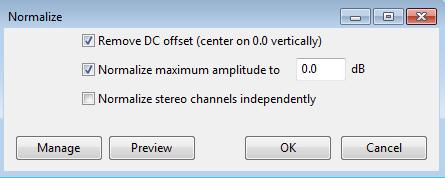
I can't remember if this is already the default or I tweaked it, but this is what my Normalize setting looks like:
5. Equalization - Voice Adjustment
Now the really painful part. This depends on what your remaining issue is as well as your voice. If you're already happy with your audio, you may skip this part. Since I wanna tweak mine some more, I go to Effect>Equalization: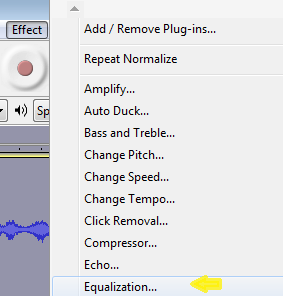
Since my issue is having some echoey/reverb sound despite the blankets and pillows and yoga mat all around me (probably because of the high ceiling in my room), I lowered the lines/pts on the left side starting from 300Hz. If you don't have such issue and you're a guy and you want your commentary to have a rich sounding bass, you may want to move the lines from <60Hz/100Hz higher instead.
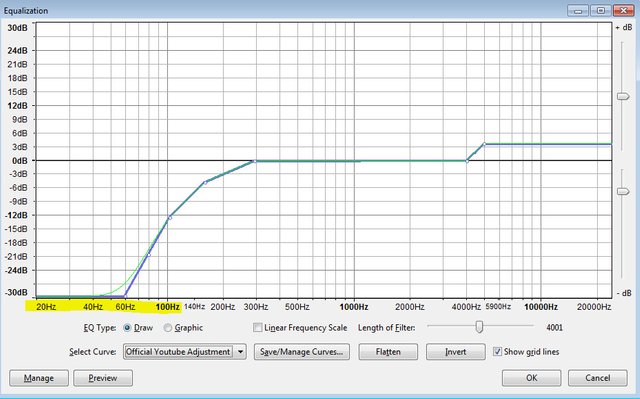
If you want to boost the treble a bit to make your commentary sound "crisp", you may also adjust the right side too.
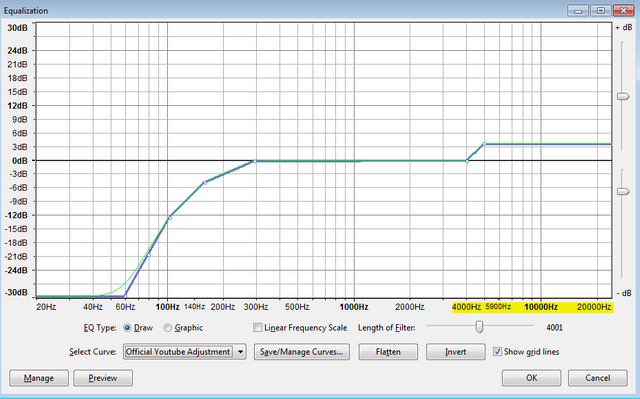
Once you have a desired voice adjustment setting for your commentaries, click Save/Manage Curves, Rename it and then click Ok.

You can also use the default Bass and Treble Boost in Equalization instead, it's up to you.
6. Equalization - DeEsser (optional)
If you still have some popping sound (sibilance issue)despite using a pop filter especially in words with "S" or even "P" or "T" you can Google and find/buy your desired De-Esser plug-in, or you can manually do so in Audacity through Equalization (involves some experimentation. I settled with this De-Esser setting for now. Note that this is what’s applicable to my voice and room, and it's not even perfect yet).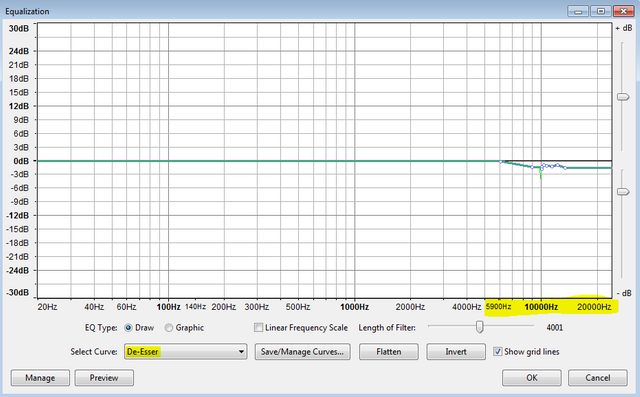
Once you have your desired De-Esser setting, save this Curve in Save/Manage Curves as well, so you can easily just select it from the drop down later on.
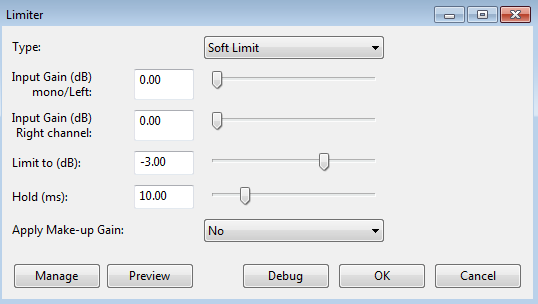
7. Noise Removal Again and Limiter (optional)
Double-check the parts in your track without commentary, and see if the white noise in the background is minimal and not too noticeable. If it's still highly noticeable, you may refer to Step 2 above and apply Noise Reduction but select that part with noticeable white noise instead of the first part of the audio before clicking Get Noise Profile. Click Effect> Repeat Last Step afterwards.If there are parts in your track with graphs that clip on the edge:
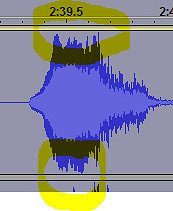
Select all track and go to Effect>Limiter (you may have to scroll down the menu for this one).
Again, you can experiment with the settings a bit, but mine looks like this:
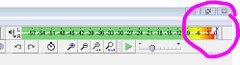
Check your track once more. The main purpose of Limiter is to prevent this from going red and hurting your listeners' ears:
III. How to Automate Editing in Audacity
Continue editing and experimenting with the settings and once you have something like your own "official" customized settings in Audacity, instead of manually doing all the steps in Part II above one by one, you may choose to manually do only steps 1 &2, and then just automate the remaining steps by using Create Chain.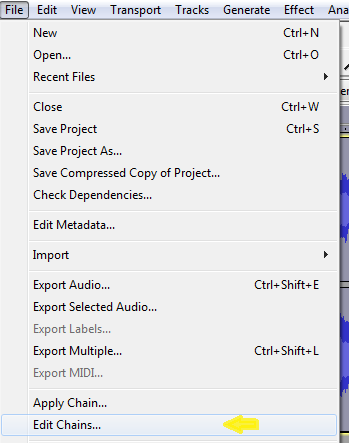
To setup your chain, go to File>Edit Chains, then go to the left window and Add a new profile.
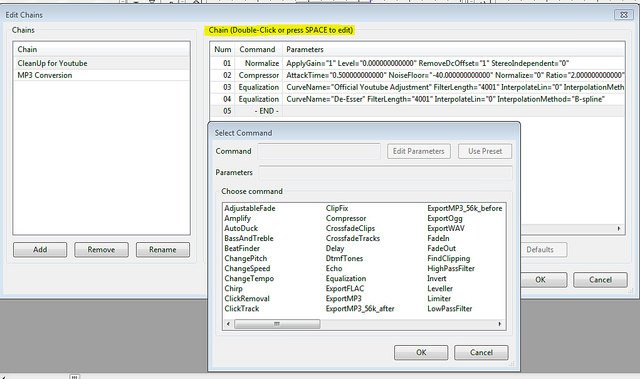
Double-click on the right window and add Steps 3 onwards above (some steps may be re-arranged depending on how you like it to sound better-- mine is Normalize first before Compressor because doing so makes my sibilance less obvious instead of the other way around, or sometimes I just skip Compressor altogether). It's very important that you're happy with your settings in the above steps, and you already have formulated your desired editing process in Audacity first before using Create Chain. The steps and settings I've shown above are just a guide, and again, different settings may work for you better especially when you have a different recording setup and also voice.
Once you're all set, all you'll be doing is:
Part I (Recording) -> Part II (Steps #1 & #2 - Minor Clean Up)-> Part III (File>Apply Chain)
IV. Finishing Touches
If you have extra time, just double-check your audio using headphones with bass boost and treble boost to ensure that they still sound ok especially since different people use different kinds of headsets. When you're satisfied of the result, save your edited audio commentary (File>Export).This is just a basic guide and I'm nowhere near pro level when it comes to sound engineering lol, and I'm still smoothing out the edges here and there, but if there's something that improved in my channel, it's my audio. Like you can really hear the HUGE difference in audio quality between my old videos vs. my newer ones (both may still be cringey though, but oh well).
Anyway, hope this helps .
Cheers!
=^.^=