PHOTOSHOP TUTORIAL ON HOW TO CREATE THE SLICED FACE EFFECT.
Hi guys…. The world is just moving on a fast lane and catching up seems difficult. But before I continue with my everyday busy schedule, I thought to share one art I learnt just few days back. It would be most useful for lovers of abstract art and the weirdos Grins. Of all I didn’t say, I guess I never mentioned how much I love graphics designs… Yea, this is one of the many I like; Photomanipulation.
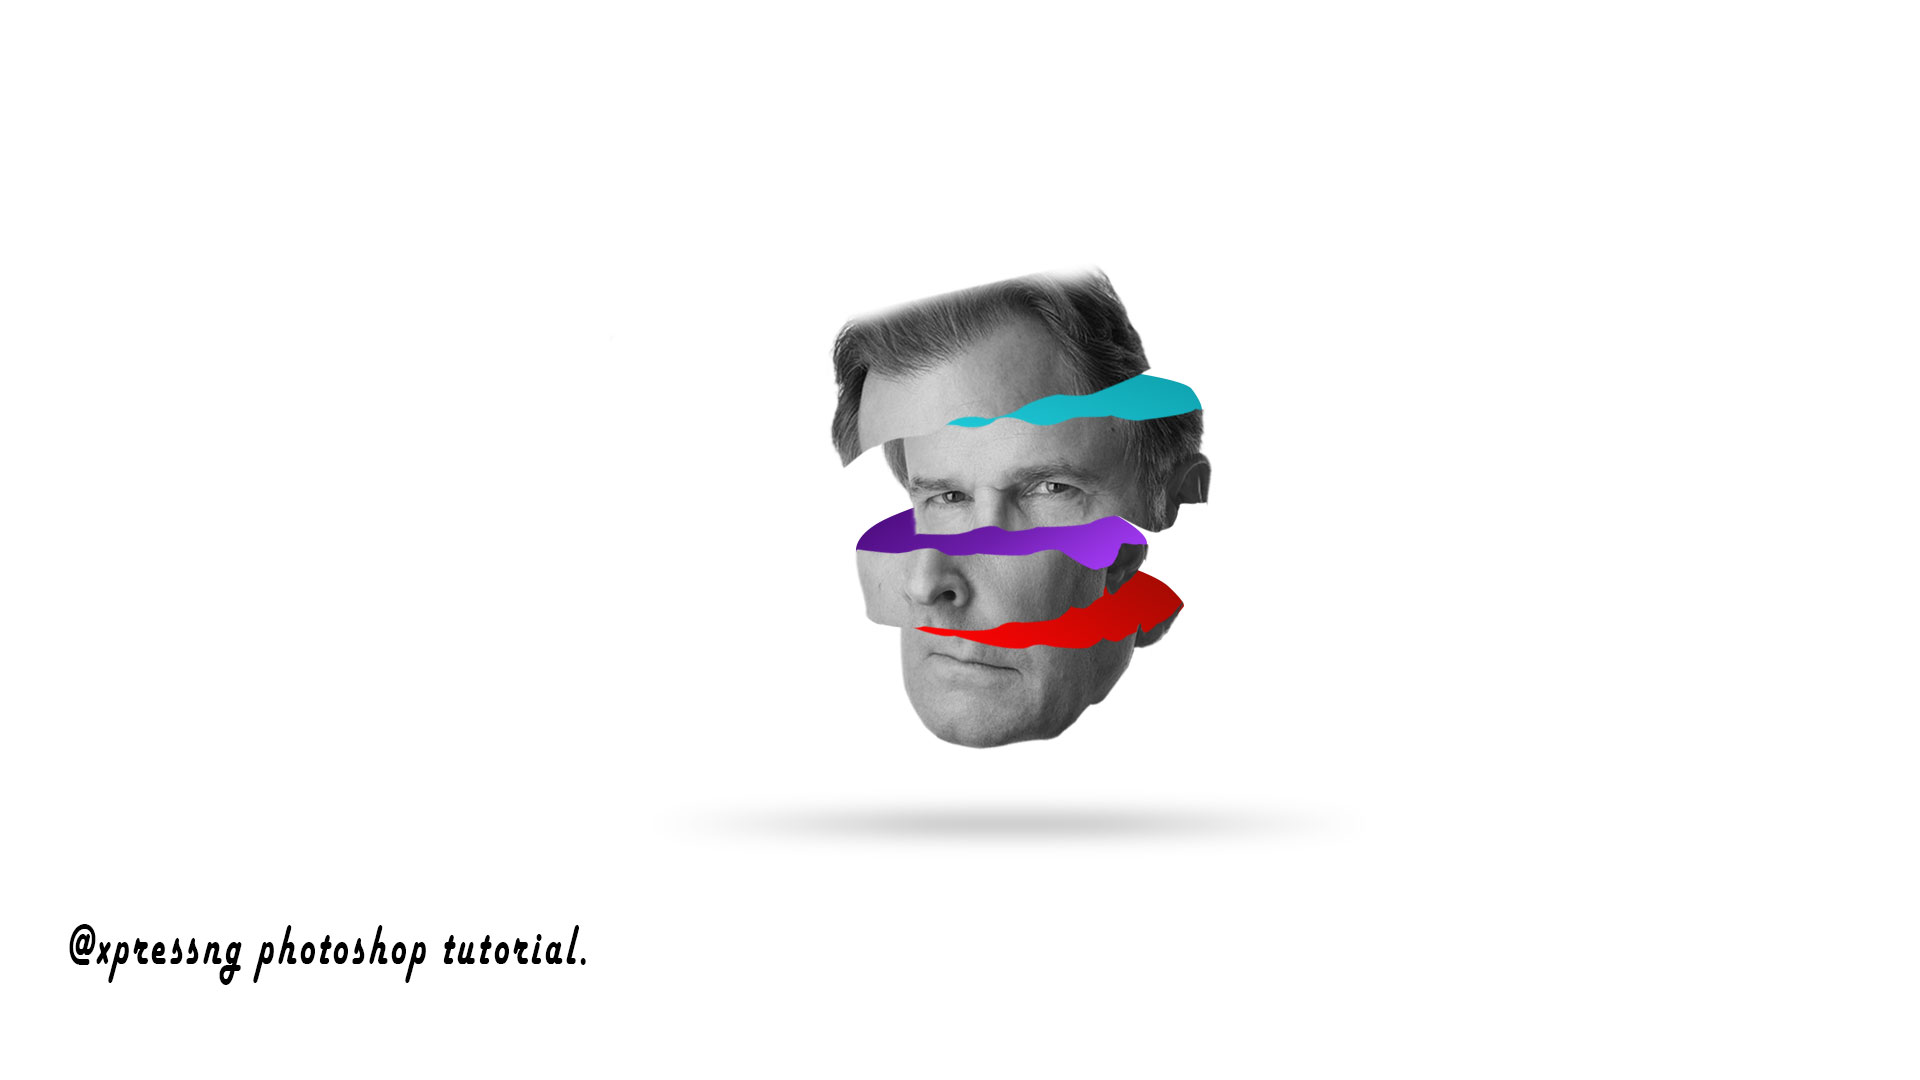
And this, with another method.
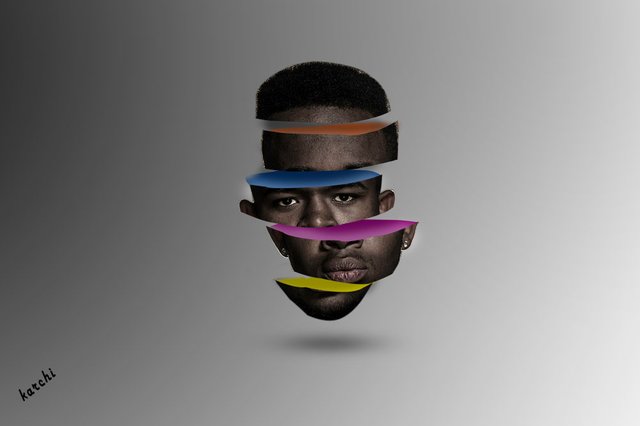
Let’s roll!
I think the first thing is should have done is introduce the applications just so some of you who has no idea or little about the apps could follow along. But no worries, I have detailed screenshots of every move, so you could start with this. Then I could come up with a detailed tutorial of the applications.
So, for this tutorial, I’m using a Photoshop CS6(64 bits) on my Laptop, which runs on a Windows OS. All you need to do is read every line, with a pack of popcorn in your hands and then you get the work done, prolyl more perfect then the end result of what I have here.
So firstly, you want to make sure you have a high-resolution image, prolyl a shoot of you or any model. For this tutorial I got this image from google as seen in the screenshot below. Having done that, head over to your photoshop app. P.S: you could use any photoshop whether CS6 or CC.

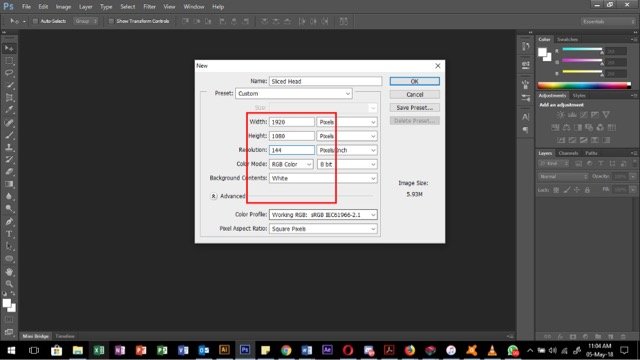
Step 1: Open a new document from the file menu in the options bar as seen in the image below. Fill in any name of your choice, for me “Sliced head” is fine. Set the size of your document, at least big enough to contain what you want to do. For this tutorial I used 1920 as width and 1080 as height. Also set resolution to 144, basically from 72-300 is fine. Always set your measurement to pixels. Then, most importantly, set your color profile to RGB- Red, Green and Black if you would be having that on screen but if you would print this, set to CMYK; Cyan, Magenta, Yellow and Black. Then click ok to create the document.
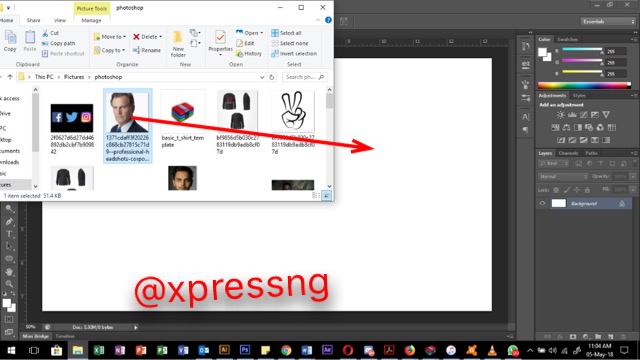
Step 2: You want to make sure you have you image in your computer folder. Just drag and drop as seen in the image below and then scale this image. Never scale and image without holding the Shift key or the Shift and Alt key. This would help maintain the details of your image. Then hit the enter key on your keyboard after scaling.
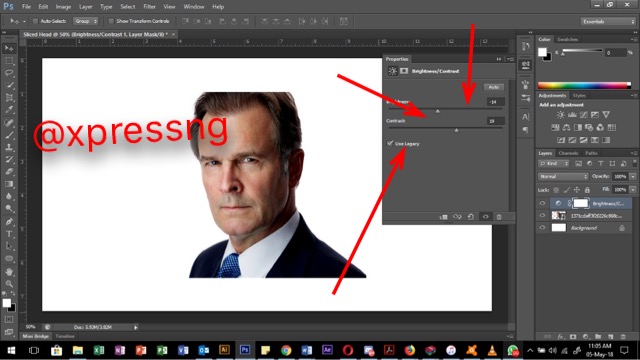
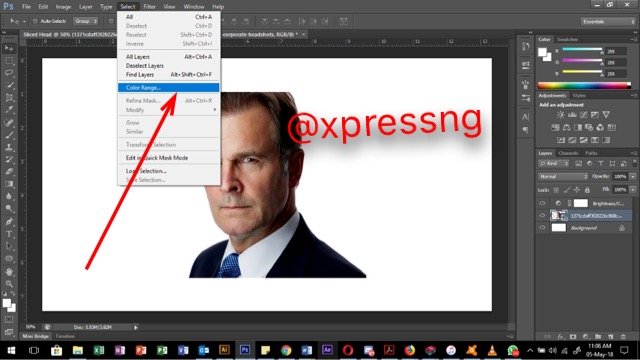
Step 3: You might want to cut out the image form the background. To do this, you could either use any of the selection tools or the pen tool to make a selection around the object and the cut and paste on a new later. Both for this tutorial, since it has a white background, I’d use another method for this. Especially for an image with white background, this is quite easy. Click on the round circle button down the layers panel as seen in the image below, scroll down to the brightness and contrast option, when it opens, check mark the USE LEGACY option. Increase the contrast and reduce the brightness until u can see the white background fading out, click ok. Click select on the menu bar of the canvas and click color range. Hold down shift key + click on the white background of the image to make everything white and the Alt+ black sides of the image.
P.S: If there are black patches, you could use your brush tool to fill the patches, while the white color is selected.
Brightness/Contract setting:
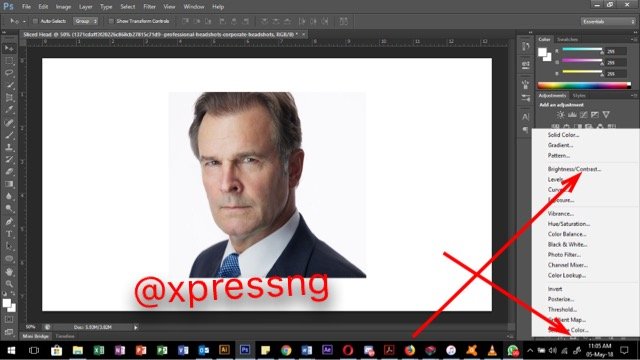
Adjustments:
Color Range:
Color Range Settings:
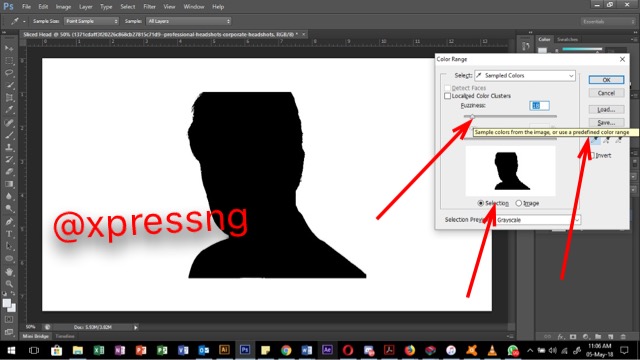
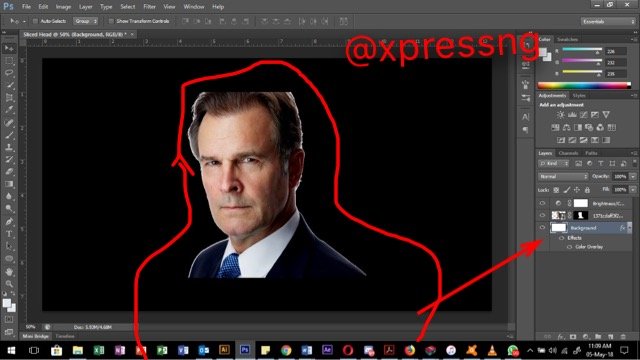
Step 4: unlock the background in the layers panel, by double click on the padlock you see there. This opens the layer and you could rename If you wish to. Then double click again to open the layer style panel and head over to the color overlay options and apply color. Choose the black color so you could see where white lights are shading and adjust.
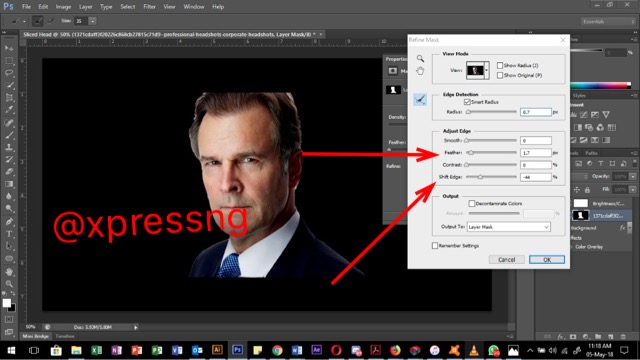
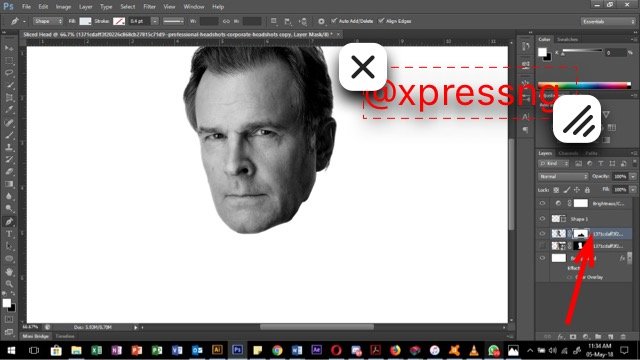
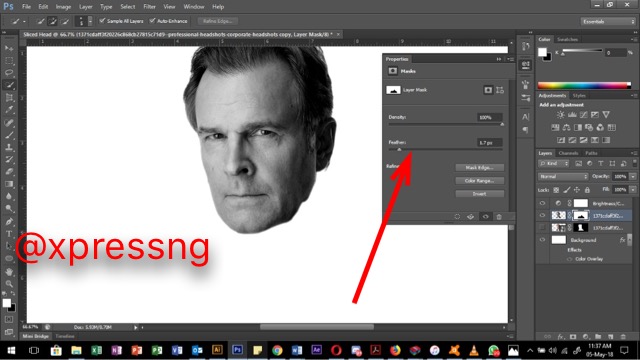
Step 5: Click on the mask layer and then refine mask; set it to back, decrease the “Shift Edge Value”, the soften the edges by increasing the feathers a little bit, as seen in the image below. Then go ahead and hide the effect layer after you have got a softer edge. Hiding the effect layer would reveal the white background.
Background Color effect
Feathering:
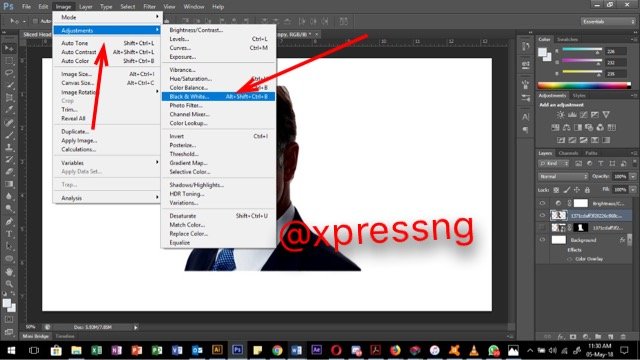
Step 6: Duplicate the image layer, drag down to create a new layer option or just duplicate with the duplicate option when you left click on the panel. Then hide the bottom layer, then right click on the upper layer to convert to smart object and then rasterize the layer same way. After this, you’d have to convert to black and white. This is optional but to do that, click on the image option in the menu bar and then go to adjustments and then black and white, click ok.
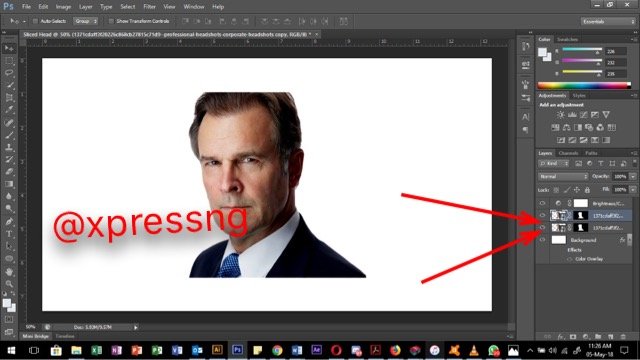
Smart Image and Rasterize:
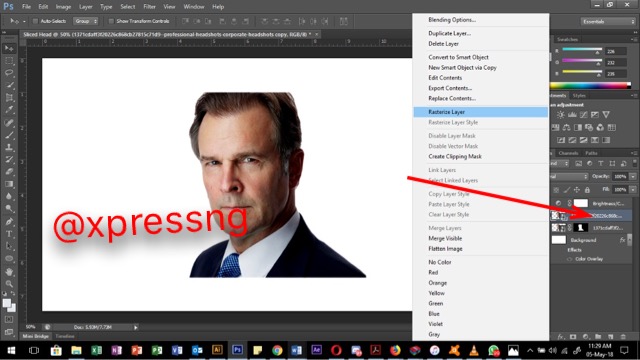
Black and White:
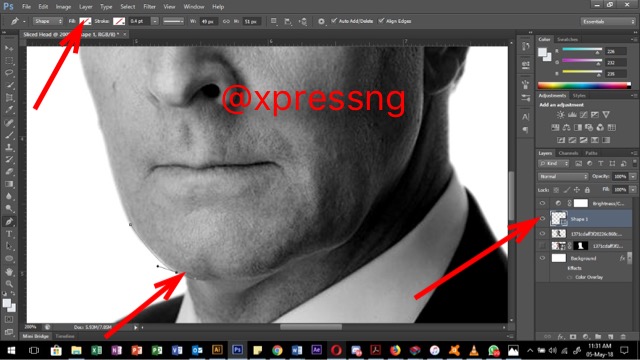
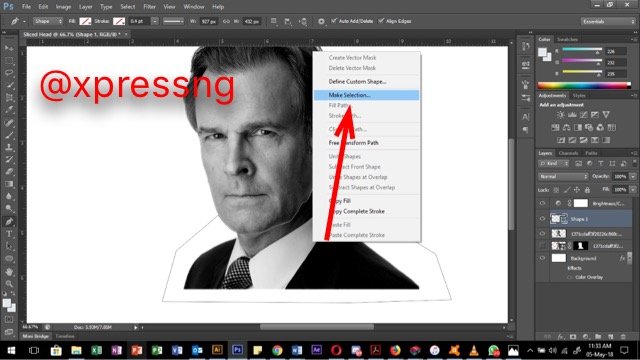
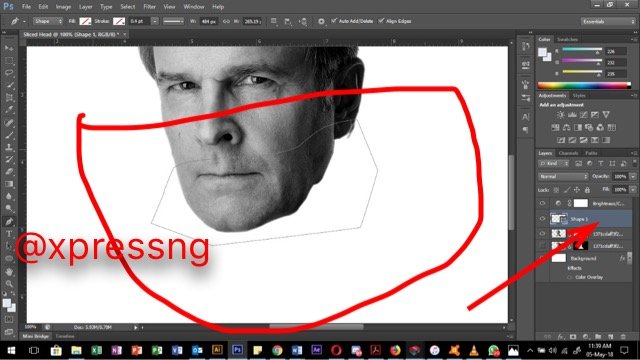
Step 7: You can now delete the shoulder part of the image. So, pick the pen tool on the tools bars or P on your keyboard. Then begin to trace out the part you want to take out… which is the shoulder part. Make sure you deactivate the fill colour and then close path, make selection.
P.S; the trace should be from the chin level. And the selection should be done on the masked layer.
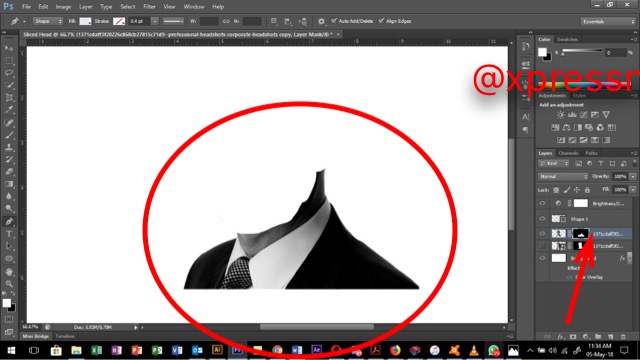
The image looks like this after the selection has been made. Then press the keyboard shortcut Ctrl+I to invert the image to a white background and the head part oi the image, as seen in the image below. After this, go ahead and delete the shape you created. Left click on the thumbnail to open the options where you see feather option, then increase the feather a little, to soften the edges of the image.
.jpeg)
Step 8: I call this the real deal. This is basically the part where you have to divide the parts of the faces you’d like to have that sliced effect. Again, select the pen tool and trace out the chin part of the face. You have to follow along the anatomy of the face. Then close the selection when you get to the beginning of the trace, you see the pen tool forms a circle icon just where u should close the trace. You don’t necessarily have to make a selection here. Just do this for other parts of the face.
P.S: before u start a new trace, your image layer should be clicked on. Then the pen tool creates a shape layer. Always deactivate fill color.
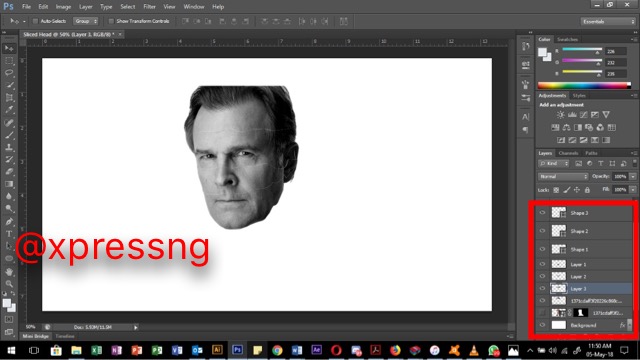
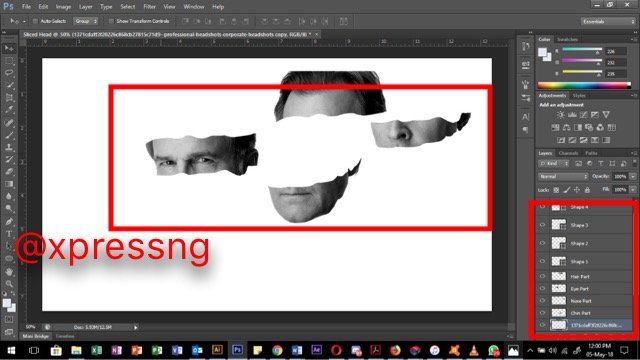
Step 9. After you must have completely done that, select the image layer, convert to smart image like you did earlier, then rasterize layer again. Then make a selection om the first shape by holding down your control key on the keyboard and the click. This selects the shape on the image of the face. Then Ctrl X to cut the image then create a new layer and the paste in the new layer. Repeat process for all other parts of the face until you have them all in different layers.
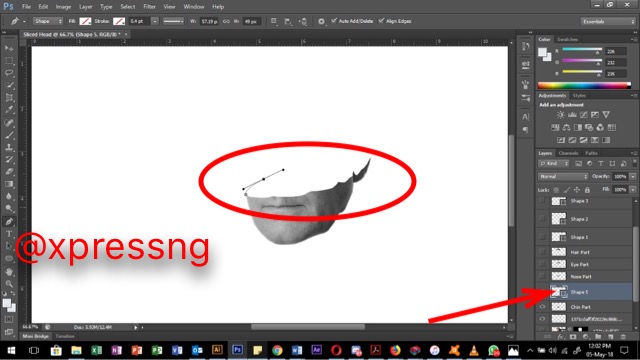
Step 10: Hide layers except the chin layer, select your pen tool and make an ellipse shape around the chin layer as seen in the image below. The select the ellipse tool, go to fill color as seen in the other image below, then add gradient color. This process should be repeated for all other parts of the face. Make sure you follow the anatomy of the face when creating the ellipse too.
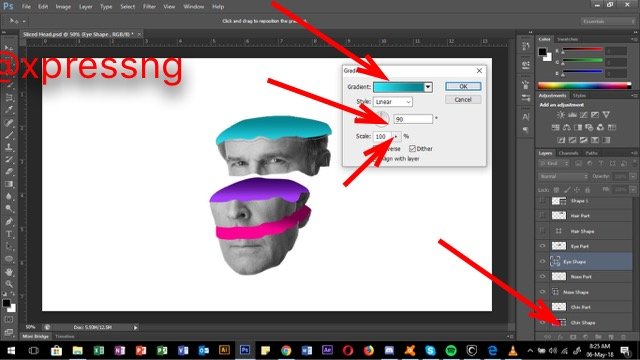
Step 11: Having done that, you should change the gradient colour to beautiful colors of your choice, preferably bright colors, because you’d be creating shades with the darker shades of the colors. So just pick the color as directed in the image below. Increase the scaling, rotate the angle a bit to create a perfect shade. If your ellipse is not well shaded, it won’t look nice, so you have to do this quite well. The darker part of the ellipse should be on the outer part and the lighter on the inner.
Repeat same process for all other ellipse. Then adjust the face just how you’d place a sliced loaf of bread wink
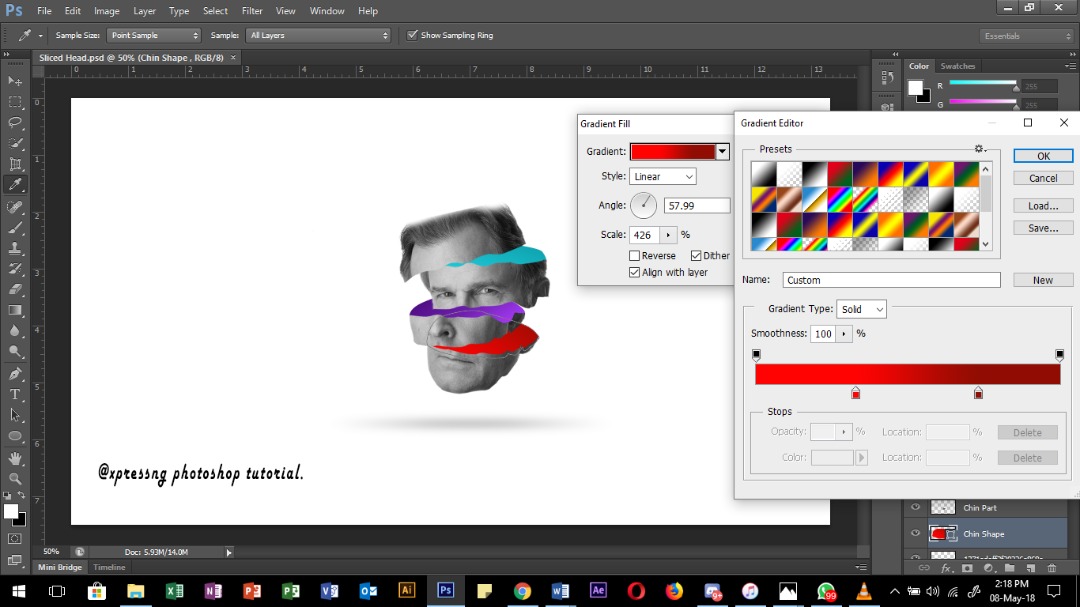
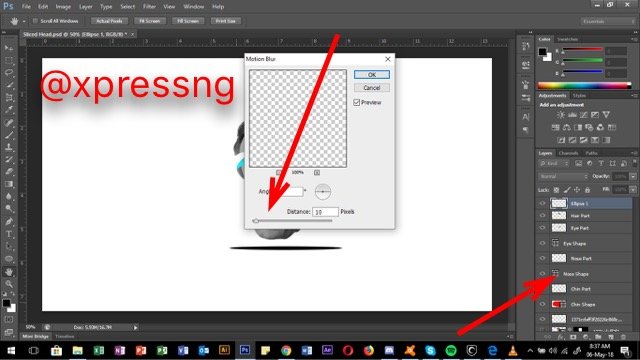
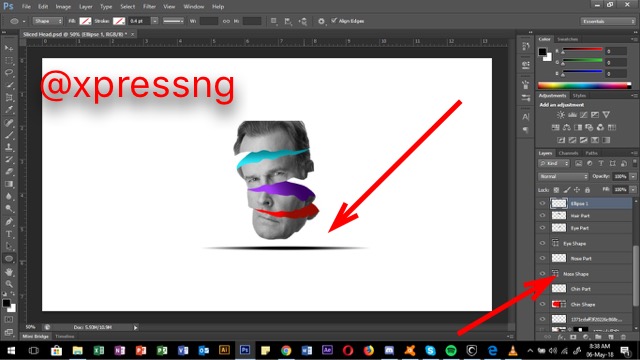
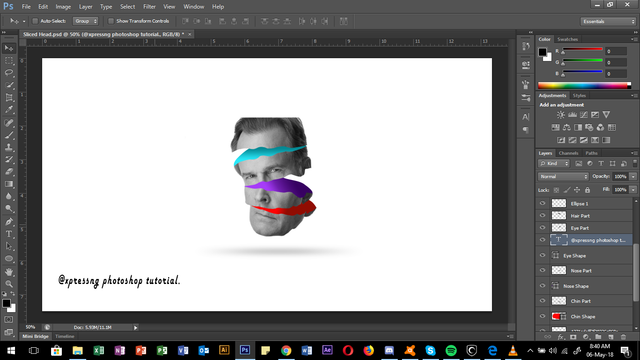
Step 12: Here you create a drop shadow. There are severally ways this could be done, but in this tutorial, I’d show just one. Draw out a flat ellipse and the fill with black color. Convert the new ellipse layer to smart image and rasterize, the go to filter in the menu bar on top and then go to “motion blur”, the apply, increase the motion a bit. The go to filter again and apply “gaussian blur”. Make the radius around7-8. Then reduce the fill to make this have a soft shadow. You can select all and [lace in the middle. Add text like I did if you wish. But this is it basically.
.png)

Thanks for reading. I’d try to get a good app for recording, so the next tutorial comes with a video as well, but until then, we’d make do of what I have grins. So that’s it basically.
I’m open to questions, observations, comments, queries, suggestions or critiques. Feel free to drop an image if you practicalized this. Also feel free to drop corrections. Thanks
Yours Awesomely,
Xpressng.
This tutorial was first typed on my MS WORD 2017, on my laptop, running on Windows 10, then copied and pasted here.
Screenshots were taken on the laptop as well.
Photoshop CS6 application.
Jeeeez.. Your title and content though.. Was that done on purpose??
Edited. That was a mistake but corrected.
Okay, I'm gonna wait for this one to fly!... Awesome tutorial. Great content too.
Thanks dearie... I'd wait for it to mooooonnnn.
Lol.
Karchi wonders 😁
You knooooowwwww... 😜😜
Wow...
Amazing darling
MVP... Thanks dearie.
Congratulations! Your post has been selected as a daily Steemit truffle! It is listed on rank 7 of all contributions awarded today. You can find the TOP DAILY TRUFFLE PICKS HERE.
I upvoted your contribution because to my mind your post is at least 34 SBD worth and should receive 171 votes. It's now up to the lovely Steemit community to make this come true.
I am
TrufflePig, an Artificial Intelligence Bot that helps minnows and content curators using Machine Learning. If you are curious how I select content, you can find an explanation here!Have a nice day and sincerely yours,

TrufflePigBookmarked for my son to go through this post.
Oh wow... i feel honored Sir. Thanks
Wow @xpressng, I'm coming for more tutorials
Thumbs up!
Thanks mami..