Tutorial | How to create a text with transparency in Photoshop
Hi steeams, Sorry for my inactivity this week, I know I have not been posting as often as before, I had some difficulties with my computer and that's where I do my design, but everything is solved, and I hope to post more tutorials for you .
In this new post I will show you how to create a transparency text.
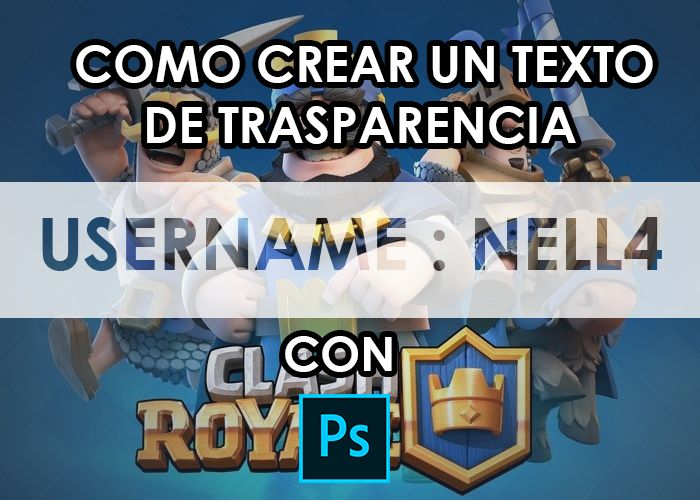

Here I will show you some examples made by me, so that you can observe how this transparency text is based:



As you could see doing this type of text would be great in some images of our gallery, so, I come to bring this amazing and easy tutorial.
- Let us begin...
Step by Step
- We will place our image (may be of your choice) to which we will place the text.
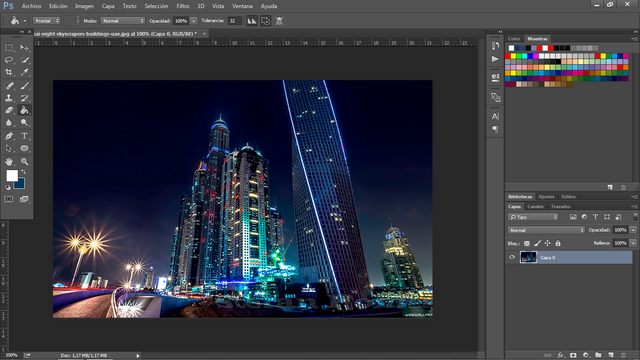
- We will go to one of the layer options, which we will use Gradient.
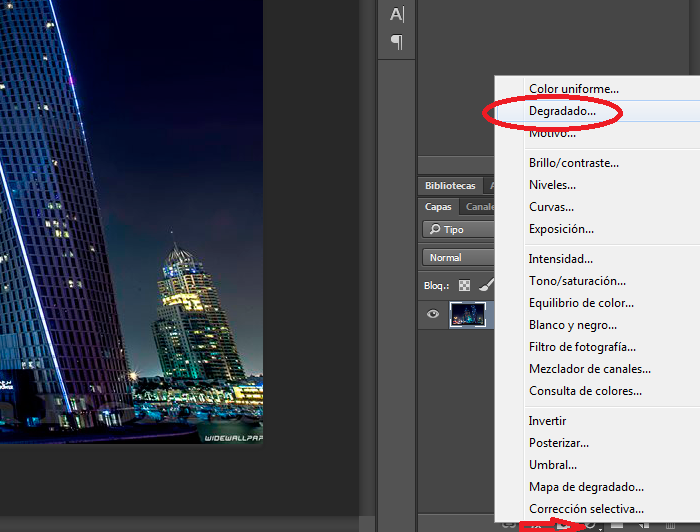
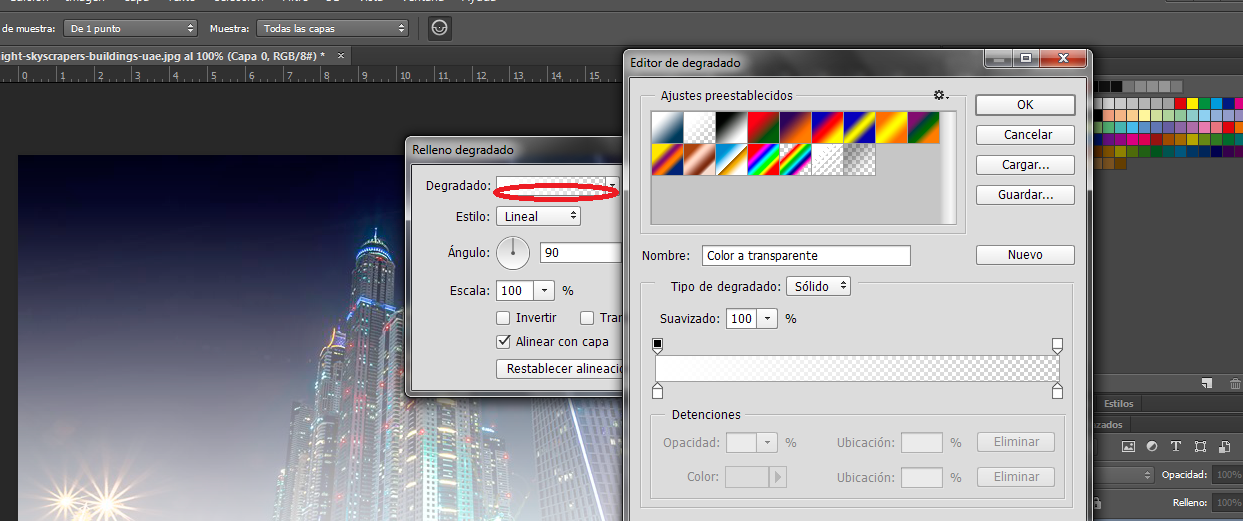
- This small box will appear to us and if we observe our image it changes its tonality.
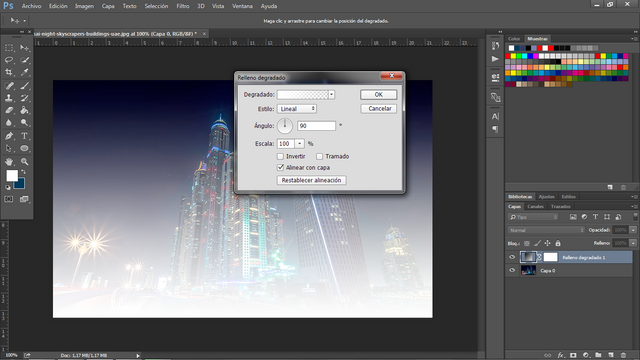
- We double click on the bar where it says "degraded and a box will appear to level the colors.
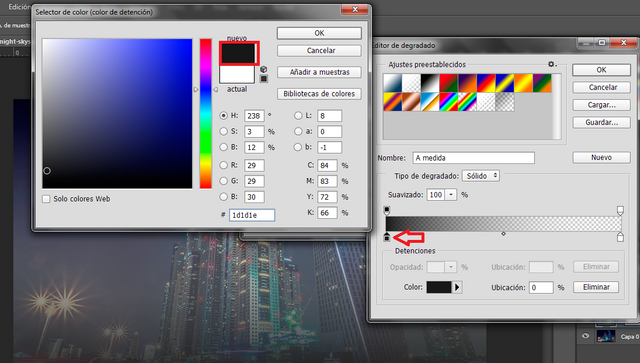
- We click twice on one of the small boxes below, and a color palette will appear, in my case I will place the color black and we notice that our image darkened a bit, (in your case you have to place a color as your image and darken it, example: if you have an image with a yellow background, in the color palette you have to look for a dark yellow so that I can darken the image in which you work.)
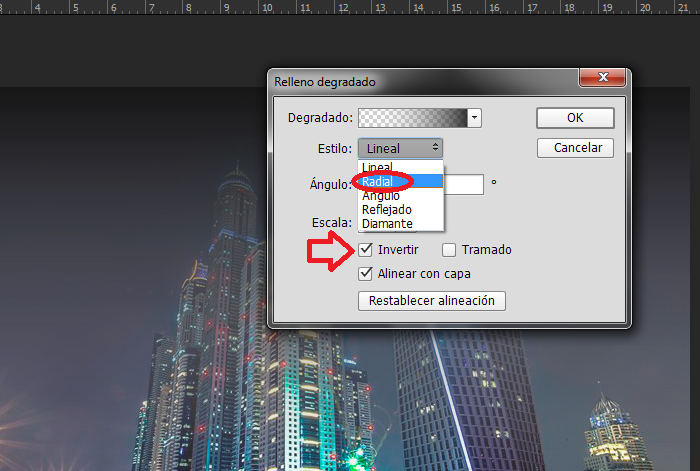
- After having selected the color, we return to the first box of the beginning, and we will mark the box to invert, and we will select in linear and we will leave more options and we will choose radial.
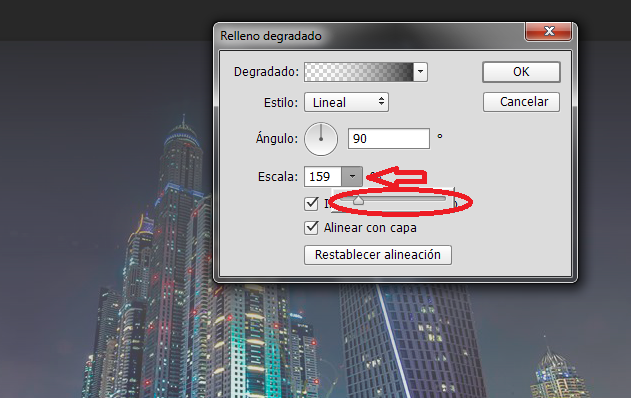
- We select the option of scale and we play with the bar, until a point of our preference and after that we give in OK.
- We create a text layer, with the font (text) of our preference, in my case you will use Century Gothic Bold
that already comes with the integrated photoshop, so we do not have to download it.
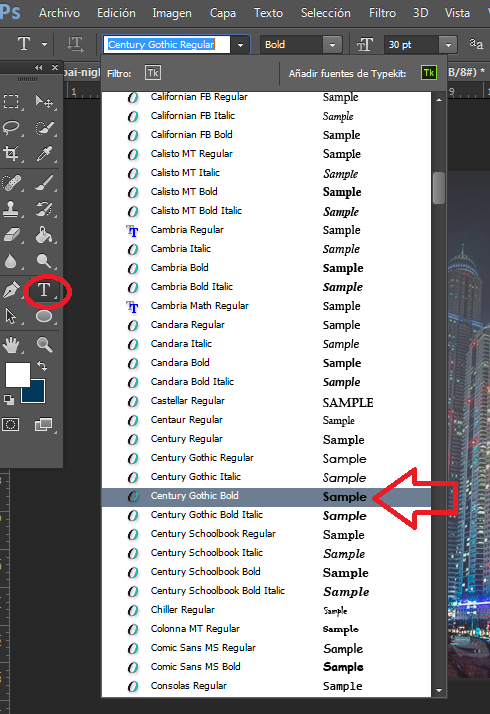
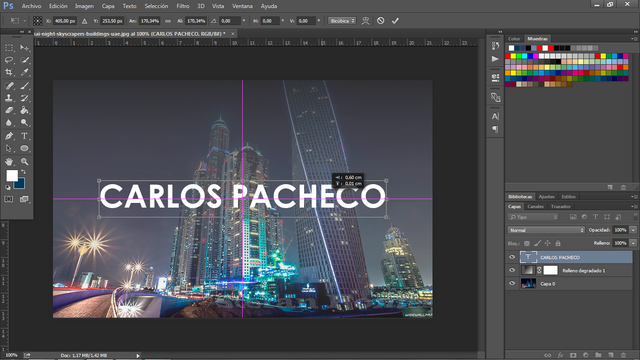
- We write our text, with Ctrl + T we can enlarge our text and take it to the middle of our image.
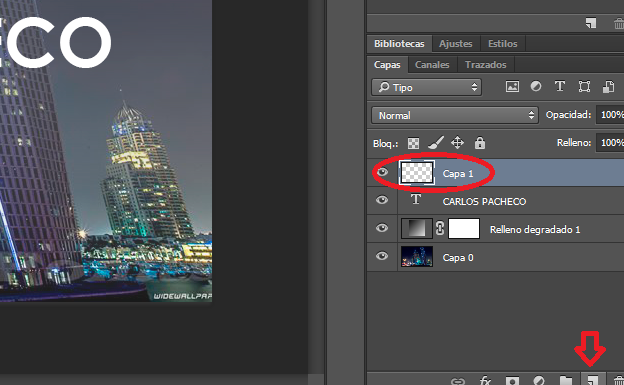
- Now we will create a new layer.
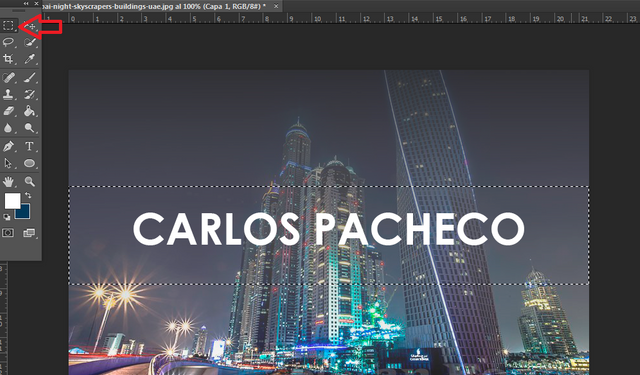
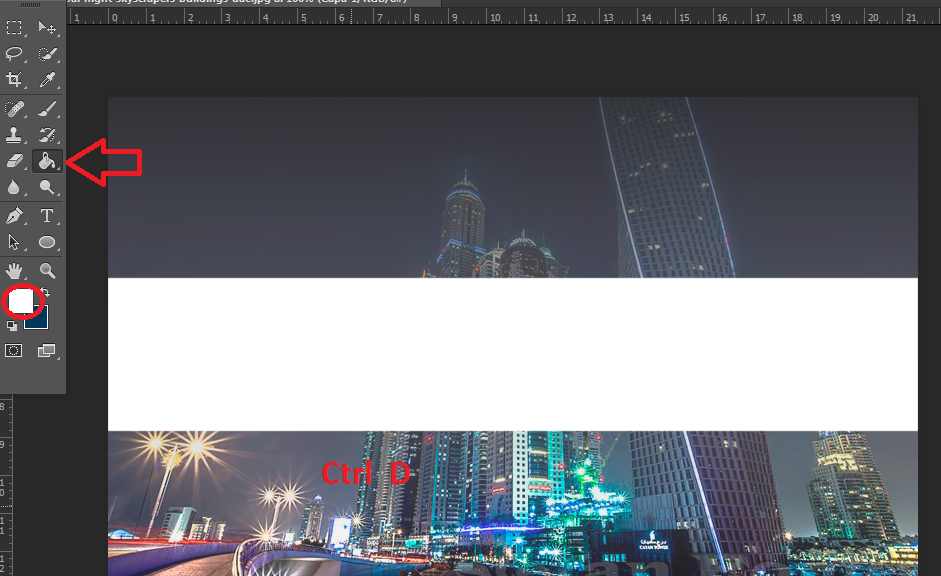
- Now we use the rectangular frame tool and we will enclose our text.
- Now we use the paint pot having the white color, we will paint the marked selection, that is our rectangle and we give it Ctrl + D to remove the selection.
- Now we lower the opacity to our preference.
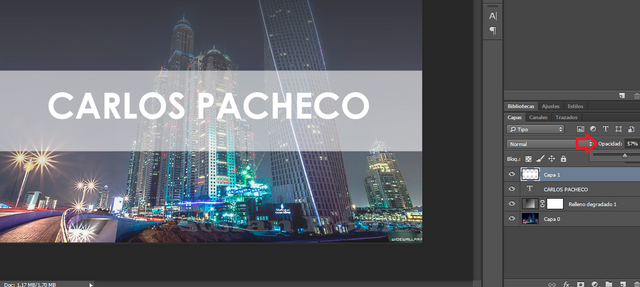
- And we observed that our text would be holding form, Now we keep pressing the letter Ctrl and we put our click on the text layer and we will notice that we will get a "small square" and we will click and all our text will be completely selected.
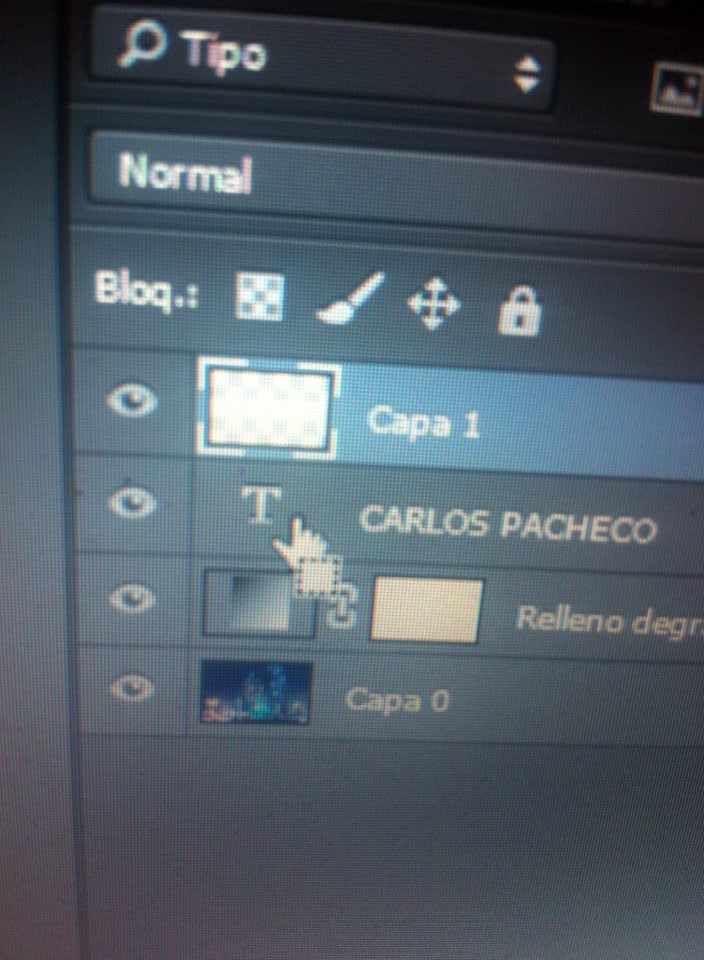
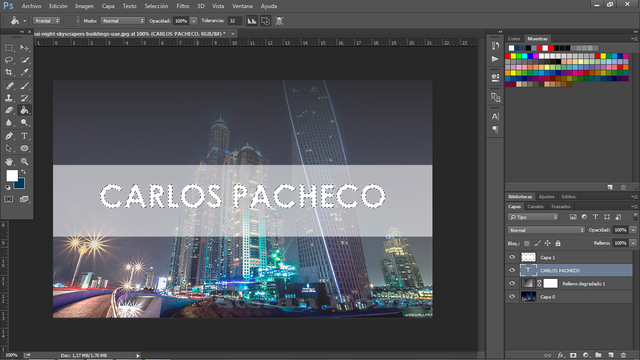
- We observe that we have marked the layer that we create, then we press the Delete key of our keyboard that is "Supr" and we press Ctrl + D.

- And by almost finished our text, we remove the "eye" to our text layer.
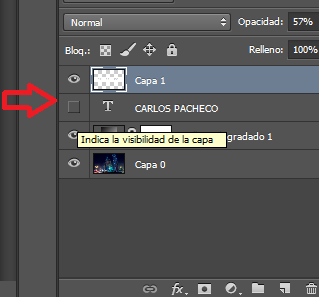
- and we see that our text is finished.
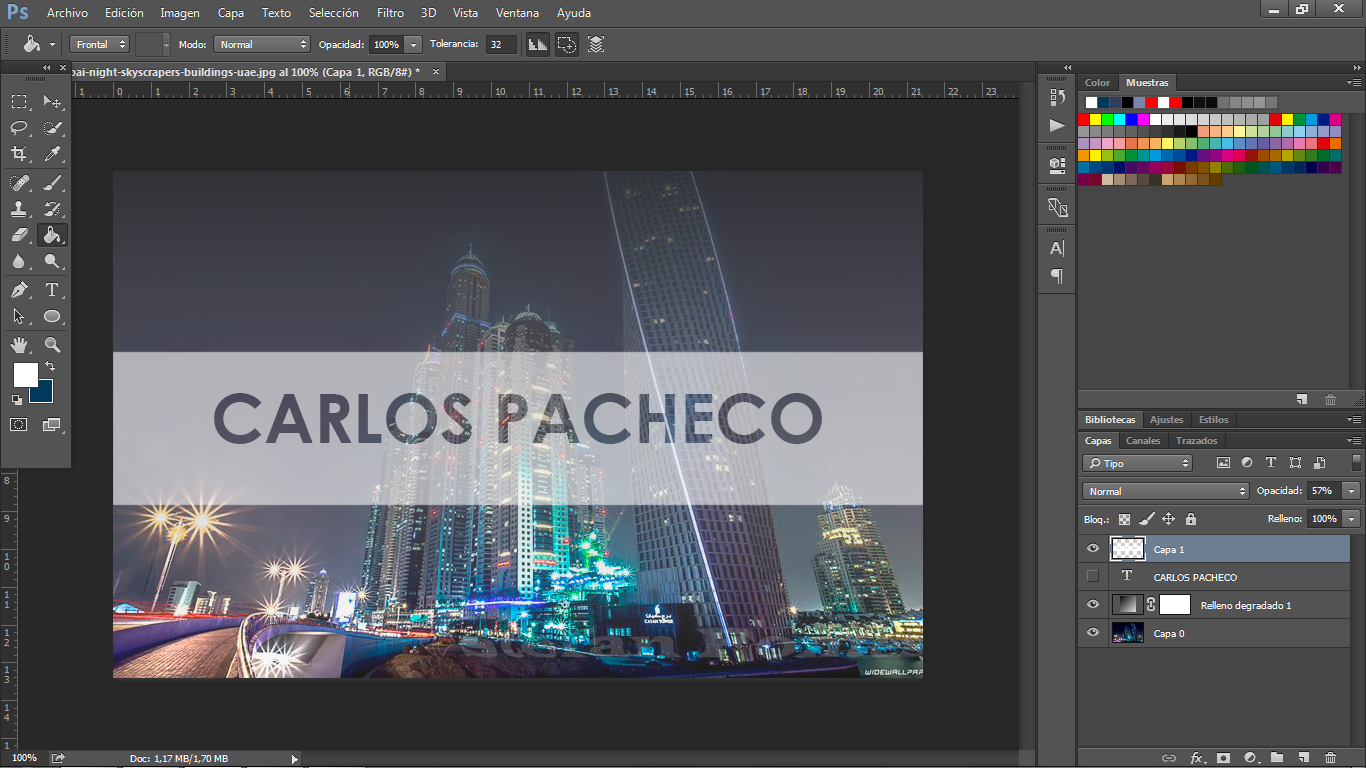
PS: You can play with the opacity and place it to your preference and make the image look much better.
Finished


I hope you liked this tutorial, as you could see it is very simple to make this type of text, it would be very cool in all our images, I hope you can practice it.
Remember that your vote and your comment are very important to me, until the next post.
Congratulations @nell4! You have completed some achievement on Steemit and have been rewarded with new badge(s) :
Click on any badge to view your own Board of Honor on SteemitBoard.
To support your work, I also upvoted your post!
For more information about SteemitBoard, click here
If you no longer want to receive notifications, reply to this comment with the word
STOP