How to become a Programmer for Complete Noobs! Part 4

How to become a Programmer for Complete Noobs! Part 4
Hi Steemians!
In today's lesson, we're gonna continue to build and improve our website in HTML, now using photos and links! We're gonna take the basic stuff you just built, in part 2 and 3, and make it fancier and funner! (And funner is not even a word!)
Introduction-- Uhh, why even learn HTML?

- You'll be the most interesting man/woman in the world!
- With HTML, you can make a website, which you can use to make money!
- If you love HTML and web design enough, you could just quit your current job and only build websites, and work solo as an entrepreneur!
- A whole lotta people who build websites who don't even code that work in UX, which stands for user experience. These people make a lot of money to design apps that are user-friendly. Knowing HTML will definitely help in a UX career
- HTML is easy to learn. 'Nuff said
- HTML will get you closer to being a hacker. ;) To be a hacker, you need to understand the web. The web is heavily built on HTML elements.
Now let's awesome-fy our previous HTML webpage that we built in part 3!
Step 1- Open your code editor (Brackets)
Open up your code editor, and get your code ready!
Below is the code we worked on last time. Type it out, OR copy and paste it (but remember you will learn more by typing!):
<!DOCTYPE html>
<html>
<head>
<title>Page Title, shows up at top of tab</title>
</head>
<body>

<h1>This is a Heading, it will be big and bold!</h1>
<p>This is a paragraph, my text here will be smaller</p>

</body>
</html>
Step 2: Actually understand the code from last time (shown above)
Time for a brief overview of html!
Every HTML program should have these 5 things!:
- "!DOCTYPE html" tag
- "html" tag
- "head" tag
- "title" tag
- "body" tag
As you may have noticed, these things are called tags.
There are open and close tags. Open tags have a "< >" and close tags have a "< / >". If this seems confusing, don't worry about it! You will soon be a HTML pro :D
1. !DOCTYPE tag
<!DOCTYPE html>
The !DOCTYPE tag tells the web browser what kind of page this is. To write good HTML code, you should ALWAYS put your !DOCTYPE tag on the top of your HTML page.
2. html tag
<html>
Hi, I'm inside the "html" tag!
ALL of my HTML code, including the "head", "title", and "body" should
be inside here.
 In fact, EVERYTHING should be inside here, except the "<!DOCTYPE html>"
</html>
As you can read inside the tag, EVERYTHING goes inside of the html tag. Pay close attention to the "opening" and "closing" tags.
Do you see the difference between:
<html>
And:
</html>
?
(Hint hint! One has a \ and the other one doesn't. The one with the \ ALWAYS closes the tag!)
3. head tag
<head>
Hi, I'm inside the "head" (or header) tag!
This contains all my important stuff
like my "title" and "CSS" and other things!
</head>
The head contains important stuff like your title, as you can read above!
4. title tag
<title>I'm inside the "title" tag!
Everything in here shows up on my tab in Chrome or Firefox.
Keep in mind that my title tag should go inside the "head" tag!
</title>
5. body tag
<body>Hi, I'm inside a "body" tag.
The "body" of my text goes inside here!
Like paragraphs, etc.
</body>
Step 3: Create a cool Meme on memedad to add to our Website !
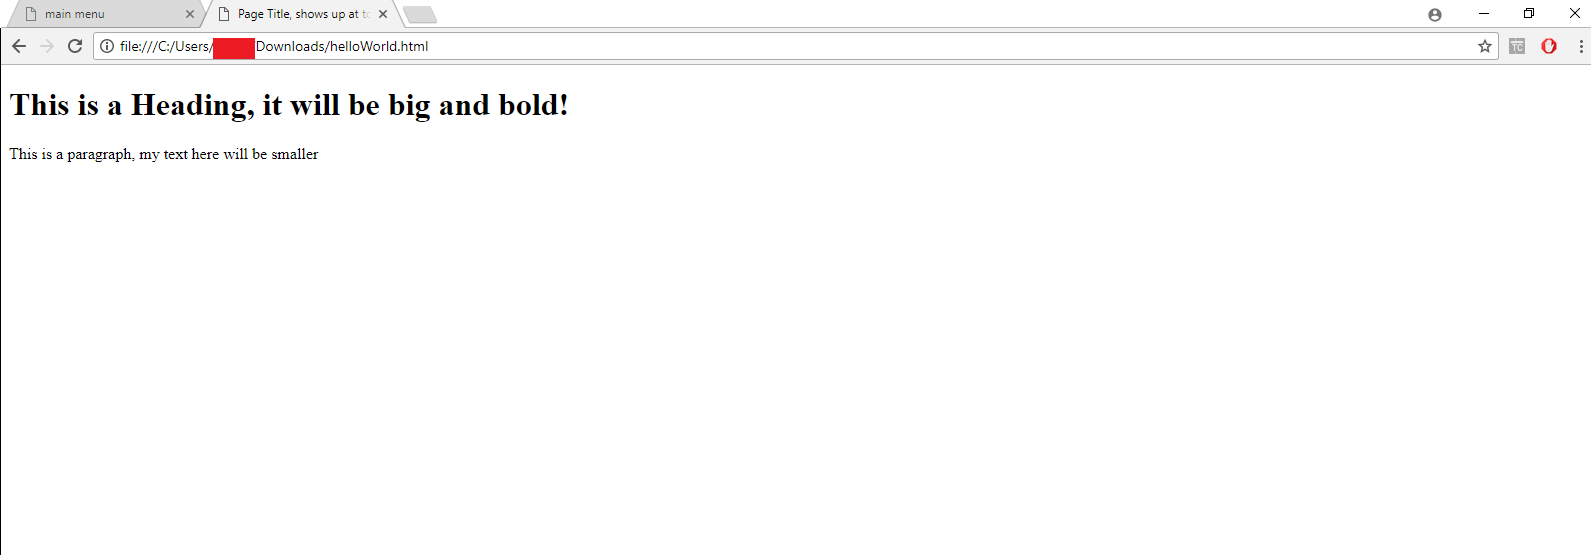
So last time, we made this website, with the code above:

BORING!
Let's spice things up with a Meme! :D
Step 3.1 Go to memedad.com and create a Meme
Here's the link to memedad to create your Meme: http://memedad.com/

Select a meme, then make a caption. DO NOT MAKE AN ACCOUNT, unless you want to, for some reason. Simply right click and save the image.
Make sure to save to the same place your html code is in and remember your name you saved it as!!
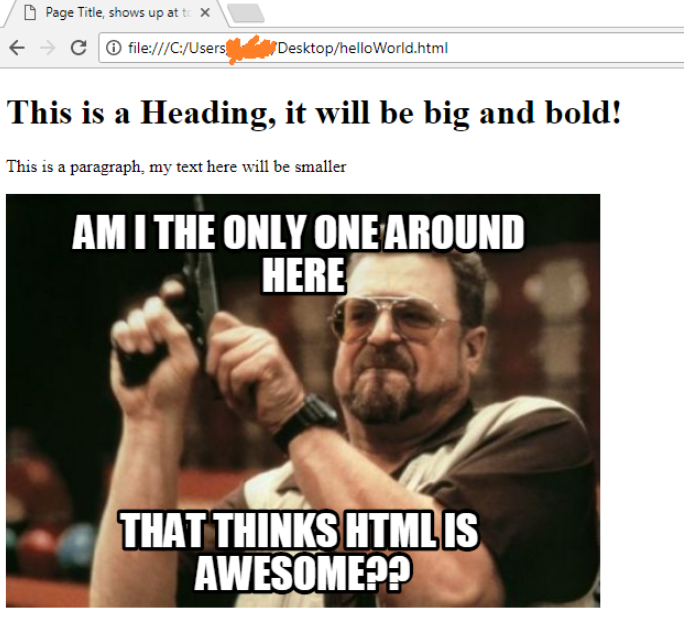
Here's the meme I created:

So funny, right? xD
Step 4: Move our image to same folder/directory as our html file
Did you do this already? If not, do it now!
Step 5: Make an "image" tag to add to our code!
An image tag looks like this:

My image "src" is just the name of my meme image file. That's my meme png right there.
Formally, there are 4 components to an image tag:
- "<img":
- this is the opening tag
- "src='myimagename.png'"
- "src" means "image source"
- Our image file name goes in here
- "alt='this is text if this crashes'"
- "alt" means "alternate image"
- This is optional, but if our image can't be found, this text is displayed
- ">"
- this closes the image tag
(NOTE: All these little rules, like the ones above, in programming are called syntax. Syntax can be nice, or really annoying. HTML is really fun, but I personally think the "syntax" in HTML is kinda weird)
If this explanation and rules made no sense above, don't worry about it! This will make sense later!
Step 6: Insert our image tag into our HTML code and show off!
Here's how my code looks below in the Brackets code editor, after adding our image tag:

Here's the code again, if you wanna copy-paste it:
<!DOCTYPE html>
<html>
<head>
<title>Page Title, shows up at top of tab</title>
</head>
<body>

<h1>This is a Heading, it will be big and bold!</h1>
<p>This is a paragraph, my text here will be smaller</p>

</body>
</html>
And...(drum roll please!), here is our final webpage, after clicking on the thunderbolt on Brackets!

Conclusion
TLDR: today we learned about the 5 important tags in html:
- "!DOCTYPE html" tag
- "html" tag
- "head" tag
- "title" tag
- "body" tag
AND we added an image to our website!

Please upvote and comment below if you liked this! Thank you Steem community, I love ya guys <3 <3
A small note, when you were talking about html tags in 2.2 you used the wrong slash. May be confusing to beginners.
Hi rantar, thanks for the fix!!! I fixed it!
Nice eye!
You are welcome!
Congratulations @keep0nl3arning! You have completed some achievement on Steemit and have been rewarded with new badge(s) :
Click on any badge to view your own Board of Honor on SteemitBoard.
For more information about SteemitBoard, click here
If you no longer want to receive notifications, reply to this comment with the word
STOPCongratulations @keep0nl3arning! You received a personal award!
Click here to view your Board
Congratulations @keep0nl3arning! You received a personal award!
You can view your badges on your Steem Board and compare to others on the Steem Ranking
Vote for @Steemitboard as a witness to get one more award and increased upvotes!