How To Create A Website in Less than 2 Hours
HOW TO BUILD A WEBSITE
A REALLY SIMPLE GUIDE ON HOW YOU CAN BUILD A WEBSITE IN LESS THAN 1 HOUR
Have you been looking to build a website for your business but don't know where to start? Look no further, you've landed to the right webpage.
It Takes Only 3 Steps To Build A Website! Let's Get Started!
I
Choose A Platform Where You Want Your Website To Be Built
II
Purchase Domain Name and Hosting
III
Set Up Your Website
STEP ONE
Choosing A Platform Where You Want Your Website To Be Built.
Deciding on what platform to have a website built on could be a bit difficult for the newbie but I've got you covered and I recommend WordPress (WordPress.org) because its what I use.
The ultimate open-source content management system (CMS) platform of the 21st century called WordPress allows non-tech savvy and business owners to build a stunning website without coding knowledge or having to learn web programming.
I highly recommend using WordPress because of its amazing features below ↓
- Powerful
Research says WordPress is now being used by more than 60 million websites, including 30.6% of the top 10 million websites as of April 2018 which includes blog site, business website, mailing lists, forums, media galleries, online stores and lots more and I bet that rings a bell.
- User-Friendly
Being a newbie in web development field could be overwhelming but WordPress made it easy and it will take you from non-tech savvy to a web designer in a few days.
WordPress platform also offers their user tons of ready-made website template which allows the user to change the look and functionality of a WordPress website without writing a single line of code.
- No Cost
Like I've said before, WordPress is an open-source content management system that is available for the universe to use without paying a dime. All you need to have your website running is to purchase a domain and hosting before you can go live.
- Mobile Friendly
Building a website that works across all browsers and devices has never been so easy. WordPress platform made it easy for every website to be responsive and mobile friendly.
- Helpful Community
There are tons of WordPress developers and community working every day to make the platform more beneficial and easy-to-use for me and you. No question will be left unanswered when it comes to development, marketing, customizing, design and lots more.
STEP TWO
Every Website Needs An Address And Home.
Choose A Domain and Hosting That Suit Your Business
WordPress.com allows the newbie to create a basic site that’s free forever—no credit card required but I don't recommend that. It may be free but with limited features and you should allow nothing to stop your business from growing.
The good news is, you get to have a free domain name but you won't look professional. For instance: [email protected]. Oops! Unprofessional.
Like I said earlier, every website needs an address and home to go professional and it doesn't matter how small your business is. I highly recommend you purchase a domain name and hosting to make your business go professional. For instance: yourbusinesswebsite.com. Yay! looks professional
Basic Rules To Abide When Choosing A Domain
Following the basic rules below when choosing a domain name will be of good benefits to your business.
Your domain name should:
be a Top Level Domain e.g .com. .org .info
be short and catchy
contain relevant keywords
be unique
easy to remember
and lastly, I expect you not to include a number.
Talking of domain name and hosting; the domain name is your home address (website address) while hosting is the piece of land you build your house on (website).
I believe no one would dare to build a house on a rented land unless its a mobile home lol. And for this reason, we are going to look into the cost of domain and hosting in our next lesson.
Domain Name and Web Hosting Costs
Talking of domain and hosting cost, there are many providers out there and choosing one that meets the WordPress minimum requirement could take some effort but I've got you covered with my internet research skill.
I will share with you three web hosts that are highly recognized by WordPress which you can also explore to learn more about them before purchasing.
BlueHost
DreamHost
SiteGround
I recommend Blueshot.
Bluehost is known as one of the top 5 hosting providers for they offer an exclusive discount to new users by giving out a free domain name worths $15 and discount on hosting plan.
For a new user with low capital, you can go for the $2.95 a month + Free domain to start with and upgrade later but I recommend the plus plan, as you get more exclusive features including unlimited websites, free SSL certificate, $200 marketing offers for only $5.45 per month.
STEP THREE
HOW TO INSTALL WORDPRESS, CHOOSE A THEME AND CUSTOMIZE YOUR WEBSITE
It's almost done and I hope you are still here with me!
I believe you have purchased a suitable domain name and hosting and now is the time to set up your website and go live.
We are going to look into steps involving setting up your website the right way, and the first thing you need to do is install WordPress. Let's go!
Installing WordPress
There are two definite ways to install WordPress which includes 1-click and manual installation, but I highly recommend 1-click installation for the newbie as it doesn't require any technical skills.
1 Click Installation
One click installation allows non-tech savvy to have WordPress installed on their domain in a blink of an eye without any technical skills.
If you are using Bluehost account or any other web host that supports WordPress, you'll find the 1-click installation in your control panel, and if you encounter any technical issue, their 24/7 customer supports are willing to help.
The 1-click installation doesn't require any skill but below are the steps you need to follow when doing it.
And If you choose not to work with Bluehost but a different web hosting provider, this will still be the same or similar in every case.
Firstly login to your hosting account
Click/login to your control panel
Click on 1-Click installs
Look for the WordPress Icon and click
Choose your domain
Click the Install Now button and be smart to know what's next with the details you'll get. Done!
It is quite simple to understand but if you still dont get it right, I recommend you contact the customer support team and they will help you out.
Choosing A Theme
Choosing a theme can be confusing for a newbie for there are tons of both free and paid WordPress themes at your disposal to build a professional looking website for your business.
And not to waste your precious time I recommend you start with 'Illdy'- a free one page, easy to customize multipurpose WordPress business theme suited for business, portfolio or any other creative websites.
WordPress automatically installs a theme to get you started, but you want something that suits your business more. And now I'm going to walk you through how to find and install your dream theme.
How To Find A Theme
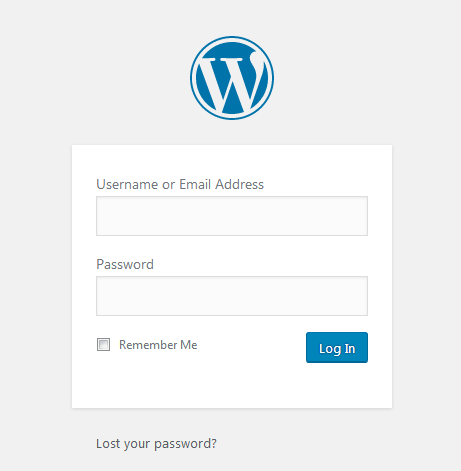
Login to your WordPress Dashboard - The only way to do this is by typing your domain name along with /wp-login and a page to log in with your details will come up.
For instance: http://yourbusinesswebsite.com/wp-login.
Provide your username or email address and password to log in as shown in the image below
Once you are logged in, the picture shown below will be the look of your WordPress dashboard.
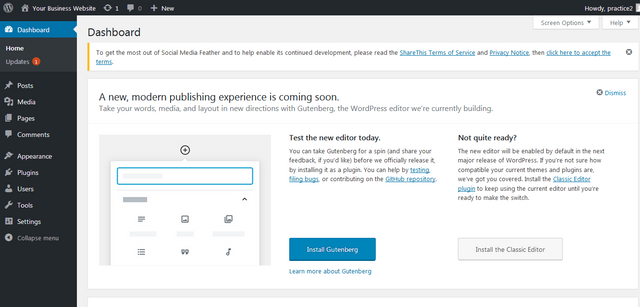
Note: I recommend you explore the WordPress dashboard, get familiar with it and understand how it works.

Next Step
Move your mouse to the menu at the left side of your dashboard and click on Appearance > Themes and now you can move your mouse to the left-middle top of your dashboard to click on add new button as shown below.
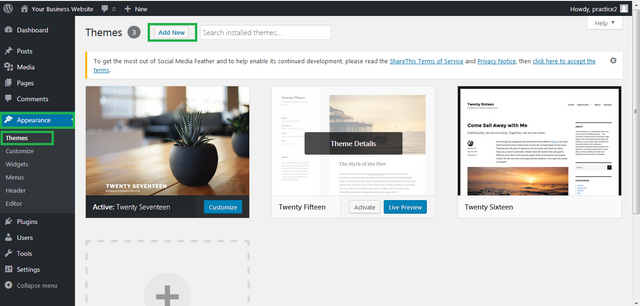
After clicking on the add new button, I need you to move your mouse to the right side of your dashboard, click right inside the "search themes" box and type your theme name "Illdy" to search and click on the install button and activate.

You did it! Yay!!!
Customizing Your Website
Now that you've installed and activated your chosen theme, I think its time you customize your website by following the easy guide and I bet you can't wait to see your site looking cool. Let's get started!
After installing and activating your theme, I recommend you move your mouse back to the menu at the left side of your WordPress dashboard and click on Appearance > Customize.
After clicking on the "customize button", it will automatically load a demo page, and recommend at the left side of the screen to install two plugins which are mandatory.
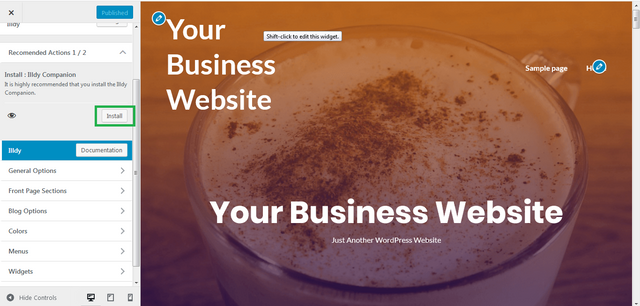
After installing the two plugins, it will tell you to import demo content by clicking on the button below the instruction given.

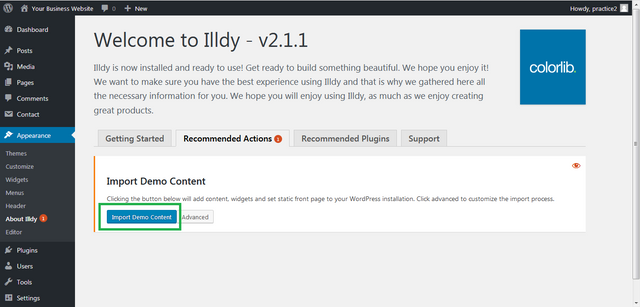
After installing the two plugins, it will automatically load a new welcome page, and you are to follow the instruction given by clicking on the "Import Demo Content" button shown on the welcome page.
After you've clicked on the "Import Demo Content" button shown on the welcome page, it will automatically install the theme as per demo and display this message " Hooray! There are no required actions for you right now. "
And for you to know what your website now looks like, I recommend you move your mouse back to the menu on the left side of your WordPress dashboard and click on Appearance > Customize for further customization
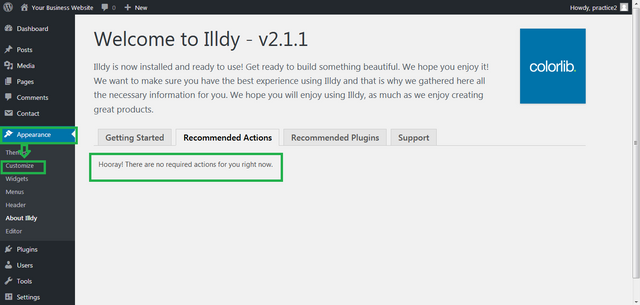
And guess what, below is what you are going to see and I hope you get it done

Now that you've set up your theme as per demo which helps speed up the creation of a WordPress website, it is time to replace all the demo contents with your business or preferred information. In the next steps, we are going to look at the eight things that will finally make the website yours which includes how to:
Configure front page
Setup Jumbotron
Configure About section
Add Project
Configure Tesimonial Section
Work with Service Section
Setup Blog
Use counters
and finally, how to point menu to page sections along with some other guides and I highly recommend you visit this link "https://colorlib.com/wp/support/illdy/" for better understanding.
Note: To get the best out of your website, read the content below.
Great! I hope you made it.
Last but not the least, I'm going to list some useful and resourceful information to help you get the best out of your websites.
Free Image Website
Unsplash
Pixabay
Pexels
Domain and Hosting
I recommend Bluehost to get a free domain and exceptional web host service
Free and Premium Themes
Athemes
Themeforest
Colorlib
Conclusion...
Thanks for being patient and if you love what I do, please click on the share button and follow me for more updates, thanks
Congratulations @cybertecsream! You have completed the following achievement on the Steem blockchain and have been rewarded with new badge(s) :
Click on the badge to view your Board of Honor.
If you no longer want to receive notifications, reply to this comment with the word
STOPDo not miss the last post from @steemitboard:
My wife is looking at doing a website that accepts square because it's cheaper than PayPal. Could any site accept square and would my wife be able to just print out payment information for taxes
This is great. I'm at work on my phone. But as soon as I have a computer and some time. IAM going to be getting a website done