Building the "Fountain of Youth" - Tower Cap
"If there is magic on this planet, it is contained in water."
- Loren Eiseley
Series Index
- Part 1: "Fountain of Youth" - Embarking On A New Maker Adventure
- Part 2: "Fountain of Youth" - Figuring Out How To Build It
- Part 3: "Fountain of Youth" - Inside an Acrylic Polishing Machine
- Part 4: "Fountain of Youth" - ~Euphoria!~
- Part 5: "Fountain of Youth" - Standing On Giant Shoulders
- Part 6: Building the "Fountain of Youth" - Mechanical Modifications
- Part 7: Building the "Fountain of Youth" - Tower Cap
- Part 8: Building the "Fountain of Youth" - Electrical Modifications
Why a Tower Cap?
The Tower Cap, a George Wiseman improvement upon the original acrylic polishing machine, is an attachment designed to allow the lye mist created by the electrolyzer to settle, minimizing the amount of lye that escapes from the machine during operation. By the way, you can order an HHO health machine "off-the-shelf" from Eagle-Research.
If you've ever done any plumbing,
you may already be familiar with cutting, preparing, and assembling PVC pipe using appropriate tools, cleaning fluid, and PVC glue. If not, no worries; PVC is actually pretty easy to work with, and you can find endless tutorials to help you with any details online.
The finished Tower Cap, installed. ~ Image by the author.
Pardon the odd image shape above; I snapped the photo at an angle in order to fit the whole machine into the frame of the camera I was using at the time.
Let's look at the assembly and glue-up process.
I assembled the Tower Cap on an old card table with some cardboard sheets protecting the surface from glue drips. The table was set up outside, because acetone and PVC glue can get rather fume-y,:mask: and I'm pretty sure there are better, safer ways to get high.
Sure, you can buy a small can of PVC cleaning fluid, but it is mostly acetone anyway (95% or more), and I already had a gallon of acetone on hand.
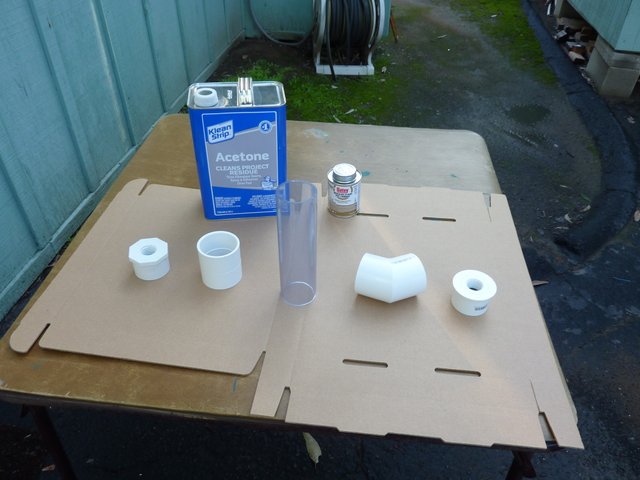
Tower Cap parts and materials on work table. ~ Image by the author.
In the image above, you can see everything needed (except perhaps a rag or some paper towels) for the Tower Cap.
Left to right in front are the following pieces of Schedule 40 PVC:
- 2” to 3/4” Bushing
- 2” Coupling
- 8” Clear PVC Tower Tube
- 2” 45degree Elbow
- 2” to 3/4” Bushing
The two bushings came from two different sources; there is no special reason for one to be HEX shaped and the other round, but your sense of aesthetics may call for one or the other.
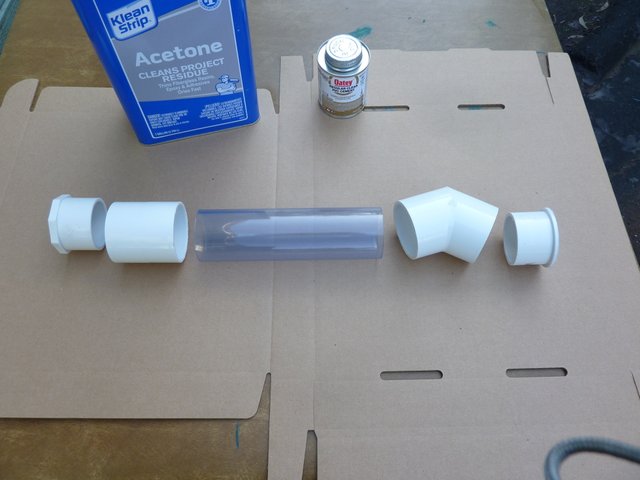
Parts lined up, ready to glue. ~ Image by the author.
I glued the lower bushing and coupling together first, taking some care not to use too much glue...
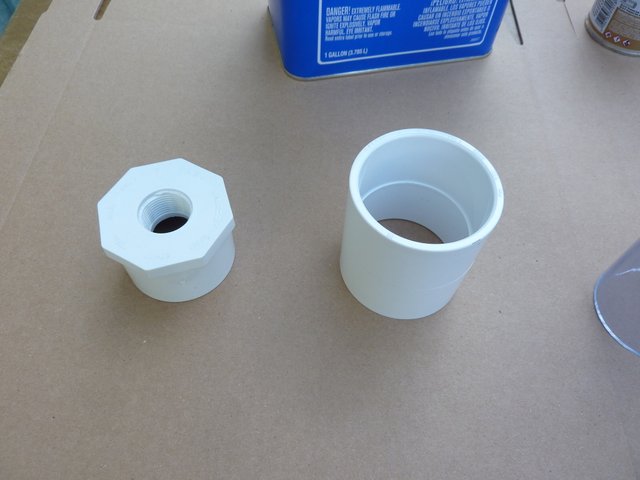
Lower bushing and coupling. ~ Image by the author.
That PVC glue is rather nasty, :mask: and prone to drip all over, but you need to use plenty—enough to ensure a well-sealed glue joint. The lower bushing is there to connect to the upper half of the coupling by using thread tape and a 3/4" short pipe nipple between the two.
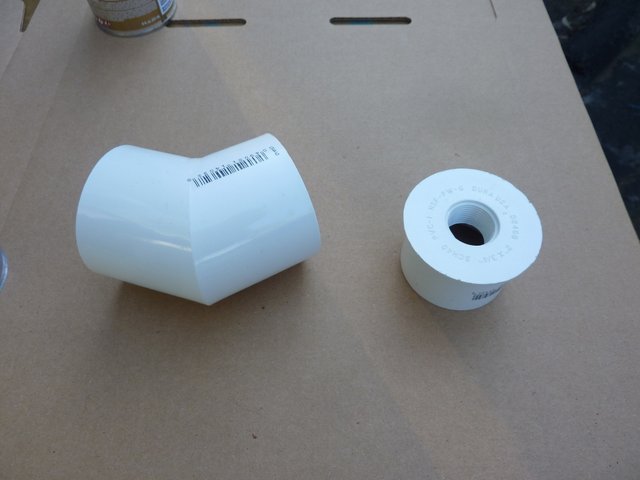
Upper elbow and bushing. ~ Image by the author.
Next, I glued the upper elbow and bushing together. What's the upper bushing for? I wanted to be able to "swap out" attachments and connectors easily, in case I later changed my mind about something. By having a threaded bushing at the top of the tower, that will make any changes down the road relatively easy.
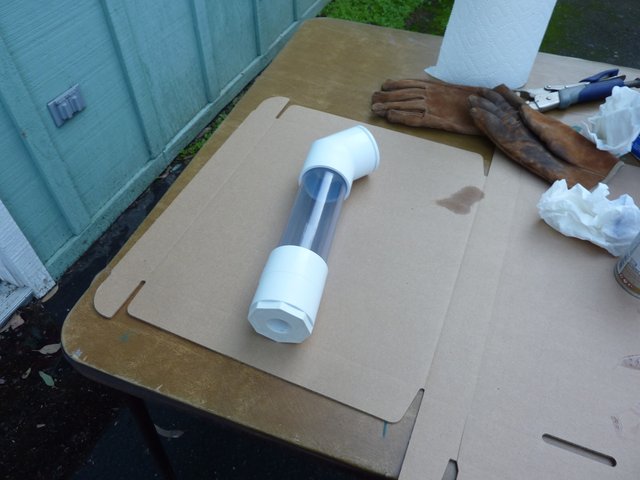
Finally, I glued the 2" diameter, 8" long section of clear PVC between the lower coupling and upper 45 degree elbow to complete the main, glued portion of the Tower Cap assembly.
Completed glued portion of Tower assembly. ~ Image by the author.
I managed to annoy myself by dripping some glue on the transparent pipe; however, as it turns out, when the system is operating I've never really noticed it. Fair warning, however! It's really easy to drip that PVC glue, so a little thought and careful preparation (and maybe some practice with applying just the right amount of PVC glue before you attempt this!) will go a long way.:wink:
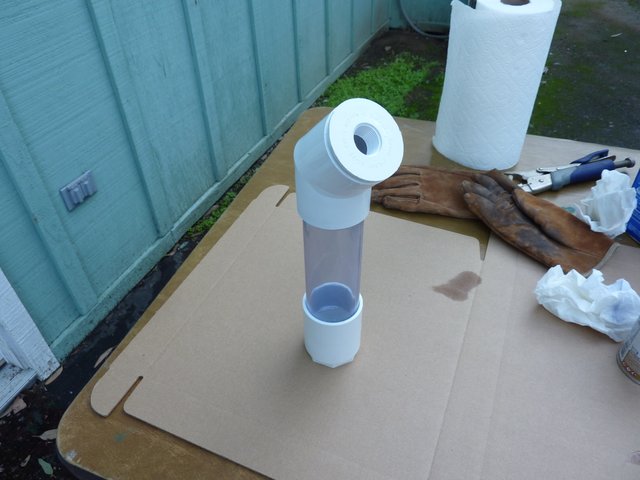
Why does the Tower Cap employ a piece of transparent PVC pipe? You can read George Wiseman's complete rationale on his website, but—summarizing—it lets you see if your electrolyte is foaming due to possible contaminants. I'm contemplating an alternate design to replace the tower, but my thoughts on that aren't "fully cooked" yet.
The Tower standing up. ~ Image by the author.
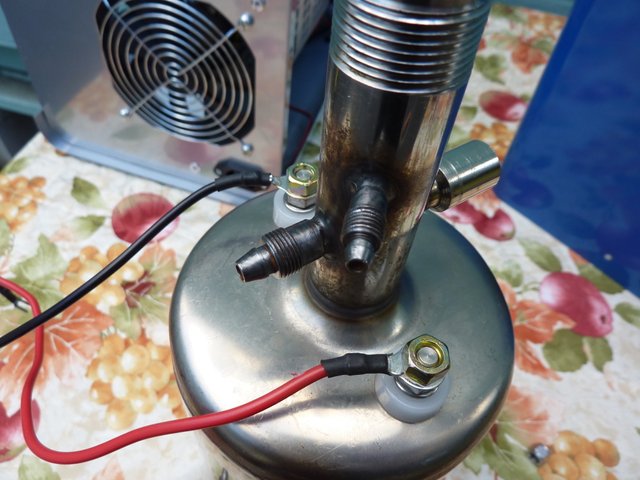
Although the threads on the top of the tank seemed to be the right pitch and diameter to closely match the PVC coupling, I don't think they are tapered the way pipe threads usually are. They are meant to connect to the tank cap that came with the machine. Because of this, I had to use a lot of teflon thread tape on the threads before screwing on the lower half of the PVC coupling.
Tank threads are not pipe-tapered. ~ Image by the author.
The slides below are here just as a reminder of what the 3/4" PVC coupling looks like. I put the smaller half on the bottom of the system, i.e. attached to the electrolyzer tank so the tank assembly would be as simple as possible and require as small a hole in the machine cover as possible. The larger half of the coupling attaches to the bottom of the Tower Cap, and includes the collar used to screw it to the lower half.
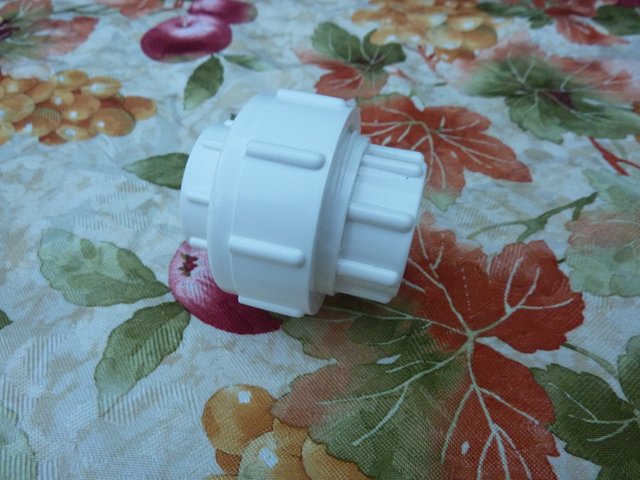
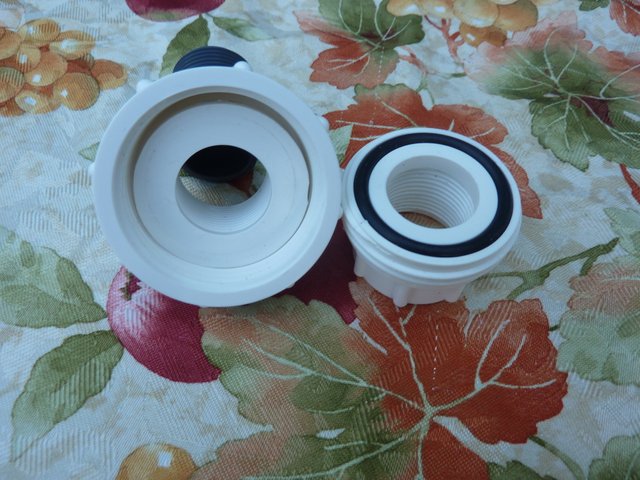
<<<-Drag to SCROLL Left and Right->>>, CLICK for full-sized image. All Images by @creatr
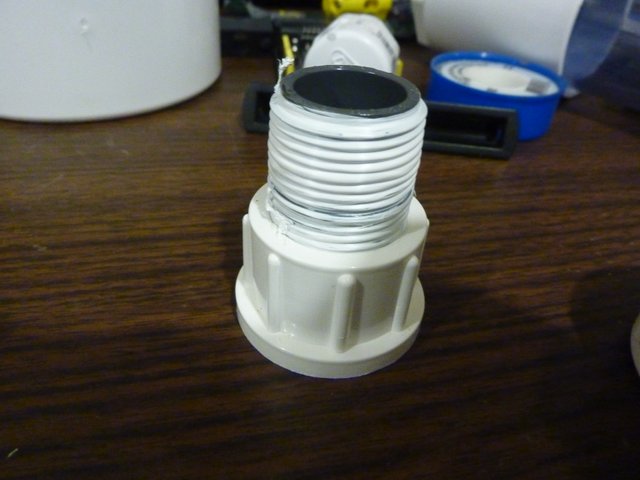
The next image shows the upper half of the coupling with a teflon covered pipe nipple installed, but without the collar in place. The nipple is what connects the Tower Cap lower bushing to the upper half of the coupling.
3/4" Pipe Nipple, taped and installed in upper coupling half. ~ Image by the author.
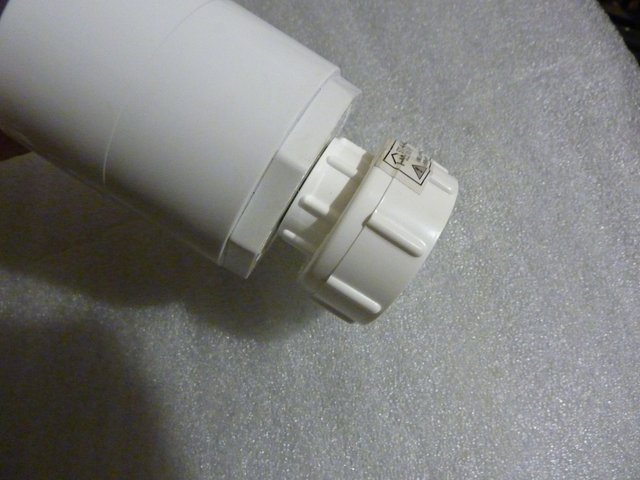
Here you can see the upper half of the coupling, with its collar, firmly attached to the Tower Cap base. Note that because the nipple is so short, it has been completely embedded inside the threads of the bushing and the coupling, and is now out of sight.
Upper half of coupling installed in Tower base. ~ Image by the author.
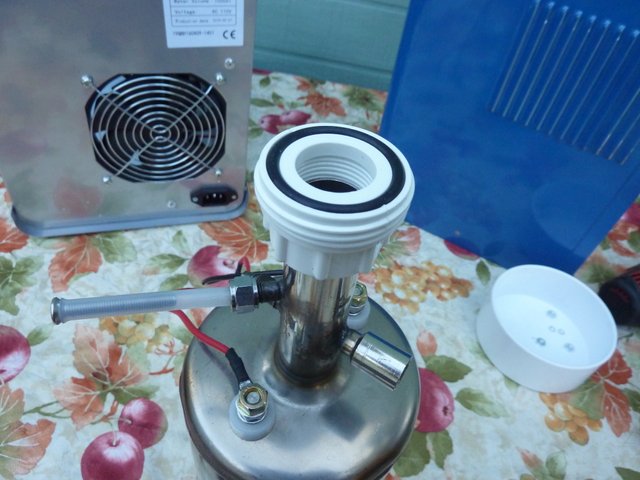
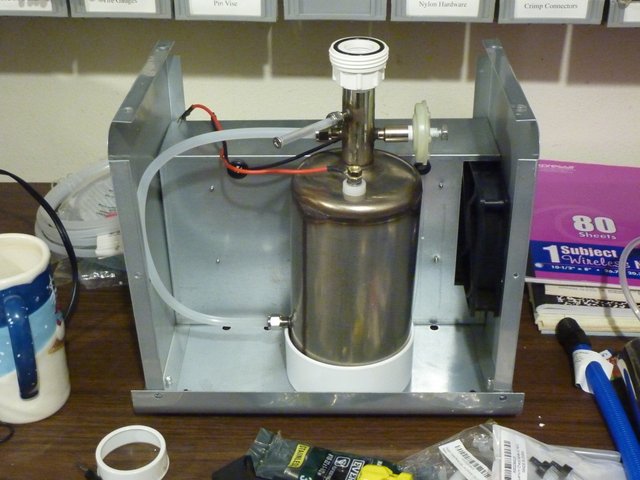
Comparing the image above and the image below, you can see how the Tower Cap can be easily set on the top of the tank and fastened by screwing down the coupling collar.
Lower half of coupling on top of tank. ~ Image by the author.
That's how I made my Tower Cap.
I hope you're finding this series interesting and instructive, especially if you've discovered it at some point in my future and are planning to build your own HHO for health machine.
Next time we'll look at some of the electrical modifications made to get the machine up and running in a controllable fashion.
See you then!
DISCLAIMER:
I am not a doctor, nor am I a medical professional of any kind. This series of articles describes my very individual, personal quest to investigate credible reports of the benefits of breathing hydrogen and oxygen gas, drinking hydrogen enriched water, and applying hydrogen and oxygen gas to weakened or diseased body parts. The devices I am building, the tools and materials I am using, and the gases I expect them to produce, are potentially dangerous and even life-threatening if used carelessly. Should you choose to use any of this information, do so only with the most serious care taken for safety. Any use made of this information is entirely at your own risk. I am not in any way responsible.
AquaCure® is a trademark of Eagle Research.
~FIN~
you can still reward it: CLICK HERE.
P.S. If you have an "in" with anybody at Steemit, Inc. - Would you please ask them to get rid of these damn, extremely annoying "off-website" arrow/boxes? The have, overnight, made Steemit ugly. There are much better solutions.
For more technology articles,
please check out our Library Technology Shelf - CLICK below:

For more Health articles, CLICK our Library Health Shelf.


Introducing: The SILVERengines proton - Image by @creatr
CONTACT US - Will Exchange for Steem
You are why I'm here on Steemit!
I have very eclectic interests and hope, over time, to write about them all.
⬇️To Check Out @creatr's World⬇️CLICK Each Image Below⬇️

|

|

|


Love love the details :) I'm such a health nut that I'm still thankful you have posted about Browns gas...I had no idea.
I listened to the whole George Wiseman video and got a way better understanding. I've always been an advocate for HBOT and I appreciated George bringing up both the HBOT and Hydrogen therapies.
I'm so glad you're enjoying this. :)
We're still trying to "hit our stride" and make daily use habitual. I'm still fiddling with the details, and also with the machine location, getting some longer hoses, etc...
George is a real font of knowledge! Well worth listening to and following.
Yes, I am definitely enjoying your posts on your Brown's Gas:)
How do you know that your machine is at or below the 4.7 % ? I believe any higher and the hydrogen becomes combustible?
Also, (I might be way off in my thinking of this yet) regarding the water, do you know if the Brown's gas bubbling through the water...is there more hydrogen in the Brown's gas water or the same hydrogen in the water as Kangen water?
I really love my Tyent water ionizer so that is why I am wondering if the Brown's gas water has more or less or the same amount of hydrogen as Kangen water. If you don't know, no worries :) I'll keep digging :)
I haven't looked into Kangen water yet. I don't know how much hydrogen "sticks" in the water when Brown's gas bubbles through it; I just know that we need to drink it straight away after bubbling, because hydrogen is such sneaky stuff... it can escape from just about anything!
The percentage is straight math, based on lung capacity and breathing rate. George works out the details pretty clearly in his manual for the AC50 machine. You can easily find a copy of that manual on the AC50 page, linked frequently from my articles. ;)
I also did the math on reaching that level in the volume of a typical sized room... It would take days and days, and that would only be if the room were sealed... So, really, the main caution is keeping sparks and flames away from the machine outlet (and from any gas bags surrounding body parts).
Thanks!
I think I got my answer listening to one of George's interviews. There are different types of hydrogen gas. Brown's gas is far superior because it's a plasma gas whereas ionized water is great but it doesn't sound like it's as good of quality. I'll keep digging :)
Congratulations @creatr! You received a personal award!
You can view your badges on your Steem Board and compare to others on the Steem Ranking
Do not miss the last post from @steemitboard:
Vote for @Steemitboard as a witness to get one more award and increased upvotes!
Thanks for using eSteem!
Your post has been voted as a part of eSteem encouragement program. Keep up the good work!
Dear reader, Install Android, iOS Mobile app or Windows, Mac, Linux Surfer app, if you haven't already!
Learn more: https://esteem.app
Join our discord: https://discord.me/esteem