My Jarvis: The ESP8266
Background
This is a series of submissions on my attempt to create my own JARVIS and all the home automation bits that go with it. This series of articles starts here.
Overview
The basic idea behind any home automation (which at the end of the day is all that Jarvis is) is the idea that different things in your house are controlled/monitored from a central location or at the very least, a remote location. This means that you need devices that are connected to your lights switch, kettle, fridge or whatever else you want to control/monitor. Now unless you want to run wires all over your house these need to be on WiFi. Until now, this meant a Raspberry Pi with a wifi dongle as the cheapest option. In the last few years however a chip has come on the market that has revolutionised this space. It is made by a company called Espressif and it is called the ESP8266.
History
The ESP8266 first came to market in August 2014 and was completely unusable. No one (at the time) knew anything more than the basics about it and it came with no English documentation. The very low price, low component count and the fact that it came with a full WiFi stack, however, made it attractive for people to dig into.
It was found that the processor architecture inside the ESP was known and actually had some good documentation and the rest is history.
Description
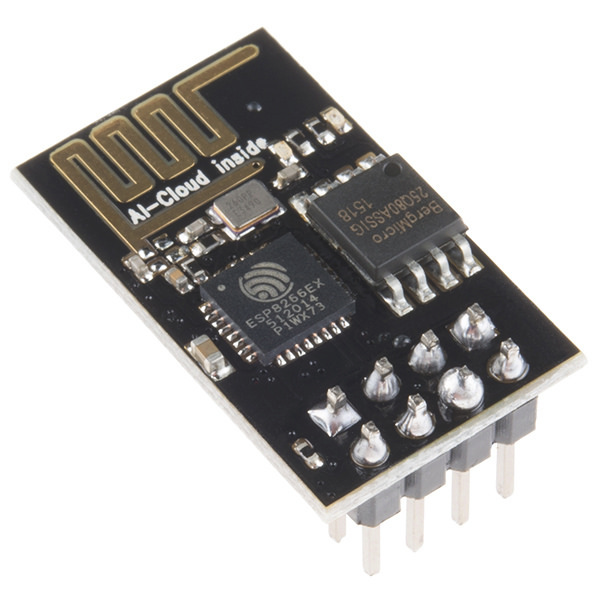
The ESP8266 is a very cheap chip (under $10) which can do amazing things if you know how to use it. It has a full 32bit RISC processor on board and a full WiFi stack. In October 2014 Espressif released the first (buggy) SDK for developing software directly for the chip. This SDK is now fully featured, well documented and essentially means this chip can be used for almost anything. See a much more thorough description of the chip on my github page.
How I Use It
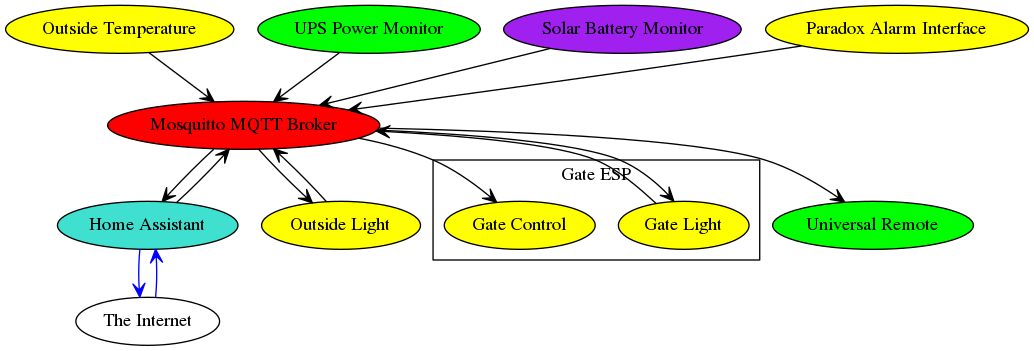
There are different devices around the house that switch lights on an off, measure temperatures, open gates etc. All of these devices use an ESP chip. The software on the ESP connects to the WiFi network and then an MQTT protocol is used over the network. Depending on the application the ESP then switches a relay or reads a temperature sensor etc. All of these ESP devices speak to a central MQTT broker which is then, in turn, linked to Home Assistant.
Options for Use
There are many ways to set up an ESP. You can load a scripting environment onto it and then use that scripting language. Currently supported options include:
- Lua
- Python
- AT Command Set
The alternative is to write the software on the "bare metal". For most of the ESP devices in the system I written the bare metal software. My software can be found here.
This tutorial is good to start with if you are into the bare metal programming of this chip.
In this image the yellow objects represent this bare metal ESP development.