Playing with pixels
Images are usually seen as the end product of the design process, as a developer I see them as just another representation of data and as such they're ripe for manipulation.
My original experiments using images to create data were attempts to find ways of working past the limitations of older hardware, this was back in the day when we'd precalculate sin/cos tables into arrays to try and speed stuff up. It became useful again working with the limitations of the first and second generation iPhones. Today I tend to use the technique to manipulate data visually.
Images come in a wide variety of formats, typically contain extra (meta) data and have various compression algorithms applied.

When we zoom in on the image above with no smoothing applied i.e just make the pixels bigger, we can see that the text at the bottom isn't actually text and around the white areas there are artifacts caused by the compression technique.
Getting started
We'll start off simple and using a graphics package such as Photoshop or GIMP, the terminal and some python we'll work through an example which will start with an image and end with a file containing usable data. The image format that we use will avoid issues associated with meta data and compression so we can avoid a number of headaches.
If you want to follow along without having to crack open a graphics package, all the files are available at https://github.com/abitofcode/steemit_resources
Future posts will discuss some techniques that use the data we generate along with and other approaches to generating data procedurally.
Creating our first Image
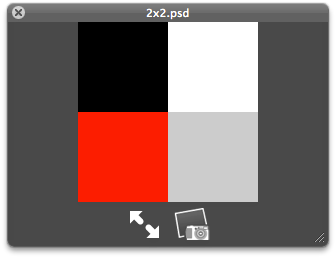
It'll help to know whats happening under the hood so the first step is to create a simple 2 pixel wide by 2 pixel high image in Photoshop and color it as follows.
Colors:
- Top left - Black (#000000)
- Top right - White (#FFFFFF)
- Bottom left - Red (#FF0000)
- Bottom right - Grey (#CCCCCC)
Save this as 2x2.psd using the standard Photoshop (PSD) format.
The PSD format that Photoshop uses is not much use to us as it contains lots of data that we just don't need, we're going to use the Raw format to create something we can work with.
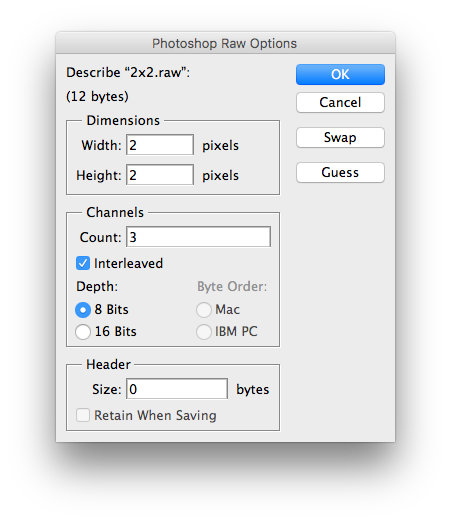
In Photoshop select 'Save As...' from the File menu and then Photoshop Raw from the Format dropdown, save as 2x2.raw and set the following options (I'm using CS3).
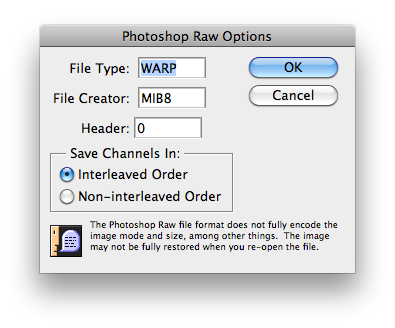
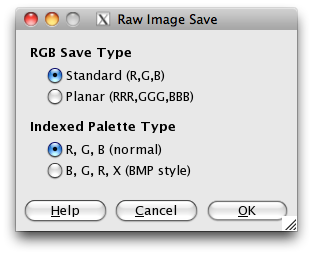
Note: The Raw format is not unique to Photoshop, GIMP for example also allows saving in a raw format.
Looking inside the image
There are lots of tools we can access from the terminal that'll make analysing the files a lot easier. I have a hotkey setup to my terminal but you can access it easily from spotlight (⌘ + Space) by typing 'terminal'.
Open the folder you've saved the files in with finder, select the folder and 'Copy' using Command+c. We can now get to the folder quickly in terminal by typing;
>cd *paste*
Where *paste* is ⌘ + v, alternatively you can drag the folder onto the terminal window. cd is the change directory command.
Use hexdump in the terminal to have a look at what's going on in each file, we can see that for 4 pixels worth of data the 2x2.psd is bulky as it contains the extra meta information that Photoshop adds. The first number on each line indicates the number of the byte that the line starts with.
>hexdump 2x2.psd | head
0000000 38 42 50 53 00 01 00 00 00 00 00 00 00 03 00 00
0000010 00 02 00 00 00 02 00 08 00 03 00 00 00 00 00 00
0000020 6c fa 38 42 49 4d 04 25 00 00 00 00 00 10 00 00
0000030 00 00 00 00 00 00 00 00 00 00 00 00 00 00 38 42
0000040 49 4d 04 24 00 00 00 00 3a df 3c 3f 78 70 61 63
0000050 6b 65 74 20 62 65 67 69 6e 3d 22 ef bb bf 22 20
0000060 69 64 3d 22 57 35 4d 30 4d 70 43 65 68 69 48 7a
0000070 72 65 53 7a 4e 54 63 7a 6b 63 39 64 22 3f 3e 0a
0000080 3c 78 3a 78 6d 70 6d 65 74 61 20 78 6d 6c 6e 73
0000090 3a 78 3d 22 61 64 6f 62 65 3a 6e 73 3a 6d 65 74
I've piped the output of hexdump through head to limit the amount of data shown. To see all the data Photoshop is actually using to store 4 pixels try removing the | head
>hexdump 2x2.psd
So, how does this compare with the raw file?
>hexdump 2x2.raw
0000000 00 00 00 ff ff ff ff 00 00 cc cc cc
000000c
The raw file is a lot more promising and we can see the black (00 00 00), white (ff ff ff), red (ff 00 00) and grey (cc cc cc) values just follow on after each other. At the end of a hexdump we get the number of bytes in the file in hexadecimal, here it is 000000c. You can convert this to decimal using a calculator or in the terminal again.
>printf "%d\n" 0x000000c
12
This prints to the terminal (printf), in decimal notation (%d) followed by a newline (\n) the hexadecimal value (0x prefix) 0x000000c. The result is 12 bytes, a red byte, green byte and blue byte for each of our 4 pixels. If we open finder from our terminal;
>open .
We get the following;
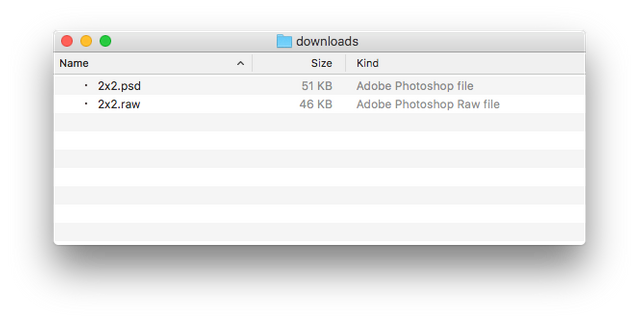
46k! This is the size of the file on disk, not the size of the file in bytes. Finder is reporting only a minor difference in the size of the files.
Lets head back to the terminal and use the list directory contents (ls) command with the -l (long format) option.
If you want to know why there is a difference between the filesize and size on disk there is a great explanation with examples here
>ls -l 2x2.raw
-rw-r--r--@ 1 abitofcode staff 12 2 Jun 02:21 2x2.raw
>ls -l 2x2.psd
-rw-r--r--@ 1 abitofcode staff 28310 2 Jun 02:20 2x2.psd
We can see here that the 2x2.raw file is returning the correct size of 12 bytes, while the PSD file returns 28,310 bytes! We can check this with by converting 28310 to Hex and comparing it with the value of bytes output by hexdump.
# convert 28310 to its hex value
>printf "%x\n", 28310
6e96

# list out the end of the file. Here the final 0006e96 is the number of bytes.
>hexdump 2x2.psd | tail
0006e10 00 00 00 04 00 00 00 00 38 42 49 4d 6c 63 6c 72
0006e20 00 00 00 08 00 00 00 00 00 00 00 00 38 42 49 4d
0006e30 66 78 72 70 00 00 00 10 00 00 00 00 00 00 00 00
0006e40 00 00 00 00 00 00 00 00 00 00 ff ff ff ff 00 00
0006e50 00 ff ff cc 00 00 00 ff 00 cc 00 00 00 ff 00 cc
0006e60 00 00 00 00 38 42 49 4d 50 61 74 74 00 00 00 00
0006e70 38 42 49 4d 46 4d 73 6b 00 00 00 0c 00 00 ff ff
0006e80 00 00 00 00 00 00 00 32 00 00 00 ff ff cc 00 ff
0006e90 00 cc 00 ff 00 cc
0006e96
Lets manipulate the data
The Raw format is just a sequence of bytes, we could use it as it stands but to get a little more hands on lets manipulate it further to get a feel for how it's laid out.
Currently we have 3 bytes for each pixel, each capable of holding up to 256 values and when combined we can store very large numbers.
Lets assume this is overkill for our needs and that we want to make the file smaller by using only one out of every 3 bytes. The plan is to drop the green and blue bytes and only use the red, this means that for every pixel we can store a value from zero to 255.
Note:
Originally I used to save the image to greyscale before outputting to Raw hoping that values such as 0xCCCCCC and 0xABABAB would be averaged out to 0xCC and 0xAB however the grayscale conversion doesn't do a straight average between the red, green and blue values. Grayscale conversion is discussed in more detail over here http://photo.net/digital-darkroom-forum/00R5Z7
The new approach means I can determine the value of a pixel in Photoshop by adjusting the Red value between 0x00 and 0xFF, the green and blue values can be set to anything (as they will be discarded). This has the added bonus of allowing me to use distinctive colors when laying out hit areas (this'll make more sense when we use the data).
A quick python script and the conversion is done.
# convert.py
# Loop through a file of raw rgb data and create a new file
# containing only the r values.
# Author: C.Wilson - @abitofcode

import sys, struct

if len(sys.argv) != 2:
  # the program name and the filename
  # stop the program and print an error message
  sys.exit("Must provide a filename")

# use the value we passed in as the source filename
infile = sys.argv[1]
# prepend '_' to create an output file name
outfile = '_' + infile
# open the output file for write binary (wb)
o = open(outfile, "wb")
#openf the input file for read binary (rb)
with open(infile, "rb") as f:
    # grab the first 3 bytes from the file
    pixel = f.read(3)
    # loop through 3 bytes at a time until complete
    while pixel:
        # split the bytes into the individual color components
        r,g,b = struct.unpack("BBB", pixel)
        #print str(r) + ':' + str(g) + ':' + str(b)
        # pack the first byte (red) so it can be written
        p = struct.pack("B",r)
        # write the byte to the output file
        o.write(p)
        # read the next 3 bytes from the file
        pixel = f.read(3)
# close the source file
f.close()
# close the output file
o.close()
Using the script should be simple, open terminal and navigate to the folder that contains the files convert.py and 2x2.raw and try the following.
# View the contents of the existing Raw file
>hexdump 2x2.raw
0000000 00 00 00 ff ff ff ff 00 00 cc cc cc
000000c

# Using the python script generate a new file _2x2.raw
>python convert.py 2x2.raw

# View the contents of the new file
>hexdump _2x2.raw
0000000 00 ff ff cc
0000004
This takes the input filename and prepends an underscore to it to create the output filename. We now have a file that contains only the red byte for each pixel, it can store a value between 0x00 and 0xFF (Zero and 255).
Loading a Raw file into a graphics package
If you've tried loading the original Raw file 2x2.raw back into Photoshop you may have noticed an extra dialog box. When we stripped everything down to the Raw format all we were left with was the data for the pixels, there is no longer any meta data stored within the image file for items such as the width and the height.
These now need to be provided otherwise Photoshop has no idea whether the image is supposed to be 1x4, 2x2 or 4x1. The Channels value represents the number of bytes per pixel, for the original 2x2.raw file this would be 3 (reg, green and blue channels), for our modified file _2x2.raw this would be 1 (the red channel).
In a future post I’ll show how we can access pixel data at a given position and look into some practical applications.
Cheers
Chris
The files used in this post can be found at https://github.com/abitofcode/steemit_resources