My Recent Project: A 3D Model of Ring Topology
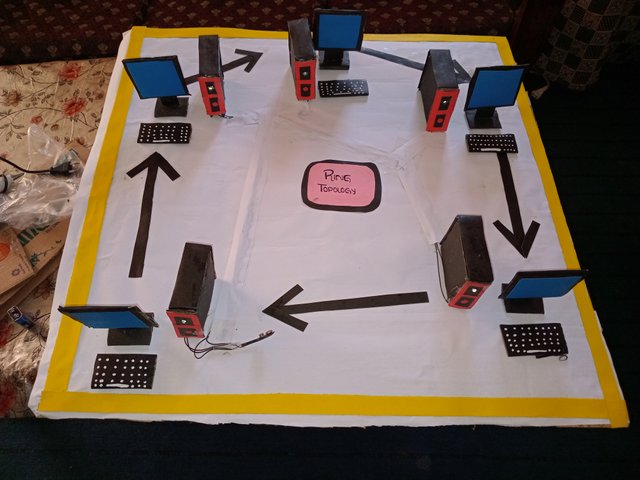
Hello everyone I hope you all are good well and enjoying life Today I am sp excited to share the project that I recently completed for my student . I will provide all the details about this project from the idea to the final execution but. Let me first introduce the project. It was a 3D model of a Ring Topology which I create for one of my students as part of his school project. The model consists of five PCs connected in a ring representing how data flow in a network using ring Topology.

What is Ring Topology?
Ring topology is network setup in which each Computer is connecte to exactly two other computers forming a circular data path. Data travels in one direction passing through each device until it reache its destination.
Steps for Creating the 3D Model
1. Choosing the Base
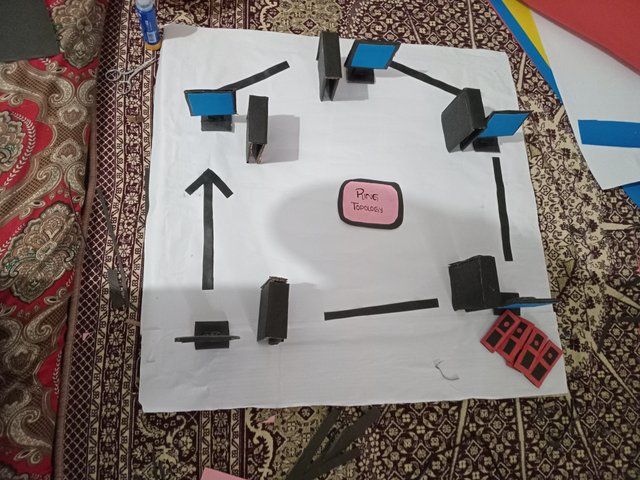
Initially I plann to use a thermal sheet as the base but unfortunately it was not available in the market in more 5 market i check the the thermal sheet but it was not avaialbebut it not avaialbe so as you know everyone problem have solution so i find the solution . So I chooser the wood instead. Wood provided a sturdy foundation for the project and ensured that the components remained stable. i see the wooden box in my home in which my mother bring fruits so i dismantle these box and make a plate base from it as you can see in the below picture.
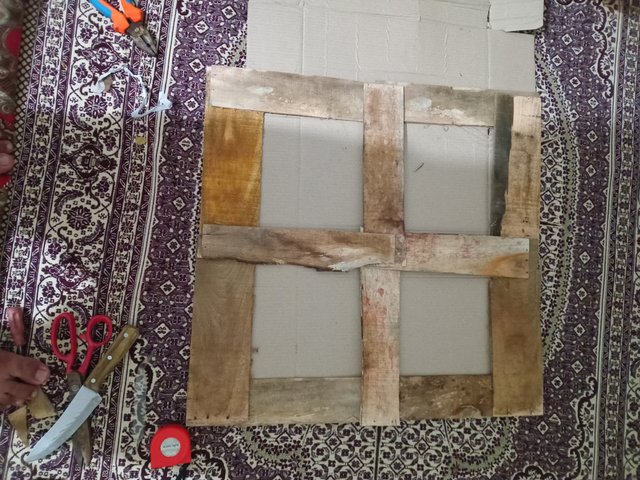.jpg)
2. Designing the Computers
- I used cardboard to create the CPUs monitors and keyboards. and for the cover i use the black chart to give it more good look .
- Each computer was designed in a miniature 3D form making the model visually appealing and easy to understand.
- I use bluse chart for the screens blue to resemble real computer displays. it ig giving a real look.
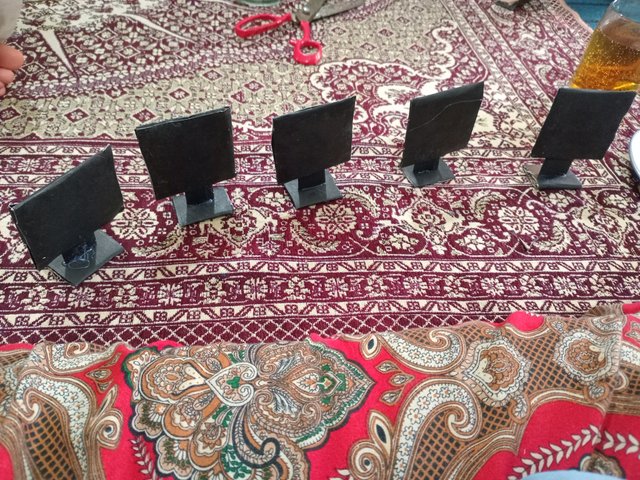.jpg)
.jpg)
3. Connecting the Computers
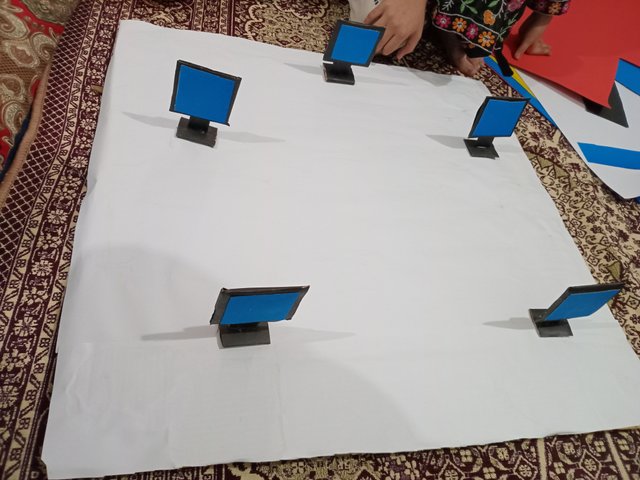
- To demonstrate ring topology I placed the computers in a circular formation and used black arrows to show the data flow.
- The arrows clearly indicate how data travels in one direction across the network. as you can see in below picture how its look perfect.
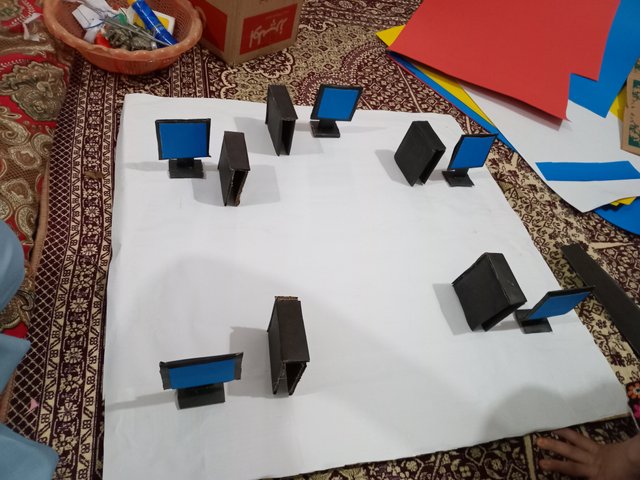.jpg)
.jpg)
4. Adding Lights for Realistic Effect
- I installed small LED lights inside the PCs to give them a realistic appearance.
- This feature made the model more interactive and visually engaging.
.jpg)
5. Final Touches
- I added labels and neatly arranged all the components.
- A yellow border was placed around the model to enhance its presentation.
- Finally I attached a battery pack to power the LED lights inside the computers.
.jpg)
complted model
This project was exciting experience for me. It not only helped my student understand ring topology but also gave me a chance to be creative with 3D modeling and network concepts. I hope this model serves as a useful learning tool
The network is like the sea—vast and complex. If you're interested in networking, I remember from my studies that I got the CCNA certification. (CCNA, or Cisco Certified Network Associate, is a certification that validates your knowledge of networking fundamentals, including routing, switching, security, and automation.)
The certification was paid for by my university, but the courses were free. You can search on Google for free CCNA courses, and the official Cisco website (https://www.cisco.com/) also provides learning resources. They even teach you using Cisco Packet Tracer, a free network simulator for hands-on practice. It allows you to simulate any type of network
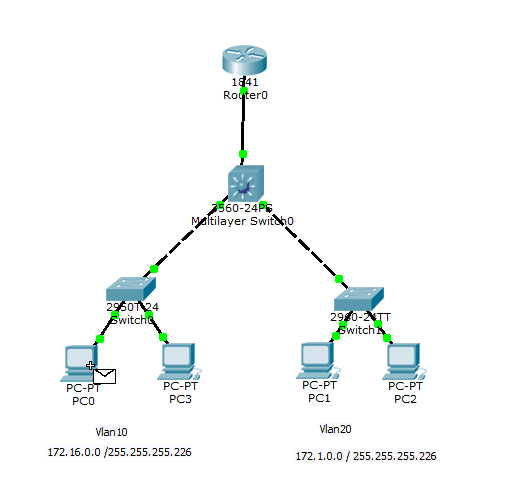
Cisco Packet Tracer
you can also see this tutorial https://www.geeksforgeeks.org/implementation-of-ring-topology-in-cisco/
thank you so much this tool is new for i can do many new things withs tools thank thank so much
That's nice to see, you working very efficiently on your project. However I didn't know about that thing because my knowledge about computers is not like you. Through this post i to learned a lot about this. I wish you all the best for this project.
Regards,
Faran Nabeel
my pleasure thank you so much for the feedback