Do you think about learning to tattoo? , Learn how to assemble your machine in 7 easy steps
7 simple steps to assemble your tattoo machine and start the adventure of carving your art.
7 simple steps to build your tattoo machine and start the adventure of carving your art. There are many people who are passionate about the art of tattooing, both to create it and to make part of their life as a business.
this post is for people like you, now before you start killing the ancestors of making your first tattoo you should start with the main thing, learn how to assemble your machine and know the fundamental concepts that will make you the best tattoo artist in your area.
Now I explain how to assemble your machine in 9 simple steps:
1- Connect the power source to the device. On the back you must connect the cable that is inserted into the outlet at the other end. In the power supply there are two more places to insert cables, no matter what cables you insert in them, but both must be connected. One cable must reach the pedal and the other cable is similar to a Y.

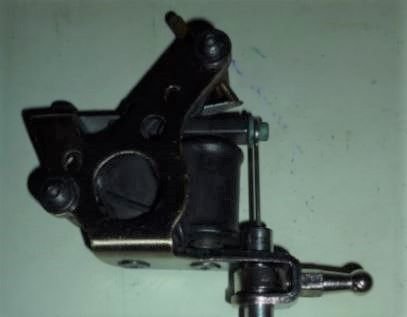
2- With one of the guns, place a nipple on the pin of the reinforcing bar. That's where the top of the needle connects around.
Armature Bar: is the piece that is responsible for hammering constantly taking control of the needle.
Nipple: the protruding hook where the needle that injected the ink will fit
3- connect the tube that connects the machine with the Grip and the other side connects the tip that you will use (For line, shadow, or fill)
 )
)
4- Take the grip of the tube and connect it to the tip of the tube, this will hold the Grip that you manipulate to scratch.
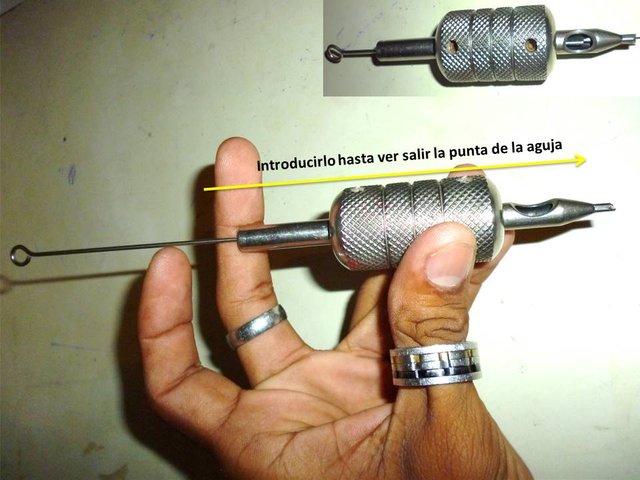
5- Place the tube through the tube press. Push the tip of the needle over the nipple and tighten the screw of the tube. You can lower the tube so that it covers more or less the needle, remember that the needle will not completely cut the skin, just inject enough to enter between the first and second layer of skin
6- Connect Y-shaped cables to the gun. One end goes into the screw on the back of the gun and the other end must be inserted to the right, just above it.
 )
)
7- Press the pedal and you're done, you can start scratching
with this ready to be one more in the experience of tattooing and carving your art forever in people who admire their artistic tastes.