How to heal your lower back pain with these simple yoga poses
Hey guys,
how are you doing?
I can almost see you as you dive into Steemit posts, sitting back into your chair... or sank into your bed or sofa... or sunbed (I see you Digital Nomads!)...
...DON'T YOU EVER GET BACK PAIN?? I DO :)
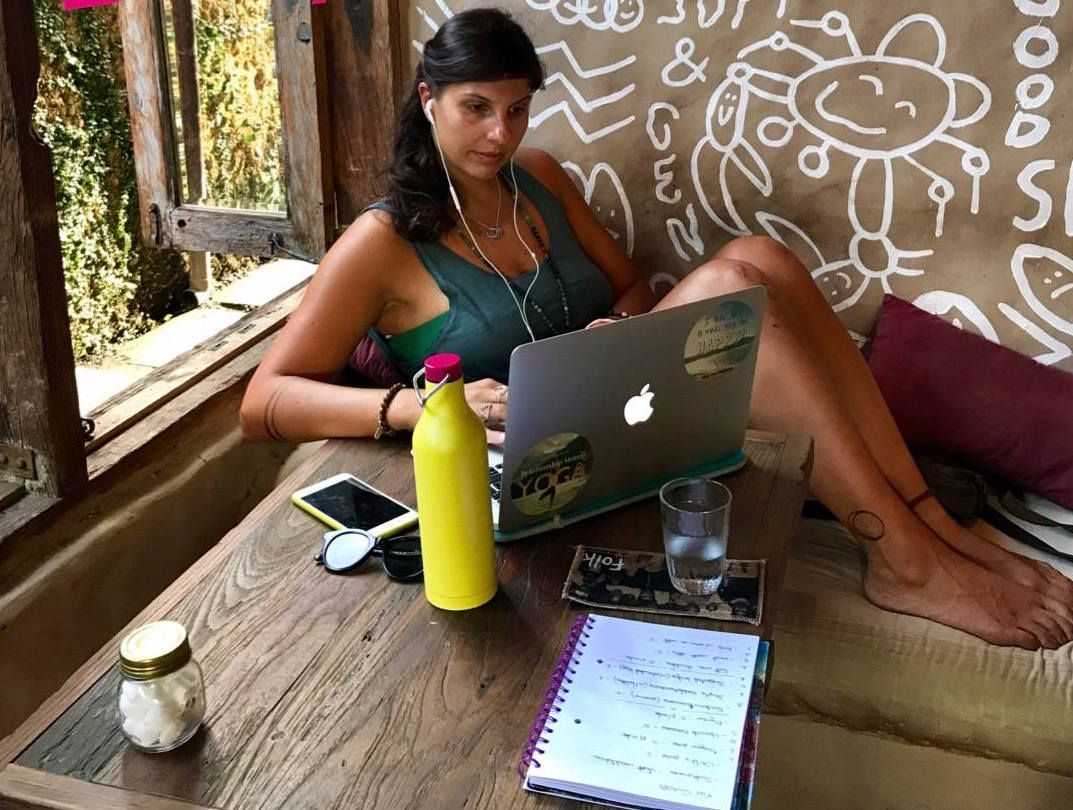
One of the most common problems my yogis often complain about is in fact BACK PAIN.
I myself have suffered from this for many years before I started practicing yoga. I’ve had mild scoliosis since the age of 9, and a few years ago I discovered I had a herniated disc…
How? One day I felt something like a knife cutting through the back of my right kidney while I was practicing a back bend that was too deep for me.
And you know what? I was probably doing it in an unsafe or wrong way, plus my teacher at the time didn’t give me the right cues. She pushed me one step too far than my body could bear… and ZAC! There I was lying on the floor curled up in pain.
I had to stop practicing for months before I found the courage to get back to my mat.
Do you ever feel something similar?
Well, read on to learn how you can practice a few exercises that can help you heal and ultimately get rid of your pain. You don’t necessarily need to be an advanced yogi, and maybe you’ve never done yoga before, but trust me, it’s not a cliché. Yoga REALLY is good for many things, including healing your lower back pain!
Now, what kinds of lower back pain are there?
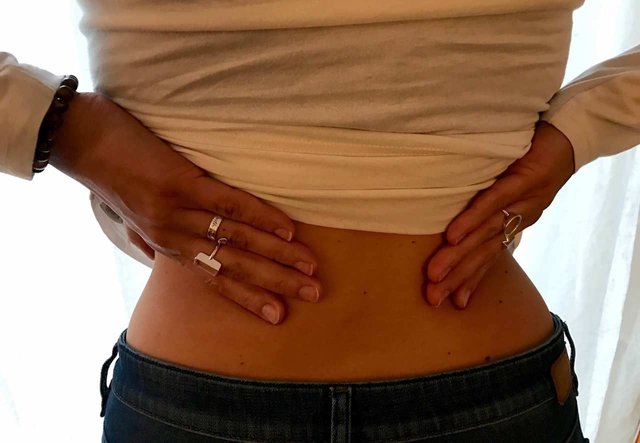
Unfortunately, the answer is MANY. Lower back pain can derive from many variables: stress, bad posture, micro genetic malformations (the latter was my case for example).
This pain is often caused by misplaced discs in your lower spine (L1-S5). These could pop out (we are talking about millimetres only!) during a particularly abrupt movement, or simply by doing something as common as lifting a shopping bag. I’m no doctor, but I’ve experienced these problems myself for so long!
So I decided to study anatomy and my condition, in order to be able to safely guide my students into and out any yoga poses, and ensure they wouldn’t experience what had happened to me.
Since lower back pain tends to be the main reason why many of us don’t want to backbend during our yoga practice, I thought I’d share something interesting.
What if I told you there was a way to safely practice backbends, without injuring your back, AND that there were even poses that could make your lower back pain go away??
And if you've never done yoga in your life, these exercises are still very useful to get rid of any back pain you may have.
While seeing your doctor first is always your safest bet, you can try these 6 simple yoga poses that could help alleviate your lower back pain.
A word of caution though: LISTEN TO YOUR BODY!
If it hurts, it’s not good! If you feel like you need to come out of a pose, or should not push as deep as the teacher says, listen to your body, and pull the hell out of that pose! Use a variation instead, ask the teacher, or simply come down into child’s pose and wait for the next instructions.
Now, here are the 6 poses:
1. Cat-cows
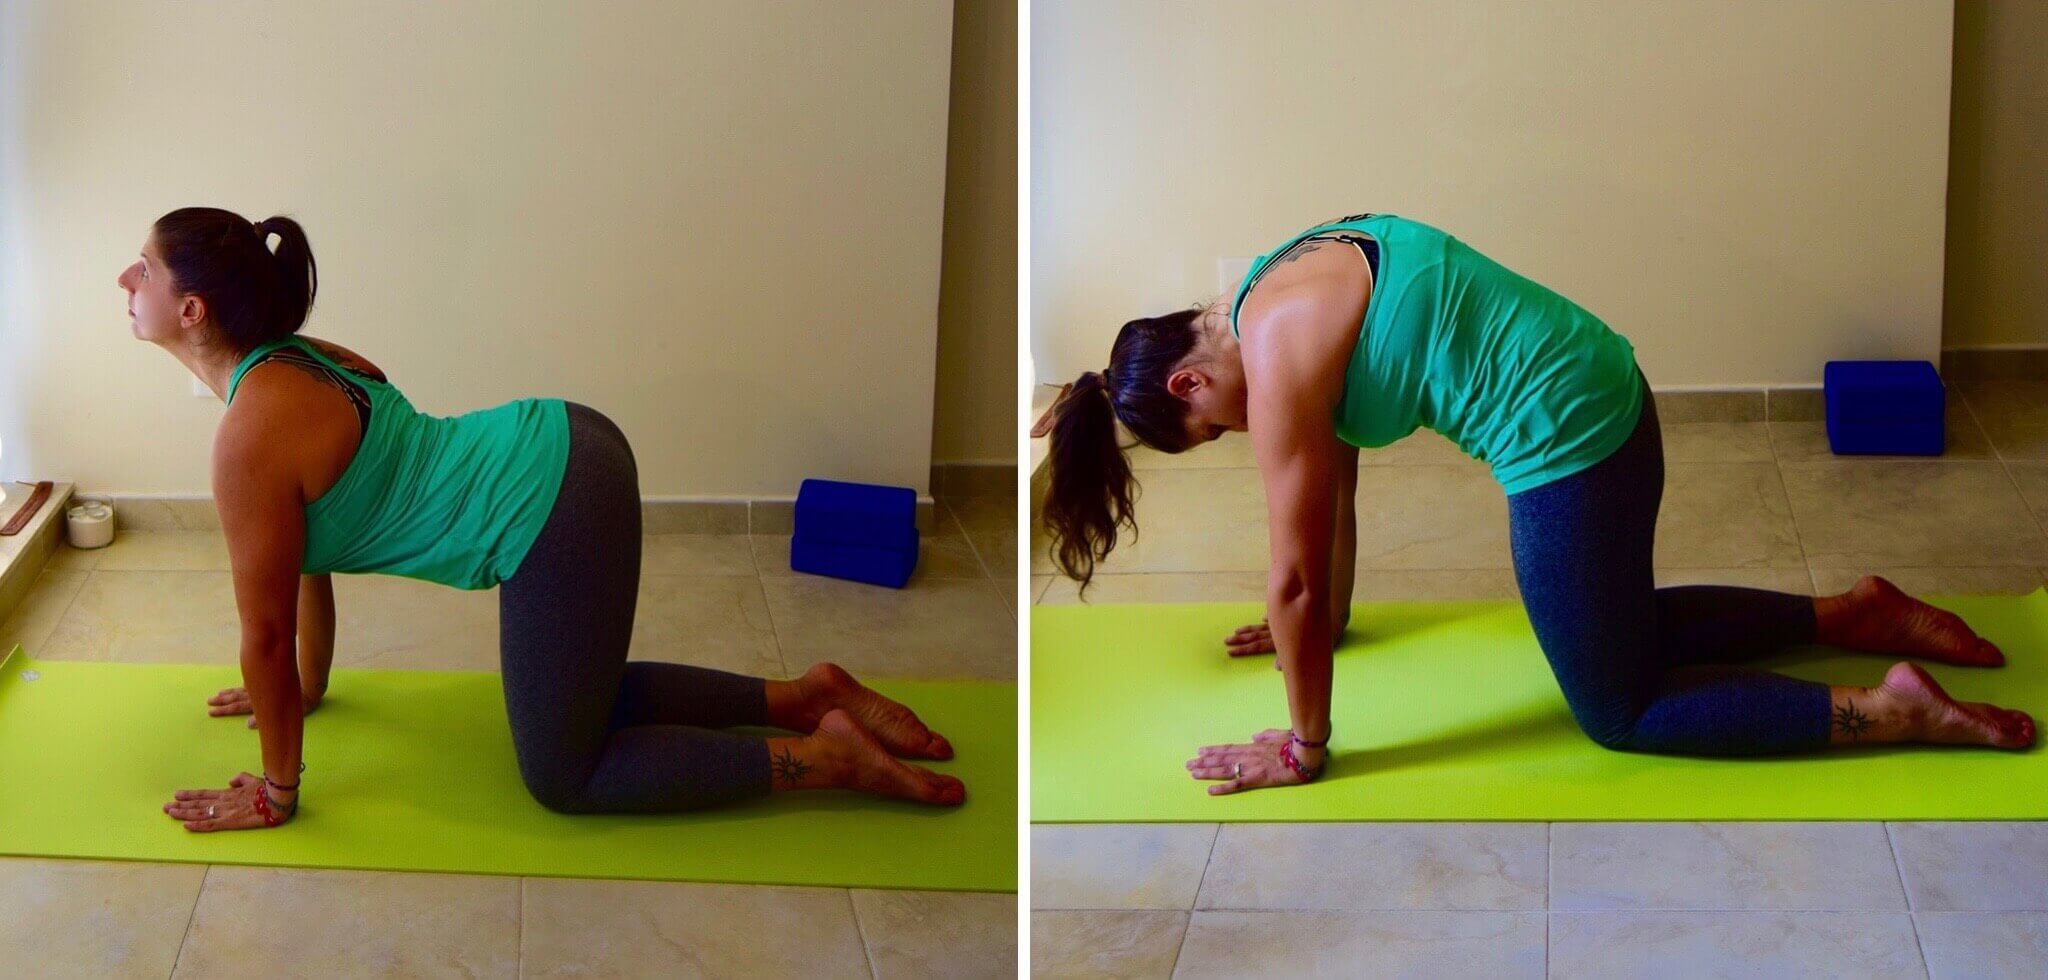
Come into all fours on your mat and check your alignment. Ensure your hands are pressing into the mat, right under your shoulders, with fingers pointing forward. Your knees should be right under your hips. Tops of the feet are pressed into the floor, core is engaged, and your back is flat, as if you were balancing a tray of glasses on it.
On the inhale, look up, press your chest forward, belly to the floor, shoulders relaxed, sit bones to the sky, keeping your arms straight.
On the exhale, do the opposite: curve your back making a C shape by pressing the floor away with your hands and tops of the feet, looking at your navel, feeling your scapulae rounding and stretching.
Repeat 5 times, maintaining a slow equal breathing through your nose. See the image below for more details.
2. Half lord of the fishes – Ardha Matsyendrasana
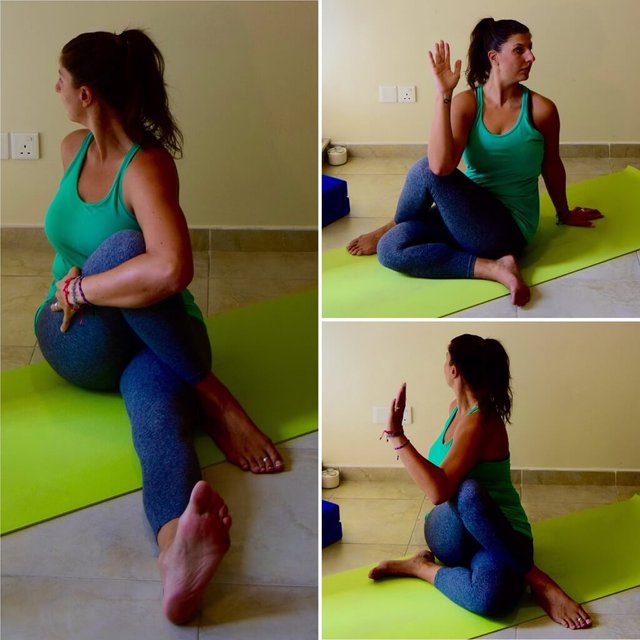
Sit on the floor with your legs straight in front of you. Bend your knees and slide the left foot under the right leg, pushing the outer side of your left foot into the floor, and placing it outside your right hip. Bring the right foot across the left leg and press it flat into the floor, outside your left knee. The right knee should point up, and the left one towards the front of the mat.
Inhale and lengthen your back lifting from the crown of your head, while placing your right hand behind your lower back on the floor, to support you, and lifting the left arm up.
Exhale and twist to the right from your upper back, bending your left elbow at ninety degrees and pushing it into your outer right knee. Ensure both sitbones are equally pressed into the floor.
Keep pressing your chest up and look beyond your right shoulder.
With every inhalation, lengthen your spine a little bit more, with every exhalation twist a little more, but ensure you twist from the chest!
Maintain this pose for up to 60 seconds, then slowly come back into center as you exhale.
Return to the starting position and repeat on the other side.
3. Plough pose – Halasana
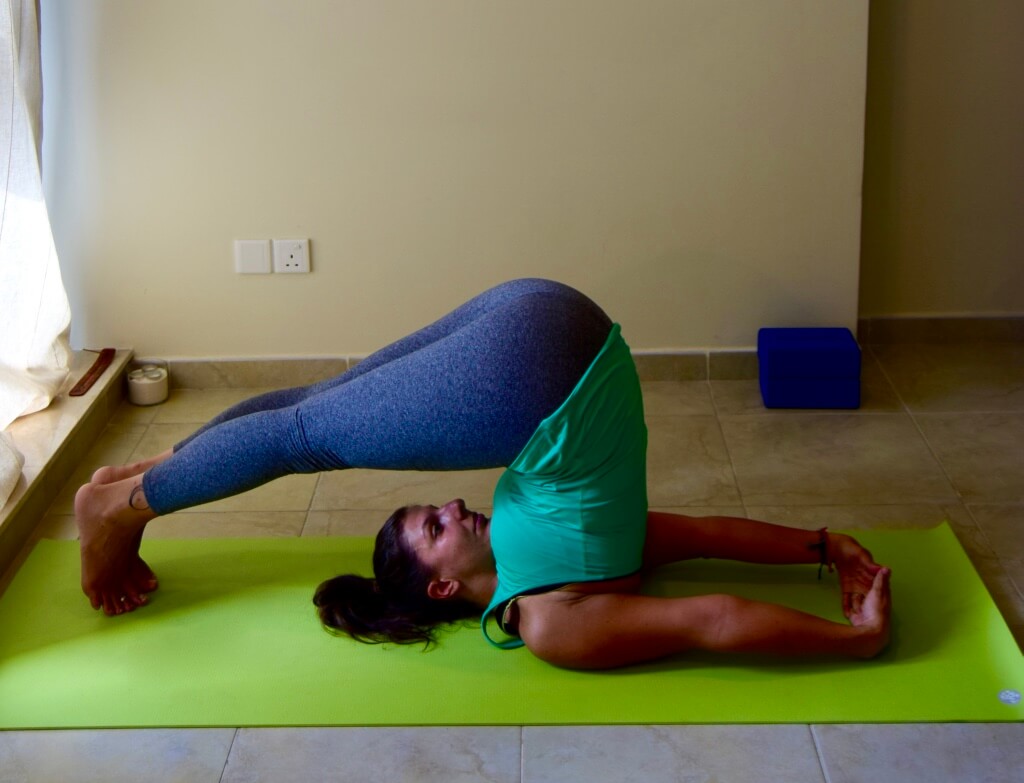
Lying supine on your mat, inhale and kick your feet up and behind you, trying to drop them on the floor above your head. Press your elbows into the floor and place your hands on your lower back, so you can support it.
Work on extending your legs with toes pointed, squeezing your thighs and knees together. Keep your chin in. If you feel stable enough, you can also interlace your hands and press the outer sides of your little fingers into the mat.
Maintain the pose for 30-60 seconds, then slowly exhale, using your core muscles and your hands to bring the legs up and down back to the mat, slightly bent, rolling each vertebra down into the floor as you slowly lower the legs, always supporting the back with your hands.
4. Restorative bridge – Setu Bandha Sarvangasana
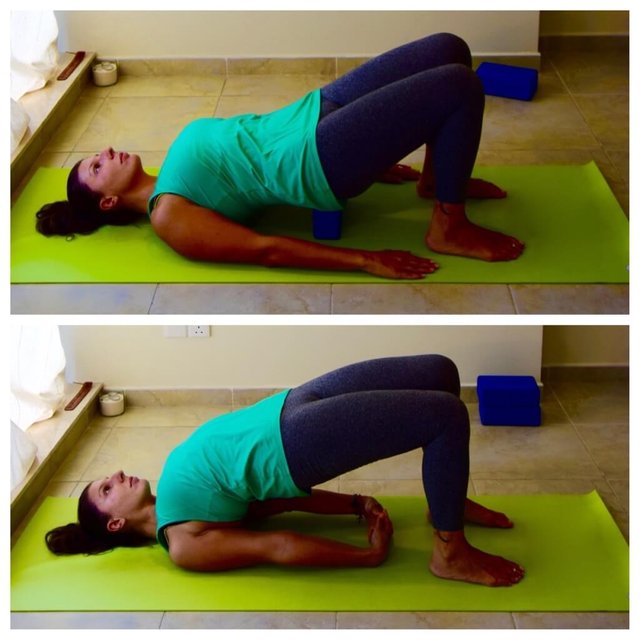
Keep a block or thick book beside you and lie supine on your mat. Bend your knees and plant the soles of your feet hip distance apart near your bum, so that your fingertips can brush your heels. Press your whole spine into the mat and elongate it from the crown of your head, drawing chin in and tailbone up.
As you inhale, press into your feet, engage your thighs pushing the knees forward and peel your spine up from the floor, vertebrae by vertebrae, starting by curling your tailbone and lifting your back. Place the block on the medium height under your sacrum (not in the lower back!) and rest there for 60 seconds. It should feel pretty comfortable!
If you want to go deeper, you can turn the block on the highest side, so it’s pressing vertically into your sacrum.
You can leave your arms relaxed into the floor with palms down, or lift them and lie them on the floor next to your ears.
Inhale and exhale slowly, maintaining the pose for up to 60 seconds, then slowly drop the spine back to the floor, vertebrae by vertebrae.
Repeat 3 times.
This is one of my absolute favorite and most restorative poses that I practice regularly.
5. Twists
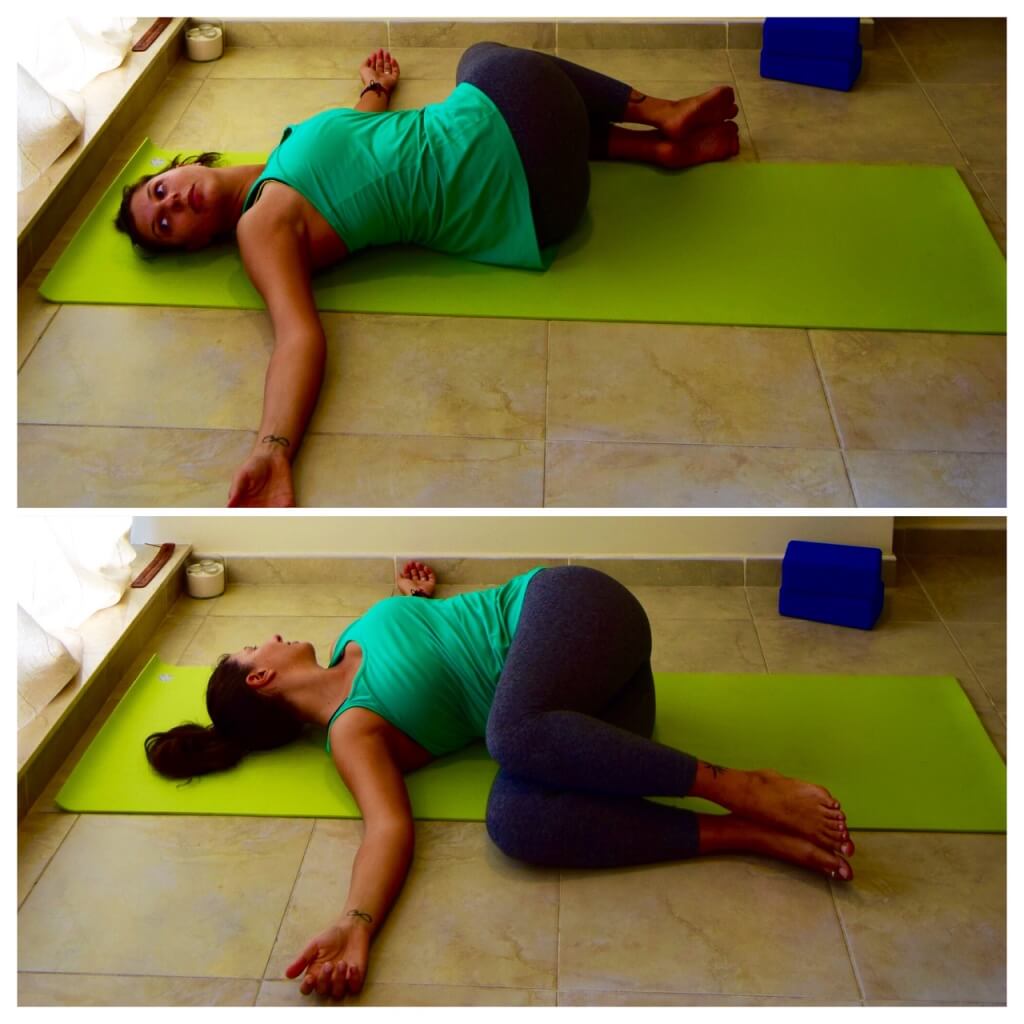
Lie supine on your mat. Open your arms in a T or cactus shape, bring your knees into your chest, slightly move your hips to the left, and drop your knees to the right, keeping them at ninety degrees, or extending the legs completely, so your body is in an L shape on the floor.
Press the left shoulder into the mat, so that the upper back is on the floor as much as possible, and the sacrum is off the floor. Look towards the left shoulder.
Maintain the pose for 30-60 seconds, then gently use your core to bring the legs back into centre, reset your spine, and repeat the same on the other side.
6. Legs up the wall – Viparita Karani
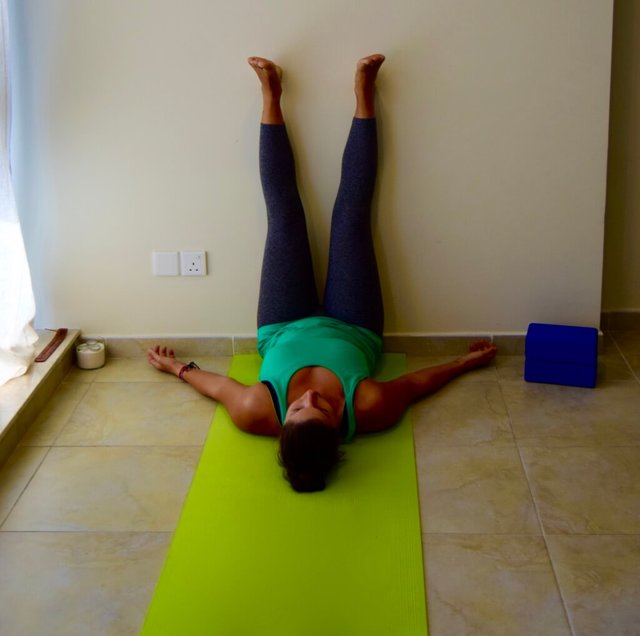
Sit sideways as close as you can to a wall, and have a pillow next to you. Lie down on the floor, perpendicular to the wall, keeping your bum in contact with the wall, and swing your legs up onto the wall, keeping them extended but relaxed.
Press your spine and the back of your head into the floor, ensuring spine and neck are in one straight line. Open the shoulders and release your arms out to the sides, palms facing up. Soften or close your eyes.
If you feel your bum is uncomfortable place the pillow under your pelvis.
Stay in this pose for up 5 minutes, breathing slowly.
To come out, slide the legs down the wall so you are in an L shape on the floor, stay on your side for a few breaths, and slowly come up to sitting as you inhale.
This is a very relaxing pose that you can also take before going to bed, or if you’re pregnant and want to conduct breathing exercises.
What to do next:
Try these whenever you feel you need to release tension in your back, or simply as you wake up in the morning or before going to sleep. You can even do them on your bed!
Just make sure you take a few breaths between each pose, so you allow your spine to reset and fully absorb the benefits.
The effects might not be immediate, but you’ll surely feel them in the long run and your lower back pain might indeed disappear.
I'd love to hear how you feel now: can you let me know in the comments below??
Or just add your questions - everyone could learn something new today!
Last but not least: if you liked this post, your Upvote is most welcome ;)
Goodnight!
Chiara
Great post. I love how yoga can heal the mind, body, and soul. Namaste Sister!
Congratulations @yoga.with.chiara! You received a personal award!
Click here to view your Board
Congratulations @yoga.with.chiara! You received a personal award!
You can view your badges on your Steem Board and compare to others on the Steem Ranking
Vote for @Steemitboard as a witness to get one more award and increased upvotes!