LUX | Dragon Sculpture + Process!
Hello! It's Cervine Canine, back again with a process post on my most recent sculpture!
Time taken: 10-15 hours total
Materials: SuperSculpey, aluminum wires, aluminum foil
Lets begin!
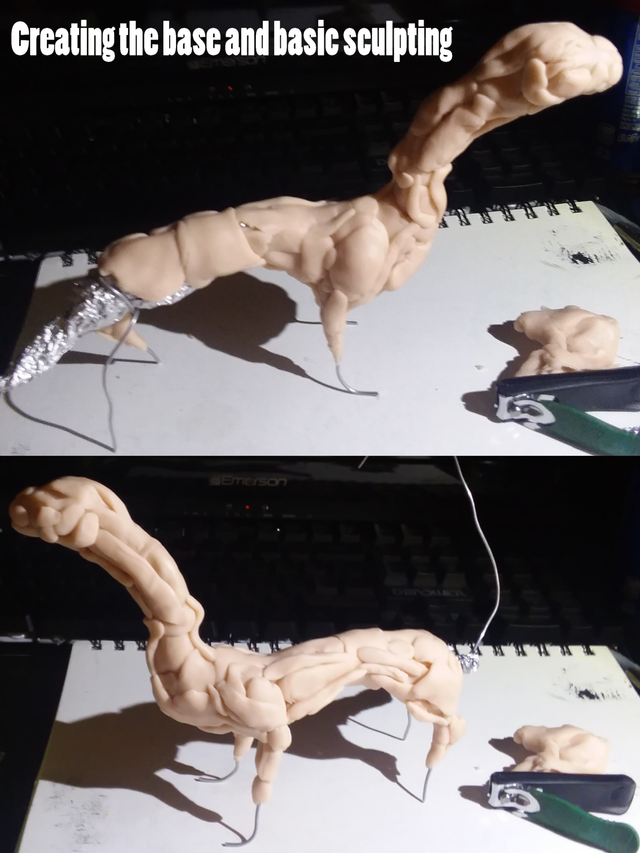
I began with a wire and foil base. It was fairly rough and didn't look like much, so past-me did not snap a photo. make sure to make your sculpture mostly foil, since SuperSculpey is fairly dense and heavy. A higher foil percentage also allows for a shorter baking time. With the clay, I applied globs to mimic bones and muscles. This way I could create an accurate anatomical model.
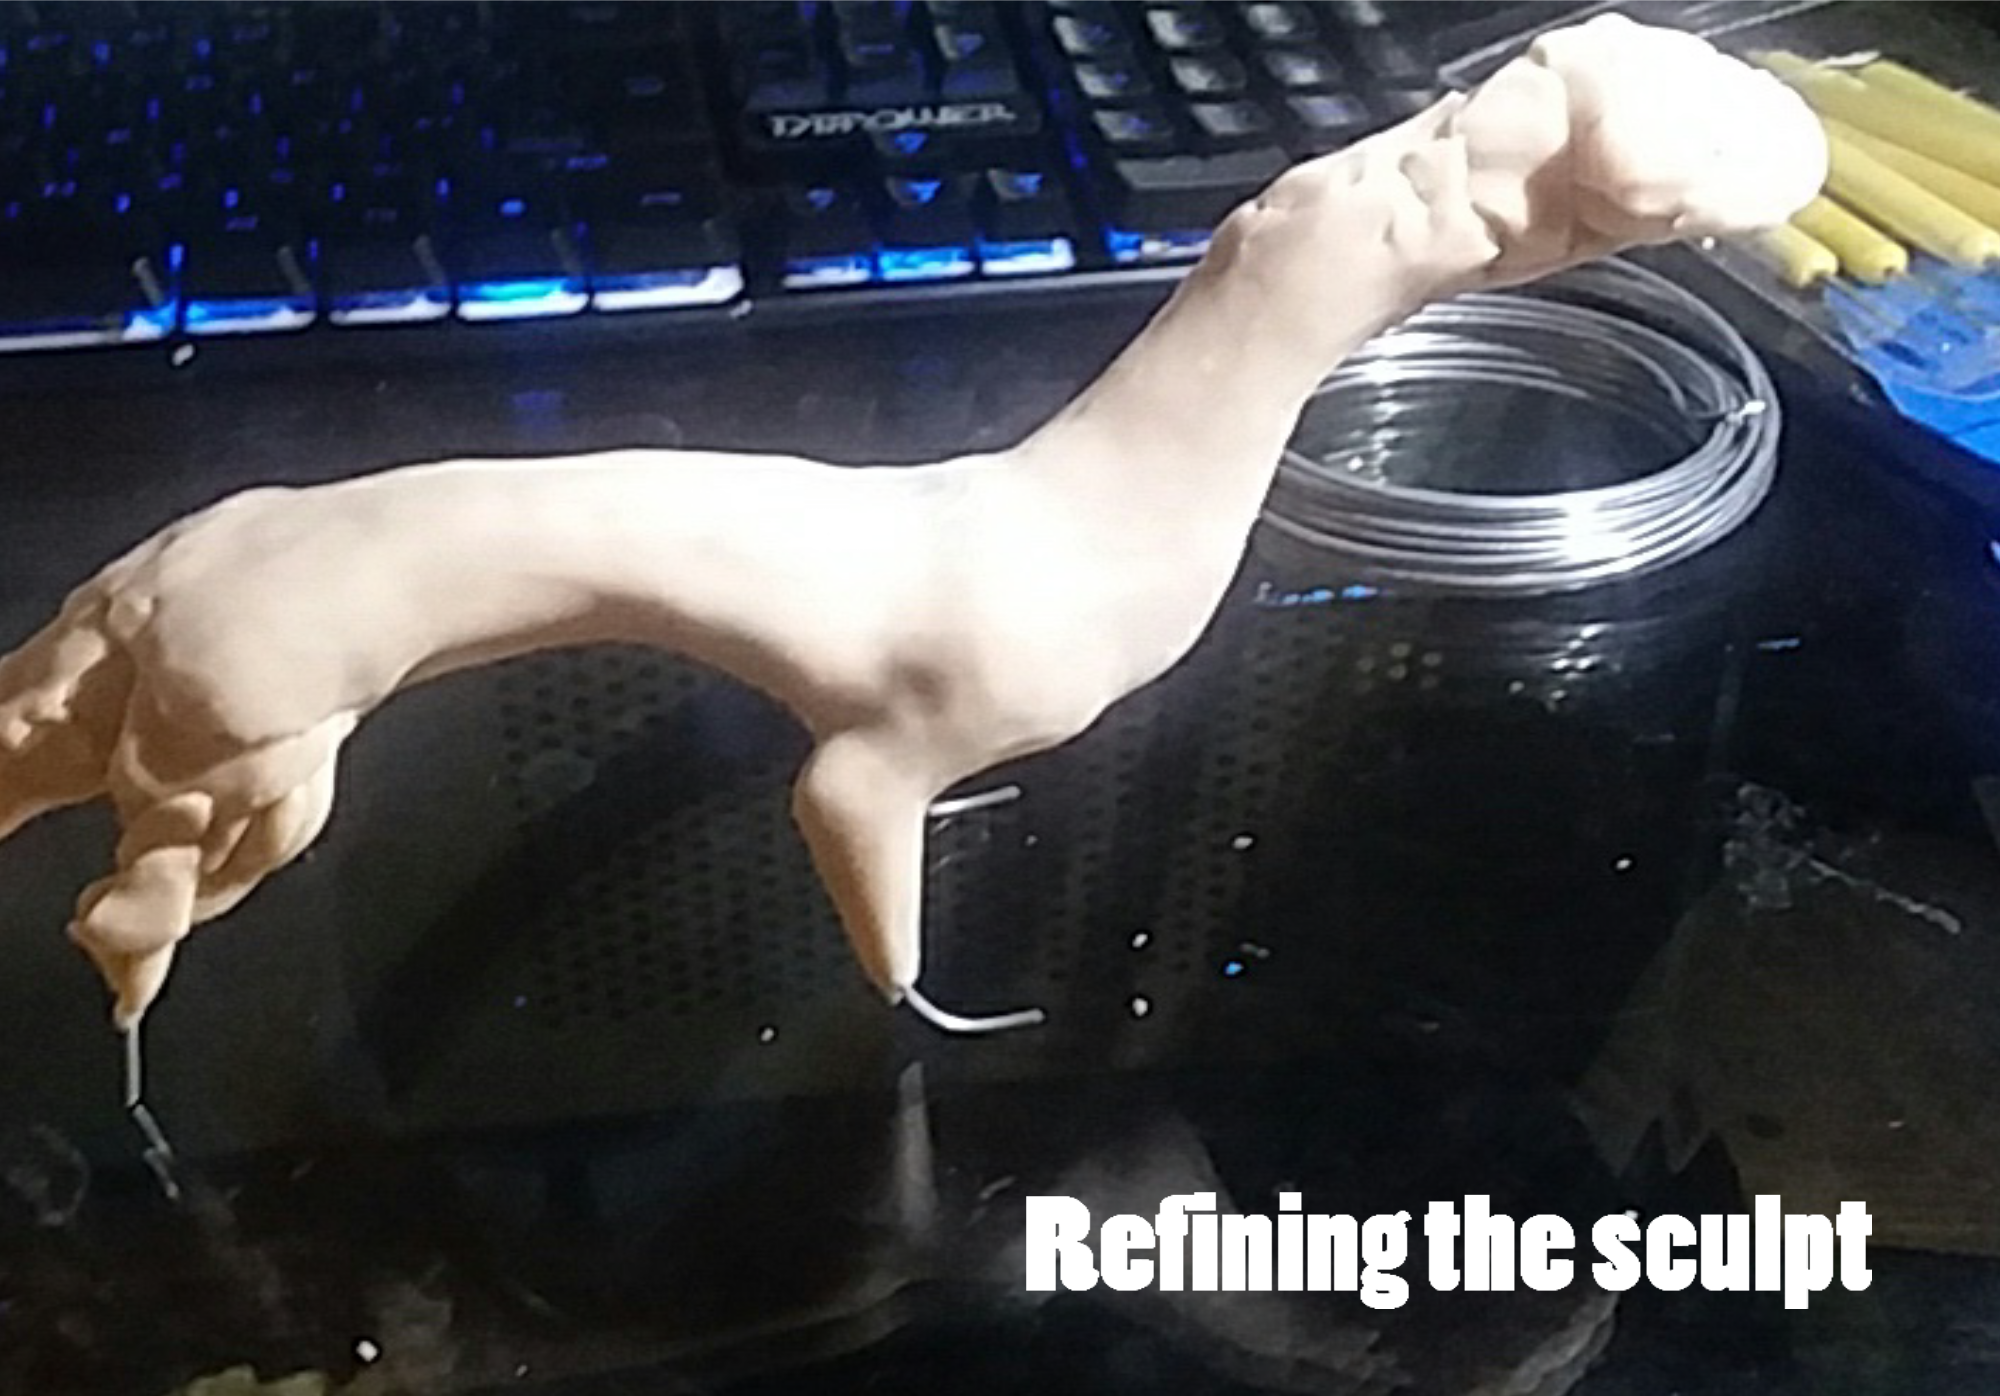
With refinement, I smooth out the clay according to how the muscles would appear. I try to get accurate pressure imagery in this stage, since I want the dragon to appear to be resting on it's front legs! I made sure the clay also appeared as skin folds when I began to work on the back legs.
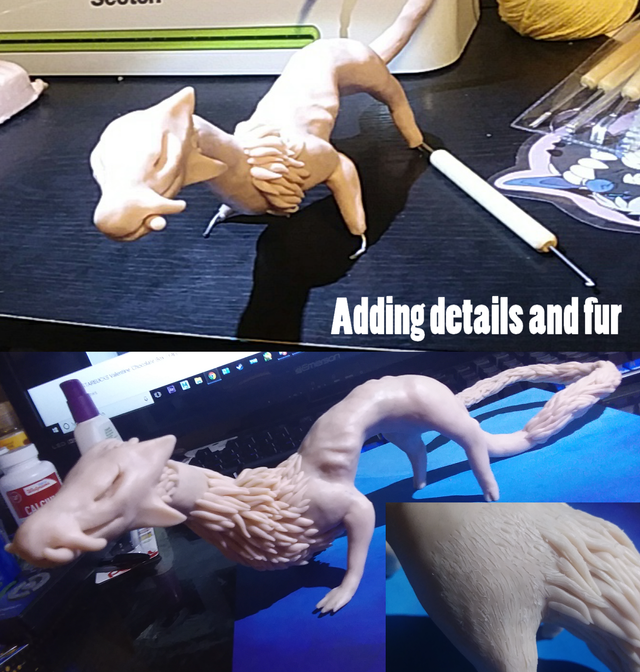
During this stage, I had changed the character I was referencing, hence the change in muzzle length ^-^". This stage centered around adding basic shapes (the triangles on the head), then going in and adding the finer details (the mane and fur texture). I carved out the eyes and mouth with sculpting tools my grandfather had gotten me for Christmas, but you could use any tool at your disposal! Adding the fur texture was simple but tedious as I had to create small grooves all over the body.
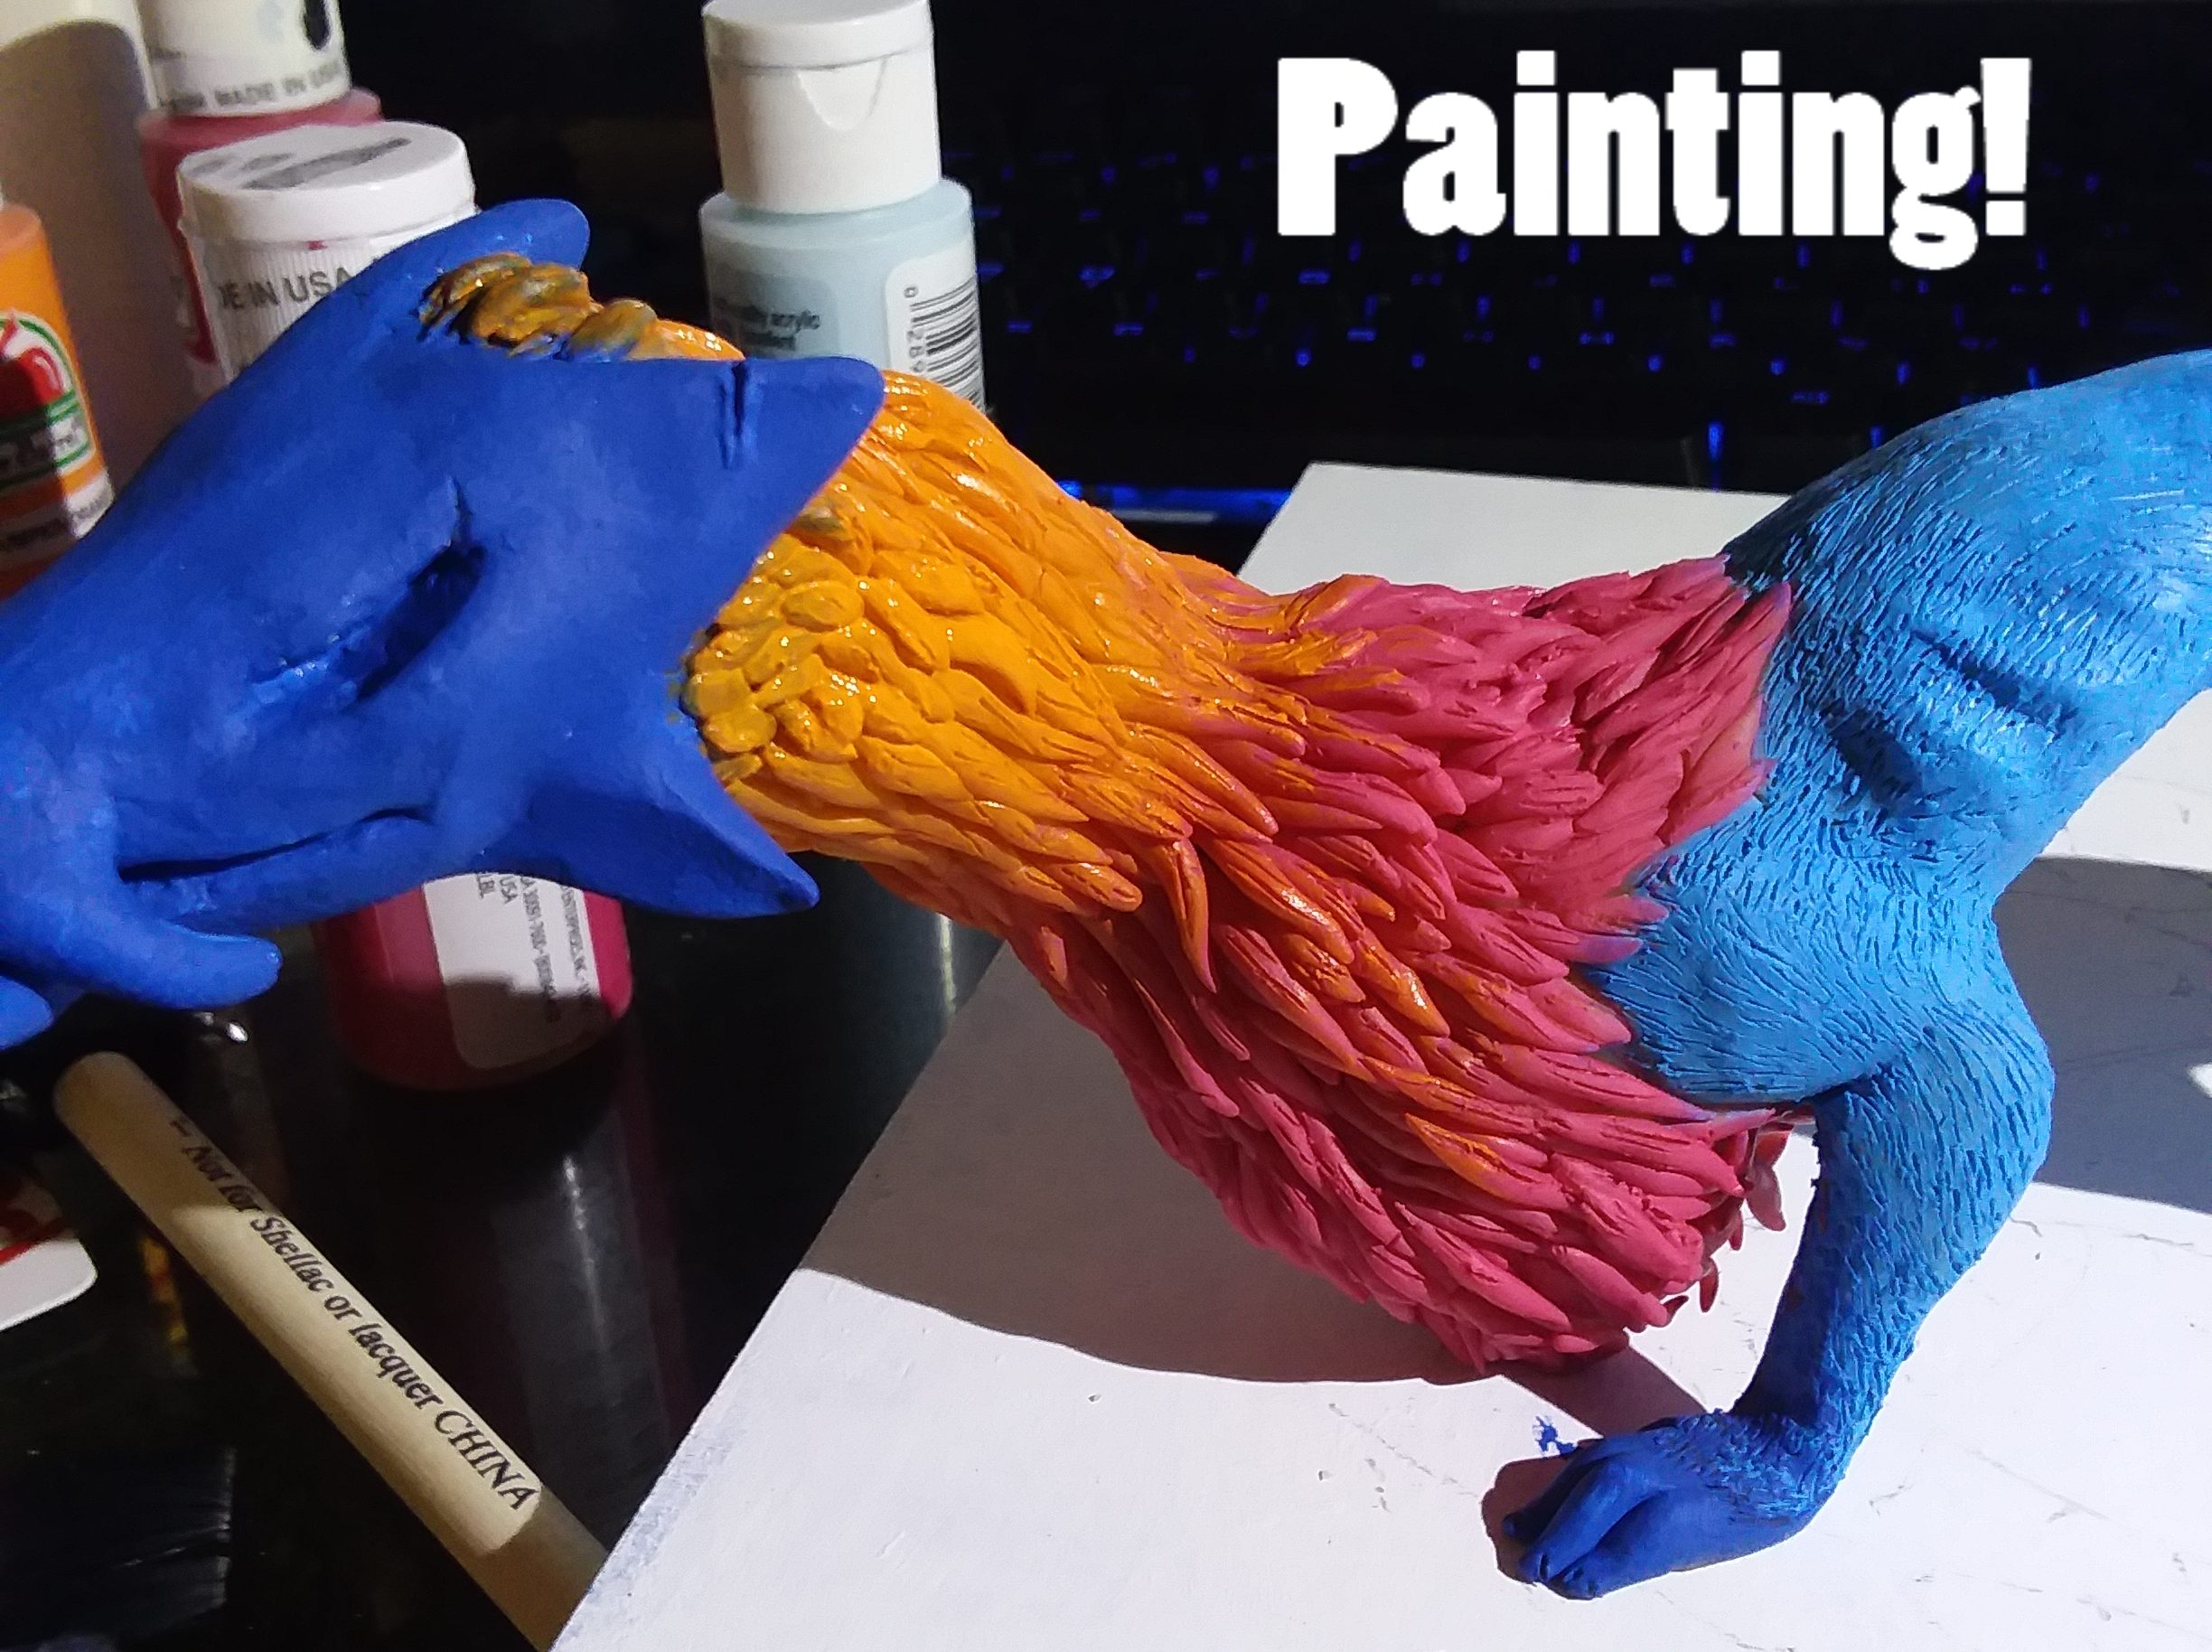
This step was where I began to test specific color pallets until I came across something I enjoyed. At first I was going to use white for the mask and a very light blue for the body but I found it was too washed out. As this character is the opposite of my other dragon character (she has desaturated fur), I wanted Lux to be vibrant and intimidating. I happened upon this pallet which I fell in love with!
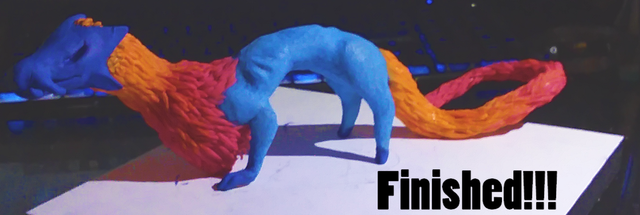
This is the final result! Hope some of you found my process interesting or helpful!