A Guide to Steemit, Steempress, and Crossposting Best Practices

Not long after I began this writing to my Wordpress site in October 2018, one of the things I knew I needed to do was to crosspost my writings to major outlets. In doing so, I setup my website to automatically submit my posts to Steemit as well Medium.
I've since given up on getting the Medium plugin to work as it is no longer supported. However that is irrelevant as this will focus on Steemit as well as configuring the plugin to automatically submit posts from Wordpress.
First Things First - Steemit Account
If you do not already have an account on Steemit, I'd suggest you go through this process first. As the Steemit site is powered by the Steem blockchain, registering an account means you need to either pay a transaction fee to have your account submitted to the blockchain immediately, or submit the registration and wait 1-2 weeks.
If you are already holding some cryptocurrency or even the STEEM token itself, the process to immediately open an account is relatively painless and just requires you to transfer coins to a specific wallet during the registration process.
Focusing on the payment options if using Blocktrades to register, these are Bitshares (BitCNY, BitEUR, BitShares, BitUSD), Bitcoin (BTC), Bitcoin Cash ABC (BCH/BAB), Bitcoin Cash SV (BSV), DASH (DSH), Ethereum (ETH), Litecoin (LTC), and STEEM or STEEM Dollars. These options may change after time of writing.
My suggestion is to not only to use the payment option, but also to pay more than the registration fee. Any value over the registration fee you send will go into your Steemit account and this is important for a reason I will get into later.
Best Practices - Canonical Links
Since your articles are being first posted to your own website, you want search engines to know that your site is the canonical link, meaning it is the original source of the information instead of duplicate content.
There are many Wordpress plugins that can achieve this for you and if you'd like to do this without a plugin, there is a guide by Simon Hawter over at Bybe.net on how to accomplish this. Regardless, you should make sure your personal pages are already indexed before posting to other websites.
In my personal experience, it is almost pointless to look at the Bing index if you are a new site as they will not crawl your site for upwards of months. As such, just make sure you register for Google Search Console and add your website as the property.
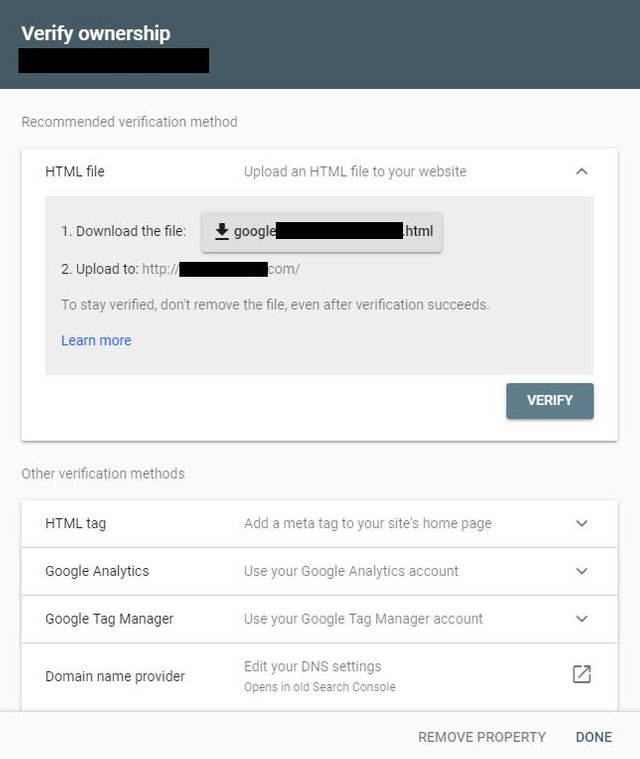
If you have not done so already, you will need to confirm your ownership of the property through the available methods pictured above. Once inside the Search Console, make sure you add a sitemap. There are several methods and plugins to create a Wordpress sitemap so I will not explain the process here. The location and maintenance of your sitemap ensures Google's Search Engine knows when new pages or posts are created, much like an address book.
The main reason the Search Console is important is because of the URL Inspection Tool. This tool will allow you to check if specific pages have been indexed by the Google Search Engine and also request priority indexing.
When you enter the URL of a page and search Google's Index, you will get a report telling you whether or not that page has been indexed by Google's Search Engine.
It is important to make sure your pages are already indexed prior to your writings being posted elsewhere as this will affect your own website's ranking on the search engine. If you want to prioritize the indexing of a page, you can press the "REQUEST INDEXING" button on the URL Inspection tool, this seems to get a page indexed within 24-hours.
Steempress Plugin
Once your Steemit account is created, you will need to configure the Steempress plugin on Wordpress. If you have not already installed it, go ahead and go to your plugins to do so. Once installed, you can find the Steempress configuration page under "Settings -> Steempress". You will see the plugin's main requirements are your Steemit username and your private posting key. Enter the @username of your Steemit account, then proceed to Steemit to get your private posting key.
To do so, click on your profile image and go to Wallet. You should then see a Permissions tab. To the right of the first key (posting key), you should see the "Show Private Key" button, click this and then copy your private key into the Steempress configuration page.
Once you save your changes you should see the indicators for the configuration show up green at the bottom of the configuration page.
The last setting you will want to setup is the post delay. The reason for this setting is due to the previous section on canonical data. The Steempress plugin instructions suggests you set this value to 10080 (7 days), however if you follow my instructions you do not need to wait this long if you plan to write and post more frequently.
The Tricky Part - Steempress Post Queue & Resource Credits
Before we get into getting your posts to Steemit, it is important to understand Steemit and Resource Credits.
Steemit's blockchain hard forked to a resource credit system which I found to be slightly confusing. Most of the articles on this topic really failed to assist me in understanding or getting the plugin working as they were old and mostly concentrated on the technology itself. As a new user to Steemit, it took me some time to wrap my head around everything.
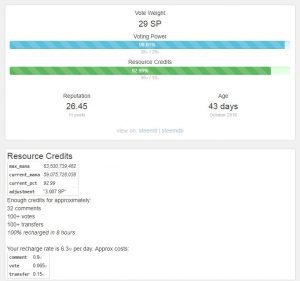
The most important tool in helping me figure this all out was the steemd.com website. By going to this website and suffixing your account name, such as https://steemd.com/@leonoxme, you are able to see the credits available to an account as well as the recharge rate of the account's resources.
If you remember earlier in this article I had stated you should send some extra resources to your Steemit account regardless of whether you end up paying for the registration, this is the reason. There are three different values in your Steemit account, STEEM, STEEM POWER, and STEEM DOLLARS. The one we are going to be focusing on is STEEM POWER or SP. As you saw from the steemd.com website the SP of your account determines your voting power and your resource credits.
If you have very little SP your initial ability to make posts is low and your recharge rate is also very low. Think of it as a stereotypical energy bar, the amount of actions you can perform are limited by this energy bar and how fast that energy bar recharges once you perform an action. Having a little extra currency in your account allows you to convert this into SP and give you more freedom to perform actions on Steemit. I would suggest this amount to equate about $10 USD as this has allowed me to set my posting delay to 5760m (4 days) without worry of ever running out of resources. Again, be sure to constantly ensure that your links are indexed first and tweak these settings as Google indexes your site quicker or you manually request indexing.
When you first make an account on Steemit, you are leveraged some additional SP to allow you to quickly use the site, however this is rather pointless if your site or posts are new as you do not want them to post to Steemit before they are considered canonical to your own website.
I ran into a tricky issue when I finally had my Steemit account up and running which is the fact that I had already written a few articles and I was unsure how the post delay addressed these. The plugins resources are not very intuitive in telling you this, but you can manually submit posts for the Steempress plugin. If you go to view all your posts on Wordpress, there is a new bulk action titled "Publish to STEEM".
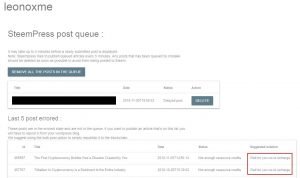
Enter the second tool in helping me to further discover how the Steempress plugin worked, https://steempress.io/queue. You will need to allow the tool to access your Steemit account and once connected you can view any posts the plugin has submitted to the Steemit blockchain. The site's design is not great, for example, the sidebar disappears if the width of your browser window is too small and I have yet to find a way to access that sidebar without increasing said width.
If you care for the technical details of this, my resolution is 1920 x 1080 and the sidebar disappears starting at about 1000px.
How Steempress Plugin Publishes Your Posts
The ability to manually publish articles using the bulk action was slightly deceiving to me. The reason for this is that Steempress actually uses the same function for all of your articles in the automatic process as well. I had assumed that by manually publishing an article it would bypass the delay that you set in the Steempress configuration, this is however untrue.
When you use the manual function, the Steempress plugin immediately adds your article to the queue and is available for review at the steempress.io website. All posts will be put in the queue immediately, but delayed depending on your delay setting in the Steempress configuration.
This means if you are manually publishing several posts, they will all enter the queue at roughly the same time with the same delay set. You may notice the warning that you can only post 4 times to the Steemit blockchain per day. However, this was not the problem for me in terms of quantity nor canonical links as I was publishing just a few older posts. However, these posts failed due to my lack of resource credits at the time.
In Conclusion
Once you have all of the tools and resources available to you, the process is relatively easy to understand. Since you can change the delay and manually push a post for publishing, you can actually keep changing the delays between your older articles between manually publishing. Review those timings with new articles the plugin will automatically pick up and you should be able to manage your posting times so that you do not over consume your resource credits or your the 4 post per day limit.
If you decide to not finance some SP into your account, I'd suggest setting all your initial earnings for SP instead of the 50/50 split in order to increase your resource credits.
I have not logged overall SP consumption and recharge rates, but per my previous article, a post consumed approximately 4m resources and my recharge rate is 6.3m/day. This is with about 29SP or the equivalent of about 10 USD.
If you do finance the account, even if just for registration, I would also suggest using a method which has a lower fee.
Once you have everything setup, I would still consistently monitor your Steemit account to make sure posts are going out properly either by viewing the queue or your blog page on Steemit. As at the time of writing I discovered a post which had never been submitted to the Steempress queue and I have yet to troubleshoot this.
I hope this helps other Steemit newbies who end up in a similar situation as I was!
Posted from my blog with SteemPress : https://leonox.me/2018-11-28/posts/technology/a-guide-to-steemit-steempress-and-crossposting-best-practices/


nice