How to Colour Your Grayscale Drawings (Student Photoshop Rendering Tutorial)
Hi Steemians, I'm back with a chunky tutorial!

Have you ever watched online tutorials where the artist will colour in grayscale (using only B/W), then suddenly 5 minutes into the video COLOUR comes out of thin air?
I have. And I have always been so confused how they did that because they never showed you exactly how. A few days ago while I was doing some concept art I have discovered the secret, the secret on how to colour like a professional artist.... And I will show you de way.

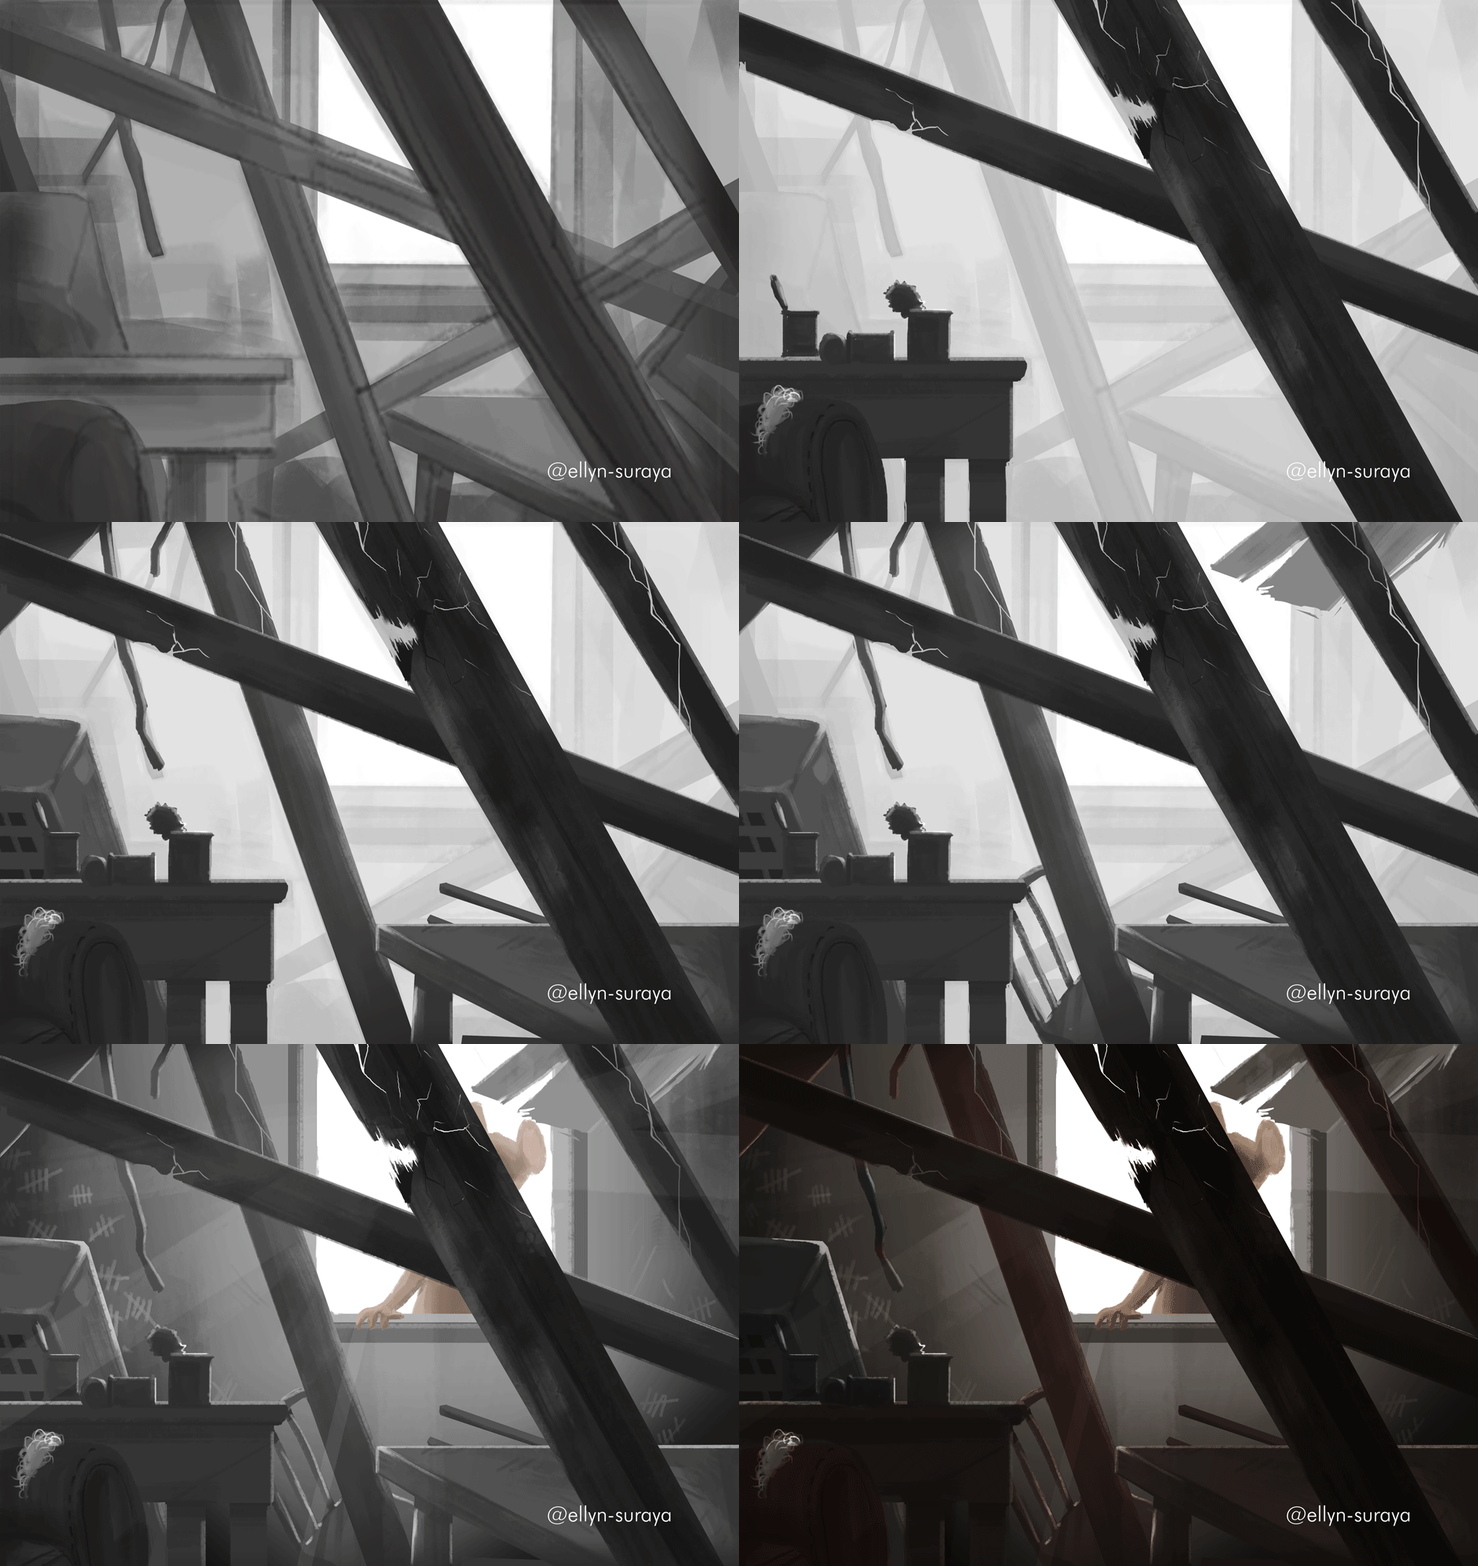
STEP 1 : INITIAL SKETCH
This is a view from inside a destroyed living room. The walls and ceilings are broken, furniture is old and dusty, and the only light is coming from the open window.

STEP 2 : COLOURS
Usually in a drawing with this kind of lighting, objects are darker as they are nearer to us. In this case, the pillars and couch is the darkest, compared to the other objects behind.

STEP 3 : BACKGROUND
The wall needed to have a gradient of black the farther it is from the open window. I also added scratches on the wall for a bit more storytelling and history behind the drawing ;) Here we can also see better that the highlights we added on the tin cans really shine against the darker background.

STEP 4 : ADDING A SUBJECT
The drawing lacked a focus, and its important that a drawing can tell a strong story. I added a rat character at the window there, looking inside the house and thinking of going inside. I also added light rays passing through the objects for a more realistic look.

STEP 5 : COLOUR OVERLAY
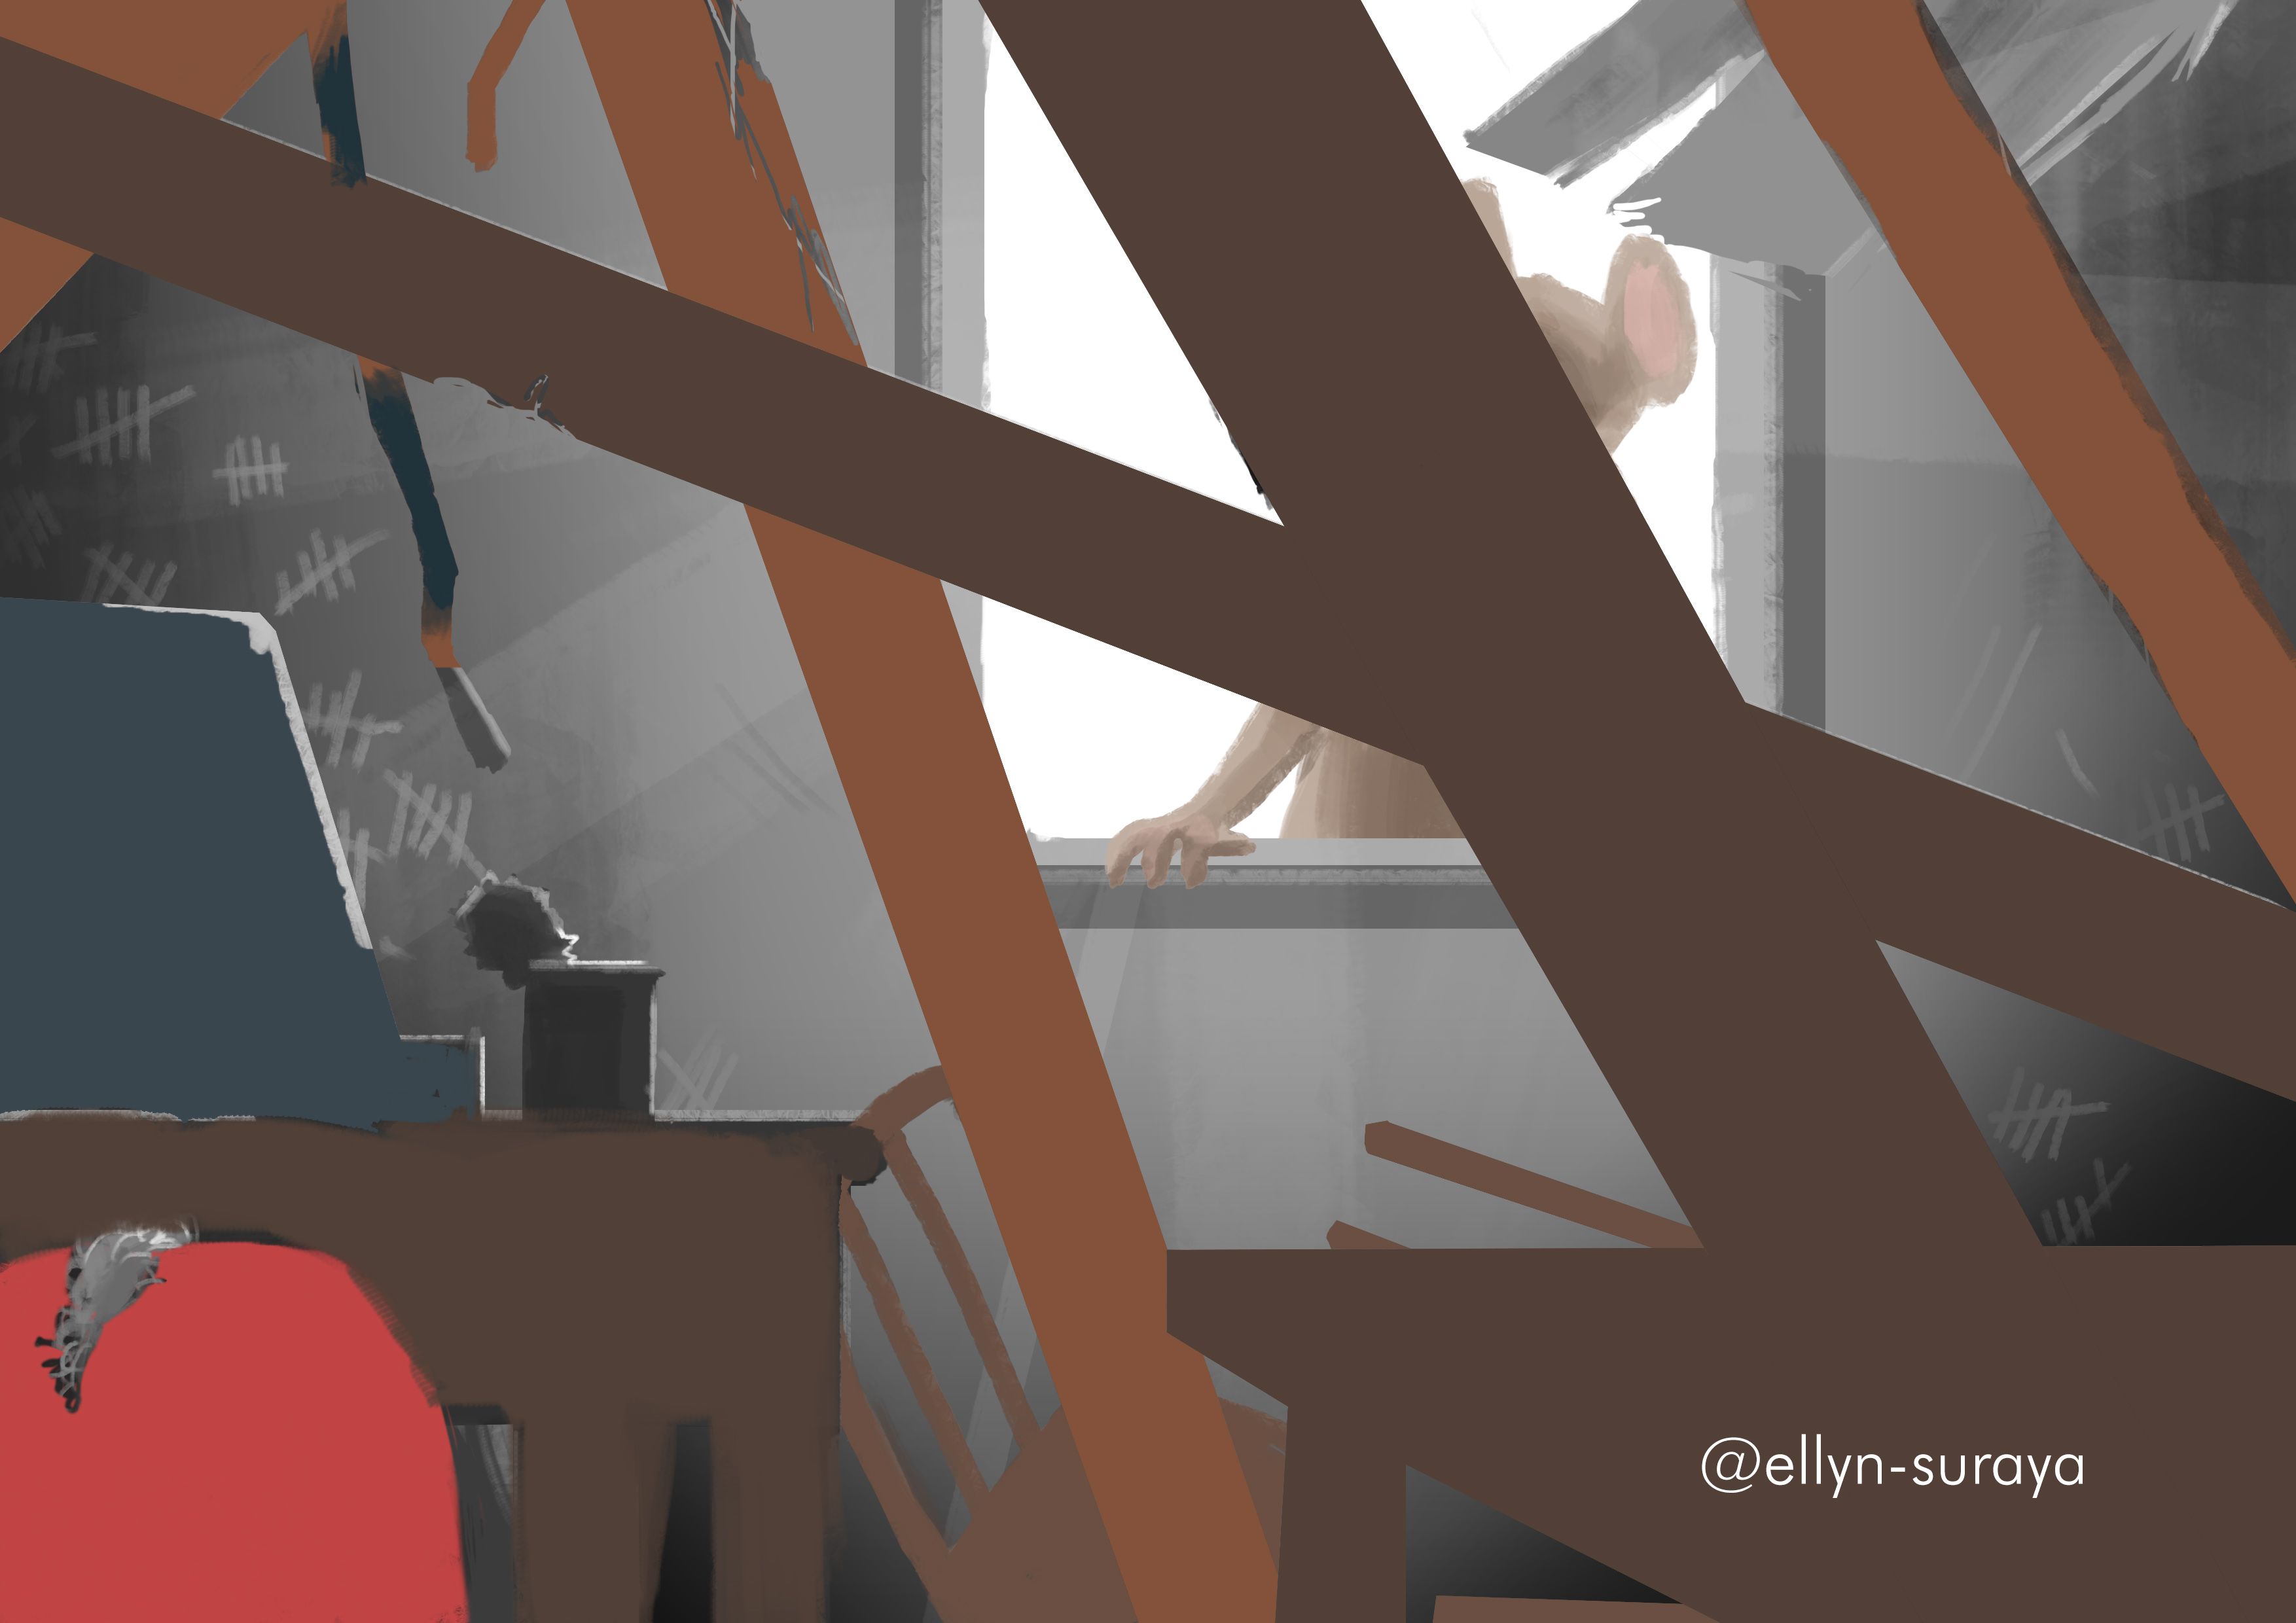
Ok here we're gonna get a bit technical with the Photoshop effects. But don't worry, it's really simple steps. Initially, it's going to look like this without applying the right effects. Flat colours over everything.

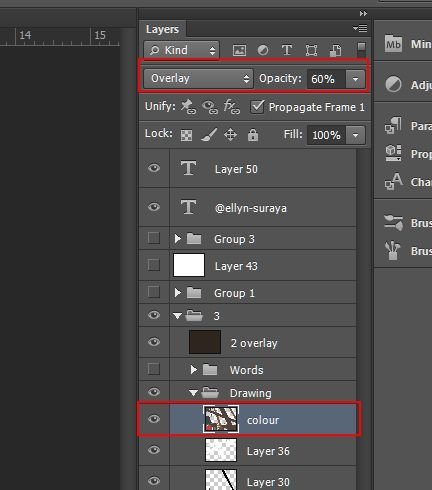
Aftewards go to your Layers window and select the layer with the flat colours. Make sure that layer is on top of everything else. Change the type to OVERLAY and set the OPACITY to 60% (or however much you want to put). I found 100% opacity to be too strong so I lowered it to the amount I thought looked best.

Afterwards, it's going to look like this!

STEP 6 : TINT COLOUR
Then, if you'd like a nice overlay tint to your environment drawings, you can always put a tint colour over it. Create another layer over the colours layer and fill up with the colour you want. As in, paint the whole canvas that colour (just select the paintbucket tool and click on the canvas). Put it to OVERLAY again and play around with the opacity.

And there you have it! I realized colouring this way was a huge time saver. Now you don't have to go through the whole process of selecting different colours and different hues for the colours for each object. You can just paint everything in grayscale first and put the flat colours in later. Its also a good way to understand shadows and light and how they work for different materials.
Great job @ellyn-suraya .... this is cool stuff... awesome sharing...
Love the artwork thank you ellyn-suraya is that a mouse ?
With love,
harj : ) xoxo
Abstract artist
(latest artwork is "Kurt Cobain emotion")
Great tutorial ..there is something I learn from this process.. Thanks :)
I feel honoured to have been helpful to greater artists haha
Your work is very good. I am happy to see all the stages of your creation.
Oooo, last time I watched a tutorial that uses this method. I went and try it on my own, but I scrapped it. Haha, thanks for sharing.
Same here! I tried but somehow it didn't work. So glad it go cleared up for me.
Hahaha, it didn't work out for me too! :D Thank you for showing the process once again. Maybe when I have time, I'll give it another shot :D
what a cool tip ellyn..thank you for sharing this!! :)
Hahaha Im sure a pro like you knows more than me...
haha..nampak je mcm tau..tapi tak tau sgt sebenarnya ..masih belajar nk improve.
Thank for sharing the tips..simple and effective :))
Haha another pro! I feel so honoured.
Lol I did tried drawing using grayscale but its so hard for me, Nice post btw XD!
you should try again its so fun!!
Thanks for sharing! It's so helpful heheh (finally we kno de wey)
my queen im grateful to have showed u