Web Interface Installation Guide for SocialSend Wallet.
In this guide we will see the necessary steps to put into operation the web interface for Rasperry Pi with the SocialSend wallet.
Installing the necessary programs.
First we need to download and install the SocialSend wallet in the Raspberry Pi 3 as we saw in this tutorial link or download the finished image from this link
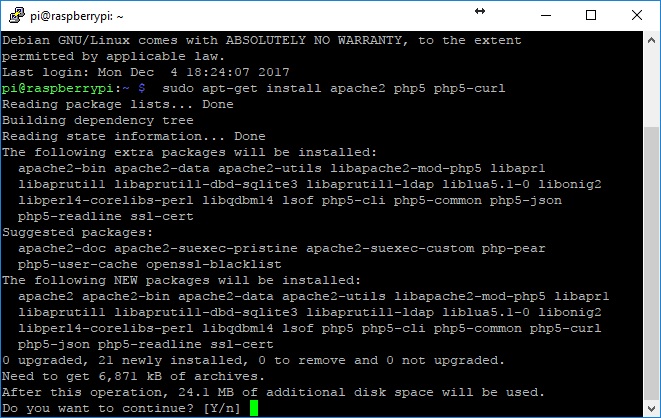
Once we have the ready image we start with the installation and configuration of the web server. For that we install Apache and PHP5.
sudo apt-get install apache2 php5 php5-curl qrencode
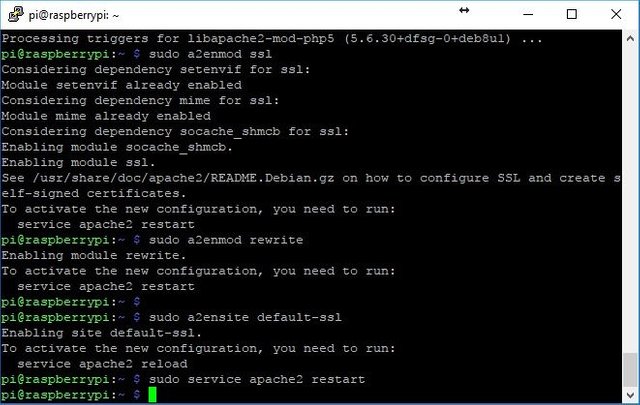
First activate the secure connection in apache and configure the SSL certificate to have an encrypted connection in our interface. For this we are going to use openSSL to generate the certificate.
sudo a2enmod ssl
sudo a2enmod rewrite
sudo a2ensite default-ssl
service apache2 restart
Creating the folder to save the certificate.
sudo mkdir /etc/apache2/ssl
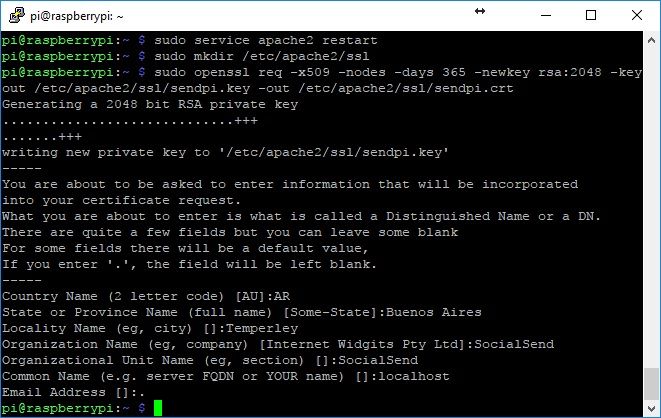
Create the certificate with a validity of 365 days and keep it in the directory that we have just created. Establish the permissions so that they are protected.
sudo openssl req -x509 -nodes -days 365 -newkey rsa:2048 -keyout /etc/apache2/ssl/sendpi.key -out /etc/apache2/ssl/sendpi.crt
sudo chmod 600 /etc/apache2/ssl/*
When we generate the certificate, complete all the information it requested. When it ask us for the field "Common Name" just put "localhost".
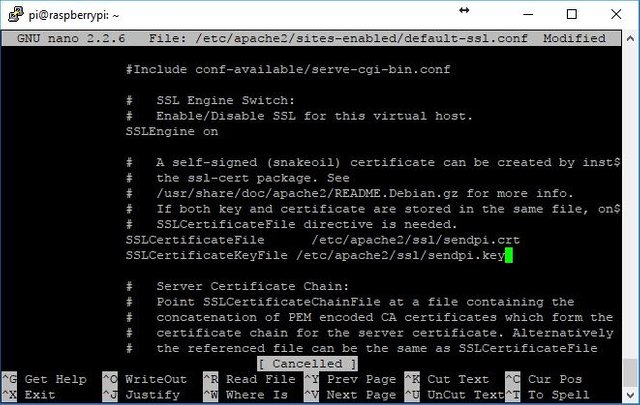
Edit the apache configuration to use the certificates that we just created.
sudo nano /etc/apache2/sites-enabled/default-ssl.conf
This command opens the nano editor. We have to look for the following lines:
SSLCertificateFile      /etc/ssl/certs/ssl-cert-snakeoil.pem
SSLCertificateKeyFile   /etc/ssl/private/ssl-cert-snakeoil.key
and replace it with
SSLCertificateFile      /etc/apache2/ssl/sendpi.crt
SSLCertificateKeyFile   /etc/apache2/ssl/sendpi.key
Then we are going to change the user that apache runs. This is so that the apache is executed with the same user that the wallet does, in this way, we have not permissions problems with the files. We edit the following configuration file:
sudo nano /etc/apache2/envvars
We look for these lines
export APACHE_RUN_USER=www-data
export APACHE_RUN_GROUP=www-data
and change it for these others
export APACHE_RUN_USER=pi
export APACHE_RUN_GROUP=pi
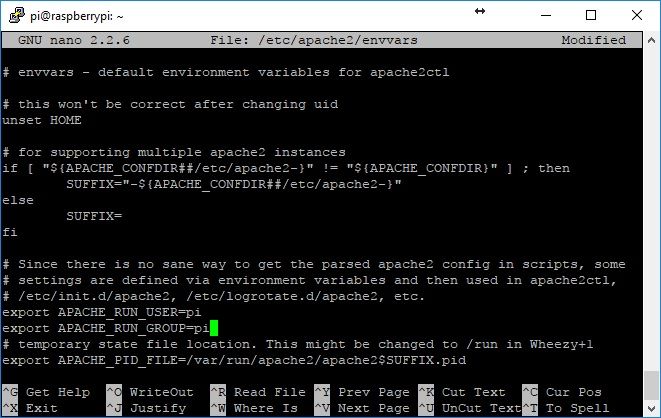
To allow the use of the .htaccess files we must change the apache configuration for the /var/www/ directory for that we execute the command:
sudo nano /etc/apache2/apache2.conf
We look for the configuration for the directory /var/www/ which should be the following:
<Directory /var/www/>
        Options Indexes FollowSymLinks
        AllowOverride None
        Require all granted
</Directory>
and change the AllowOverride None toAllowOverride All, leaving as follows:
<Directory /var/www/>
        Options Indexes FollowSymLinks
        AllowOverride All
        Require all granted
</Directory>
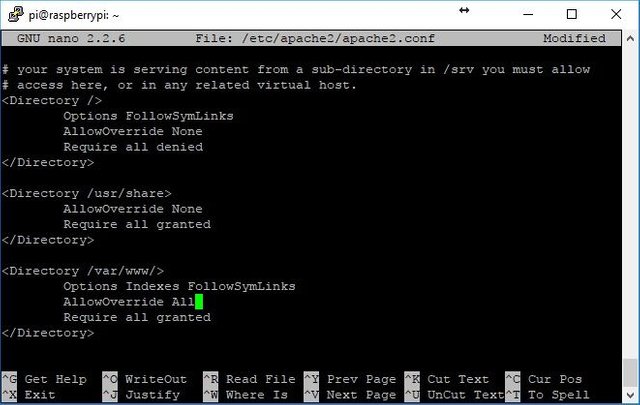
Save the changes and restart the apache to enable the new configuration with the following command:
sudo service apache2 restart
Copying the web interface files.
Download the web interface files:
cd ~
git clone https://github.com/hernss/SendPi.git
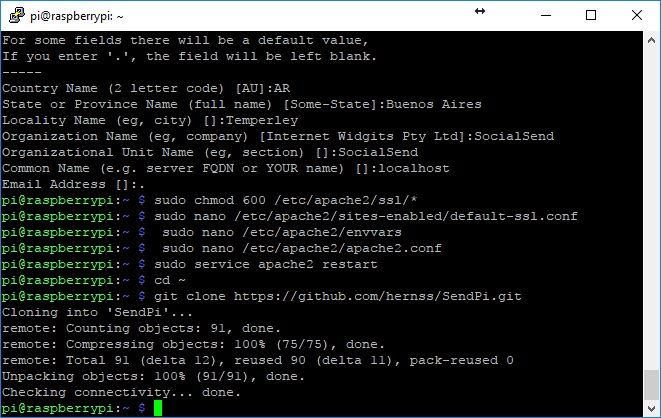
Copying the files to the web directory:
sudo chown pi /var/www/html/
cd SendPi/
chmod +x install
./install
Starting the interface for the first time.
We open a web browser and put in the address bar https://192.168.X.X (being 192.168.x.x the local ip address of the Raspberry Pi)
As the certificate of the SSL connection is generated by ourselves the browser don't recognizing the creator of it. To avoid this warning, you have to add an exception in the browser.
The first time you access the interface, you will ask us to enter a password.
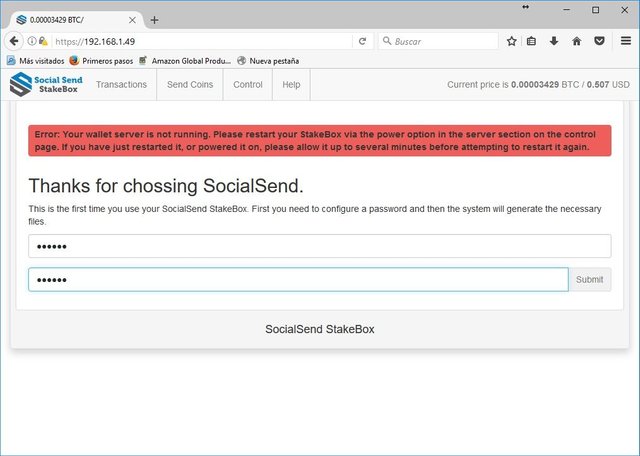
After entering the password the system will configure all the files to communicate with the wallet. It is important that before starting this step the wallet is already configured and the variables "rpcuser" and "rpcpassword" have been set in the file send.conf. The system will access this file to have access via RPC to the wallet.
Example of send.conf file:
rpcuser=anyuser
rpcpassword=anypassword
rpcallowip=127.0.0.1
staking=1
server=1
listen=1
daemon=1
Once the password is confirmed, the system will ask us to login.
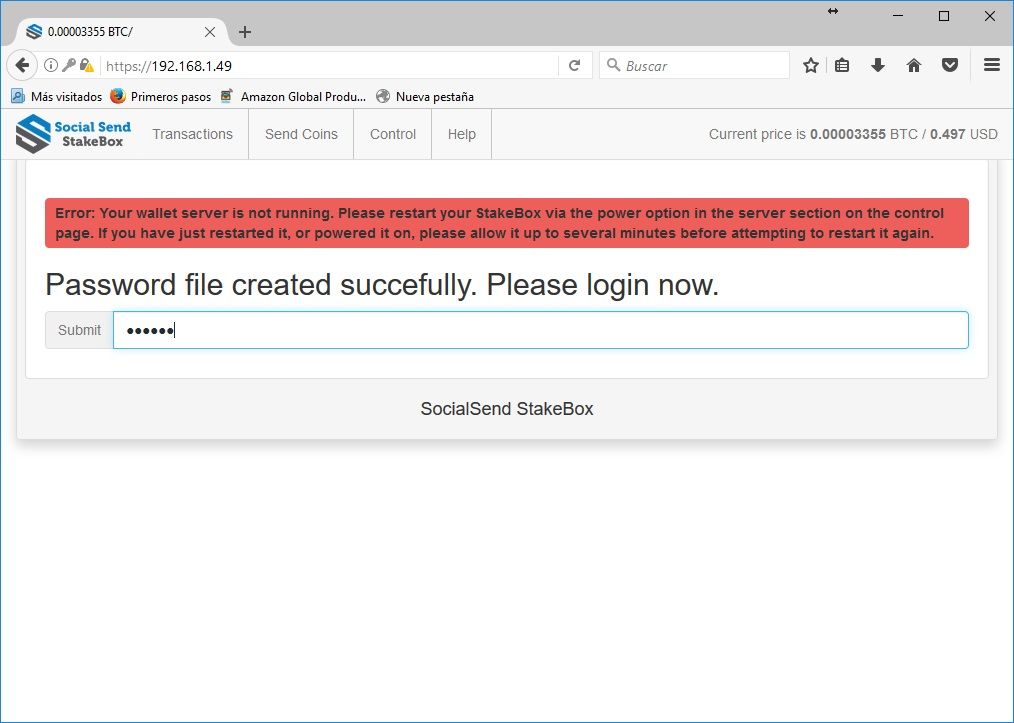
There we are going to have full access to the functionality of the Interace Web.
If this guide was useful to you, some SENDS will always be welcome.
STRtrnjav8MGfTrkUn1BgMwdCU9mwYCQff
Enjoy the vote and reward!
Thanks!!
Congratulations @hernss! You received a personal award!
Click here to view your Board of Honor
Do not miss the last post from @steemitboard:
Congratulations @hernss! You received a personal award!
You can view your badges on your Steem Board and compare to others on the Steem Ranking
Vote for @Steemitboard as a witness to get one more award and increased upvotes!