An entrepreneur can be an engineer or anything, if he is willing, has access to knowledge and information. A day with @olajidekehinde and his team.
6 years year ago, I wanted to be an accountant because I have always being reliable, accountable and credible financially. After writing JAMB twice and failing to be admitted into Higher Institution. My Dad told me I didn’t get the course because it wasn’t mine. It was my father that asked me to study Entrepreneurship, He said I had technical talent and it is entrepreneurship that offer me the best avenue to maximize this skill.
I have always had the passion to try and repair things, from radio, wiring to building batteries, power bank. My friends wonder sometimes what I am doing in commercial field.
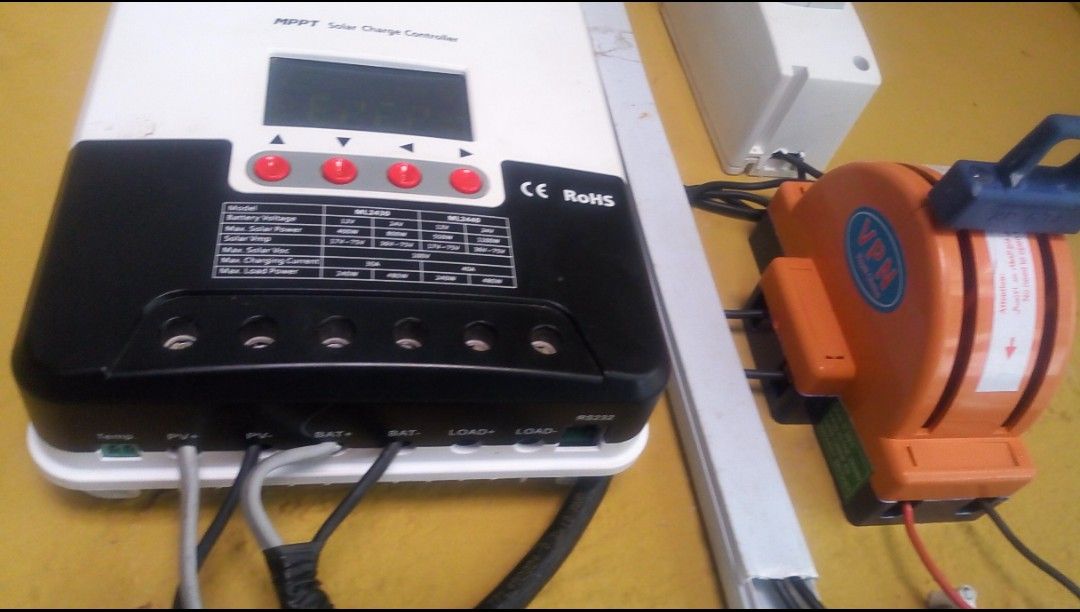 A Breaker, Charge Control and Switch Boss used in solar installation. (Picture Source, field trip with @olajidekehinde)
While I was studying Entrepreneurial studies at the Federal University of Agriculture, Abeokuta, I grew the passion to create electricity. I once worked on using banana peel to charge phone and was part of a group, Enactusfunaab that use poultry waste (dungs) to create methane which can be converted to power generator.
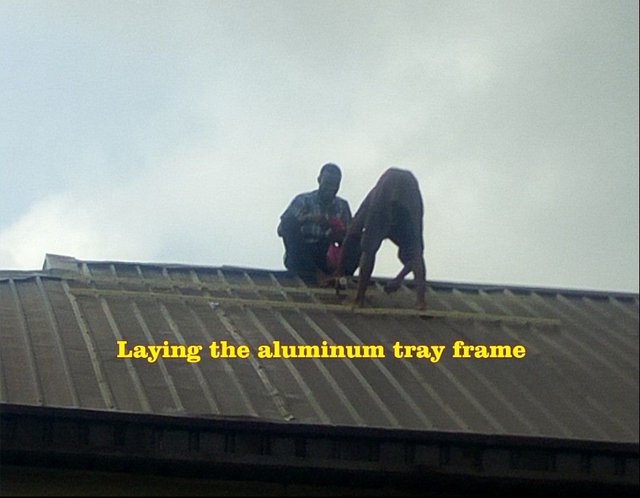
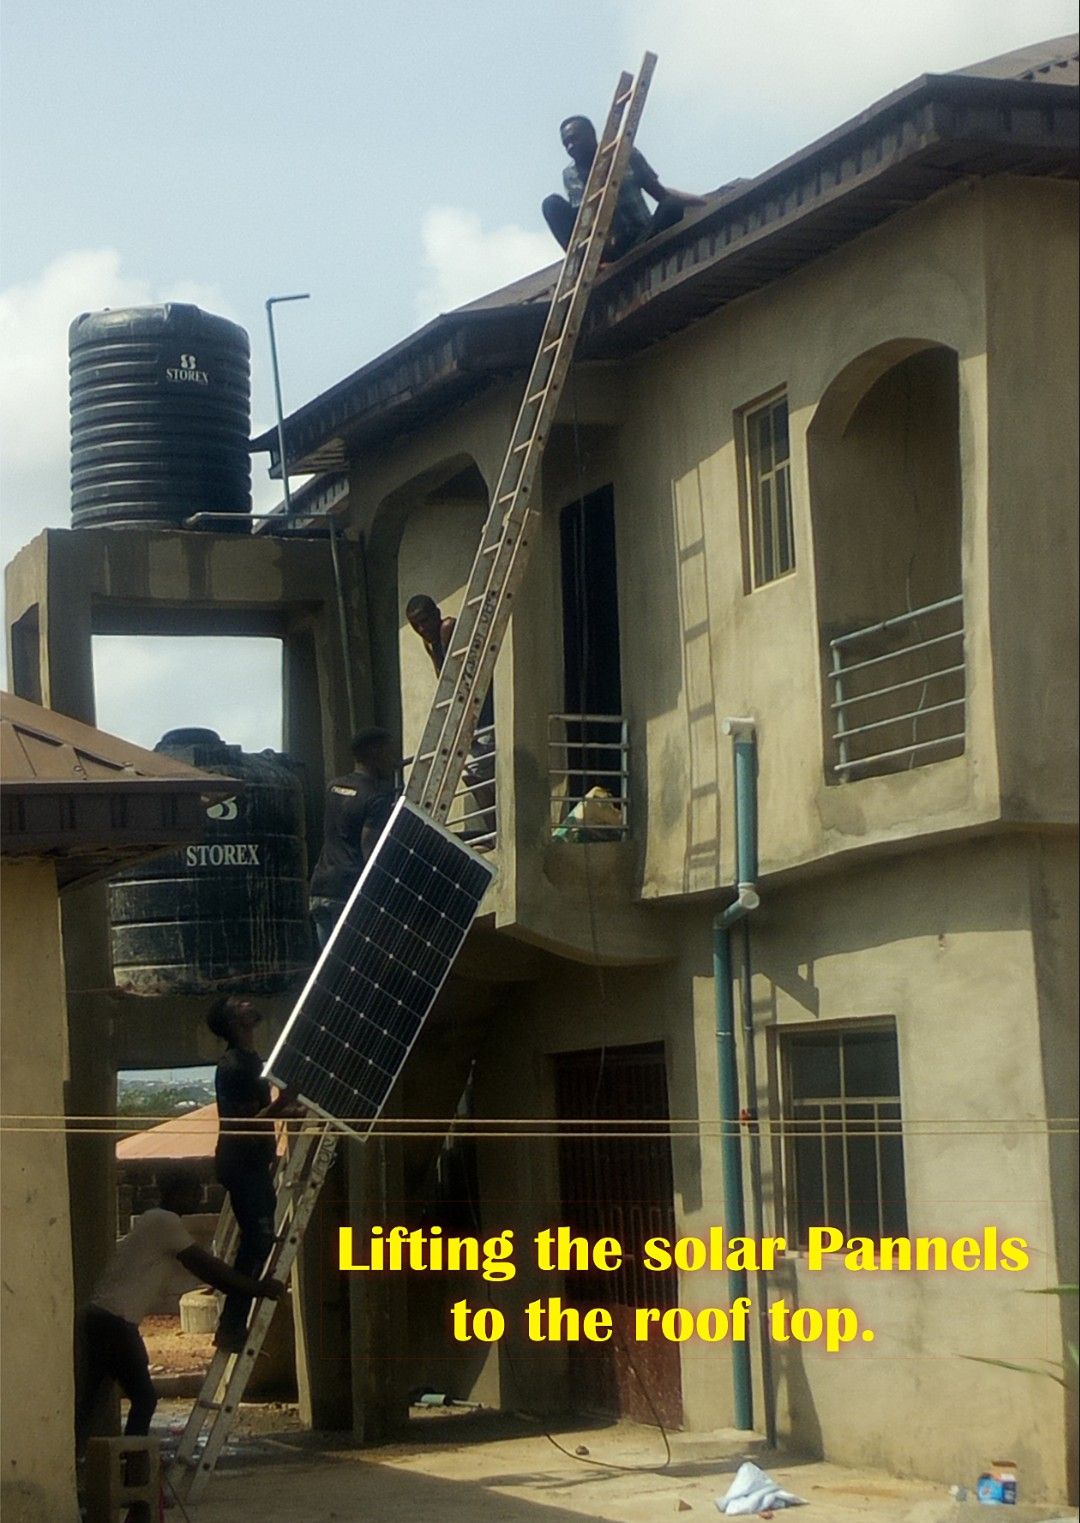
During Steemit meetup, Ibadan, I met Engineer @olajidekehinde, during our discussion, I learnt he installs solar system. Immediately I was interested and he said he would call me on his next field work. He was faithful to his promise, yesterday I was part of his team that installed 6 (65 inches by 39 inches) solar panel at Camp, Abeokuta, Ogun state, Nigeria.
It was a very exciting time spent with @olajidekehinde and his team. So I have decided to share my knowledge learnt yesterday with steemit on the steps on installing a solar panel to power a house. The material used yesterday that I am able to identify are.
a) Knots, Screw Driver and Screws
b) Diagonal Pliers
c)T spanner 10mm
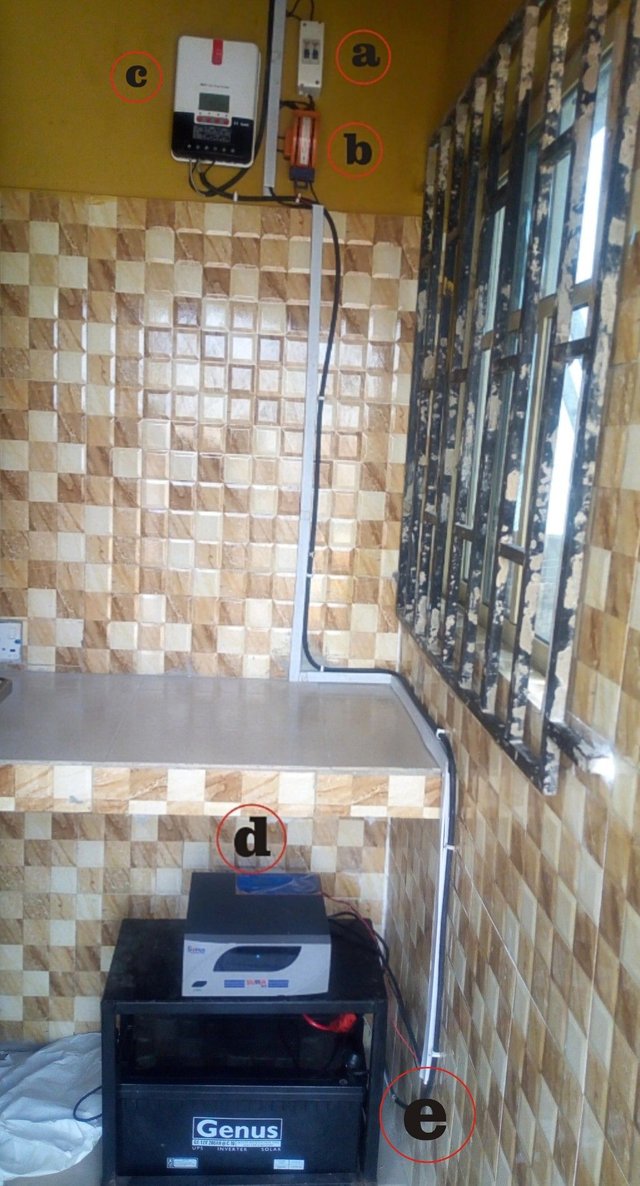
d) Charge Controller
e) Wire and ATC Cables
f) Battery Jointer
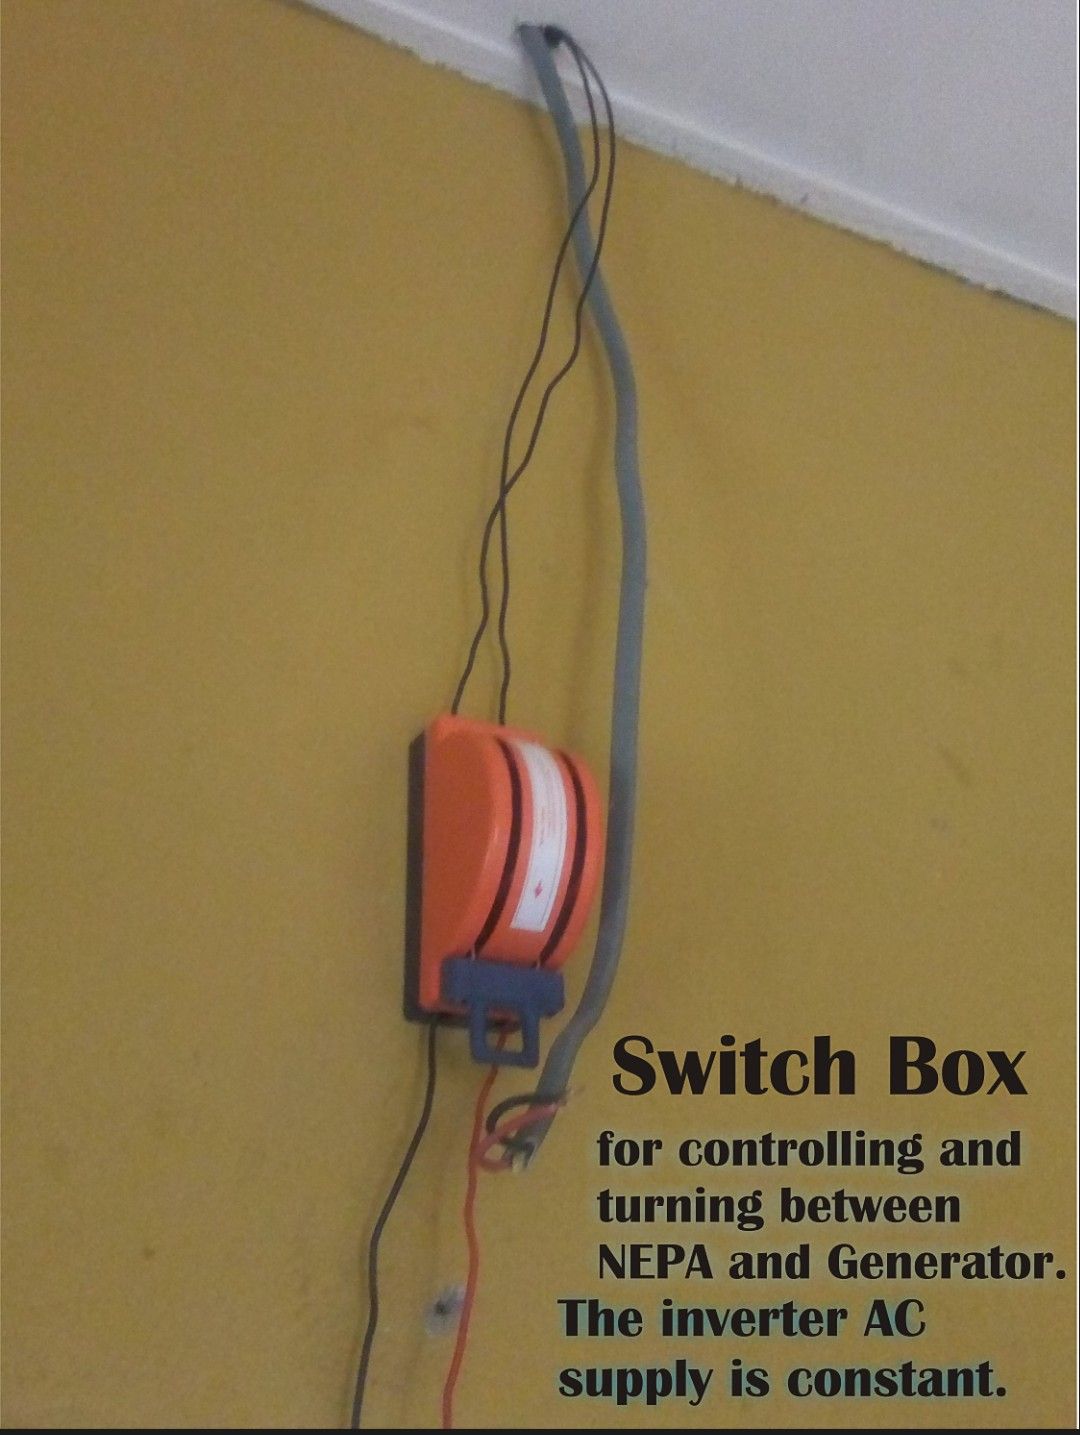
g) Switch Box and Breaker
h) Genus Battery 12v 200AH and Inverter
i) Branch Connector
j) Ladder
l) Nails (tornado) and Clips.
m) Tape Rule, Saw and Black Tape.
The Steps in Installation.
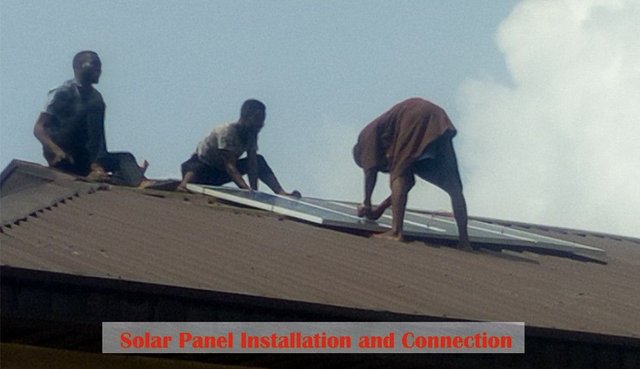
Solar Panel Installation
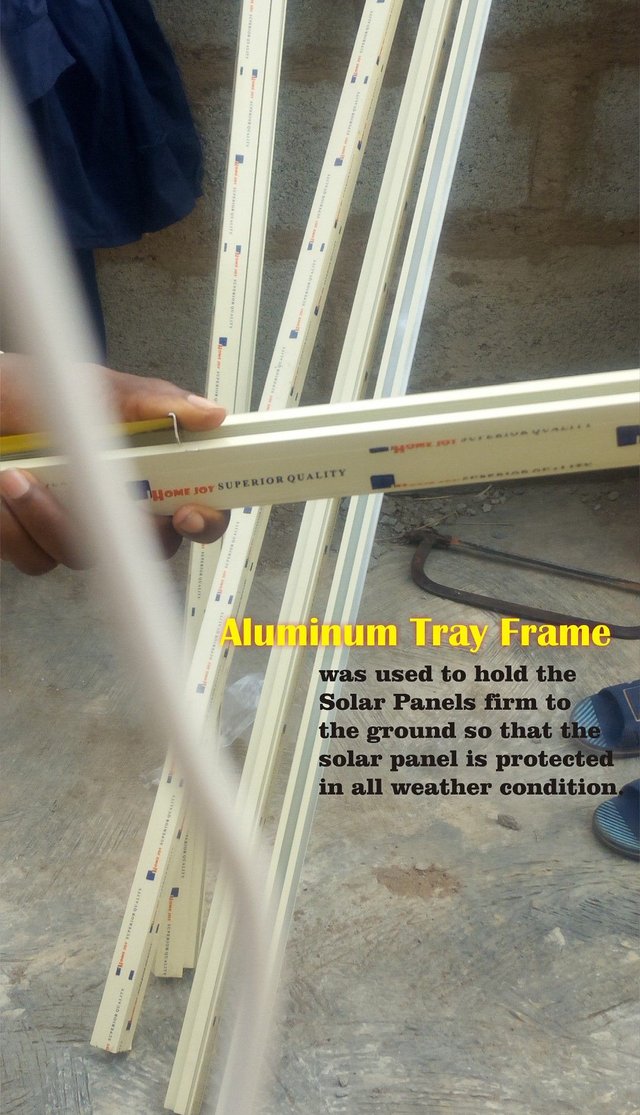 The frame is aluminum to prevent rusting. (Picture Source, field trip with @olajidekehinde)
 (Picture Source, field trip with @olajidekehinde)
 (Picture Source, field trip with @olajidekehinde)
 (Picture Source, field trip with @olajidekehinde)
 (Picture Source, field trip with @olajidekehinde
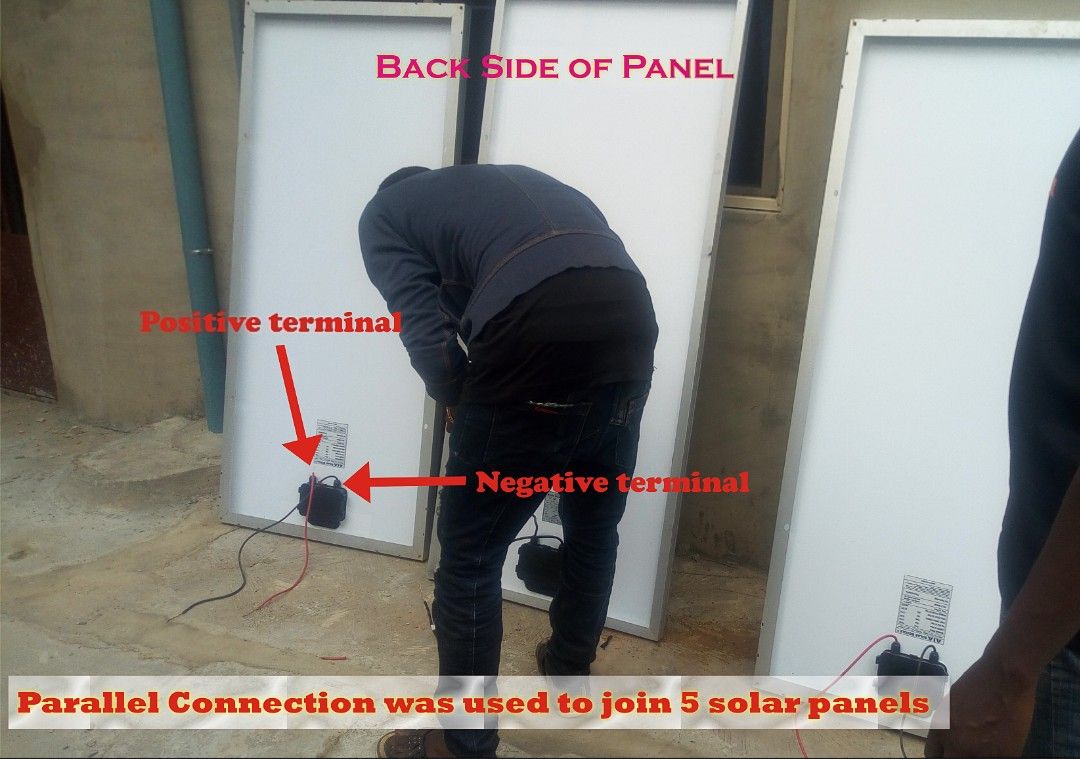
Parallel Connection was used to join the panels (Joining the positive terminal all together at on end likewise negative terminal at the other ender. A branch conector (female and male connector can be used for the parellel connection)
Main Connection
 (Picture Source, field trip with @olajidekehinde)
 (Picture Source, field trip with @olajidekehinde)
a) Breaker - automatic stops the inverter from working in occurrence of shortage in circuit or bad connection. It serve as a fuse.
B) Switch Box
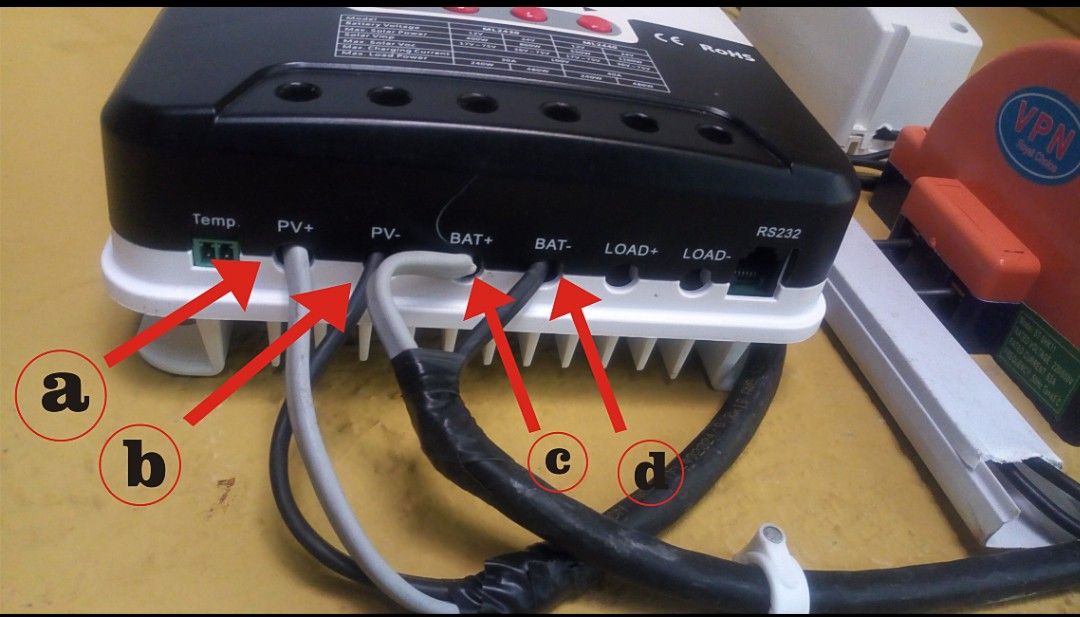
C) Charge Controller - to regulate the amount of charge coming from the panel that flows into the deep cycle battery bank to avoid battery overcharge.
D) Inverter - Covert DC current from the solar panel to AC.
E) Battery - Storing current. The battery @olajidekinde used is 12v200AH
 (Picture Source, field trip with @olajidekehinde
a) Connection of the positive wire coming from the positive solar terminal.
b) Connection of the negative wire coming from the negative solar terminal.
c) Connection of neutral wire coming from the input of the Genus inverter.
d) Connection of life wire coming from the input of the Genus inverter.
Inverter Installation

(Picture Source, field trip with @olajidekehinde)
a) Input receive the DC from the charge control
b) Positive and negative battery wire are connected to the battery.
Output Installation
it carries the AC converted and it is wire to the switch box.
I want to acknowledge @olajidekehinde on this for given me opportunity to learn.
Thanks for reading, please upvote and resteem if the post was found helpful.