About Photography: Exposure, The Triangle and going Manual

Exposure
What is exposure?
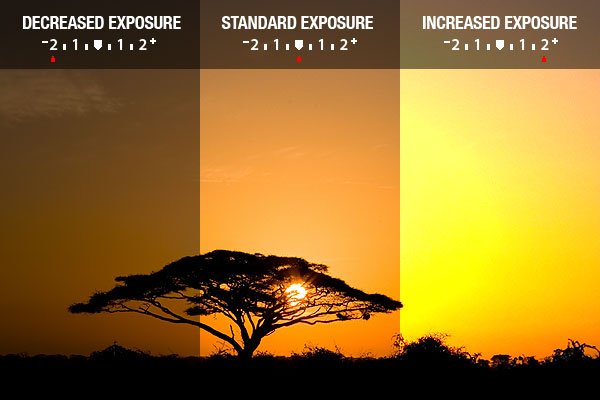
Exposure is how an image is captured and how much light is captured. Let's imagine a window. The size of the window determines how big the aperture is: a low aperture value equals a big windows that lets through lots of light. Curtains or window shutters are like the shutters inside cameras: the longer the window is open the more light gets inside. ISO is similar to tinted glass or even sunglasses: a low ISO value let's through little light like wearing sunglasses. And that's basically what exposure is or how a camera works.Exposure is measured in exposure values EV.

Exposure Triangle
In our previous posts we have talked about shutter speed, aperture and ISO. They make up the "exposure triangle". Knowing how to use each one of those will ensure you'll always make a well exposed image. But it's no exact rocket science. There's a lot of experimentation involved. It comes down to how we want the finished photograph to look like.
From high to low:
![]()
Going from Full Auto to Manual
While full auto makes photography easy as "point and shoot" these days, it doesn't let you create the type of pictures you'd necessarily want. Going to straight to manual surely teaches a lot, but there' no need to make such a big jump. Most cameras are equipped with many different regimes that let you manually change one setting, but let the computer take care of the others:
You could also set it to full Auto and put a range on the shutter speed. Using ranges on all settings is a smart way of using that mode.*

Where you have to go manual
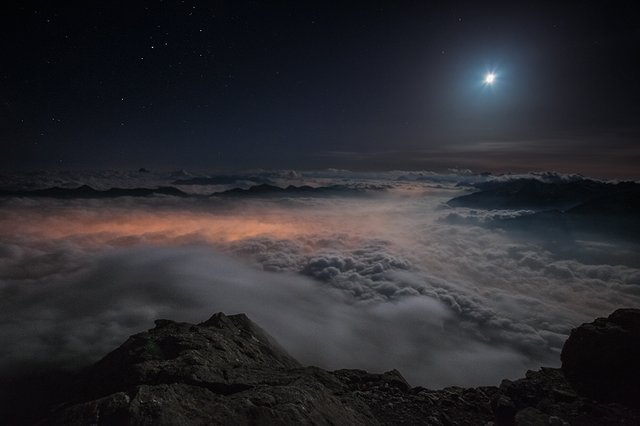
Long exposure images. It's something cameras can't do on their own. Shooting in the darkness of night or using a 10stop filter will effectively blind the camera. But doing long exposures is no rocket science. Simply take a well exposed image before shooting. Set the filter on the lens and calculate how long the shutter speed should be knowing you'll need to increase the exposure value by 10 stops. In the night is trickier. You'll have to use a flashlight or a distant light as a focusing point and take a sample shot with a high ISO. That way you'll quickly get an idea what the real image might look like once you set the ISO lower and shutter speed longer.

Also if you are doing anything with speedlights I'd recommend going manual unless you have a smart speedlight.
Sources:


Very informative post! Thank you for the refresher. I especially like the ISO, shutter speed, and aperture triangle.
Have a great week!
Steem on,
Mike
Thanks for stopping by!
Cheers!
Great guide for beginners! Thank you for shared.
Welcome! Thank you for reading!
Great explanation and nice image
thanks!
This lesson deserves Daily Photo Selection. 😊
Thank you! :D
Check My Nature Photo Gallery . Follow Me for More.

very good post! thanks for the info!
welcome! :)