The Brenizer Method
As mentioned in the comments of my previous post, I will try to explain another compositing technique that can be used for (usually) environmental portraits.
The Brenizer Method (from the photographer who invented it), also called "bokeh panorama" and other names, is, essentially, a shallow DOF (depth of field) panorama.
You can find more on the creator's web site: http://ryanbrenizer.com/category/brenizer-method/
Now, what is the purpose of this method? As mentioned many times, photography is a matter of compromises. This method was born as a workaround for a specific compromise, namely the lack of really fast wide angle lenses. This may not make much sense to you right now :)
But: wide angle lenses tend to give an "immersive" feeling to an image, since, literally, the lens tends to be very close to the subject and still show a lot of surroundings. But wide lenses have 2 compromises: they tend to introduce a lot of distortion and they are not good at isolation, since short focal length means deep DOF (i.e. everything looks in focus). In order to get the isolation you can achieve with a, say, fast (f/1.4 or similar) 85mm with a 35mm or 24mm lens, you'd need the wide angle lens to be f/0.4 or some such. Lenses like these do no exist now. Period. Not yet at least :)
So how can we get around this? What if I really really want to do an immersive environmental portrait that shows someone against a nice background without the distortion of a wide lens and with the isolation of a fast telephoto?
Enter the Brenizer method. It is a panorama, really :) With a few quirks.
First of all, you need a camera that can shoot in manual mode and with a 50mm or ideally longer (85mm or longer) fast lens.
You need to be as far away from your subject so that you can frame him / her / them in a single photo.
As per the settings, you need to use a fast aperture (like f/1.4 of f/1.8), the faster the aperture, the more pronounced the effect. Since these apertures may be quite a lot for daylight scenes, you may need to compensate with very fast shutter speeds, which is not an issue here. Keep ISO as low as you can.
Meter for the subject(s) and focus on the subject(s). Then set the camera in manual focus so that the focus does not change.
I also suggest you shoot RAW or, if you don't want to, set a fixed white balance to avoid having color shifts in your panorama.
Now, before you start, tell your subject(s) to stay as still as possible. If they can't (e.g. your subject is a pet) or if you want to capture movement, it's still doable, only more complicated.
Then take a photo of your subject(s). If they need to move, wait for them to leave the scene. Then start taking images all around the subject(s) with a circular motion. As with any panorama, allow for plenty of overlap among your images. You can do one or more concentric circles around the subject(s), depending on how much background you want to show.
Once at home, use whatever software you have that can stitch images into a panorama. If you've done everything perfectly, you'll be pretty much done at this point. But if that's not the case, some common pitfalls to look out for:
- Some people don't like the look - I think they find it "artificial"
- If more than 1 image contains the subject(s) (entirely or just parts of them), the stitching software may composite the subject(s) from multiple shots. This can lead to strange or disproportionate figures if the subject(s) was moving or even if not since you'd be panning your lens around the subject(s) and therefore changing perspective. In Photoshop I change the masks generated by the merge function to bring back the portions of the subject(s) that I want
- If you shoot JPEG and the white balance wasn't fixed you may have color / hue shifts in your final image
- Watch out for stitching errors which can be common in the out of focus areas
- As with any panorama, be mindful of composition: I prefer to shoot a lot around the subject(s) so that I have good breathing space for cropping as needed - downside being bigger panoramas that take longer to my computer to process
- As with any panorama, you need to be disciplined when taking the photos: missing a photo in the sequence could invalidate the whole image, but you will not know until too late (i.e. back at home at your computer)
- As with any composite technique, it is way more cumbersome than taking a single shot
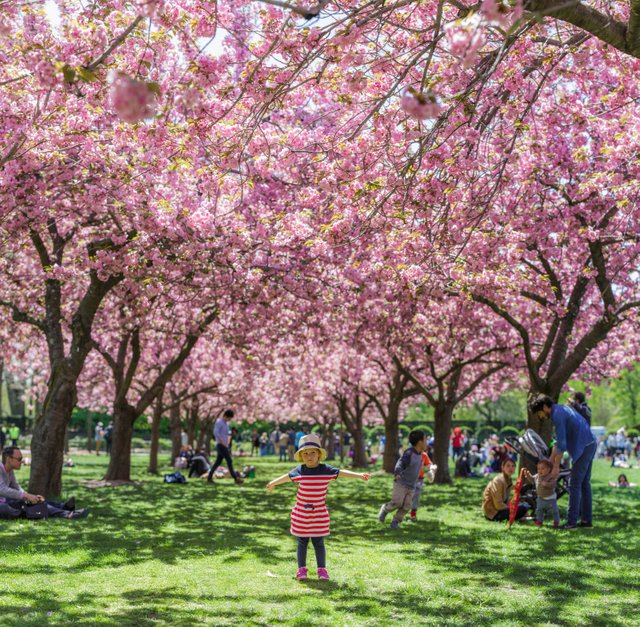
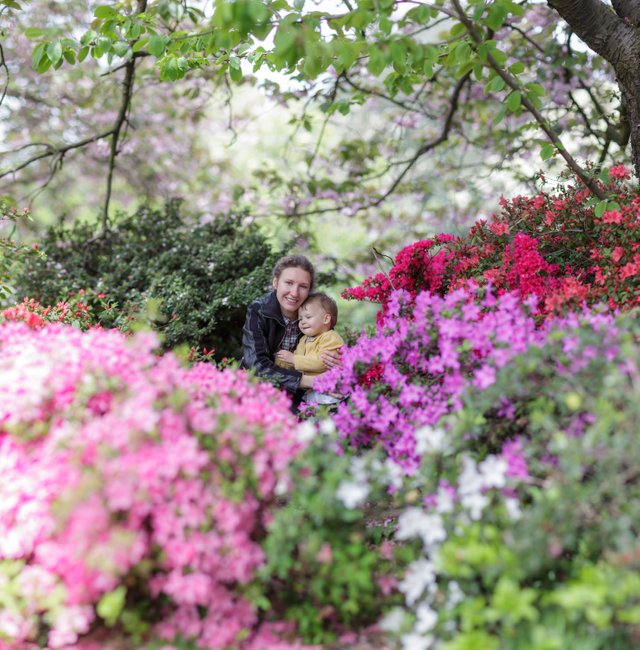
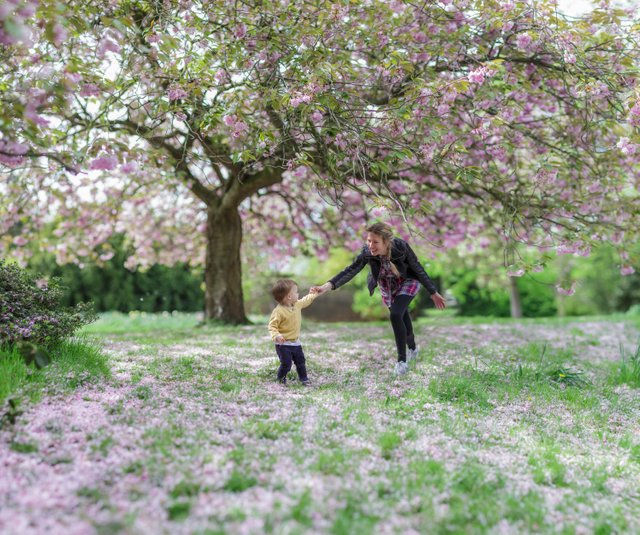
As usual, here are some of mine that I like - for some reason I haven't used this technique yet in fashion shoots. Possibly because I rarely feel the need to simulate a wide angle perspective in a fashion shoot... So all of them are with my family members :)


Beautiful pictures and informative post!
Thank you :)