Photographing Raptors With Phoblographer - The Buzzard 📷
The Opportunist:
This is a part of an ongoing photo series detailing my experiences of photographing raptors in the wild. Be sure to check out the previous instalment if you haven't already, Photographing Raptors With Phoblographer - The Red Kite.
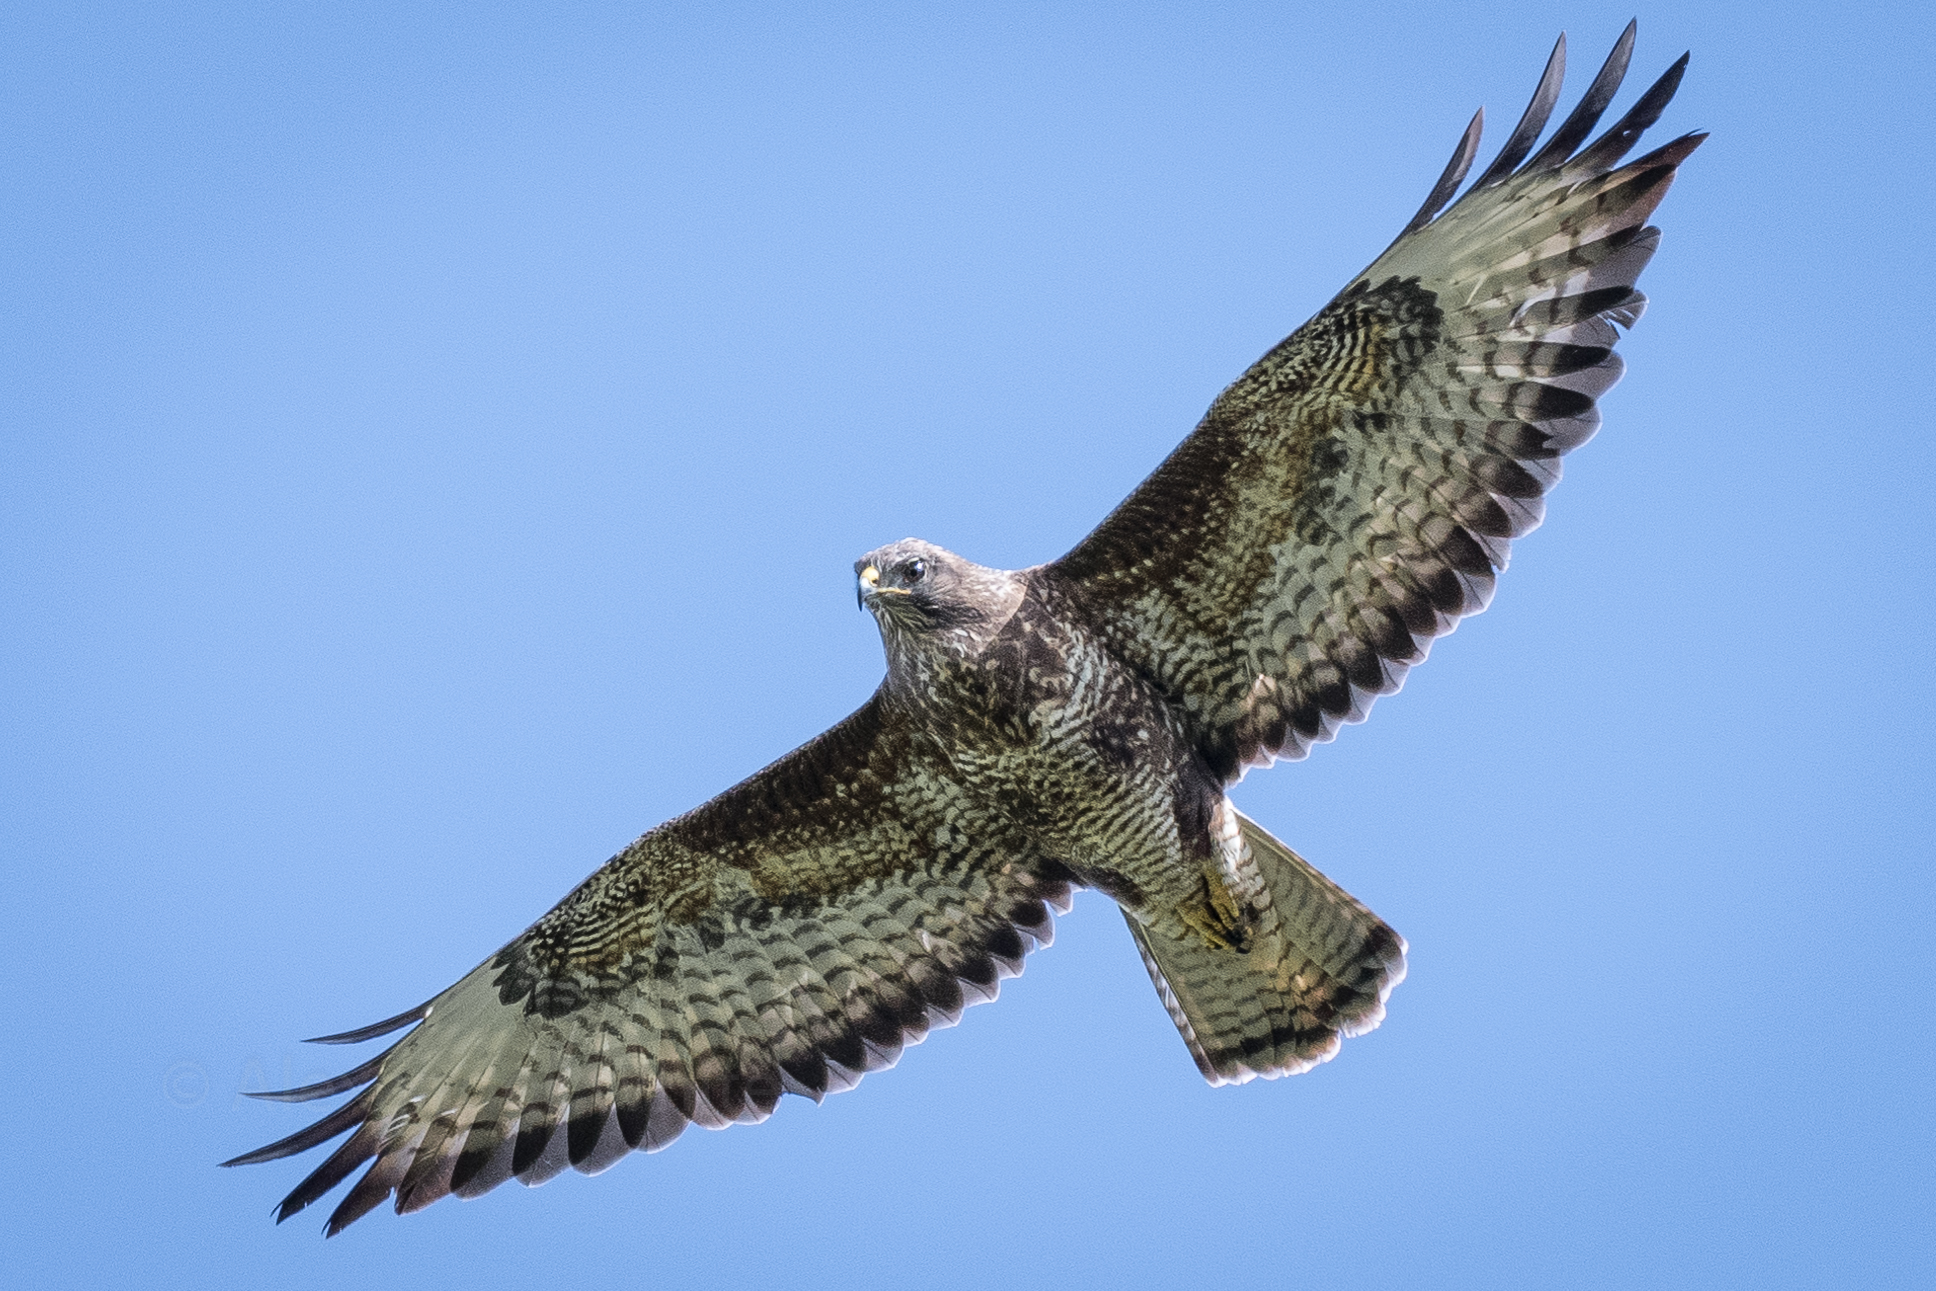
The buzzard is a relatively common bird of prey; they're opportunists and will feed on carrion as readily as live prey. They nest primarily on the edges of woodland and can often be seen hovering thousands of feet up in the air. Like all hawks, buzzards possess incredibly acute eyesight and will identify their quarry from a distance before diving rapidly to intercept them.
A Disapproving Look. Nikon D750, Sigma 150-600mm C @ f/7.1, 500mm, 1/1250 sec, ISO 640
Due to their excellent eyesight, buzzards will nearly always spot you from afar and move away before you have a chance at getting close to them. It should therefore come as no surprise that the majority of the photos in this article were taken with me lying on my back in tall grass. Almost every shot I've ever taken of a raptor came as a direct result of my approach in the field. It really is vital that you're able to hear the birds before they see you. This will allow you to position yourself correctly in anticipation of their flight path.
A Distinctive Sound. Nikon D750, Sigma 150-600mm C @ f/7.1, 500mm, 1/1600 sec, ISO 640
Buzzards make a loud, distinctive "pee-oh" kind of sound. As they primarily hunt over open ground, you should have no trouble hearing their echoing call. On fairly windless days raptors can also create their own air turbulence on which to hover. They'll flap their wings successively for several seconds and then hover relatively motionless while they scour the ground for prey.
Buzzard Banking. Nikon D750, Sigma 150-600mm C @ f/7.1, 500mm, 1/1600 sec, ISO 640
The reason I'm relaying all of these behavioural characteristics is because, as I've mentioned in previous posts, knowledge of your subject is critical in achieving your end result. Successfully photographing wild animals requires that you understand their habits and their behaviours. Mimicking the tendencies of your subject, at least in the the thematic sense, can also be an incredibly effective tool. By this I mean, the kingfisher is a patient hunter, when photographing the kingfisher it pays to be patient. The red kite is audacious, and your own audacity can allow you to get closer than would otherwise seem possible. The buzzard is an opportunist, and you too must be opportunistic in the pursuit of your desired shot.
Back Button Focusing:
It's important to note that I use something known as "back button focusing" in all of my photography. For those of you who are unfamiliar with this, back button focusing reassigns the button used to autofocus to one of the camera's face buttons, most commonly the AE-L/AF-L button.
The advantage of this is that it makes auto focusing independent of the shutter release. This means that you can easily focus on your subject and then recompose the image before taking the shot. Provided you've set your camera to continuous focus, (AF-C) then as long as you hold the assigned back button, the camera will keep on focusing. In practical terms, I've found this very useful for wildlife photography as it reduces camera shake caused by constantly holding the shutter button. Over time it also allows you to grip your camera more naturally and is conducive to good panning technique.
It really comes down to personal preference, but it's worth trying if you've found that you're often missing focus, especially with action shots. Setting up your camera for back button focusing only takes a few minutes. It simply requires that you dive into a few of your camera's settings menus. Just remember that your looking to reassign the AF-ON button.
Silhouette Avoidance:
When photographing birds in flight, achieving a correct exposure can be challenging. It's very easy for your camera's metering system to be fooled when your subject is against a bright background. For this reason you should always use "spot point metering" to allow you to expose for the bird and not the sky.
Hawk-eye. Nikon D750, Sigma 150-600mm C @ f/7.1, 500mm, 1/1600 sec, ISO 640
A blue sky is often easiest to shoot against as an overcast backdrop can result in a dull image. The highlights present in white clouds are also hard to retain when exposing for the bird. An incorrectly exposed shot will result in a silhouette effect, wherein the bird is simply a silhouette portrayed against a background.
Hawk Soaring. Nikon D750, Sigma 150-600mm C @ f/7.1, 500mm, 1/2000 sec, ISO 640
As always, a relatively high shutter speed should be employed to ensure that there is minimal motion blur in your final image.
Hawk Gliding. Nikon D750, Sigma 150-600mm C @ f/7.1, 500mm, 1/1250 sec, ISO 640
Most entry level to mid-range cameras will allow you to shoot in a specific crop mode. These can be accessed from the camera's menu and can help in decreasing your file sizes. I'll cover the importance of this in a future blog, though it's always good to experiment with your camera's settings.
Hide & Seek
Often the best way to get close to wildlife is by using a hide. You may have a dedicated bird watchers hide set up permanently at your local nature reserve. These are often shed like enclosures with viewing points, their only disadvantage is that they're stationery and they require a rather sedentary approach. I personally use a lightweight throw over hide similar to a ghillie suit. I've found that it works very effectively and is more versatile than a more traditional pop-up hide.
Out of Sight. Nikon D750, Sigma 150-600mm C @ f/7.1, 500mm, 1/1000 sec, ISO 800
Out of Mind. Nikon D750, Sigma 150-600mm C @ f/7.1, 500mm, 1/1000 sec, ISO 800
Both of the images shown above were taken on a tripod with a throw over hide. Achieving this shot in the wild meant waiting for several hours in an area where I knew buzzards were nesting. When this guy landed within my field of vision, I took my opportunity and these were the end results.
Wildlife photography really can be a rewarding pursuit. Having the right equipment is important, though even more critical is your approach in the field. Understanding your subject and approaching your craft with dedication and patience will pay dividends in the long term. Remember that there's no such thing as a wasted opportunity, as long as through your success and your failures, you continue in improving your skills as a photographer.
Thank you for taking the time to read my article, I hope you've found it both engaging and informative. I'll be covering raptors again as part of an ongoing series.
If you've found this article useful then please upvote & follow me for similar content in the future. Also please consider resteeming this blog if you believe it deserves to be shared with the wider community. Cheers everybody : )
All images present in this article are © Alexander White
Amazing shots !
Thank you, I'm glad you enjoyed them.
Absolutely wonderful images Alexander. Will share your Back Button Focusing tip with a friend here in Sydney, who photographs some of our native birds. Lovely to connect with you now too.
That's great, I hope he finds the tip useful. It can take a little getting used to at first, but the results are worth it.
Sure to @phoblographer. Would have resteemed your article but saw it too late. Will share on my FB Page for 'creatives'though.
My friend recently went to Central Australia on a Photography Workshop. Nothing build as a 'Hide' in the middle of the outback. So they used 'huddling techniques' ~ The birds apparently don't recognize the 'huddle' as being humans trying to 'capture' them.
Thanks for sharing my work, and that "huddle technique is interesting". It makes sense as birds readily identify us by our outline. I never find myself in a group situation without a hide so I probably won't get a chance to try it.
Maybe one day I'll get the chance to visit the Australian outback and give it a go : )
Absolutely fab photos birds of prey are the hardest to find and when you do, getting the correct photo is essential
In wales we find it easier as for in Birmingham we usually only see them as we are driving down the motor way and you can't stop
great information in your post and one I will try out,
followed you and work
thank you
Thanks, I'm glad you enjoyed the photos. You're right, birds of prey are especially hard to get close to in the wild. As for Birmingham, I'd suggest trying Sutton Park, you'd almost certainly spot a sparrowhawk there.
Excellent photos and tutorial @phoblographer. Upvoted, resteemed & your link will be in the DPS.
Thanks for sharing my work.
Such beautiful shots you captured! Thanks as always for sharing.
Thank you, I enjoy sharing my work with others.
Some great tips and great shots!
Thanks, nice name by the way : )
Wow....sesuatu yang menakjubkan..
Wow....sesuatu yang menakjubkan..
Okay, well maybe this is a BIT more involved than street photography haha that sigma lense is SICK. You're doing awesome work man.
Thank you, I'm glad you're enjoying my work, and yes the lens is very versatile and relatively lightweight. I think wildlife photography and street photography offer different kinds of challenges. It depends on what kind of person you are I guess.
Yeah, very different I would imagine. People can sometimes be elusive but I imagine not nearly as elusive as this guy.
Excellent work! I was about to ask about the lens, but you've included it in the description :)
I'm thinking about Nikon's 200-500 f/5.6, but I'm still unsure whether this is a good choice.
The Nikkor 200-500 f/5.6 is heavier, more expensive, and offers similar results in practice. The main problem I've seen with the Nikon lens is variance, that is sharpness can vary from lens to lens.
The Tamron 150-600 is also another alternative, though I've known people to have problems with the focus sticking. If you'd prefer a more lightweight option, the Nikkor 300 f/4 Pf with a teleconverter is also viable. Shooting into a light source can however be problematic with this lens due to the Phase Fresnel element.
I can wholeheartedly recommend the Sigma 150-600 C, I'm yet to experience any issues with it (knocks on wood). I guess it just depends on your shooting style and personal preference. I hope you'll be satisfied with your eventual purchase either way. : )
Now that's a reply, thank you! I've heard some people comment on quality control problems with Sigma too - I guess it's a common problem with telephoto lenses.
I'll try to compare some photos on Flickr and eventually decide, although at this point, I'd rather sell all my gear and get into Fuji. That said, I've no idea of their selection of telephoto lenses... Hmm...
No problem, I knew a guy with an XT-1 and an XF 100-400mm, he seemed to get on well with it. Fuji cameras are very much in the ascendance at the moment, great for street photography. I'm tempted to get a X100F myself : /
It's has a fixed lens, that's rather limiting I think... And at 35mm, you'll have to shoot rather close to your subjects. Like a fist's distance away :)
The image quality is incredible though :)
Yeah I'd only use it for street photography. I'm used to shooting at 24mm when out and about so it wouldn't be too bad.
If anything I probably have too much gear, so it's unlikely that I'd ever get one : /
24mm? That's too wide for me, although I won't deny I like 28mm - but I just can't stick my lens up people's noses :)
I think an X-T20 with a 23mm or 35mm is a completely justified (wink wink) investment! :D
It would be nice to fund that investment with profits earned from Steemit. Though I think it would probably take several years of blogging : /