Tutorial | How to Bring your Shots to Life with Adobe Photoshop CC

One of the most useful tools that you have for setting a good dark/light proportion is the 'Levels' window.
There you will be able to play with the values and compensate the lack (or the excess) of black, grey and white levels of your picture.
You can access the Levels window in the next route:
Image > Settings > Levels
Or through the next comand (for Windows):
Ctrl + L

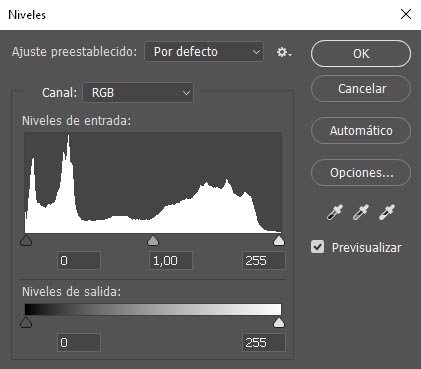
For example in this picture you can note that there's a lack of light, of whites level. You can be sure checking the Level window:
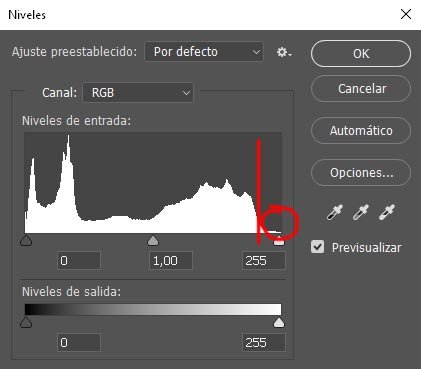
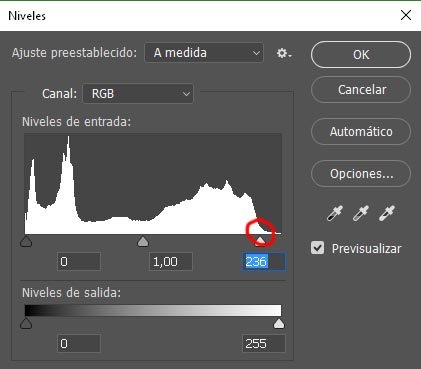
To solve this you just need to slide the white point to the left, just matching with the point where the whites start growing.
Just like this:
This is the result (the upper image)
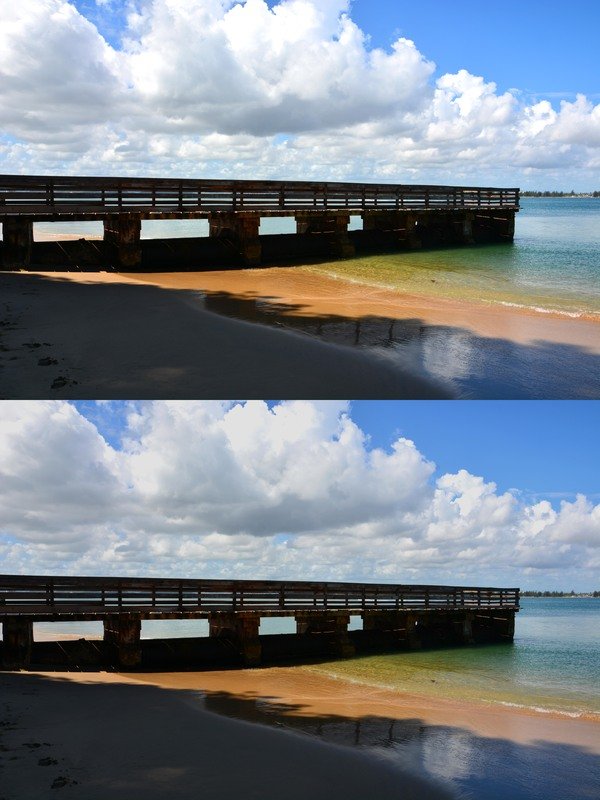
Also you can play in the same way with the black and grey tones if the picture needs it, and the result should be like this:
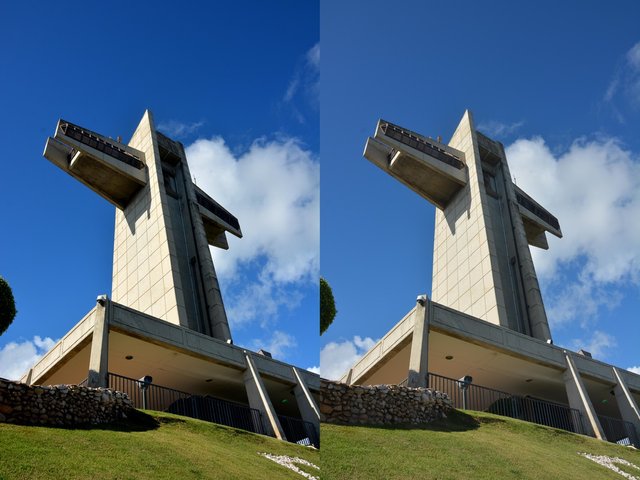
By changing this parameters you also create more contrast between the colors, so its intensity is higher.
I hope you find this post useful!
Cheers and enjoy!
p2npoison>
Quedada en Madrid! habra una donacion para las consumiciones de los invitados! visita la quedada en https://steemit.com/steemit/@cervantes/steemconnect-cervantes-project-week-1-madrid-en-es