Action Photography - How To Get That Killer Red Bull Shot!
Action, Adventure, Adrenaline. If jumping off a cliff, shredding some pow, hurtling through tight bends or chasing down a leopard gets you high, you're insane.. just like me. If you like to get an intense rush and be part of the action without raising your life insurance premiums, there's action photography. There's no better feeling than when you stop time in a single frame in that perfect picture when all the stars align. It can be an adrenalin rush on its own.

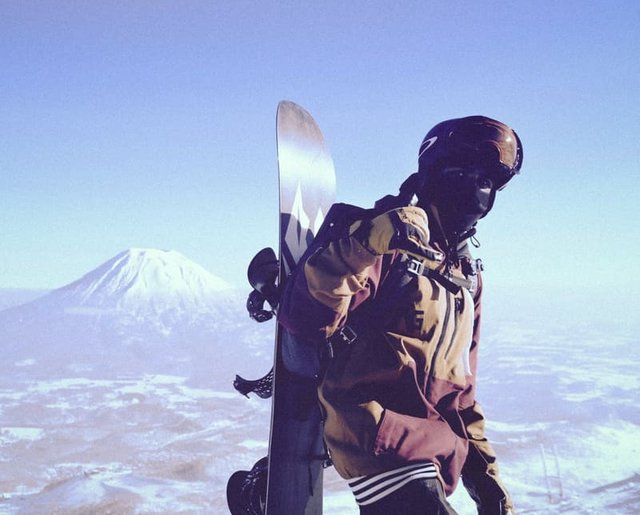
Photo by Mo Sadaati
Action photography can be difficult. Because action photography encompasses both Sport and Wildlife, your subjects are going to be fast and dynamic. If you don't have cat-like reflexes or the right settings on your camera, you could lose the shot forever. Fortunately, there are things you can do beforehand to optimise your chances of capturing your National Geographic photo. This guide aims to go through a few of those elements to consider.
Equipment
Camera
Ideally you'll need a professional camera. When venturing out into sport and wildlife territory, camera phones do offer the ease of portability but you lose a lot of control over your shot. I think if you're looking to get an awesome slow motion video and can't be bothered lugging your DSLR gear up a 5000 foot mountain, camera phones can provide an alternative but for that premium red bull photo that gives your portfolio wings, I'd recommend a DSLR or mirrorless camera. Make sure you check out your camera's "burst" mode or "continuous shooting" mode. The higher the frames per second, the more likely you're going to a frame you like.
Keep in mind that sometimes the action can end up being in environmentally hostile conditions such as the rain or snow. Make sure you check your camera limits with the manufacturer. Pretty useless if your camera just dies the second you pull it out in sub-zero temperatures or gets hit with a bit of drizzle.
Lens
Most action photographers will appreciate a good telephoto lens. It's the easiest way to get the details of the subject without interfering or putting yourself in harms way. If you can get a leopard chasing down a gazelle from 5 meters using a 14mm lens, you've probably just taken the most unique picture in the history of wildlife photography. Wouldn't it be nice to survive long enough to edit it though? A 600mm lens will give you a reasonable head start, but will most likely weigh you down. Most photographers will opt for a telephoto lens with a balance of portability and zoom. Typically this would end up being a lens with a focal length of around 200-300mm. If you have a crop sensor, the field of view is generally narrower, getting you a picture that might look like you've taken it using a longer focal length e.g. A 300mm lens on a crop sensor will look more like a photo you've taken from 480mm lens.
Aperture, the wider the better. The reason a larger maximum aperture is preferred is because it allows you to take a picture at the higher end shutter speeds that you'll need to be working in without needing to increase your ISO too much. No one likes a noisy photo.
Sports, and wildlife photography can be expensive. Large maximum aperture + longer focal lengths usually = $$$. There are certainly third-party lenses that Sigma and Tamron make that provide similar specifications without the 'holy shit, I'm going to have to sell my Ducati price tag' (you think I'm kidding? Check the price tag on the 400mm f2.8 prime from canon).
Another thing to consider is that with longer lenses comes increased movement. Not by your subject, but by your hand. With this kind of magnification comes magnification of camera shake. Some camera sensors come with image stabilization (i.e. The camera sensor counters your camera movement). Some lenses also come with image stabilization (i.e. The lens itself counters for the movement of the camera). If you're using both a lens and camera body with this ability, you should only use one or the other. Having image stabilization turned on both the camera and the lens can paradoxically reduce the overall stabilization of your image as you have multiple elements trying to compensate for the other (best use case for 'too many cooks spoil the broth'). The same principle applies when taking landscape shots on a tripod. Turn image stabilization off as it continues to hunt for camera movement and makes inappropriate twitchy corrections even when the camera is completely still.
Zoom Vs Prime Lens
There are some benefits and disadvantages to both. Buying a prime lens is generally cheaper, sharper, and lighter in weight. On the other hand, you lack the convenience of altering the focal length which means you'll have to compensate by physically moving yourself to get closer or further away from the action (which in a lot of scenarios isn't possible). Some zoom lenses will have a variable aperture as well, which means that as you zoom in, your maximum aperture gets worse. There are zoom lenses with a constant maximum aperture but they are reasonably expensive. As I mentioned in one of my earlier posts, because I travel, I prefer the convenience of not having to continually switch lenses. I like a good zoom lens with a constant aperture.

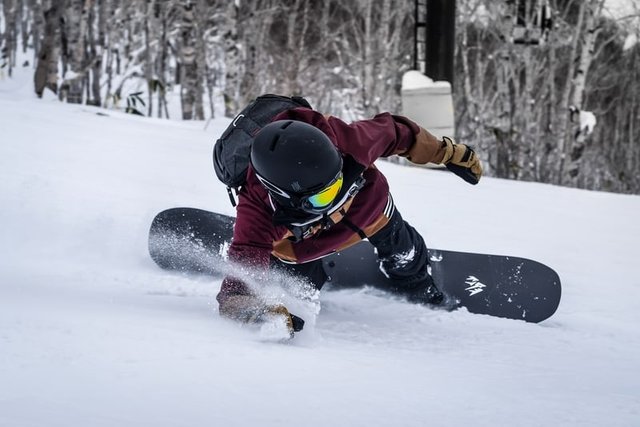
Photo by Mohammed Sadaati
f4.0, 1/2000, ISO 200
Settings
Shutter Speed
This will make or break your shot. Depending on how fast your subject is, you'll be looking at relatively high shutter speeds. If your shutter speed is too slow, you may end up blurring the action. Getting a shot of a tennis player just after smashing the ball can be clean at 1/500th of a second. Shooting at 1/1000th will get a clean image of the deformed tennis ball. At 1/4000th of a second you can capture the sweat flying off their forearm. Of course in low light, even at f2.8, capturing an image at a shutter speed of 1/4000 can leave your photo completely underexposed. You may need to increase your ISO and deal with noise later In post. if it's partially underexposed, you may be able to correct this fairly easily.
ISO
This is how sensitive your camera is to light. You'll want to use the lowest possible ISO. In good lighting this will usually be maximum around 100-200. You'll need to use higher ISO's in lower lighting conditions. I did mention that no one likes noise, but that's removable post editing (very painfully might I add, but it's possible). It's much more desirable to get a noisy shot than one that's blurring the action. Most professional cameras have usable ISO's of up to 3200 and sometimes 6400 (i.e. Maximum ISO Resulting in photos that don't need further noise reduction).
Aperture
If action photography were a kingdom, Aperture and Shutter Speed would be king and queen. Now I did also mention a larger aperture is better to gather light, however there is a counter to this. With larger apertures, your depth of field gets smaller. To explain this, imagine that you're shooting a soccer player. With your aperture opened to f2.8, you'll only have the player in focus with the background and foreground out of focus. If your player moves forward or backward he may step into the out of focus field before you take your shot. With it set to f16, you'll get everything in focus from the grass near your feet all the way to the crowd in the stadium in the background. Unfortunately this will result in poor lighting and you'll have to compensate by cranking up the ISO or slowing your shutter speed. If you've got a really fast reliable autofocus, having your aperture set wide open shouldn't be a problem. It also gives a that great bokeh effect. Lag in autofocus is usually remedied by either reducing your aperture or buying a camera with better autofocus.
Exposure Mode
You'll find that there's several types of modes you can set your camera in. These include the ones specific for certain situations like macro, landscape and portrait modes. The other ones are more technical like aperture priority, full manual and shutter priority modes. It can be a bit confusing sometimes. By now you'll be familiar with full manual mode (if not just ask, I'll set up another article for it). This gives you the most control over the elements of the shot. You set the shutter speed, the ISO and the aperture. In sports photography, the subject, and the lighting can change incredibly fast and you won't have time to process and set each parameter. You'll need a mode that balances control and assistance to gain the maximum potential from your camera.
The best mode to use is aperture priority. This is usually marked as 'A' or 'Av'. It allows you to set a fixed aperture and your camera does some fancy calculations to set the fastest shutter speed for any given lighting condition. You'll usually want to keep your aperture wide open at its maximum to optimize your shutter speed. Keep in mind though that if the lighting is too low, this will generally result in a slower shutter speed which can cause blurring. This can be compensated, in part, by putting up your ISO.
Generally the longer the focal length, the faster your shutter speed needs to be (to compensate for camera shake). I usually use the inverse rule.
Minimum Shutter Speed = 1/focal length
So if you're shooting with a lens with a focal length of 300, you should aim for at least a 1/300th of a second shutter speed. With image stabilization, you can have a slower minimum.

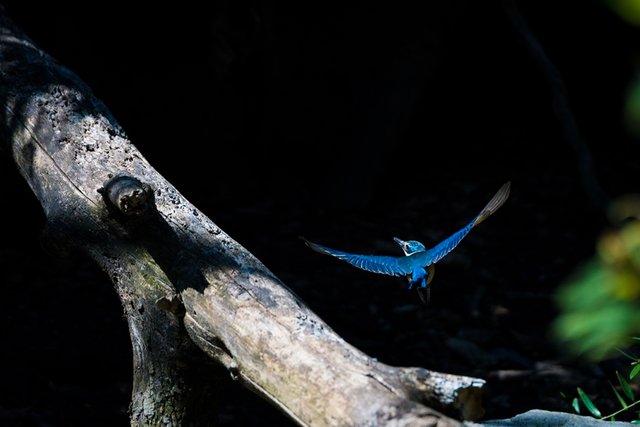
105mm at f4.0, 1/4000, ISO 100
Drive Mode
Set your drive mode to continuous shooting. This basically sets it so that your camera will continue to shoot at its highest frame rate for the duration that you hold the shutter button down. If your camera takes photos at 6 frames per second, and you hold it down for 3 seconds, you'll get 18 pictures. If your camera takes really large resolution photos, there may be a refractory period from after the 3 seconds to when you can shoot again. This is because you've probably just taken 18 pictures each with a file size of 40MB and now it's trying to save it all onto your card. This is remedied by reducing the size of your pictures or changing the file format from RAW to JPEG.
Autofocus
This ones important. Most DSLR's and mirrorless cameras have the option to have one-shot autofocus and a continuous autofocus. The one-shot locks the autofocus once and that's it until you fully press the shutter button. Unfortunately in action photography, your subjects will rarely stay still for you, constantly moving forward and backward from your field of focus. Continuous Autofocus is perfect for these situations. This mode continues to hunt for the right focus, right until the milliseconds before you fully press the shutter button. Some smarter autofocus systems have tracking autofocus which continuously autofocuses the moving subject in the frame rather than a set point.
Awesome! If you've got some pretty extreme shots, we'd love for you to share with us! If you've got a keen interest in sports, action or wildlife photography, post your tips in the comments below. I'm always keen to learn and improve my photography game, and so are the people here.
exposure triangle - everyone should start with that :) very good and easy explanation :)
That's a really good point, I assumed that was known, but I think you're right, perhaps people will find an article on the basics of attaining good exposure useful
Cool photos!
Thanks @choogirl for taking the time to read my posts, I understand you're quite busy recruiting!
I still have time to read stuff and upvote the content I like.
I love the Tricky XXX snowboarding games. Great photos.
I can ski but have not snowboarded in real life.
Amazing work.
Perfect place to get a shot, even better if you score a spot on the edge of the half pipe. I don't ski, but I've seen some pretty sweet ski photography too!
My girlfriend has just informed me you were talking about a video game, my bad :P I thought it was something similar to the Winter X Games. Apologies for the confusion.
Plz vote me back bro. I voted your all post :)
Appreciate your votes, they mean a lot to me. I apologise if I haven't gotten around to seeing your posts yet, I'll get there
Ok,thz .
Congratulations! This post has been upvoted from the communal account, @minnowsupport, by rukiegamer from the Minnow Support Project. It's a witness project run by aggroed, ausbitbank, teamsteem, theprophet0, and someguy123. The goal is to help Steemit grow by supporting Minnows and creating a social network. Please find us in the Peace, Abundance, and Liberty Network (PALnet) Discord Channel. It's a completely public and open space to all members of the Steemit community who voluntarily choose to be there.
If you like what we're doing please upvote this comment so we can continue to build the community account that's supporting all members.