Photography 'rule of thirds', improve your shots
With the birth of digital photography and it's introduction into the mobile phone, we instantly have 100's of millions of new photographers.
iPhone 5s shot of Half Moon bay, CA
One of the widely used techniques is called the rule of thirds which everyone taking a photo should know about. We are not professional photographers and a lot of times just take quick pics to show friends and family. By taking a few seconds to frame the subject within the shot that will complement the surroundings often makes the difference between a good shot and a great one.
The rule of thirds uses 2 horizontal and 2 vertical lines across the screen which breaks the image into 3rds. Placing the subject at the intersection where the lines cross (4 of them) produces and image that is balanced and easier for the viewer to focus on.
iPhone screen shot of the camera app with the rule of thirds grid lines.
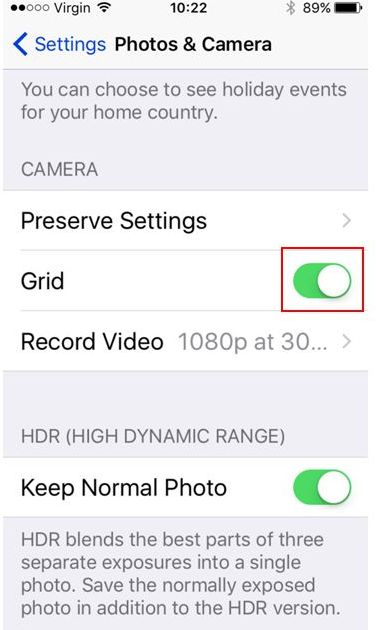
For those with an iPhone, you can go to settings, Photos & Camera, then turn on Grid.

From the example of the coast shot above, you can see that the fog rolling over the mountains is about 1/3rd from the top edge. The white wash of the water about 1/3rd from the left edge and the end of the mountain range is ending about 1/3rd from the right edge. It is in general, a balanced shot.
I see landscape shots that have a lot of sky or a lot of land which produces an imbalanced shot. The photographer chooses what he or she would like the viewer to focus on and typically will show more of one or the other.
A cropped landscape shot of a lot of sky
Here is one from a sunset in Maui
So play around with the shots that you are taking. Take several with the subject in different locations. When you get back home, you can view the images and delete the shots that you feel do not have the right balance. (Finding the balanced shot is easy to see, you will find one that catches your eye right away).
There is a lot of additional information and articles about the rule of thirds on the net. I'd suggest checking it out on your favorite media site or just a photography based site.
Lastly, use the focus square on the subject so it will be clear for the viewer to see. Now go out and take some great shots! Send a link in the comments to your shot so I can take a look on how you used this technique.
Sanborn park in Saratoga, Calif

Nice post. Thanks for giving some nice technical information in photography. I see some nice shots taken by you. Photographs are beautiful.
Thanks for the feedback @shrivastava
Very useful tips! I love this.
Good info!
Congratulations @glennolua! You have completed some achievement on Steemit and have been rewarded with new badge(s) :
Click on any badge to view your own Board of Honor on SteemitBoard.
For more information about SteemitBoard, click here
If you no longer want to receive notifications, reply to this comment with the word
STOP@glennolua got you a $1.73 @minnowbooster upgoat, nice! (Image: pixabay.com)
Want a boost? Click here to read more!
great !!
Thanks @marian0 for upvoting my last post. I follow you and I have upvoted this post thinking it was yours... I am new around here... Anyway you have not posted since 12 days and, as far I know, the votes are worthly just 7 days... Keep in touch! I always share one of my "last" photographies in my posts. I say "last" because they can be old, but changed thanks to the filters of my Smartphone and Instagram http://www.instagram.com/mbokusu :)
My friend, a kind reminder here.
#cn tag is stand for chinese.
However, no chinese was detected in this article.
Please use wisely for your tag,thank you.