Blue Hour
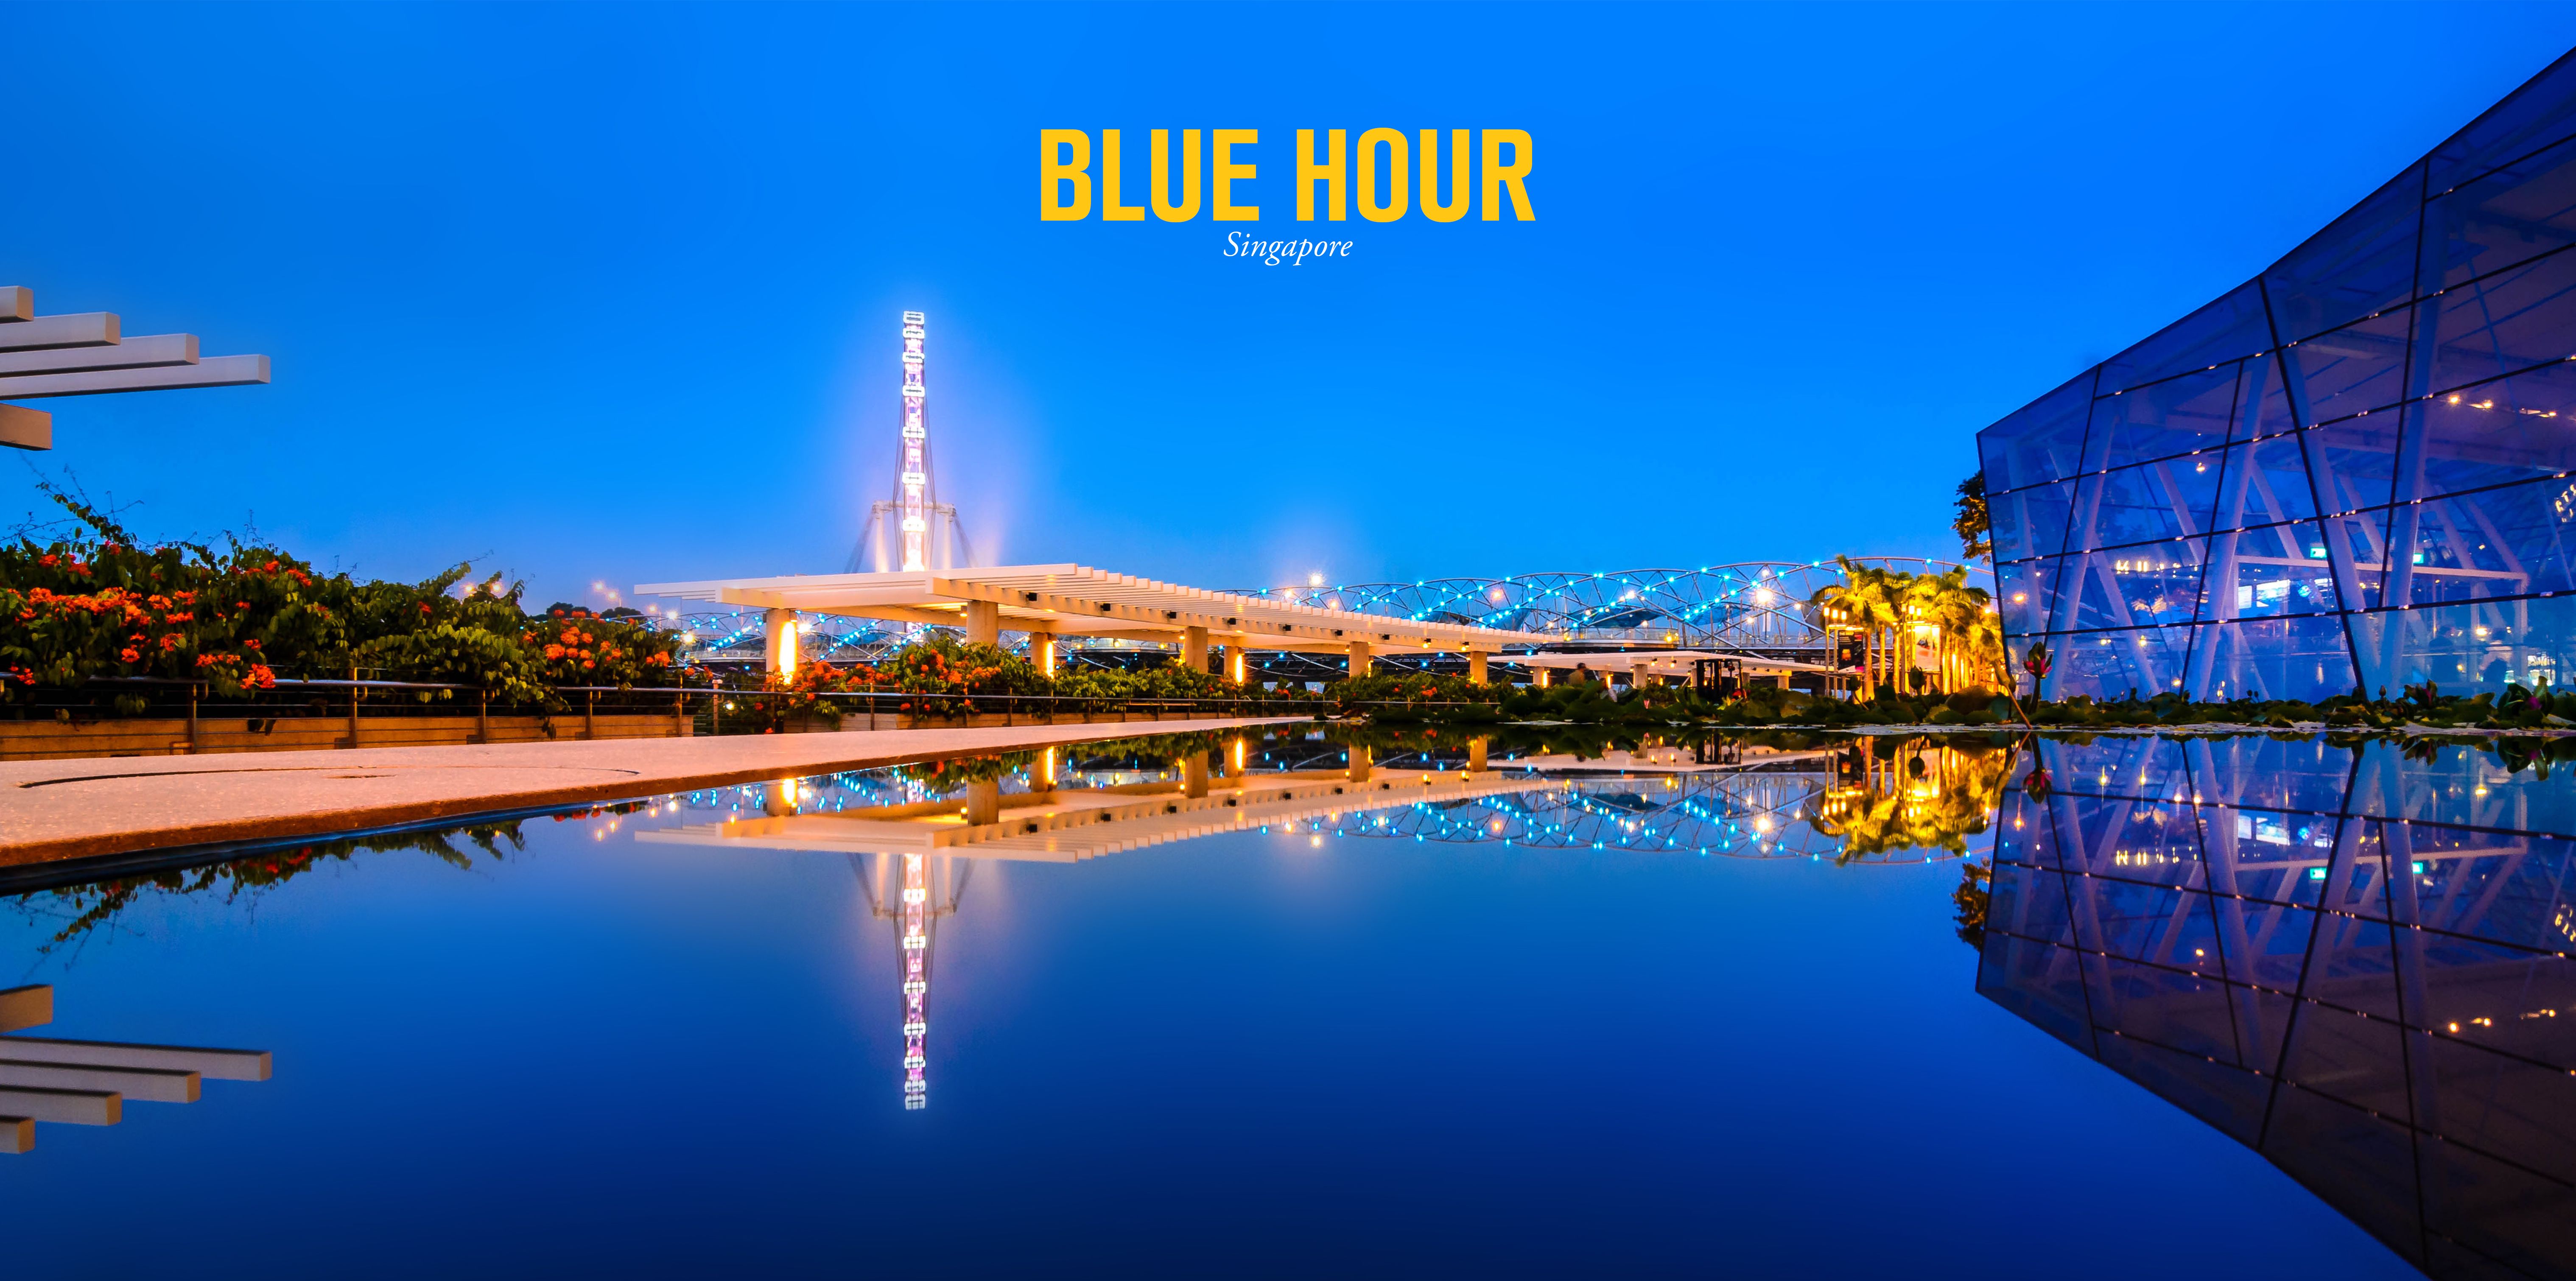
Photography has always been about chasing and understanding light. It can either make or break your photograph. Choosing the right time of the day to shoot is essential in getting that money shot. Long before I was into street and travel photography, you would see me carrying a tripod and heavy lenses to shoot skyscapes. Capturing how the city transforms as the sun moves down to the horizon fascinated me. I rarely shoot skyscapes these days but I’d like to share everything I’ve learned about a topic that not all photographers are familiar - Blue Hour.
Most of the equipment I used in shooting this genre of photography are no longer with me since I opted for gears that would match my lifestyle more now. This series looks back on my early days as a photographer and features photographs of iconic structures around Singapore. Looking at the photographs, I felt like a completely different person took these shots. It’s far from the type of photographs I have now but I’ve taken with me the rules and discipline I learned from the experience and applied it to my recent works.
GOLDEN VS BLUE HOUR
Most photographers know that the Golden Hour is the best time to shoot. This post is not about contesting that common rule but rather offering an alternative. For beginners, Golden Hour basically means sunset or sunrise. Expect dramatic lighting when shooting during these hours. Golden tones filling up the sky would give you a magical scene that every photographer is looking for. Blue Hour, on the other hand, happens before sunrise and after sunset. Deep blue hues that dominate the sky during this time would give you great contrast to the warm artificial light sources in the streets and buildings. The resulting photograph gives a calm and mysterious feel to its viewers.
You don’t have to choose one since these hours are just next to each other. Stay in a spot longer and capture the same subject at two different time phases. You’ll be surprised to see how different the shots would be. This way you’ll get more choices and spend more time perfecting a shot. I find Blue Hour easier to shoot compared to Golden Hour. It’s easier to compose your shots without the sun in the scene and the risk of overexposing your image is lower. Harsh lighting and shadows won’t be a problem either.
ArtScience Museum, Singapore
PLANNING
Carefully plan everything ahead since Blue Hour happens really fast. You’ll never want to miss this small window of opportunity just because you’re busy doing last minute preparations. Make yourself familiar with the location and try to walk around finding the spot that would best accentuate the marvels of the structure that you’re shooting. The exact time to which Blue Hour happens differs in every location. Researching about this would greatly help in scheduling the shoot. And lastly, anticipate on how the light would affect your subject. Paint a picture in mind on how you would want the final photograph to be.
Don’t get fooled by the name. While it’s true that the sky turns to deep blue hues during Blue Hour, the event doesn’t last for an hour but only for approximately 30-40 minutes so all the preparations done before it happens would help you accomplish all the shots you want in a very limited time frame.
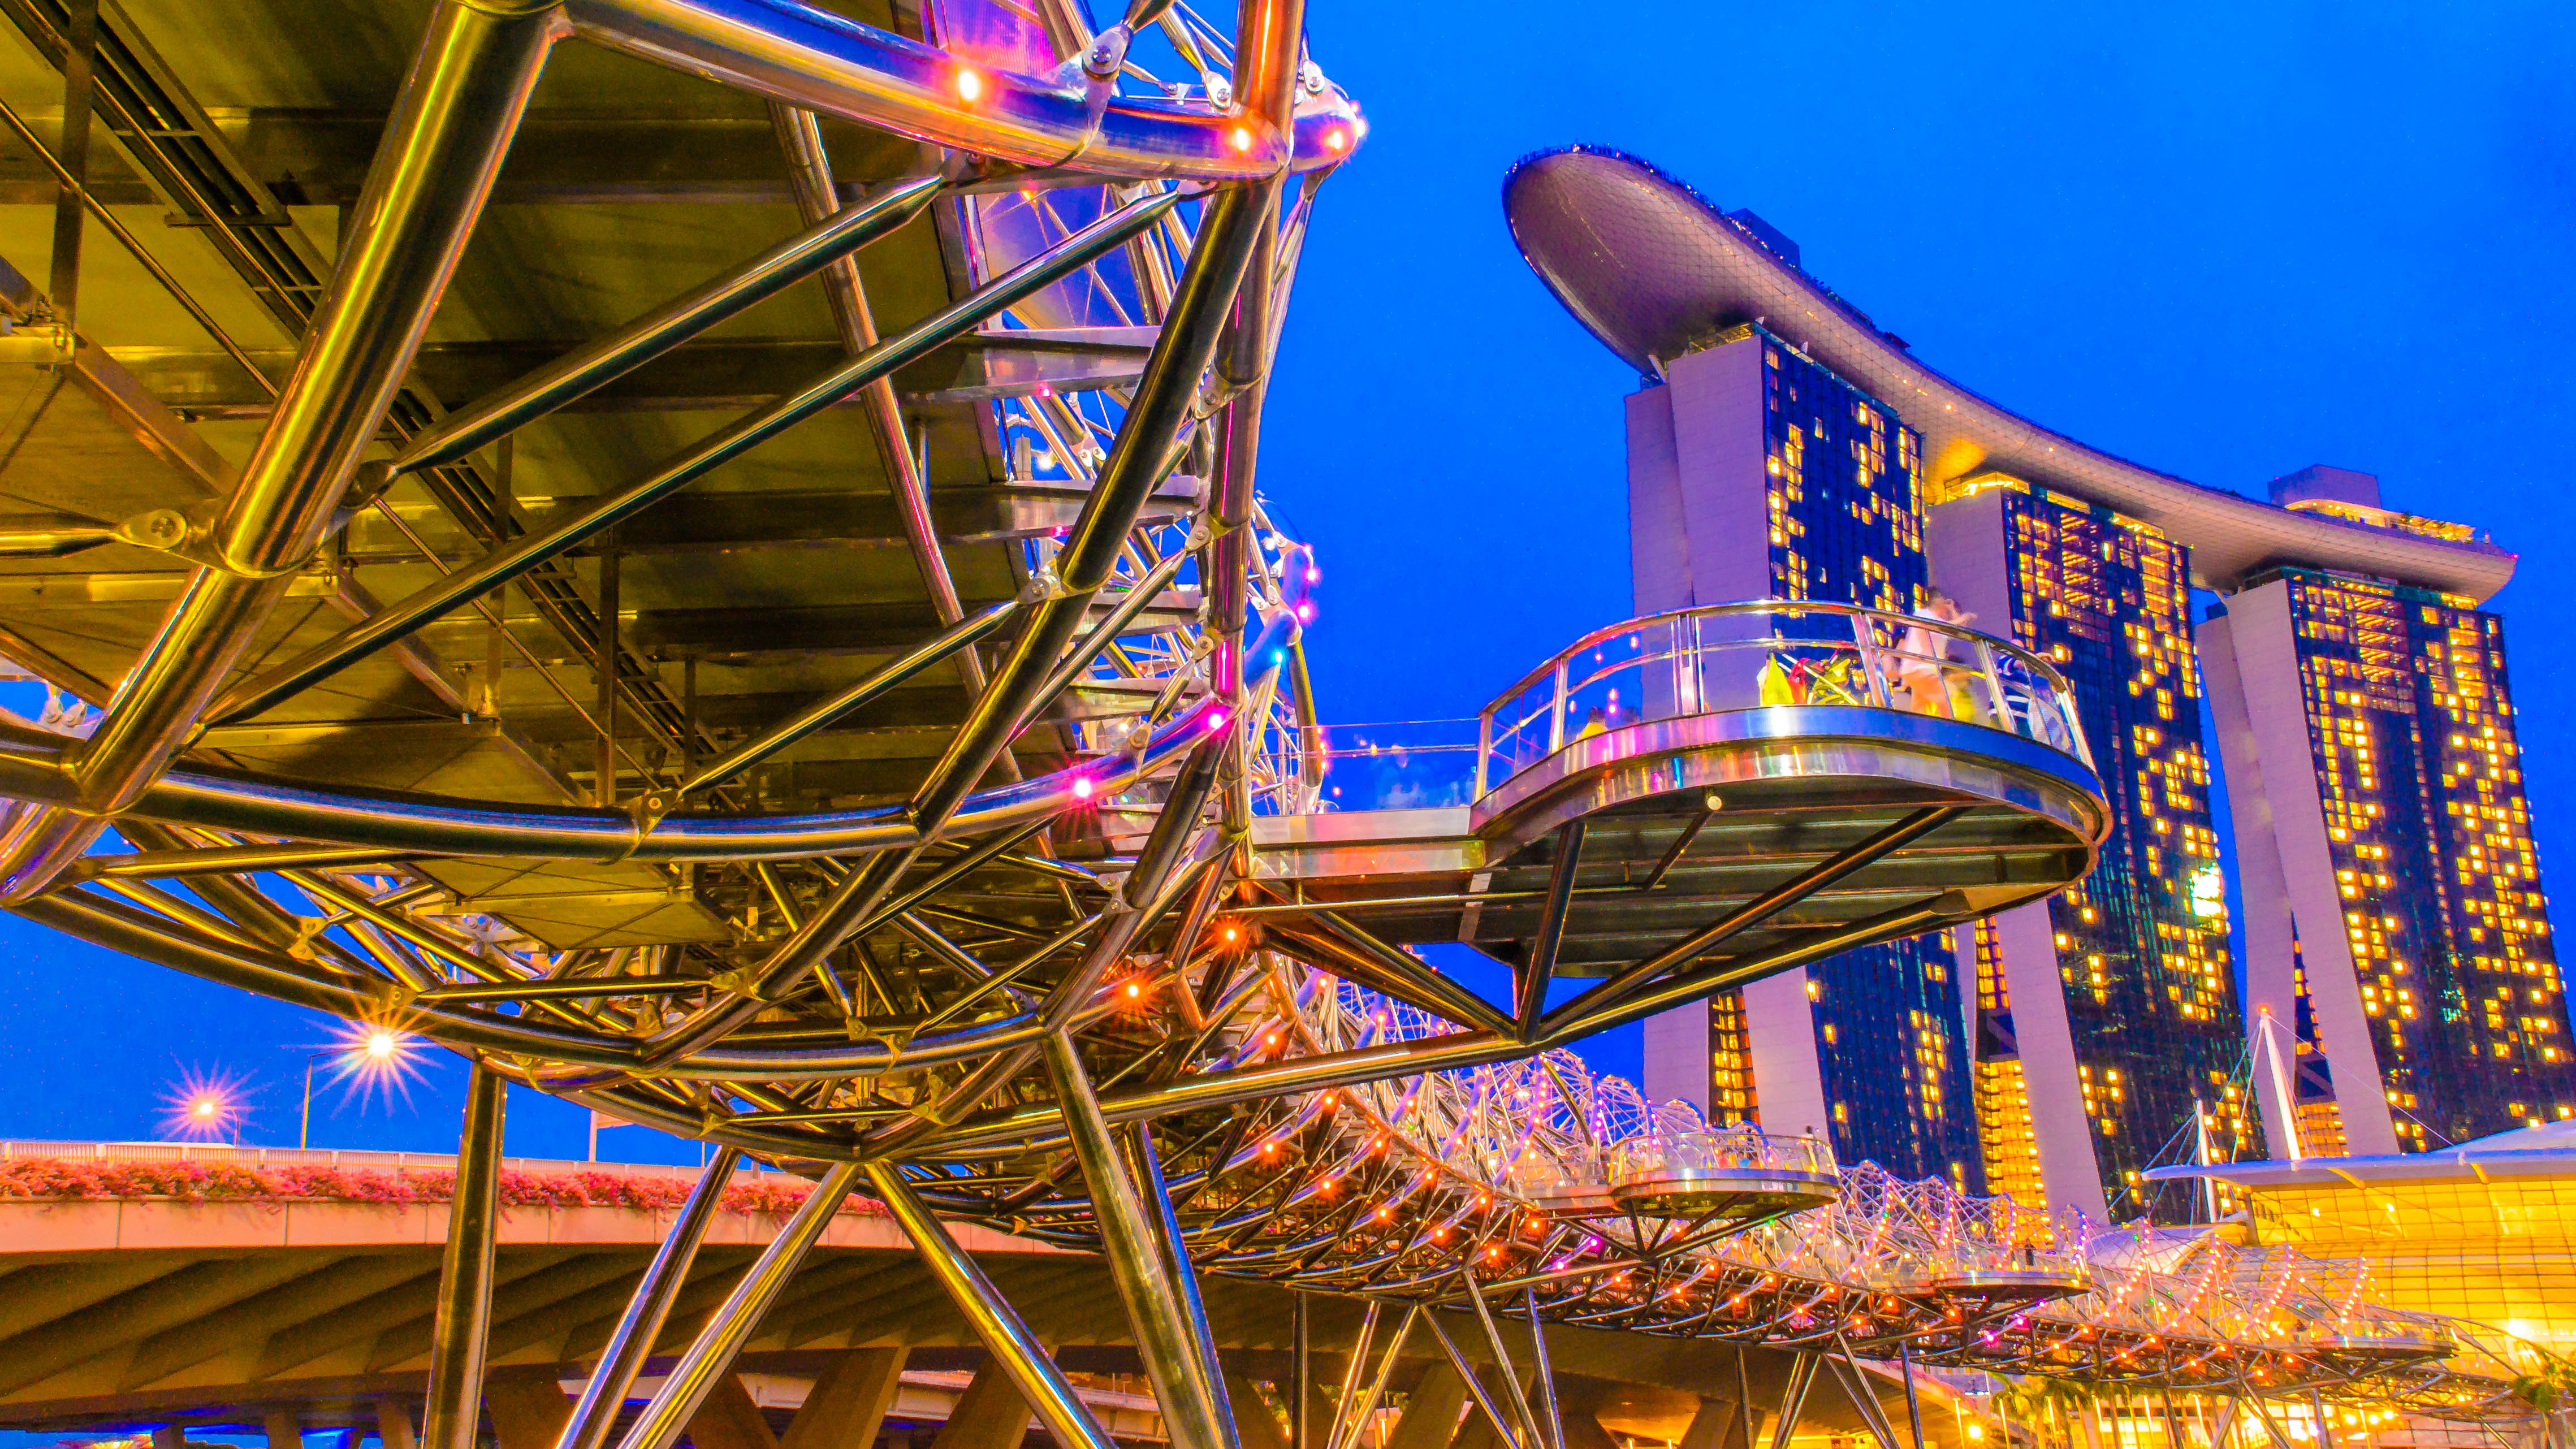
Marina Bay Sands and Helix Bridge
TIME
Blue Hour starts around 30 minutes before sunrise and 10-15 minutes after the sun has set. I prefer shooting first after sunrise to have more options just in case bad weather or other challenges would come your way. Doing this allows you to have a backup shoot after sunset.
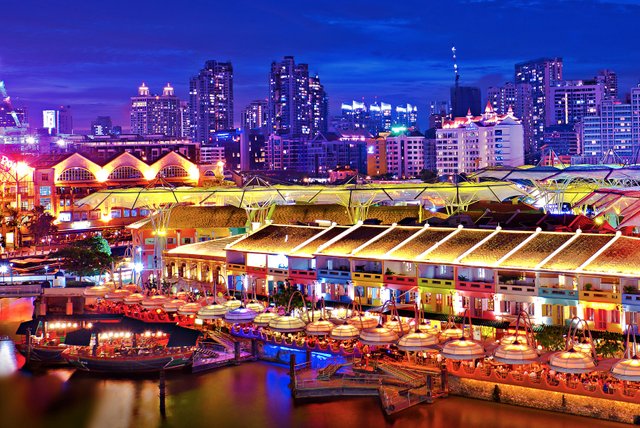
Clarke Quay, Singapore
SUBJECT
Blue hour is not limited to just shooting skyscapes. It also works well with landscapes as long as you find areas with warm light to contrast the dark blue sky. You can get creative with the use of slow shutter speed when shooting moving subjects. Light trails from vehicles create visually pleasing results. It can be used as a leading line or in some cases, the focus of the picture.
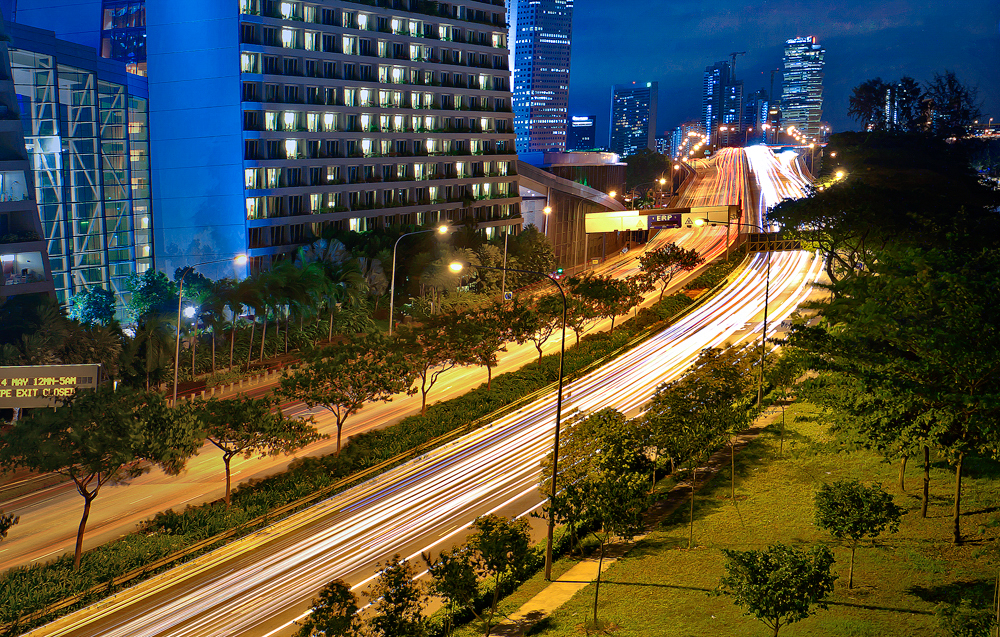
Sheares Avenue, Singapore
Keep an eye on bodies of water as well. Make use of their reflection in composing your photograph. The movement of water when captured at long exposure gives a dreamy effect that adds dynamics to the photograph.
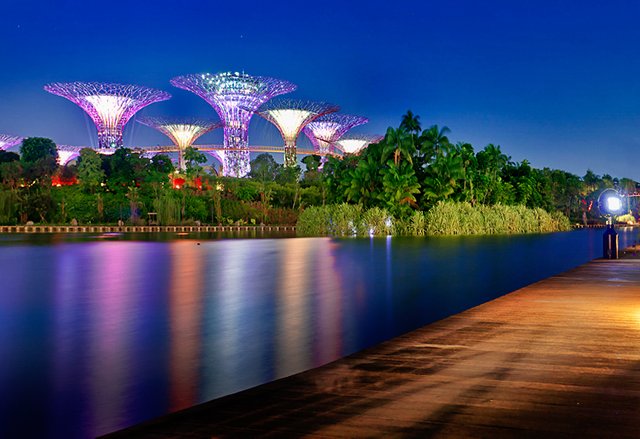
Gardens by the Bay, Singapore
GEARS
Never let your gear dictate what you can and can’t do in photography. There are always different ways of achieving a shot you want even with limited gears. It’s up to you to be resourceful and creative. Even the most basic DSLR or mirrorless camera can shoot Blue Hour images. A tripod and a wide angle lens would make your life easier but if you don’t have these, you can always improvise.

Marina Barrage, Singapore
SETTINGS
Setting up your camera and tripod on a firm ground is always the first step when shooting at long exposures. This is to avoid any camera shakes that would be noticeable on your final image. Setting your camera mode to Shutter Priority mode can be a good start for beginners. The camera automatically sets the ISO and aperture depending on the shutter speed you set. Most professionals suggest setting your shutter speed between 1-6 seconds. Once your familiar with the process, you can explore shooting in Manual mode and set everything yourself. Keep in mind that the ISO should be at its lowest to reduce noise in your image. Shoot using anything around f/8 or smaller to make everything sharp and in focus. You’ll start getting good starbursts from street lights as your aperture gets smaller. Play around the settings. There’s no one specific way of doing this. It all ends up to your personal preference.
You may now start composing the photograph then manually focus your subject. Instead of using a remote to control the camera, I would usually just set it on self-timer to lessen the equipment you have to bring. Make sure you are shooting in Raw for the camera to capture as much detail as possible and to have more flexibility later in the post-processing. Don’t forget to do a test shot. Adjust the settings until you’re finally satisfied with the results.

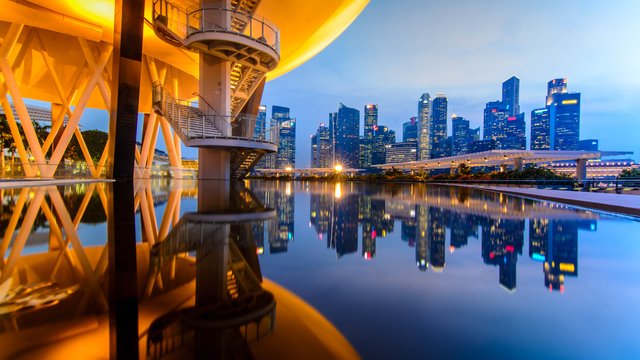
Singapore Skyline
I’m pretty sure we’ve all seen a photograph taken during Blue Hour. They can look really awesome when perfected. This colorful spectacle looks intimidating at first but with careful planning, it’s actually easy to capture. Photographers who know nothing about Blue Hour would probably pack their things once they’ve captured a great looking sunset. They’re missing a great opportunity. Try creating your own Blue Hour masterpiece on your next travel.
I hope you learned something from this post. I'll be sharing more of my creative process in the coming weeks. This is my way of giving back all the love I have received from the community. I reached 500 followers today. It may be nothing to some but it's a milestone that I would definitely celebrate.
Thank you for viewing! Let me know what you think of this series.
Warmest regards,
@legendarryll
@legendarryll, I really like how you write your posts. You always give something to your readers. Mga "pabaon" haha. I hope you make a post about photography for beginners.Hehehe. Very good read, I thought the golden hours are the only perfect time to shoot but now after reading this, blue hour shooting is definitely a must try. Thanks! Very beautiful shots, as always.
I agrrrrreeeeee!!! We'll wait for the post about photography for beginners @legendarryll :D Teach us sen pai :D
Hi guys! I'm currently working on a post similar to that. Thank you @smaeunabs for pushing me to do it gyud. Hopefully naa moy malearn. haha!
I am very excited about it!!! :D ganahan kaayo ko makat on ug photography gyud, it's like mastering the art of nature :D
Wooooow grabeee, stunning photos to the nth level! This is the first time I heard about blue hour photography, and words can't describe how I'm left in awe at this moment.
Actually, I'm planning to buy a prof camera, can you suggest a great brand esp for beginners?
Fujifilm jud ako marecommend. Let me know if you need anything else. I'm more than willing to help you in your decision making.
what fujifilm model can you recommend? hahahah patudlo nya pud ko nimo about editing ig kita nato :D see you!
Dar! This couldn't have come at a much perfect time. I was totally touched by what you said about not letting your gear dictate what you can and can't do. As someone who owns just a phone camera, I often get discouraged at the thought that I won't even come close to the awesome pictures that the more powerful cameras are capable of taking. Well of course, the latter shoots leagues better than what i have, but just knowing that what I have doesn't have to dictate what I can do with it gives me hope. I hope you write more posts like this. Steem on!
Hi @thegaillery! There's a lot of good photographers out there who shoots only with their mobile phones and they produce photographs that can rival those that are taken with professional cameras. In the end, it's all about how you play with the light and the stories you want to share.
Photography seems to be a rich man's hobby for me. But after reading what you had to say about improvisation and planning, I would say it depends on you as the photographer. The gear definitely should not dictate your shots. I look forward to your next posts. I guess I definitely am learning something new each day
The eyes behind the lens matter more than the gear itself. I'm now thinking of making a post focused on this topic after reading all the comments to inspire everyone to just keep on shooting.
I definitely think you should. Photography is your brand and I bet the people in Steemit would learn a lot from your expertise
@legendarryll you're a top notch. You deserved to be published in the international scene. I wish someone discovers you.
Beautiful shots! Worthy read for photography enthusiasts @greymonolith.